Azure リソースに対するタスクを自動化したい場合、Azure Automation は便利だと思います。ところが、Azure Automation で作成した PowerShell や Python スクリプトの管理やデプロイまでやっていないプロジェクトが多いのではないでしょうか?そこで今回は、Azure Repos で PowerShell スクリプトを管理し、Azure Automation の「ソース管理」機能を使用してデプロイする環境を Azure CLI で構築&検証してみました。
検証用の Azure Automation を作成
bash
# 環境変数をセットします
prefix=mnrauto
region=japaneast

# リソースグループを作成します
az group create \
  --name ${prefix}-rg \
  --location $region

# Automation アカウントを作成します
az automation account create \
  --automation-account-name ${prefix} \
  --resource-group ${prefix}-rg \
  --sku Free

# マネージド ID を有効にします
az resource update \
  --ids $(az automation account show \
  --automation-account-name ${prefix} \
  --resource-group ${prefix}-rg \
  --query id \
  --output tsv) \
  --set "identity.type=systemassigned"

# Runbook を作成します
az automation runbook create \
  --automation-account-name ${prefix} \
  --resource-group ${prefix}-rg \
  --name helloworld \
  --type PowerShell

# マネージド ID を作成したリソースグループの共同作成者にします
az role assignment create \
  --assignee $(az automation account show \
  --automation-account-name ${prefix} \
  --resource-group ${prefix}-rg \
  --query identity.principalId \
  --output tsv) \
  --scope $(az group show \
  --name ${prefix}-rg \
  --query id \
  --output tsv) \
  --role "Contributor"

# PowerShell スクリプト保管ディレクトリを作成します
mkdir ${prefix} && cd ${prefix}

# Runbook に登録する PowerShell スクリプトを作成します
cat <<"EOF" > helloworld.ps1
Connect-AzAccount -Identity
Get-AzResourceGroup
EOF

# PowerShell スクリプトを Runbook に登録します
az automation runbook replace-content \
  --automation-account-name ${prefix} \
  --resource-group ${prefix}-rg \
  --name helloworld \
  --content @helloworld.ps1

# Runbook を「公開」にします
az automation runbook publish \
  --automation-account-name ${prefix} \
  --resource-group ${prefix}-rg \
  --name helloworld

# Runbook を実行し jobId を取得します
jobid=$(az automation runbook start \
  --automation-account-name ${prefix} \
  --resource-group ${prefix}-rg \
  --name helloworld \
  --query jobId \
  --output tsv)

# Runbook ジョブの「出力」結果を表示します
az rest \
  --method get \
  --url "$(az automation account show \
  --automation-account-name ${prefix} \
  --resource-group ${prefix}-rg \
  --query id \
  --output tsv)/jobs/$jobid/output?api-version=2019-06-01"

# 以下のような「出力」結果となりました
Environments
------------

ResourceGroupName : mnrauto-rg
Location          : japaneast
ProvisioningState : Succeeded
Tags              :
TagsTable         :
ResourceId        : /subscriptions/25695fc8-xxxx-xxxx-xxxx-f98a857adbe2/resourceGroups/mnrauto-rg
ManagedBy         :
Azure Repos に PowerShell スクリプトを用意
bash
# ソース管理を初期化します
git init

# ファイルをソース管理に追加します
git add -A

# ソース管理をコミットします
git commit -m "first commit"

# デフォルトブランチ名を変更します
git branch -m main

# Azure Repos を作成します
az repos create \
  --org https://dev.azure.com/mnrsdev/ \
  --project mnrsdev \
  --name ${prefix}

# リモートリポジトリに Azure Repos を追加します
git remote add origin https://mnrsdev@dev.azure.com/mnrsdev/mnrsdev/_git/${prefix}

# Azure Repos にプッシュします
git push -u origin --all
Azure Automation の「ソース管理」を構築
bash
# 環境変数に PAT をセットします
pat=<Your Parsonal Access Token Here>

# Azure Automation と Azure Repos の main ブランチを紐付けます
az rest \
  --method put \
  --url "$(az automation account show \
  --automation-account-name ${prefix} \
  --resource-group ${prefix}-rg \
  --query id \
  --output tsv)/sourceControls/${prefix}?api-version=2019-06-01" \
  --body '{
    "properties": {
      "repoUrl": "https://mnrsdev@dev.azure.com/mnrsdev/mnrsdev/_git/'${prefix}'",
      "branch": "main",
      "folderPath": "/",
      "autoSync": true,
      "publishRunbook": true,
      "sourceType": "VsoGit",
      "securityToken": {
        "accessToken": "'$pat'",
        "tokenType": "PersonalAccessToken"
      },
      "description": ""
    }
  }'

# 現在の Git コミット ID を取得します
commitid=$(git log --pretty=format:"%H" -1)

# 「ソース管理」の同期ジョブを設定します
az rest \
  --method put \
  --url "$(az automation account show \
  --automation-account-name ${prefix} \
  --resource-group ${prefix}-rg \
  --query id \
  --output tsv)/sourceControls/${prefix}/sourceControlSyncJobs/$(uuidgen)?api-version=2019-06-01" \
  --body '{
    "properties": {
      "commitId": "'$commitid'"
    }
  }'

# 「ソース管理」の同期ジョブを確認します
az rest \
  --method get \
  --url "$(az automation account show \
  --automation-account-name ${prefix} \
  --resource-group ${prefix}-rg \
  --query id \
  --output tsv)/sourceControls/${prefix}/sourceControlSyncJobs?api-version=2019-06-01"
PowerShell スクリプトを変更して動作確認
bash
# PowerShell スクリプトを変更します
cat <<"EOF" > helloworld.ps1
Connect-AzAccount -Identity
$ResourceGroups = Get-AzResourceGroup

foreach ($ResourceGroup in $ResourceGroups)
{
    Write-Output ("Showing resources in resource group " + $ResourceGroup.ResourceGroupName)
    $Resources = Get-AzResource -ResourceGroupName $ResourceGroup.ResourceGroupName
    foreach ($Resource in $Resources)
    {
        Write-Output ($Resource.Name + " of type " +  $Resource.ResourceType)
    }
    Write-Output ("")
}
EOF

# ファイルの変更をソース管理に追加します
git add -A

# ソース管理をコミットします
git commit -m update

# Azure Repos にプッシュします
git push

# Runbook を実行し jobId を取得します
jobid=$(az automation runbook start \
  --automation-account-name ${prefix} \
  --resource-group ${prefix}-rg \
  --name helloworld \
  --query jobId \
  --output tsv)

# Runbook ジョブの「出力」結果を表示します
az rest \
  --method get \
  --url "$(az automation account show \
  --automation-account-name ${prefix} \
  --resource-group ${prefix}-rg \
  --query id \
  --output tsv)/jobs/$jobid/output?api-version=2019-06-01"

# 以下のような「出力」結果となりました
Environments
------------

Showing resources in resource group mnrauto-rg

mnrauto of type Microsoft.Automation/automationAccounts

mnrauto/helloworld of type Microsoft.Automation/automationAccounts/runbooks
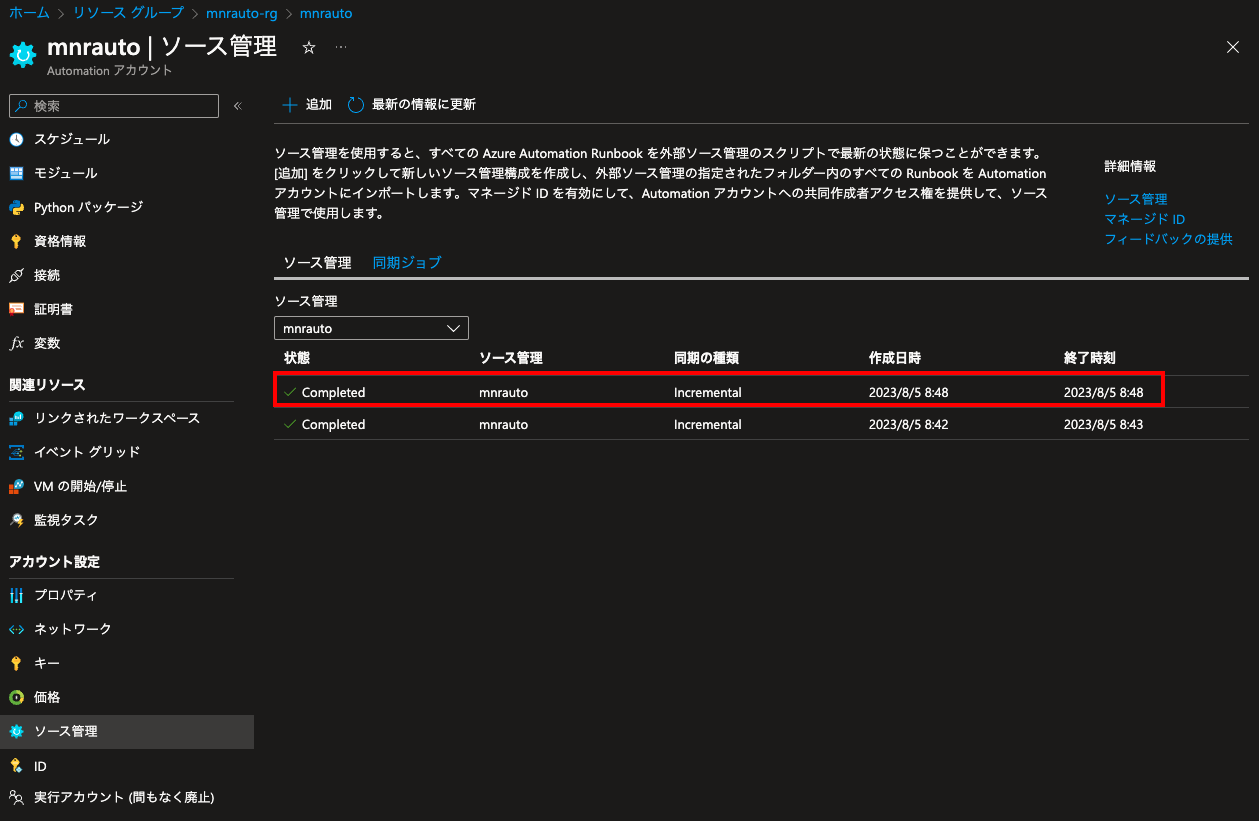
Azure Repos のソースが Azure Automation に同期された事を確認
後片付け
bash
# リソースグループを削除します
az group delete \
  --name ${prefix}-rg
参考