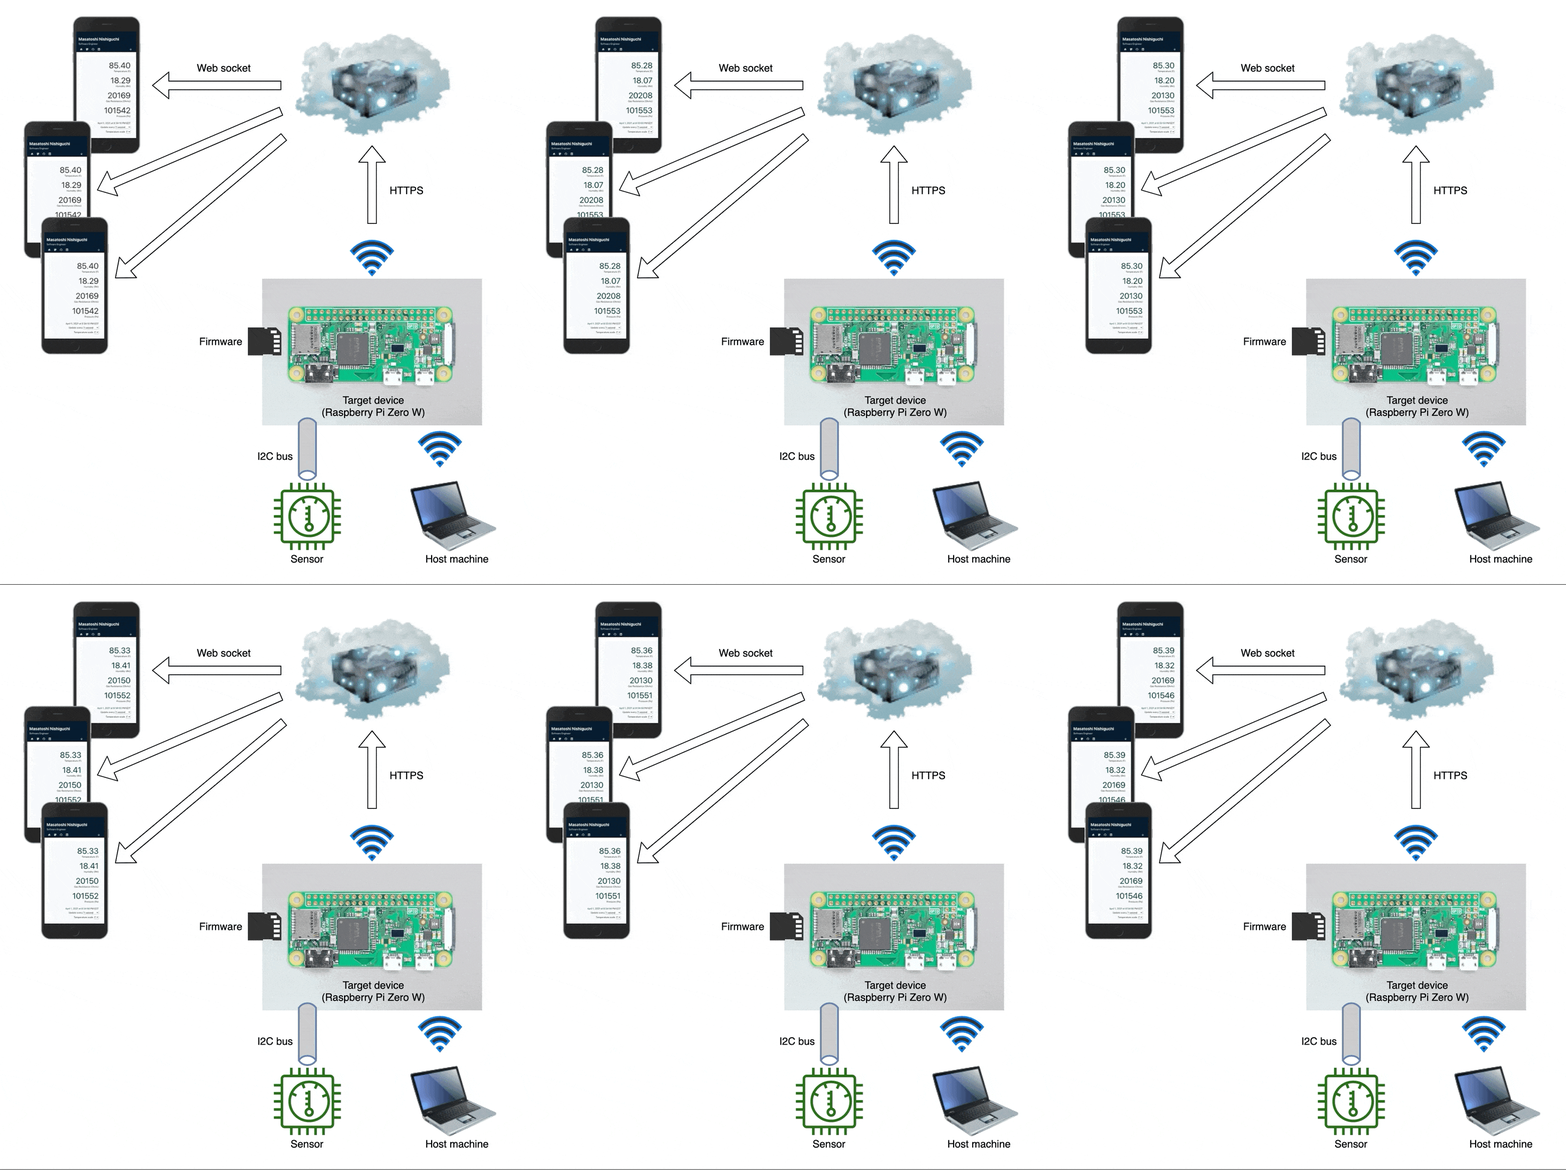
ここ最近、Elixir、Nerves、Phoenixを使ったIoTデバイスの開発に夢中になってます。しばらく電子工作しながら基礎を学んだあと、autoracex主催者@torifukukaiouさんの記事を参考に自宅の温度と湿度をリアルタイムで監視できるシステムを作りました。
取り敢えずいい感じに動いているので、次はセキュリティ面の強化に取り組もうと思います。今日は簡易的なトークン認証を実装します。
4/3(土) 00:00〜 4/5(月) 23:59開催のautoracex #21での成果です。
English edition
方針
- Plugのパイプラインに追加できるようにする。
- トークンはIExにて手動で生成する。ログインの部分は実装しない。
- APIユーザーはAuthorizationリクエストヘッダーにトークンを入れなければ、アクセスできない。
Phoenix.Token
ありがたいことに、PhoenixにはPhoenix.Tokenモジュールにトークン認証に最低限必要な機能が備わっています。Nice!
トークン認証Plugの実装例
Phoenix.Tokenモジュールを使用して、カスタムPlugを書きました。Programming Phoenixで学んだ内容をベースにしてます。実行する内容は以下の2点です。
-
ExampleWeb.API.AuthPlug- リクエストヘッダーのトークンを認証し、:current_userをconnにassignする。 -
ExampleWeb.API.AuthPlug.authenticate_api_user/2-:current_userの値が存在するか確認。
defmodule MnishiguchiWeb.API.AuthPlug do
  @moduledoc false

  import Plug.Conn, only: [get_req_header: 2, halt: 1, put_status: 2]
  import Phoenix.Controller, only: [put_view: 2, render: 2]

  @token_salt "api token"

  @doc """
  A function plug that ensures that `:current_user` value is present.

  ## Examples

      # in a router pipeline
      pipe_through [:api, :authenticate_api_user]

      # in a controller
      plug :authenticate_api_user when action in [:create]

  """
  def authenticate_api_user(conn, _opts) do
    conn
    |> get_token()
    |> verify_token()
    |> case do
      {:ok, _user_id} -> conn
      _unauthorized -> render_error(conn)
    end
  end

  defp render_error(conn) do
    conn
    |> put_status(:unauthorized)
    |> put_view(MnishiguchiWeb.ErrorView)
    |> render(:"401")
    # Stop any downstream transformations.
    |> halt()
  end

  @doc """
  Generate a new token for a user id.

  ## Examples

      iex> MnishiguchiWeb.API.AuthPlug.generate_token(1)
      "xxxxxxx"

  """
  def generate_token(user_id) do
    Phoenix.Token.sign(
      MnishiguchiWeb.Endpoint,
      @token_salt,
      user_id
    )
  end

  @doc """
  Verify a user token.

  ## Examples

      iex> MnishiguchiWeb.API.AuthPlug.verify_token("good-token")
      {:ok, 1}

      iex> MnishiguchiWeb.API.AuthPlug.verify_token("bad-token")
      {:error, :invalid}

      iex> MnishiguchiWeb.API.AuthPlug.verify_token("old-token")
      {:error, :expired}

      iex> MnishiguchiWeb.API.AuthPlug.verify_token(nil)
      {:error, :missing}

  """
  @spec verify_token(nil | binary) :: {:error, :expired | :invalid | :missing} | {:ok, any}
  def verify_token(token) do
    one_year = 365 * 24 * 60 * 60

    Phoenix.Token.verify(
      MnishiguchiWeb.Endpoint,
      @token_salt,
      token,
      max_age: one_year
    )
  end

  @spec get_token(Plug.Conn.t()) :: nil | binary
  def get_token(conn) do
    case get_req_header(conn, "authorization") do
      ["Bearer " <> token] -> token
      _ -> nil
    end
  end
end
トークン認証Plugの使用例
関数プラグauthenticate_api_user/2は使用前にどこかでimportする必要があります。2つのシナリオが考えられます。
A: routerパイプラインで使用
このパターンはパイプラインにある全てのコントローラに対して影響を及ぼしたい場合に便利です。関数プラグをExampleWebモジュールのrouter関数のquoteブロック内でimportします。
 defmodule ExampleWeb do

   ...

   def router do
     quote do
       use Phoenix.Router

       import Plug.Conn
       import Phoenix.Controller
       import Phoenix.LiveView.Router
+      import ExampleWeb.API.AuthPlug, only: [authenticate_api_user: 2]
     end
   end
ExampleWeb.Routerでプラグをパイプラインに追加します。
 defmodule ExampleWeb.Router do
   use ExampleWeb, :router

   ...

   scope "/api", ExampleWeb do
-    pipe_through [:api]
+    pipe_through [:api, :authenticate_api_user]

     resources "/measurements", API.Environment.MeasurementController, only: [:index,  :show, :create]
   end
B: 特定のコントローラアクションで使用
このパターンはある特定のコントローラアクションに対して影響を及ぼしたい場合に便利です。関数プラグをExampleWebモジュールのcontroller関数のquoteブロック内でimportするか、もしくは各コントローラファイルにて明示的にimportすることもできます。
 defmodule ExampleWeb do

   ...

   def controller do
     quote do
       use Phoenix.Controller, namespace: ExampleWeb

       import Plug.Conn
       import ExampleWeb.Gettext
+      # パイプライン上流でにimportする場合
+      import ExampleWeb.API.AuthPlug, only: [authenticate_api_user: 2]
       alias ExampleWeb.Router.Helpers, as: Routes
     end
   end
コントローラ内で特定のアクションに対して使用します。
 defmodule ExampleWeb.API.MeasurementController do
   use ExampleWeb, :controller
+  # コントローラファイルにて明示的にimportする場合
+  import ExampleWeb.API.AuthPlug, only: [authenticate_api_user: 2]

   alias Example.Measurement

   action_fallback ExampleWeb.API.FallbackController
+
+  plug :authenticate_api_user when action in [:create]
クイックテスト
IExを開きトークンを生成。
iex> ExampleWeb.API.AuthPlug.generate_token(1)
"SFMyNTY.g2gDbQAAAAVoZWxsb24GABaFup54AWIAAVGA.R3AjaixW4edvVLSQjQqr9LcTieqSV1ivfBltWBZt0x0"
そのトークンをヘッダーに含めて、APIにアクセスしてみる。
❯ curl -X POST \
  -H "Content-Type: application/json" \
  -H "Authorization: Bearer SFMyNTY.g2gDbQAAAAVoZWxsb24GABaFup54AWIAAVGA.R3AjaixW4edvVLSQjQqr9LcTieqSV1ivfBltWBZt0x0" \
  -d '{"measurement": {"temperature_c": "23.5"}}' \
  http://localhost:4000/api/measurements
{"data":{"id":37,"temperature_c":23.5}}

❯ curl -X POST \
  -H "Content-Type: application/json" \
  -d '{"measurement": {"temperature_c": "23.5" }}' \
  http://localhost:4000/api/measurements
"Unauthorized"
注意点
公式ドキュメントによると、SECRET_KEY_BASEがトークン生成に使用されているとのことですので、production用のトークンはproductionサーバーのIexで生成する必要があります。
もっとちゃんとしたトークン認証を実装するには、JWTを使うのが一般的のようです。
ウエブフックにはそれ用のルールがありx-Hub-Signature-256またはx-hub-signatureヘッダーが使用されるとのことです。
以上
