概要
Shibboleth IdP V5.2 を Red Hat Enterprise Linux 環境に構築する手順をまとめました。
大学などで利用例の多い学術認証フェデレーション「学認(GakuNin)」基盤用のIdPとしての利用を想定した手順となっています。
学認用途での Shibboleth IdP の構築手順は学認の技術ガイドにも詳細な手順が記載されていますが、2026年4月時点ではShibboleth IdP V5.2での変更内容が手順に反映されていませんでしたので、こちらでV5.2での導入を前提とした構築手順を示すことにしました。
前提
以下の環境を想定した手順となっています。
-
Red Hat Enterpise Linux 10.1
RHEL 8.10 でもほぼ同じ手順で構築可能です
Ubuntu/Debianなど他のLinuxディストリビューションの場合は一部手順を変える必要があると思います -
Shibboleth IdP V5.2.1
2026年4月時点の最新版を使用します -
LDAPサーバは構築済みとする
ユーザ認証およびユーザ属性は外部LDAPサーバから取得する前提とし、LDAPサーバは既に構築されているものとします
Red Hat Enterprise Linux の設定
RHELのインストール自体は詳しく説明しませんが、標準的なインストール方法で問題ありません。
以下、サーバーインストール(GUIなし)でインストールしたものとして説明します。
以下、設定はすべてrootユーザで実行する前提で説明します。
IPアドレス設定
環境にあわせて調整してください。
nmcli connection modify eth0 ipv4.addresses 192.168.1.100/24
nmcli connection modify eth0 ipv4.gateway 192.168.1.1
nmcli connection modify eth0 ipv4.dns 192.168.1.2,192.168.1.3
nmcli connection modify eth0 ipv4.method manual
nmcli connection modify eth0 ipv6.method disabled
nmcli connection modify eth0 connction.autoconnect yes
nmcli connection up eth0
ホスト名設定
例としてホスト名を shibboleth-idp.example.jp とします。また、EntityIDも同じにします。
hostnamectl set-hostname shibboleth-idp.example.jp
SELinux設定
SELinuxはPermissiveに設定します。
setenforce 0
sed -i 's/SELINUX=enforcing/SELINUX=permissive/g' /etc/selinux/config
reboot
NTP設定
Shibboleth IdPの動作には時刻が正確に同期されていることが重要です。
/etc/chrony.conf を編集して信頼できるNTPサーバを指定します。
#pool 2.rhel.pool.ntp.org iburst  <-- デフォルトのNTPはコメントアウト
pool ntp.nict.jp iburst
パッケージ更新
標準パッケージを一通り更新しておきます。
dnf update redhat-release -y
dnf clean all
dnf update -y
reboot
httpdのインストール
Apacheをインストールし、ファイアウォールでhttpsアクセスを許可します。
dnf install httpd mod_ssl -y
firewall-cmd --permanent --add-service=https
firewall-cmd --reload
OpenJDKのインストール
Java 17以降が必要です。Red Hat Enterprise Linux 10の場合、標準リポジトリにはOpenJDK 17は含まれていないのでOpenJDK 21をインストールします。
dnf install java-21-openjdk -y
Jettyのインストールと設定
Shibboleth IdPはJava ServletコンテナであるJetty上で動作します。
(Tomcat 11 もサポートされていますが、ここではJettyを使用します)
Shibboleth IdP V5.2 では Jetty 12.1 以降が必要です。以下の手順でJettyをインストールします。
Jettyの配置
# 作業ディレクトリを作成
mkdir -p ~/work
cd ~/work

# Jettyをダウンロード・展開します
# 2026年4月時点の最新版は12.1.8ですが、最新バージョンを確認してダウンロードしてください
wget https://repo1.maven.org/maven2/org/eclipse/jetty/jetty-home/12.1.8/jetty-home-12.1.8.tar.gz
tar zxv -C /opt -f jetty-home-12.1.8.tar.gz
( cd /opt ; ln -s jetty-home-12.1.8 /opt/jetty )
Jetty-baseの配置
Shibboleth が提供している Jetty 用設定ファイルを使用してJettyの設定を行います。
Jetty 12.1 用に用意されている設定ファイルではうまく動作しないようですので、Jetty 12.0 用の設定ファイルを使用しています。
# あえて Jetty 12.1 用ではなく Jetty 12.0 用の設定ファイルを使用しています
cd ~/work
wget https://build.shibboleth.net/maven/snapshots/net/shibboleth/idp/idp-jetty-base/12.0.0-SNAPSHOT/idp-jetty-base-12.0.0-20251017.002651-55.tar.gz
mkdir -p /opt/jetty-base.12.0.0
tar zxv -C /opt/jetty-base.12.0.0 -f idp-jetty-base-12.0.0-20251017.002651-55.tar.gz
( cd /opt ; ln -nfs jetty-base.12.0.0 /opt/jetty-base )
Jetty起動用ユーザ作成
サービス起動用のjettyユーザを作成し、設定ファイルやディレクトリの所有者、パーミッションを設定します。
groupadd -g 110 jetty
useradd -u 110 -g jetty -d /opt/jetty-base -s /sbin/nologin jetty

chown -R root:root /opt/jetty /opt/jetty-base
chmod -R g-w /opt/jetty-base
chown jetty:jetty /opt/jetty-base/{logs,tmp}
サービス自動起動の設定
chkconfig コマンドをインストールされていない場合はインストールしておきます。
dnf install chkconfig -y
/etc/sysconfig/jettyを以下の内容で作成します。
JAVA=/bin/java
JETTY_HOME=/opt/jetty
JETTY_BASE=/opt/jetty-base
JETTY_RUN=/opt/jetty-base/tmp
JETTY_STATE=/opt/jetty-base/tmp/jetty.state
JETTY_START_TIMEOUT=120
JETTY_ARGS=jetty.httpConfig.sendServerVersion=false
設定スクリプトを配置します。
cp -ip /opt/jetty/bin/jetty.sh /etc/init.d/jetty
cp -ip /opt/jetty/bin/jetty.service /etc/systemd/system/
/etc/systemd/system/jetty.service を以下の内容に修正します。
[Unit]
Description=Jetty Web Application Server
After=syslog.target network.target remote-fs.target nss-lookup.target

[Service]
Type=forking
EnvironmentFile=-/etc/sysconfig/jetty
PIDFile=/opt/jetty-base/tmp/jetty.pid
ExecStart=/etc/init.d/jetty start
ExecStop=/etc/init.d/jetty stop
ExecReload=/etc/init.d/jetty restart
SuccessExitStatus=143
User=jetty
Group=jetty
TimeoutStartSec=150

[Install]
WantedBy=multi-user.target
設定を反映させ、自動起動の登録を行います。
systemctl daemon-reload
systemctl enable httpd
systemctl enable jetty
jetty-baseの設定
/opt/jetty-base/start.d/start.ini を以下の内容で作成します。
# Any other required Jetty modules...
# Allows setting Java system properties (-Dname=value)
# and JVM flags (-X, -XX) in this file
# NOTE: spawns child Java process
--exec

# Uncomment if IdP is installed somewhere other than /opt/shibboleth-idp
-Didp.home=/opt/shibboleth-idp
# Newer garbage collector that reduces memory needed for larger metadata files
-XX:+UseG1GC

# Maximum amount of memory that Jetty may use, at least 1.5G is recommended
# for handling larger (> 25M) metadata files but you will need to test on
# your particular metadata configuration
-Xmx2g

# Prevent blocking for entropy.
-Djava.security.egd=file:/dev/./urandom

# Set Java tmp location
-Djava.io.tmpdir=tmp

# Set the location of the logback configuration file
-Dlogback.configurationFile=resources/logback.xml
/opt/jetty-base/modules/idp.mod を修正します。 (https と ssl をコメントアウトする)
[description]
Shibboleth IdP

[depend]
ee9-annotations
ee9-deploy
ext
ee9-webapp
http
#https
ee9-jsp
ee9-jstl
ee9-plus
resources
server
ee9-servlets
#ssl

[files]
tmp/
/opt/jetty-base/start.d/idp.ini を修正します。
変更点は http, http-forwarded モジュールの追加と、Faviconを表示しない設定の追加です。
# ---------------------------------------
# Module: idp
# Shibboleth IdP
# ---------------------------------------
--module=logging-logback
--module=idp
--module=http
--module=http-forwarded

(省略)

jetty.server.default.showContexts=false
jetty.server.default.serveFavIcon=false

#
# Uncomment the next line to enable the rewrite module
# --module=rewrite
# Documentation at
# https://jetty.org/docs/jetty/12/operations-guide/modules/standard.html#rewrite
以下のコマンドでlogbackモジュールをダウンロードします。
cd /opt/jetty-base/
java -jar /opt/jetty/start.jar --add-module=logging-logback
/opt/jetty-base/start.d/idp-logging.ini を以下の内容で作成します。
logbackのバージョンは/opt/jetty-base/lib/logging/内のjarファイルを確認してそれに合わせてください。
# Override logback version pinned in jetty-home/modules/logback-impl.mod
logback.version=1.5.32
httpdの設定
TLS証明書の配置
外部公開用のTLS証明書を /etc/pki/tls/certs/ に、秘密鍵を /etc/pki/tls/private/ に配置します。
例として、証明書ファイルを shibboleth-idp.crt、秘密鍵を shibboleth-idp.key とします。
適切なパーミッションを設定します。
chmod 644 /etc/pki/tls/certs/shibboleth-idp.crt
chmod 400 /etc/pki/tls/private/shibboleth-idp.key
httpdの設定
/etc/httpd/conf/httpd.confを修正します。
#ServerName www.example.com:80  <-- ServerNameのコメントアウトを外し、以下の内容に修正
ServerName shibboleth-idp.example.jp:80

(省略)

<Directory "/var/www/html">
    #Options Indexes FollowSymLinks  <-- OptionsのIndexesを削除し、以下の内容に修正
    Options FollowSymLinks

(省略)

# ファイルの末尾に以下の内容を追加
ServerSignature Off
ServerTokens Prod
Header unset "X-Powered-By"
RequestHeader unset Proxy
Header always set X-Frame-Options SAMEORIGIN
Header always set X-XSS-Protection "1; mode=block"
Header always set X-Content-Type-Options nosniff
Header set Cache-Control "private,no-cache,no-store"
Header set Pragma no-cache
TraceEnable Off
/etc/httpd/conf.d/ssl.confを修正します。
#ServerName www.example.com:443  <-- ServerNameのコメントアウトを外し、以下の内容に修正
ServerName shibboleth-idp.example.jp:443

(省略)

#SSLProtocol all -SSLv3  <-- SSLProtocolのコメントアウトを外し、以下の内容に修正
SSLProtocol all -SSLv2 -SSLv3 -TLSv1 -TLSv1.1

(省略)

# TLS証明書のファイルパスを適切に修正
SSLCertificateFile /etc/pki/tls/certs/shibboleth-idp.crt
SSLCertificateKeyFile /etc/pki/tls/private/shibboleth-idp.key

(省略)

# ファイルの末尾 </VirtualHost> の手前に以下の内容を追加
RequestHeader set X-Forwarded-Port 443
RequestHeader set X-Forwarded-Proto https
RequestHeader unset Forwarded
RequestHeader unset X-Forwarded-For
ProxyPass /idp/ http://localhost:8080/idp/ connectiontimeout=5 timeout=15
/etc/httpd/conf.d/virtualhost-localhost80.confを以下の内容で作成します。
<VirtualHost localhost:80>
    ProxyPass /idp/ http://localhost:8080/idp/ connectiontimeout=5 timeout=15
</VirtualHost>
デフォルトページの無効化
/etc/httpd/conf.d/welcome.confと/etc/httpd/conf.d/autoindex.confを削除します。
rm -f /etc/httpd/conf.d/welcome.conf
rm -f /etc/httpd/conf.d/autoindex.conf
Shibboleth IdPのインストール
Shibboleth IdPのダウンロード
Shibboleth IdP V5.2.1 をダウンロードして展開します。
バージョンは最新のものを確認してダウンロードしてください。
cd ~/work
wget https://shibboleth.net/downloads/identity-provider/latest/shibboleth-identity-provider-5.2.1.tar.gz
tar xzvf shibboleth-identity-provider-5.2.1.tar.gz
インストール
~/work/install.properties を以下の内容で作成します。
ホスト名、EntityID、スコープは環境に合わせて適切に指定してください。
idp.conf.credentials.filemode=640
idp.conf.credentials.group=jetty
idp.target.dir=/opt/shibboleth-idp
idp.host.name=shibboleth-idp.example.jp
idp.entityID=https://shibboleth-idp.example.jp/idp/shibboleth
idp.scope=example.jp
install.sh を実行してインストールします。
cd ~/work/shibboleth-identity-provider-5.2.1
./bin/install.sh --propertyFile ../install.properties
パーミッション調整
サービス実行用のjettyユーザがログ出力などできるように、以下のコマンドでパーミッションを調整します。
chown -R jetty:jetty /opt/shibboleth-idp/logs
chgrp jetty /opt/shibboleth-idp/metadata
chmod g+w /opt/shibboleth-idp/metadata
chmod +t /opt/shibboleth-idp/metadata
mkdir /opt/shibboleth-idp/edit-webapp/WEB-INF
cp -ip /opt/shibboleth-idp/dist/webapp/WEB-INF/web.xml /opt/shibboleth-idp/edit-webapp/WEB-INF/web.xml
chmod u+w /opt/shibboleth-idp/edit-webapp/WEB-INF/web.xml
ディレクトリインデックスの禁止設定
/opt/shibboleth-idp/edit-webapp/WEB-INF/web.xml を編集し、ディレクトリインデックスの禁止設定を追加します。
ファイル末尾</web-app>の手前に以下の内容を追加

<!-- Servlets and servlet mappings -->
  <servlet>
    <servlet-name>default</servlet-name>
    <servlet-class>org.eclipse.jetty.ee9.servlet.DefaultServlet</servlet-class>
    <init-param>
      <param-name>dirAllowed</param-name>
      <param-value>false</param-value>
    </init-param>
    <load-on-startup>0</load-on-startup>
  </servlet>
プレースホルダの差し替え(オプション)
デフォルトだとログイン画面のロゴ画像やフッターに「YOUR LOGO HERE」などのプレースホルダが表示されるため、お好みで調整してください。
/opt/shibboleth-idp/messages/messages.properties を編集します。
画像ファイルは/opt/shibboleth-idp/edit-webapp/images/ に配置してください。
idp.logo = /images/your-logo.png
idp.logo.alt-text = 任意のロゴ代替テキスト
idp.footer = 任意のフッターテキスト
root.footer = 任意のフッターテキスト

#パスワードをお忘れの方はこちら のリンク先URL
idp.url.password.reset = https://example.jp/password-reset
#お困りの方はこちら のリンク先URL
idp.url.helpdesk = https://example.jp/helpdesk
設定反映
ここまでの変更を反映させます。
/opt/shibboleth-idp/bin/build.sh
Shibboleth IdPの設定
学認メタデータ取得設定
Shibboleth IdPが学認のメタデータを定期的に取得するように設定します。
この手順は学認の運用フェデレーションに参加済みであることを前提とした設定を示しています。
テストフェデレーションでの動作確認を行う場合は、メタデータURLや署名証明書などをテストフェデレーション用のものに変更してください。
まずメタデータ署名証明書をダウンロードし、/opt/shibboleth-idp/credentials/ に配置します。
cd ~/work
wget https://metadata.gakunin.nii.ac.jp/gakunin-signer-2017.cer
cp gakunin-signer-2017.cer /opt/shibboleth-idp/credentials/
/opt/shibboleth-idp/conf/metadata-providers.xmlを編集します。
ファイル末尾</MetadataProvider>の手前に以下の内容を追加

<MetadataProvider id="HTTPMetadata-GakuNin"
                  xsi:type="FileBackedHTTPMetadataProvider"
                  backingFile="%{idp.home}/metadata/gakunin-metadata-backing.xml"
                  metadataURL="https://metadata.gakunin.nii.ac.jp/gakunin-metadata.xml">
    <MetadataFilter xsi:type="SignatureValidation" certificateFile="%{idp.home}/credentials/gakunin-signer-2017.cer" />
    <MetadataFilter xsi:type="RequiredValidUntil" maxValidityInterval="P15D"/>
    <MetadataFilter xsi:type="EntityRole">
    <RetainedRole>md:SPSSODescriptor</RetainedRole>
    </MetadataFilter>
</MetadataProvider>
eduGAIN メタデータ取得設定(オプション)
学認に加えてeduGAINにも参加しており、eduGAINのメタデータも取得したい場合に必要な設定です。
メタデータ署名証明書をダウンロードし、/opt/shibboleth-idp/credentials/ に配置します。
cd ~/work
wget https://technical.edugain.org/mds-v2.cer
cp mds-v2.cer /opt/shibboleth-idp/credentials/
以下の内容を/opt/shibboleth-idp/conf/metadata-providers.xmlに追加します。
ファイル末尾</MetadataProvider>の手前に以下の内容を追加

<MetadataProvider id="HTTPMetadata-eduGAIN"
                xsi:type="FileBackedHTTPMetadataProvider"
                backingFile="%{idp.home}/metadata/edugain-backing.xml"
                metadataURL="https://metadata.gakunin.nii.ac.jp/edugain-v2.xml">
    <MetadataFilter xsi:type="SignatureValidation" requireSignedRoot="true"
                    certificateFile="%{idp.home}/credentials/mds-v2.cer"/>
    <MetadataFilter xsi:type="RequiredValidUntil" maxValidityInterval="P9D"/>
    <MetadataFilter xsi:type="EntityRole">
        <RetainedRole>md:SPSSODescriptor</RetainedRole>
    </MetadataFilter>
</MetadataProvider>
メタデータ署名用証明書の設定
学認に公開するIdPメタデータに署名するための証明書を設定します。
証明書(server.crt)と秘密鍵(server.key)は/opt/shibboleth-idp/credentials/ に配置しておきます。
秘密鍵に適切なパーミッションを設定します。
chown root:jetty /opt/shibboleth-idp/credentials/server.key
chmod 640 /opt/shibboleth-idp/credentials/server.key
/opt/shibboleth-idp/conf/idp.propertiesを編集します。
# この行のコメントアウトを外し、値を空にする
idp.entityID.metadataFile=

(省略)

# 適切なファイルパスに修正
idp.signing.key= %{idp.home}/credentials/server.key
idp.signing.cert= %{idp.home}/credentials/server.crt
idp.encryption.key= %{idp.home}/credentials/server.key
idp.encryption.cert= %{idp.home}/credentials/server.crt

(省略)

# 起動時の更新チェックを無効化
idp.updateCheck.enable=false
LDAPサーバ設定
今回の例では外部のLDAPサーバからユーザ認証およびユーザ属性を取得するものとしますので、その設定を行います。
/opt/shibboleth-idp/conf/ldap.properties を編集します。
設定内容はお使いのLDAPサーバの環境により異なりますので、適切に修正してください。
# LDAPサーバのURLや接続パラメータを修正
idp.authn.LDAP.ldapURL     = ldap://ldap.example.jp
idp.authn.LDAP.useStartTLS = false
idp.authn.LDAP.useSSL      = false

# ユーザ検索のためのベースDNやフィルタを修正
idp.authn.LDAP.baseDN        = ou=users,dc=example,c=jp
idp.authn.LDAP.subtreeSearch = true
idp.authn.LDAP.userFilter    = (uid={user})
idp.authn.LDAP.bindDN        = uid=ldapadmin,ou=system
/opt/shibboleth-idp/credentials/secrets.properties を編集し、LDAPサーバに接続するためのパスワードを設定します。
idp.authn.LDAP.bindDNCredential =****
persistentIdの設定
/opt/shibboleth-idp/credentials/secrets.propertiesを編集し、persistentId生成用のソルトを設定します。
ソルト値は一度設定して運用を開始した後は変更することが難しいので注意してください。
# ランダムで十分な長さの値を指定すること
idp.persistentId.salt =******************
/opt/shibboleth-idp/conf/saml-nameid.propertiesを編集します。
# コメントアウトを外して値を uid に変更
idp.persistentId.sourceAttribute = uid
学認用属性定義の配置
学認で利用される属性定義ファイルを配置します。
下記ページで公開されている「gakunin-rules.tar.gz」をダウンロードして/opt/shibboleth-idp/conf/attributes/custom/内に展開してください。
https://nii-auth.atlassian.net/wiki/spaces/GakuNinShibInstall/pages/44401184#%E3%83%86%E3%83%B3%E3%83%97%E3%83%AC%E3%83%BC%E3%83%88
ファイルへの直接リンクはできないようなので、作業端末でダウンロードしてからサーバに転送するなどしてください。
cd ~/work
tar zxv -C /opt/shibboleth-idp/conf/ -f gakunin-rules.tar.gz
attribute-resolver.xml 設定
/opt/shibboleth-idp/conf/attribute-resolver.xml を編集しIdPからSPへ渡す属性情報を定義します。LDAPから取得する属性情報などもここで定義します。
以下にシンプルな例を示しますが、実際の設定内容は環境や要件により大きく異なりますので、適切に変更してください。
<?xml version="1.0" encoding="UTF-8"?>
<AttributeResolver
        xmlns="urn:mace:shibboleth:2.0:resolver"
        xmlns:xsi="http://www.w3.org/2001/XMLSchema-instance"
        xsi:schemaLocation="urn:mace:shibboleth:2.0:resolver http://shibboleth.net/schema/idp/shibboleth-attribute-resolver.xsd">

    <!-- ========================================== -->
    <!--      Attribute Definitions                 -->
    <!-- ========================================== -->
    <!-- Definition for eduPersonPrincipalName -->
    <AttributeDefinition xsi:type="Scoped" id="eduPersonPrincipalName" scope="%{idp.scope}">
        <InputDataConnector ref="myLDAP" attributeNames="uid" />
    </AttributeDefinition>

    <!-- Definition for eduPersonUniqueId -->
    <AttributeDefinition xsi:type="Scoped" id="eduPersonUniqueId" scope="%{idp.scope}">
        <InputDataConnector ref="myLDAP" attributeNames="eduPersonUniqueId" />
    </AttributeDefinition>

    <!-- Definition for eduPersonTargetedID (computedID) -->
    <AttributeDefinition xsi:type="SAML2NameID" id="eduPersonTargetedID" nameIdFormat="urn:oasis:names:tc:SAML:2.0:nameid-format:persistent">
        <InputDataConnector ref="computedID" attributeNames="computedID" />
    </AttributeDefinition>

    <!-- Computed targeted ID connector -->
    <DataConnector id="computedID" xsi:type="ComputedId"
                   excludeResolutionPhases="c14n/attribute"
                   generatedAttributeID="computedID"
                   salt="%{idp.persistentId.salt}"
                   algorithm="%{idp.persistentId.algorithm:SHA}"
                   encoding="%{idp.persistentId.encoding:BASE64}">
        <InputDataConnector ref="myLDAP" attributeNames="%{idp.persistentId.sourceAttribute}" />
    </DataConnector>

    <!-- ========================================== -->
    <!--      Data Connectors                       -->
    <!-- ========================================== -->
    <!-- Example LDAP Connector -->
    <DataConnector id="myLDAP" xsi:type="LDAPDirectory"
        ldapURL="%{idp.attribute.resolver.LDAP.ldapURL}"
        baseDN="%{idp.attribute.resolver.LDAP.baseDN}"
        principal="%{idp.attribute.resolver.LDAP.bindDN}"
        principalCredential="%{idp.attribute.resolver.LDAP.bindDNCredential}"
        useStartTLS="%{idp.attribute.resolver.LDAP.useStartTLS:true}"
        connectTimeout="%{idp.attribute.resolver.LDAP.connectTimeout}"
        responseTimeout="%{idp.attribute.resolver.LDAP.responseTimeout}"
        connectionStrategy="%{idp.attribute.resolver.LDAP.connectionStrategy:ACTIVE_PASSIVE}"
        noResultIsError="%{idp.attribute.resolver.LDAP.noResultIsError:true}"
        multipleResultsIsError="true"
        excludeResolutionPhases="c14n/attribute"
        exportAttributes="mail sn cn uid ou jaou o jao jasn jaGivenName jaDisplayName">
        <FilterTemplate>
            <![CDATA[
                %{idp.attribute.resolver.LDAP.searchFilter}
            ]]>
        </FilterTemplate>
        <ConnectionPool
            minPoolSize="%{idp.pool.LDAP.minSize:3}"
            maxPoolSize="%{idp.pool.LDAP.maxSize:10}"
            blockWaitTime="%{idp.pool.LDAP.blockWaitTime:PT3S}"
            validatePeriodically="%{idp.pool.LDAP.validatePeriodically:true}"
            validateTimerPeriod="%{idp.pool.LDAP.validatePeriod:PT5M}"
            validateDN="%{idp.pool.LDAP.validateDN:}"
            validateOnCheckout="%{idp.pool.LDAP.validateOnCheckout:false}"
            validateFilter="%{idp.pool.LDAP.validateFilter:(objectClass=*)}"
            prunePeriod="%{idp.pool.LDAP.prunePeriod:PT5M}"
            expirationTime="%{idp.pool.LDAP.idleTime:PT10M}"/>
    </DataConnector>
</AttributeResolver>
attribute-filter.xml 設定
各SPに対してどの属性をリリースするかを定義する/opt/shibboleth-idp/conf/attribute-filter.xml を編集します。
これも環境や要件により設定すべき内容は大きく変わります。以下は学認接続テスト用SPに属性をリリースするシンプルな例を示します。
<?xml version="1.0" encoding="UTF-8"?>
<AttributeFilterPolicyGroup id="ShibbolethFilterPolicy"
        xmlns="urn:mace:shibboleth:2.0:afp"
        xmlns:xsi="http://www.w3.org/2001/XMLSchema-instance"
        xsi:schemaLocation="urn:mace:shibboleth:2.0:afp http://shibboleth.net/schema/idp/shibboleth-afp.xsd">

    <AttributeFilterPolicy id="PolicyforGakuNinTestSP">
        <PolicyRequirementRule xsi:type="OR">
            <Rule xsi:type="Requester" value="https://attrviewer20.gakunin.nii.ac.jp/shibboleth-sp" />
        </PolicyRequirementRule>
        <AttributeRule attributeID="o" permitAny="true" />
        <AttributeRule attributeID="jao" permitAny="true" />
        <AttributeRule attributeID="ou" permitAny="true" />
        <AttributeRule attributeID="jaou" permitAny="true" />
        <AttributeRule attributeID="eduPersonPrincipalName" permitAny="true" />
        <AttributeRule attributeID="eduPersonTargetedID" permitAny="true" />
        <AttributeRule attributeID="eduPersonAffiliation" permitAny="true" />
        <AttributeRule attributeID="eduPersonScopedAffiliation" permitAny="true" />
        <AttributeRule attributeID="eduPersonEntitlement" permitAny="true" />
        <AttributeRule attributeID="sn" permitAny="true" />
        <AttributeRule attributeID="jasn" permitAny="true" />
        <AttributeRule attributeID="givenName" permitAny="true" />
        <AttributeRule attributeID="jaGivenName" permitAny="true" />
        <AttributeRule attributeID="displayName" permitAny="true" />
        <AttributeRule attributeID="jaDisplayName" permitAny="true" />
        <AttributeRule attributeID="mail" permitAny="true" />
        <AttributeRule attributeID="gakuninScopedPersonalUniqueCode" permitAny="true" />
        <AttributeRule attributeID="isMemberOf" permitAny="true" />
        <AttributeRule attributeID="eduPersonAssurance" permitAny="true" />
        <AttributeRule attributeID="eduPersonUniqueId" permitAny="true" />
        <AttributeRule attributeID="eduPersonOrcid" permitAny="true" />
    </AttributeFilterPolicy>
</AttributeFilterPolicyGroup>
サービスの起動
ここまで設定が完了したらJettyとhttpdを起動します。
systemctl stop jetty
systemctl restart httpd
systemctl start jetty
動作確認
組み込みのコマンドで動作状態を確認します。
/opt/shibboleth-idp/bin/status.sh
以下のように結果が表示され、エラーがないことを確認してください。
### Operating Environment Information
operating_system: Linux
operating_system_version: 6.12.0-124.55.1.el10_1.x86_64
operating_system_architecture: amd64
jdk_version: 21.0.11
available_cores: 4
used_memory: 1790 MB
maximum_memory: 2048 MB

### Identity Provider Information
idp_version: 5.2.1
start_time: 2026-04-26T00:58:02.943Z
current_time: 2026-04-26T00:58:03.907756494Z
uptime: PT0.964S

(省略)

service: shibboleth.AttributeResolverService
last successful reload attempt: 2026-04-26T00:57:06.024906373Z
last reload attempt: 2026-04-26T00:57:06.024906373Z
        No Data Connector has ever failed
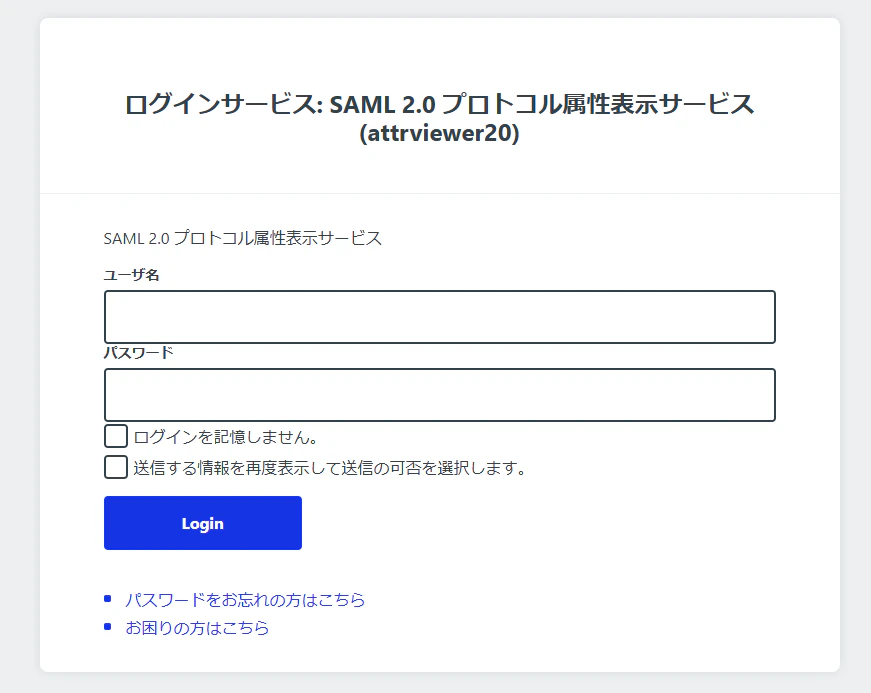
学認接続テスト用SPなどを利用して実際の認証フローが正常に動作することも確認します。
https://attrviewer20.gakunin.nii.ac.jp/
正常に動作していればこのようなログイン画面が表示されるはずです。LDAPに登録されているユーザでログインできることを確認してください。