Reconfigure.ioというサービスがパブリックベータになりました。
このサービスは、Goのコードを、AWS F1インスタンス上でSDAccelという技術を用いて動かすサービスです。
SDAccelについて詳しくは、以下の記事を参考にしてください。
【ザイリンクス】プログラマのためのFPGA開発環境が登場 C/C++を駆使してCPU/GPUの「壁」を突破 - 日経テクノロジーオンラインSPECIAL
内部では、
Goのサブセット言語->Teak->Verilog->Bitstream
のような順で変換されているそうです。
今回は、このReconfigure.ioを用いて簡単なサンプルプログラムをAWS F1インスタンスへデプロイするところまでやってみたいと思います。
登録
Signup For Freeを開き、ユーザ情報を入力した後、Submitを押します。
まず初めに、登録したメールアドレスにReconfigure.io Communityへの招待URLが届きます。
これは、Reconfigure.ioに関するニュースや、サポートを受けることのできる掲示板であり、実はこの時点ではまだReconfigure.ioのパブリックベータへの登録は完了していません。
登録から2週間ほど経ってから、実際のReconfigure.ioへの招待URLが届きますので、URLをクリックしログインをすれば登録完了です。
招待URLは二回届きます。初めはCommunity、次がサービス本体です。
インストール
登録が完了し、ダッシュボードへアクセスできるようになったら、次はrecoコマンドのインストールを行います。
ここへアクセスし、お使いのOSに合わせたインストールコマンドを実行します。
その後、ダッシュボードへアクセスをし、API Keyをコピーしておきます。
以下のコマンドを入力し、API Keyを入力すればインストール完了です。
$ reco auth
Copy the token after authentication at http://app.reconfigure.io/dashboard
Token: blablablablabla0123456789
なんか書いてみる
では早速何か書いてみましょう。
公式でいくつかのサンプルプログラムがGithub上に用意されているので、これを参考にして何か書きましょう。
プロジェクトの作成
recoは./.recoディレクトリにあるデータを使って、プロジェクトを認識します。gitみたいな感じですね。
まずはこの.recoディレクトリを作成する必要があります。以下のコマンドを、main.goを配置するディレクトリで実行してください:
$ reco project create sample_proj
これでプロジェクトの作成が完了しました。./.recoディレクトリが作成されていることが確認できます。
~/Projects/sample_proj » ls -lA
合計 8
drwxr-xr-x 2 mjhd users 4096 12月  7 21:53 .reco
-rw-r--r-- 1 mjhd users  511 12月  7 21:50 main.go
ディレクトリ構造
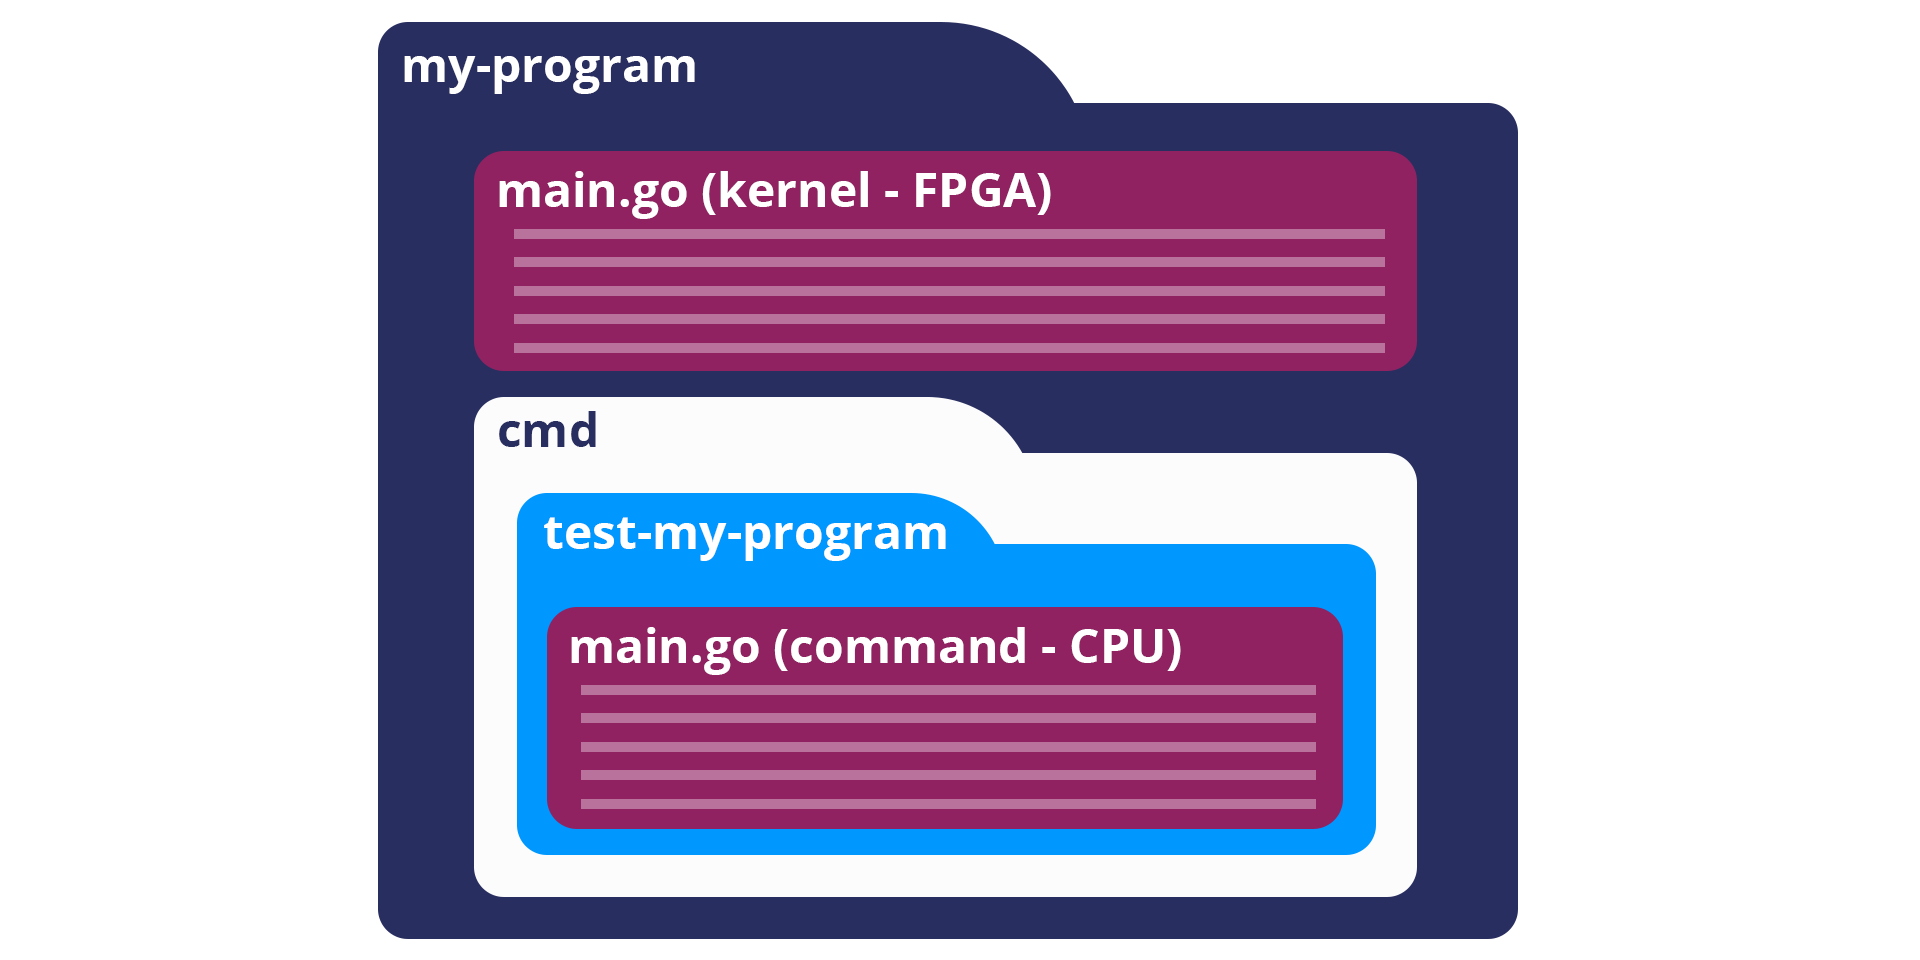
Reconfigure.ioでは、プログラムはkernel(FPGA)とcommand(CPU, Host)に分かれます。

今後、kernel(FPGA)プログラムはカーネル、command(CPU, Host)プログラムは、ホストと呼びます。
ホストは./cmd/以下にディレクトリを作成し、main.goとしてmainパッケージで配置してください。
カーネルは、./main.goとして作成してください。
以下のようなディレクトリ構造になります。
~/Projects/sample_proj » tree -a
.
├── .reco
│   └── project.json
├── cmd
│   └── test-sample
│       └── main.go
└── main.go

3 directories, 3 files
プログラムを書く
ホストプログラムの役割は以下です:
- データを作成、管理し、カーネルに送信する
- カーネルを起動する
- 処理結果を共有メモリから受け取り、出力処理を行う
カーネルプログラムの役割は以下です:
- 共有メモリからデータを受け取る
- 処理する
- 共有メモリへデータを書き込む
今回は、シンプルにランダムな値の入った配列を、それぞれ2倍していくプログラムを書いてみます。
// カーネルプログラム
package main

import (
	_ "sdaccel"

	aximemory "axi/memory"
	axiprotocol "axi/protocol"
)

func Top(
	// ホストで指定したパラメータが渡される
	inputs uintptr,
	outputs uintptr,
	length uint32,

	memReadAddr chan<- axiprotocol.Addr,
	memReadData <-chan axiprotocol.ReadData,

	memWriteAddr chan<- axiprotocol.Addr,
	memWriteData chan<- axiprotocol.WriteData,
	memWriteResp <-chan axiprotocol.WriteResp) {

	// 全てのinputsをinputChanへ流す
	inputChan := make(chan uint32)
	go aximemory.ReadBurstUInt32(
		memReadAddr, memReadData, true, inputs, length, inputChan)

	// データを2倍し、outputChanへ吐き出す
	outputChan := make(chan uint32)
	go func() {
		// ループは停止しなくても良い
		for {
			outputChan <- (<-inputChan) * 2
		}
	}()

	// outputChanからoutputsへ流す
	aximemory.WriteBurstUInt32(
		memWriteAddr, memWriteData, memWriteResp, true, outputs, length, outputChan)

}
// ホストプログラム
package main

import (
	"encoding/binary"
	"xcl"
)

func main() {
	// カーネルとのやり取り用のWorldを作成する
	world := xcl.NewWorld()
	defer world.Release()

	// カーネルをインポートする
	// 二つの識別子は固定
	krnl := world.Import("kernel_test").GetKernel("reconfigure_io_sdaccel_builder_stub_0_1")
	defer krnl.Release()

	// 入力する配列を作成する
	inputs := make([]uint32, 30)
	for i := range inputs {
		inputs[i] = uint32(i)
	}

	// カーネルとのデータの入力用に共用メモリを確保する
	inputBuff := world.Malloc(xcl.ReadOnly, uint(binary.Size(inputs))
	defer inputBuff.Free()

	// 出力用の配列を作成する
	outputs := make([]uint32, len(inputs))

	// カーネルとのデータの出力用に共用メモリを確保する
	outputBuff := world.Malloc(xcl.WriteOnly, uint(binary.Size(outputs))
	defer outputBuff.Free()

	// ここで、データを作成し、上で割り当てた共用メモリを用いてカーネルにデータを渡す
	binary.Write(inputBuff.Writer(), binary.LittleEndian, &inputs)
	binary.Write(outputBuff.Writer(), binary.LittleEndian, &outputs) // 初期化だけする

	// カーネルへ渡すパラメータを指定する
	// 第一引数(配列へのポインタ)
	krnl.SetMemoryArg(0, inputsBuff)
	// 第二引数(配列へのポインタ)
	krnl.SetMemoryArg(1, outputBuff)
	// 第三引数(配列の長さ)
	krnl.SetArg(2, uint32(len(inputs)))

	// カーネルを実行する
	krnl.Run(1, 1, 1)

	// 共用メモリに出力されたデータを、表示する
	binary.Read(outputBuff.Reader(), binary.LittleEndian, &outputs)

	for i := range inputs {
		fmt.Printf("%d => %d\n", inputs[i], outputs[i])
	}
}
そして、プログラムが正しいかどうか、型チェックを行います。
» reco check
./sample_proj/main.go checked successfully
無事通ったら、実際にReconfigure.io上のハードウェアで実行してみます。
» reco test run test-sample

2017-12-07 23:49:32| preparing simulation ..
2017-12-07 23:49:34| done
2017-12-07 23:49:34| archiving
2017-12-07 23:49:34| done
2017-12-07 23:49:34| uploading ...
2017-12-07 23:49:34| done
2017-12-07 23:49:34| running simulation
2017-12-07 23:49:34|
2017-12-07 23:49:34| you can run "reco simulation log aaaaaaaaa-bbbbbbbb-ccccccc-dddddddd" to manually stream logs
2017-12-07 23:49:34| getting simulation details
2017-12-07 23:49:34| status: queued  mkdir -p ""/mnt/.reco-work/sdaccel/dist""
cd "/mnt/.reco-work/sdaccel/dist" && XCL_EMULATION_MODE=hw_emu emconfigutil --xdevice xilinx:aws-vu9p-f1:4ddr-xpr-2pr:4.0 --nd 1
****** configutil v2017.1_sdx (64-bit)
  **** SW Build 1933108 on Fri Jul 14 11:54:19 MDT 2017
    ** Copyright 1986-2017 Xilinx, Inc. All Rights Reserved.
INFO: [ConfigUtil 60-895]    Target platform: /opt/Xilinx/SDx/2017.1.op/platforms/xilinx_aws-vu9p-f1_4ddr-xpr-2pr_4_0/xilinx_aws-vu9p-f1_4ddr-xpr-2pr_4_0.xpfm
  emulation configuration file `emconfig.json` is created in ./ directory
...(中略)...
0 => 0
1 => 2
2 => 4
3 => 6
4 => 8
5 => 10
6 => 12
7 => 14
8 => 16
9 => 18
10 => 20
11 => 22
12 => 24
13 => 26
14 => 28
15 => 30
16 => 32
17 => 34
18 => 36
19 => 38
20 => 40
21 => 42
22 => 44
23 => 46
24 => 48
25 => 50
26 => 52
27 => 54
28 => 56
29 => 58
verilog,1.60,46512
xo,66.00,1579708
xclbin,73.91,1120504
実行結果がでましたね。きちんと二倍されています。
デプロイ
正常に動くことが確認できたら、AWS F1インスタンスへデプロイをしましょう。
まずは、Reconfigure.io上にアップロードし、ビルドをします。
» reco build run
2017-12-07 23:57:16| preparing build ..
2017-12-07 23:57:17| done. Build id: aaaaaaaa-bbbbbbb-cccccc-dddddddddd
2017-12-07 23:57:17| archiving
2017-12-07 23:57:17| done
2017-12-07 23:57:17| uploading ...
2017-12-07 23:57:18| done
2017-12-07 23:57:18|
2017-12-07 23:57:18| you can run "reco build log aaaaaaaa-bbbbbbb-cccccc-dddddddddd" to manually stream logs
2017-12-07 23:57:18| getting build details
2017-12-07 23:57:18| status: queued  mkdir -p ""/mnt/.reco-work/sdaccel/dist""
...(省略)
ビルドが完了すると、以下のコマンドで今までのビルド一覧を確認できます。
» reco build list

                BUILD ID                     STATUS           STARTED          DURATION
  aaaaaaaaa-bbbbbbb-ccccccc-dddddddddd      completed      19 hours ago        3h58m51s
4時間もかかりました…一度startedになったビルドはクラウド上で行われるため、Ctrl-Cでコマンドを終了してもビルドは続くようです。
停止したい場合は、reco build stop aaaaaaaaa-bbbbbbb-ccccccc-ddddddddddとしてください。
このBuildIDを用いて、デプロイをおこないます。
» reco deployment run aaaaaaaaa-bbbbbbb-ccccccc-dddddddddd test-sample

2017-12-08 20:07:45| creating deployment ..
2017-12-08 20:07:46| done. Deployment id: eeeeeeee-fffffff-gggggggg-hhhhhhhhh
2017-12-08 20:07:46|
2017-12-08 20:07:46| you can run "reco deployment log eeeeeeee-fffffff-gggggggg-hhhhhhhhh" to manually stream logs
2017-12-08 20:07:46| getting deployment details
2017-12-08 20:07:46| status: unstarted ... Device/Slot[0] (/dev/xdma0, 0:0:1d.0)
xclProbe found 1 FPGA slots with XDMA driver running
0 => 0
1 => 2
2 => 4
3 => 6
4 => 8
5 => 10
6 => 12
7 => 14
8 => 16
9 => 18
10 => 20
11 => 22
12 => 24
13 => 26
14 => 28
15 => 30
16 => 32
17 => 34
18 => 36
19 => 38
20 => 40
21 => 42
22 => 44
23 => 46
24 => 48
25 => 50
26 => 52
27 => 54
28 => 56
29 => 58
eeeeeeee-fffffff-gggggggg-hhhhhhhhh
動きましたね。お疲れさまです。
関連
Reconfigure.ioのGithubには、BNN(Binarized Neural Network)のAPIもあります。ReconfigureIO/brain
ニューラルネットワークや、画像処理、動画処理など、大きなデータを処理する場面で活用できそうです。
他にもWebインターフェース越しにデータのmd5をとるサンプルなどがあります。
https://github.com/ReconfigureIO/web-md5
時間があったらReconfigure.ioでBNNを動かしてみたいです。
