IBM Cloud Pak for Data を ROSA (Red Hat OpenShift Service on AWS) 環境にデプロイする機会を得ました。その際、ROSA 4.12 のデプロイを行った記録です。
ROSAのデプロイは前提条件の確認(これだけAWSマネージドコンソール)を除いて、ほぼすべてをRed Hat Hybrid Cloud Consoleから行います。
注)当記事は2023年8月時点での記録であり、今後変更される場合があります。
ROSAの有効化
-
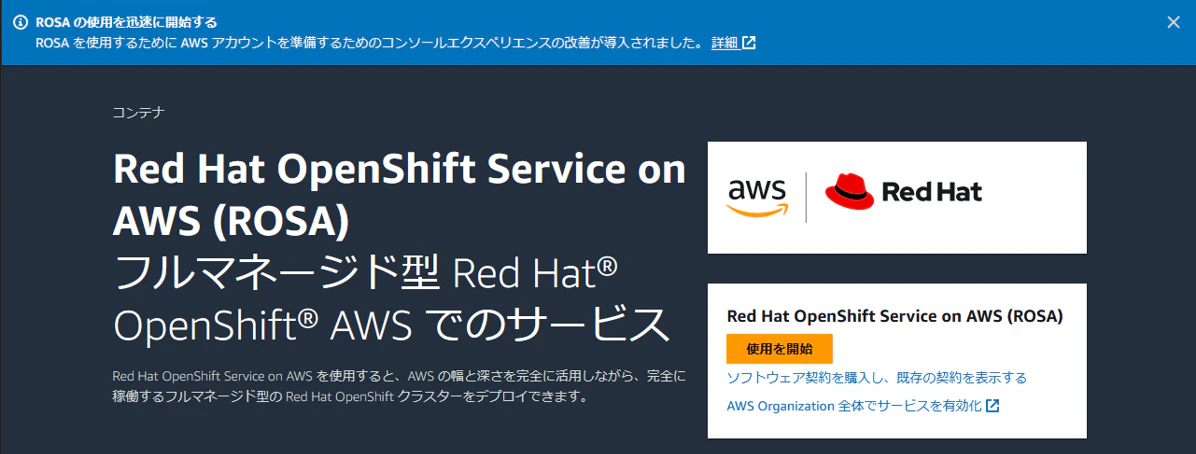
AWSマネージドコンソールのROSAの画面から
使用を開始をクリックします。
-
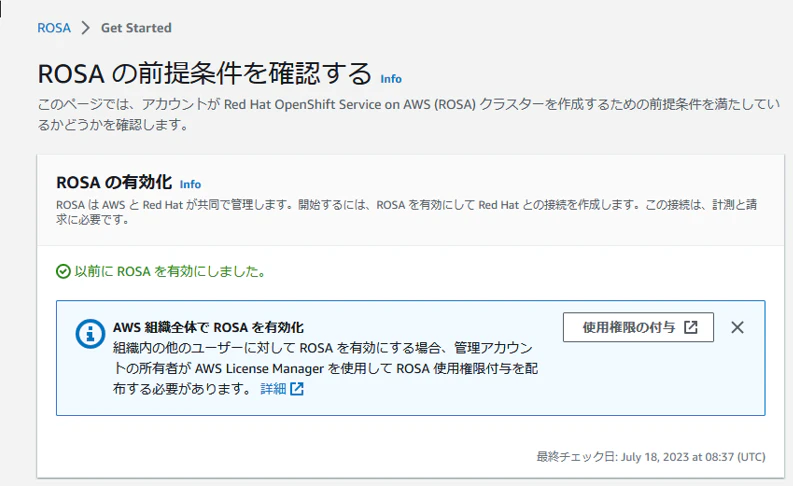
ROSAは有効になっていました。
-
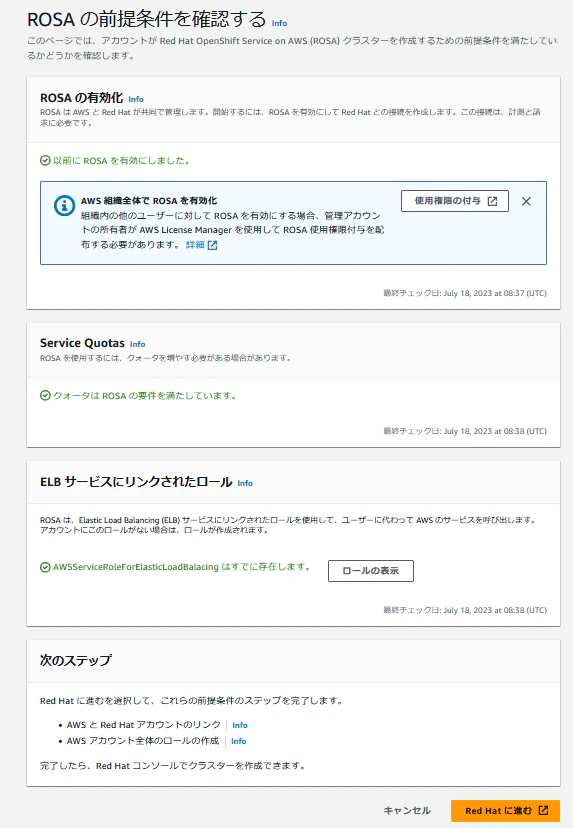
「Service Quotas」や「ELB サービスにリンクされたロール」が要件を満たしていることを確認し
Red Hatに進むをクリックします。
-
ブラウザの別タブでRed Hatのログイン画面が起動します。Red Hatアカウントでログインすると、Red Hat Hybrid Cloud Console の [Get started with Red Hat OpenShift Service on AWS (ROSA)] 画面が表示されます。この手順に沿って、デプロイを進めます。
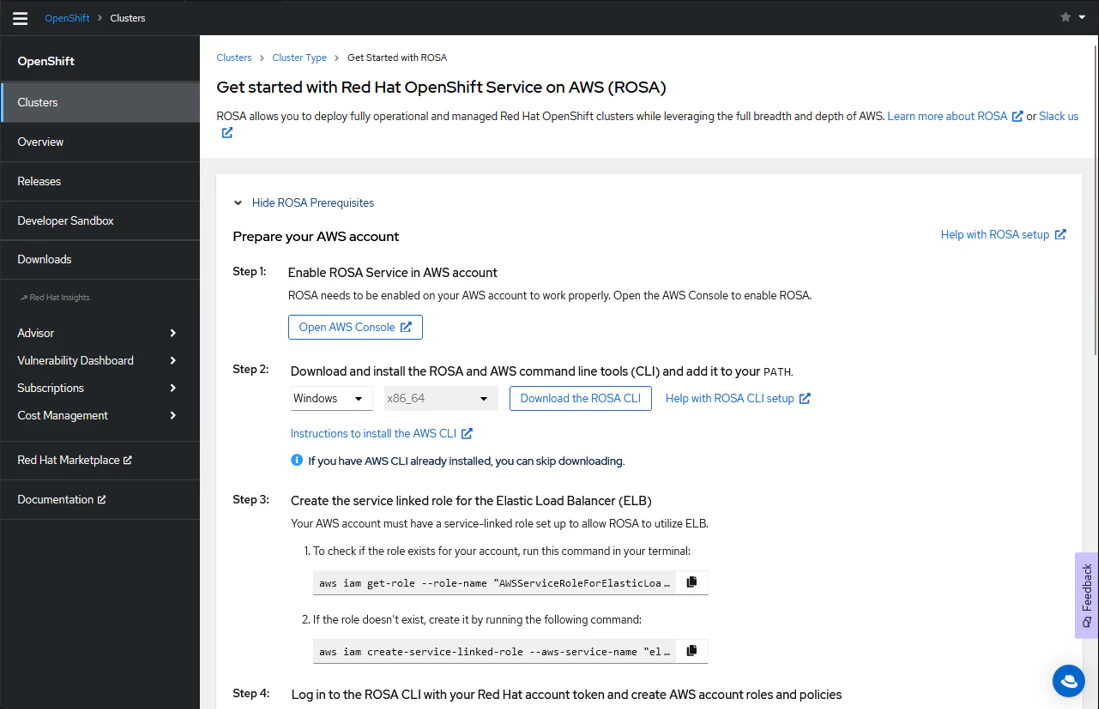
ROSA Prerequisites - Prepare your AWS account
Step 1: Enable ROSA Service in AWS account
既に済んでいます。
Step 2: Download and install the ROSA and AWS command line tools (CLI) and add it to your PATH.
このステップから実行します。
ROSA CLI
ROSA CLI(今回はLinux x86_64)をダウンロードして解凍します。rosaコマンドを実行できることを確認します。
# ls -l
-rw-r--r--. 1 root root  21240499  7月 18 04:44 rosa-linux.tar.gz
# tar xvf rosa-linux.tar.gz
rosa
# mv rosa /usr/local/bin
# rosa version
1.2.23
I: Your ROSA CLI is up to date.
#
AWS CLI
こちらを参考にしてください:awsコマンドを実行する
Step 3: Create the service linked role for the Elastic Load Balancer (ELB)
ELB用のIAMロールがあるかどうかを確認します。
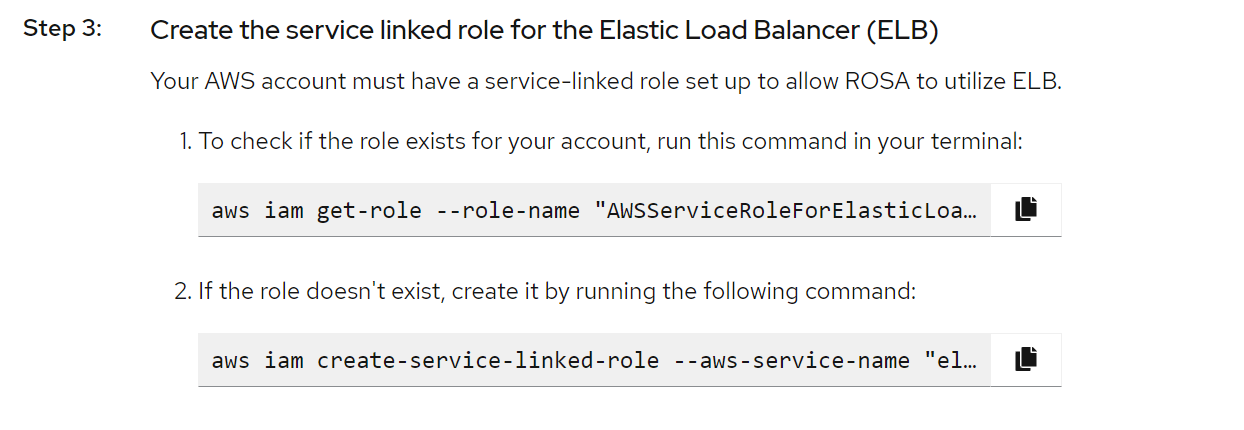
AWSコンソールのCloudShell(またはawsコマンドを実行できるクライアント)から1のチェックコマンドを実行します。必要なロールは既にありました。
コマンド実行例:
[cloudshell-user@ip-10-6-73-27 ~]$ aws iam get-role --role-name "AWSServiceRoleForElasticLoadBalancing"
{
    "Role": {
        "Path": "/aws-service-role/elasticloadbalancing.amazonaws.com/",
        "RoleName": "AWSServiceRoleForElasticLoadBalancing",
        "RoleId": "xxxxxxxxxxxxxxxxxxxxx",
        "Arn": "arn:aws:iam::xxxxxxxxxxxx:role/aws-service-role/elasticloadbalancing.amazonaws.com/AWSServiceRoleForElasticLoadBalancing",
        "CreateDate": "2022-MM-DDT02:36:54+00:00",
        "AssumeRolePolicyDocument": {
            "Version": "2012-10-17",
            "Statement": [
                {
                    "Effect": "Allow",
                    "Principal": {
                        "Service": "elasticloadbalancing.amazonaws.com"
                    },
                    "Action": "sts:AssumeRole"
                }
            ]
        },
        "Description": "Allows ELB to call AWS services on your behalf.",
        "MaxSessionDuration": 3600,
        "RoleLastUsed": {
            "LastUsedDate": "2022-MM-DDT20:48:21+00:00",
            "Region": "ap-northeast-2"
        }
    }
}
[cloudshell-user@ip-10-6-73-27 ~]$
Step 4: Log in to the ROSA CLI with your Red Hat account token and create AWS account roles and policies
1 のコマンドをコピーして実行し、ROSAにログインします。
2 のコマンドをコピーして実行し、autoモードでアカウントロールを作成します。
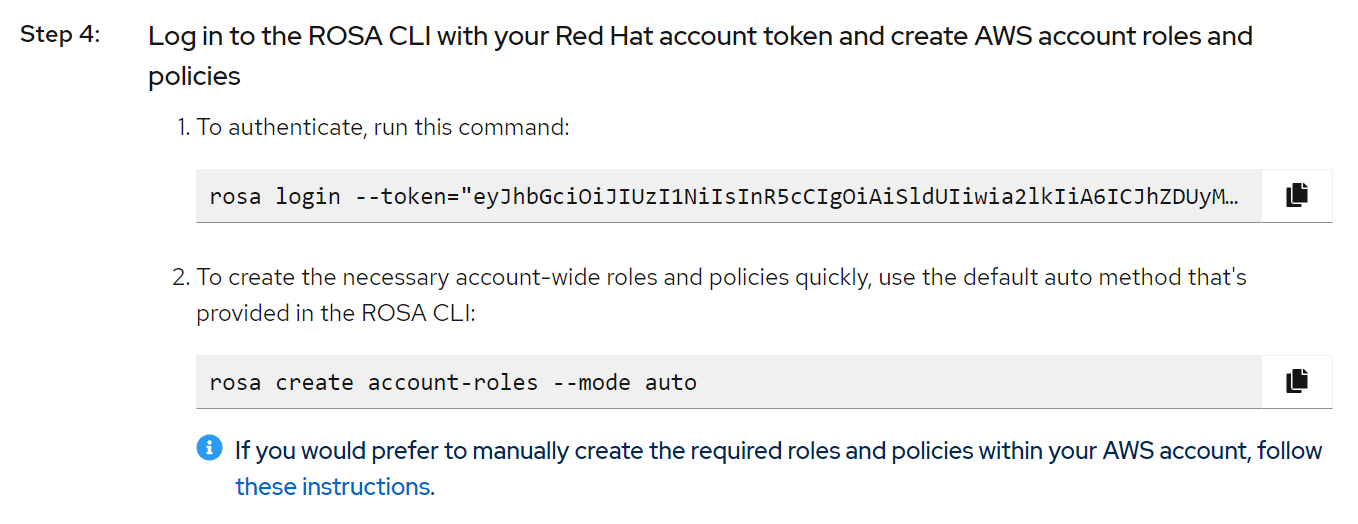
コマンド実行例:
# rosa login --token="eyJhbGciOiJIUzI1NiIsInR5cCIgOiAiSldUIiwia2lkIiA6ICJhZDUyM...."
I: Logged in as 'xxxxxx' on 'https://api.openshift.com'

# rosa create account-roles --mode auto
I: Logged in as 'xxxxxx' on 'https://api.openshift.com'
I: Validating AWS credentials...
I: AWS credentials are valid!
I: Validating AWS quota...
I: AWS quota ok. If cluster installation fails, validate actual AWS resource usage against https://docs.openshift.com/rosa/rosa_getting_started/rosa-required-aws-service-quotas.html
I: Verifying whether OpenShift command-line tool is available...
I: Current OpenShift Client Version: 4.13.4
I: Creating account roles
I: Creating roles using 'arn:aws:iam::xxxxxxxxxxxx:user/xxxxxx@yy.zzz.com'
I: Created role 'ManagedOpenShift-Installer-Role' with ARN 'arn:aws:iam::xxxxxxxxxxxx:role/ManagedOpenShift-Installer-Role'
I: Created role 'ManagedOpenShift-ControlPlane-Role' with ARN 'arn:aws:iam::xxxxxxxxxxxx:role/ManagedOpenShift-ControlPlane-Role'
I: Created role 'ManagedOpenShift-Worker-Role' with ARN 'arn:aws:iam::xxxxxxxxxxxx:role/ManagedOpenShift-Worker-Role'
I: Created role 'ManagedOpenShift-Support-Role' with ARN 'arn:aws:iam::xxxxxxxxxxxx:role/ManagedOpenShift-Support-Role'
I: To create an OIDC Config, run the following command:
        rosa create oidc-config
I: To create a cluster with these roles, run the following command:
        rosa create cluster --sts
Step5: Verify your credentials and quota
Step 5のコマンドをコピーして実行し、認証情報とクオータを確認します。
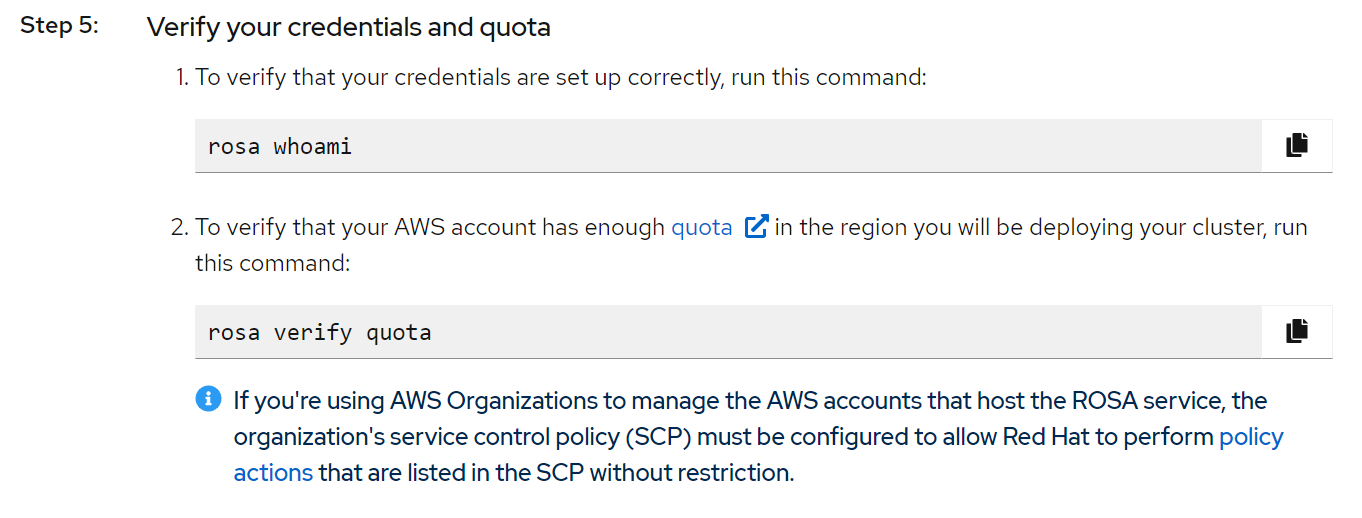
コマンド実行例:
# rosa whoami
AWS ARN:                      arn:aws:iam::xxxxxxxxxxxx:user/xxxxxx@yy.zzz.com
AWS Account ID:               xxxxxxxxxxxx
AWS Default Region:           ap-northeast-1
OCM API:                      https://api.openshift.com
OCM Account Email:            xxxxxx@yy.zzz.com
OCM Account ID:               xxxxxxxxxxxxxxxxxxxxxxxx
OCM Account Name:             xxxx xxxx
OCM Account Username:         xxxxxx
OCM Organization External ID: xxxxxxxx
OCM Organization ID:          xxxxxxxxxxxxxxxx
OCM Organization Name:        XXXXXXXXX

# rosa verify quota
I: Validating AWS quota...
I: AWS quota ok. If cluster installation fails, validate actual AWS resource usage against https://docs.openshift.com/rosa/rosa_getting_started/rosa-required-aws-service-quotas.html
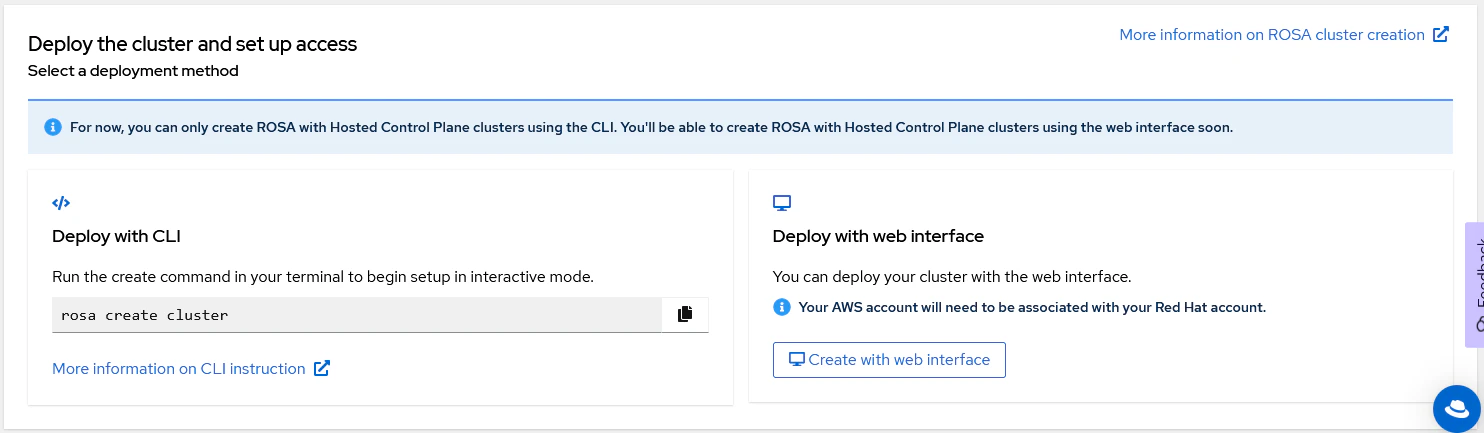
ROSAクラスターのデプロイ
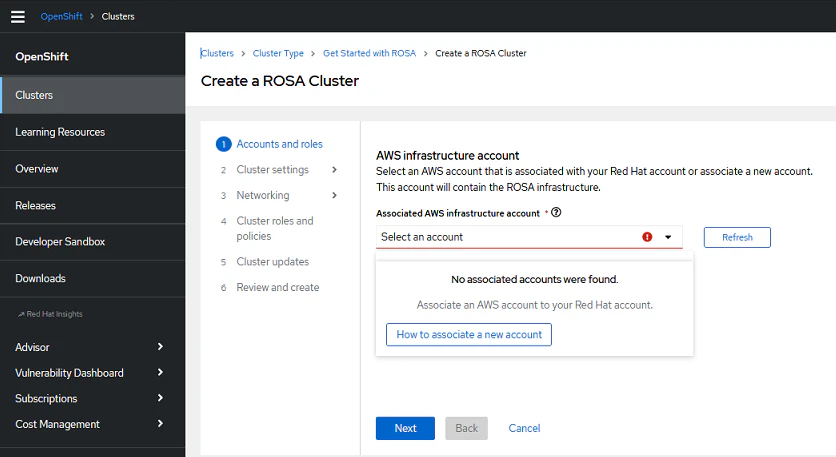
Web インターフェイスでのデプロイをします。Create with web interfaceをクリックします。
AWSアカウントとRed Hatアカウントの関連付けを行います。
How to associate a new account をクリックします。
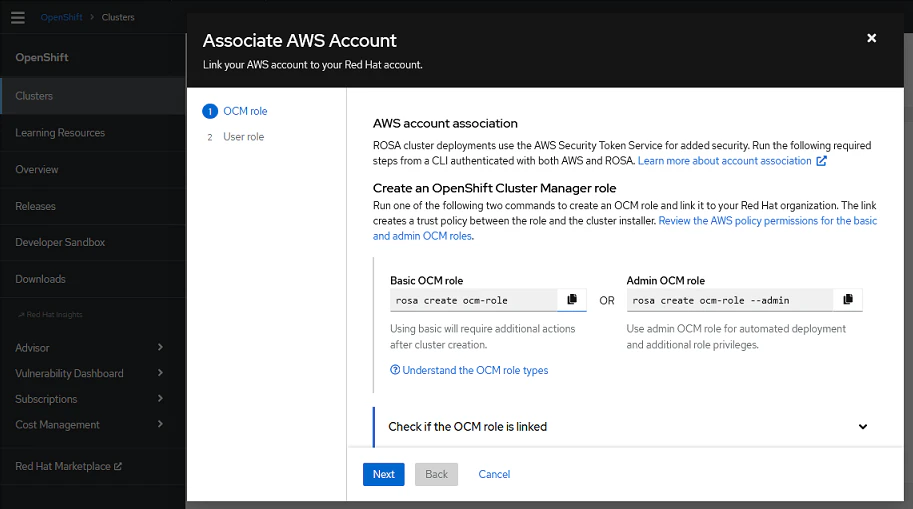
今回は Basic OCM role を実行します。
OCM role がリンクされたかどうかをチェックします。
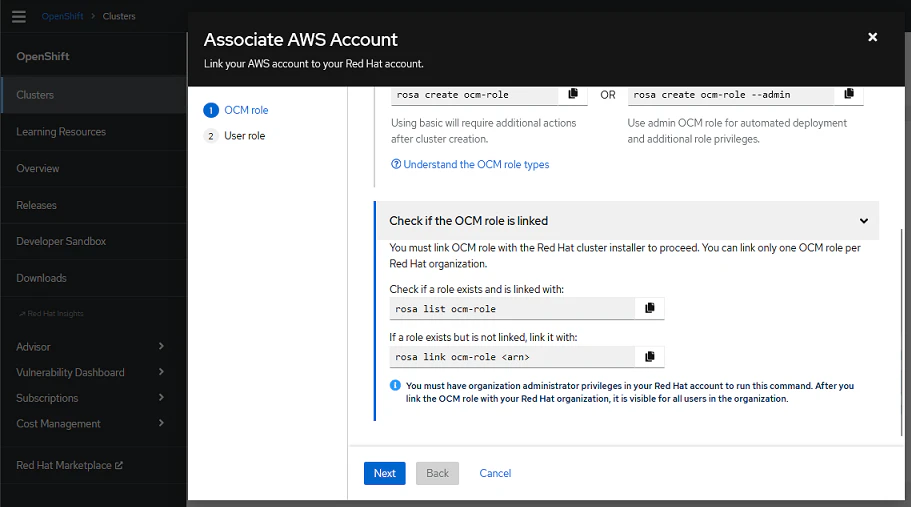
コマンド実行例:
# rosa list ocm-role
I: Fetching ocm roles
I: No ocm roles available

# rosa create ocm-role
I: Creating ocm role
? Role prefix: ManagedOpenShift
? Enable admin capabilities for the OCM role (optional): Yes
? Permissions boundary ARN (optional):
? Role Path (optional):
? Role creation mode: auto
I: Creating role using 'arn:aws:iam::xxxxxxxxxxxx:user/xxxxxx@yy.zzz.com'
? Create the 'ManagedOpenShift-OCM-Role-1XXXXXXX' role? Yes
I: Created role 'ManagedOpenShift-OCM-Role-1XXXXXXX' with ARN 'arn:aws:iam::xxxxxxxxxxxx:role/ManagedOpenShift-OCM-Role-1XXXXXXX'
I: Linking OCM role
? OCM Role ARN: arn:aws:iam::xxxxxxxxxxxx:role/ManagedOpenShift-OCM-Role-1XXXXXXX
? Link the 'arn:aws:iam::xxxxxxxxxxxx:role/ManagedOpenShift-OCM-Role-1XXXXXXX' role with organization 'XXXXXXXXXXXXXXXXXXXX'? Yes
I: Successfully linked role-arn 'arn:aws:iam::xxxxxxxxxxxx:role/ManagedOpenShift-OCM-Role-1XXXXXXX' with organization account 'XXXXXXXXXXXXXXXXXXXX'

# rosa list ocm-role
I: Fetching ocm roles
ROLE NAME                           ROLE ARN                                                           LINKED  ADMIN  AWS Managed
ManagedOpenShift-OCM-Role-1XXXXXXX  arn:aws:iam::xxxxxxxxxxxx:role/ManagedOpenShift-OCM-Role-1XXXXXXX  Yes     Yes    No
次にuse roleを作成します。
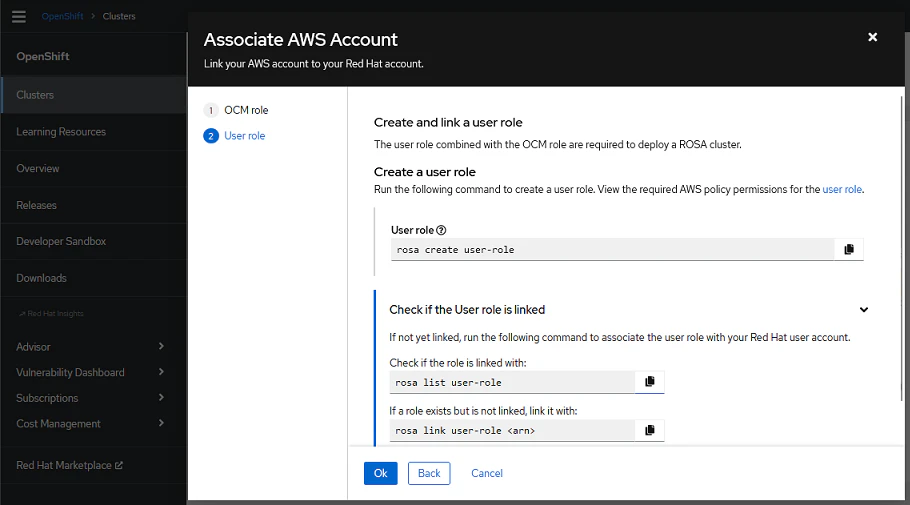
コマンド実行例
# rosa create user-role
I: Creating User role
? Role prefix: ManagedOpenShift
? Permissions boundary ARN (optional):
? Role Path (optional):
? Role creation mode: auto
I: Creating ocm user role using 'arn:aws:iam::xxxxxxxxxxxx:user/xxxxxx@yy.zzz.com'
? Create the 'ManagedOpenShift-User-rhusername-Role' role? Yes
I: Created role 'ManagedOpenShift-User-rhusername-Role' with ARN 'arn:aws:iam::xxxxxxxxxxxx:role/ManagedOpenShift-User-rhusername-Role'
I: Linking User role
? User Role ARN: arn:aws:iam::xxxxxxxxxxxx:role/ManagedOpenShift-User-rhusername-Role
? Link the 'arn:aws:iam::xxxxxxxxxxxx:role/ManagedOpenShift-User-rhusername-Role' role with account '1gOBLbn8leu12WizZMB9cfiP9mr'? Yes
I: Successfully linked role ARN 'arn:aws:iam::xxxxxxxxxxxx:role/ManagedOpenShift-User-rhusername-Role' with account '1gOBLbn8leu12WizZMB9cfiP9mr'

# rosa list user-role
I: Fetching user roles
ROLE NAME                             ROLE ARN                                                             LINKED
ManagedOpenShift-User-rhusername-Role  arn:aws:iam::xxxxxxxxxxxx:role/ManagedOpenShift-User-rhusername-Role  Yes
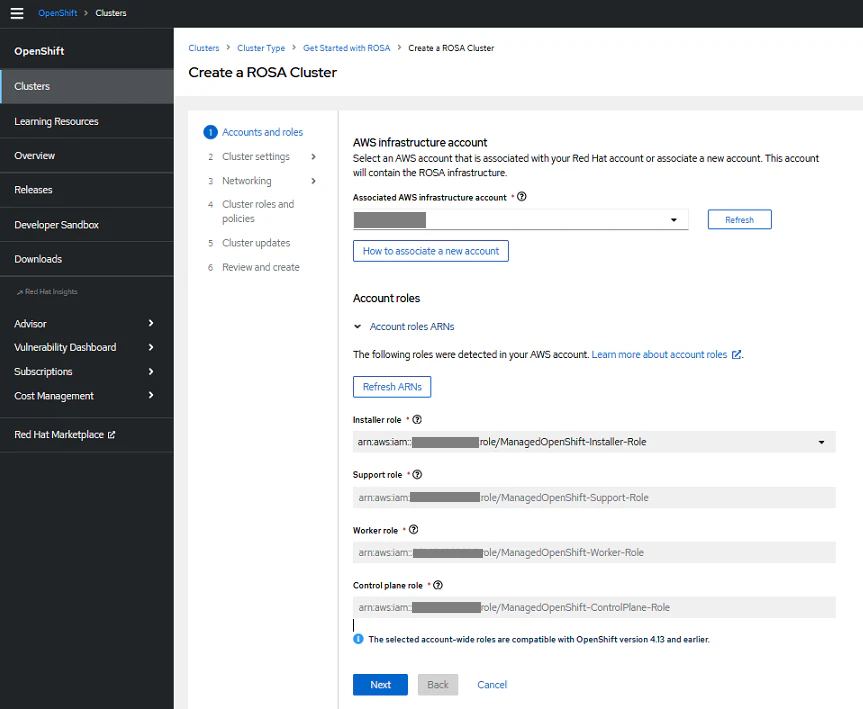
OKをクリックすると、Accounts and roles画面に戻り、Associated AWS infrastructure accountにアカウントが入っています。Nextをクリックします。
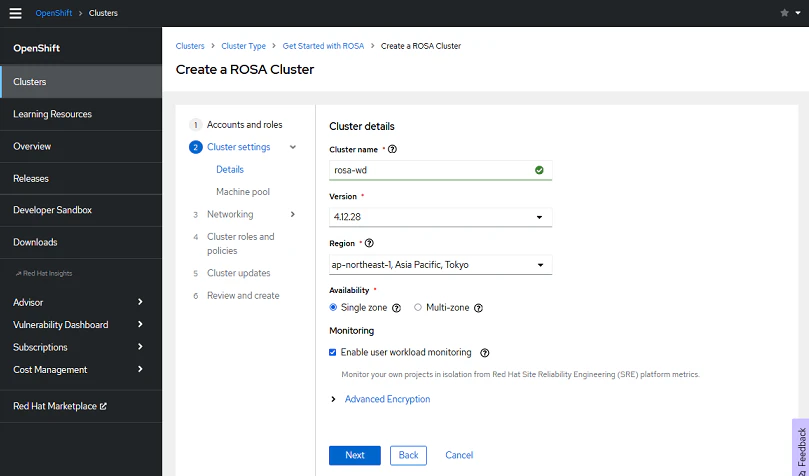
[Cluster settings Details]画面で、クラスター名を入力し、バージョン、リージョン、Availability等に希望の設定を選択し、Nextをクリックします。
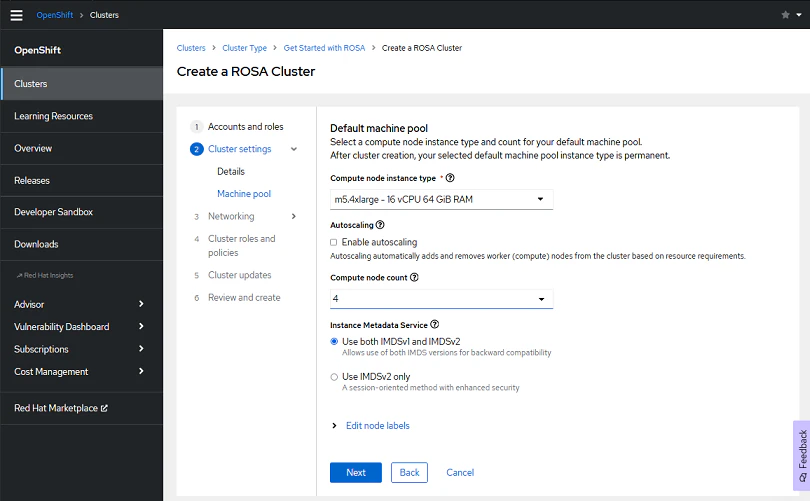
[Cluster settings - Machine pool]画面で、Compute node instance typeに希望のインスタンスタイプを選択、Compute node countに希望のノード数を選択し、他の項目にも希望の設定を選択し、Nextをクリックします。
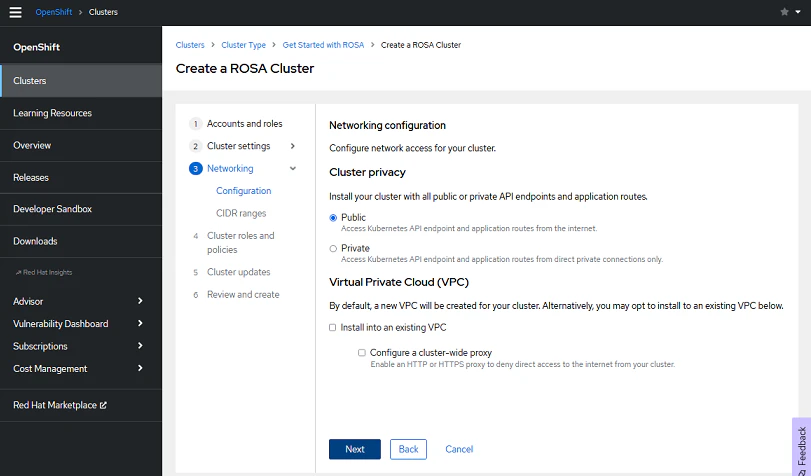
[Networking - Configuration]画面で、希望の設定を選択し、Nextをクリックします。
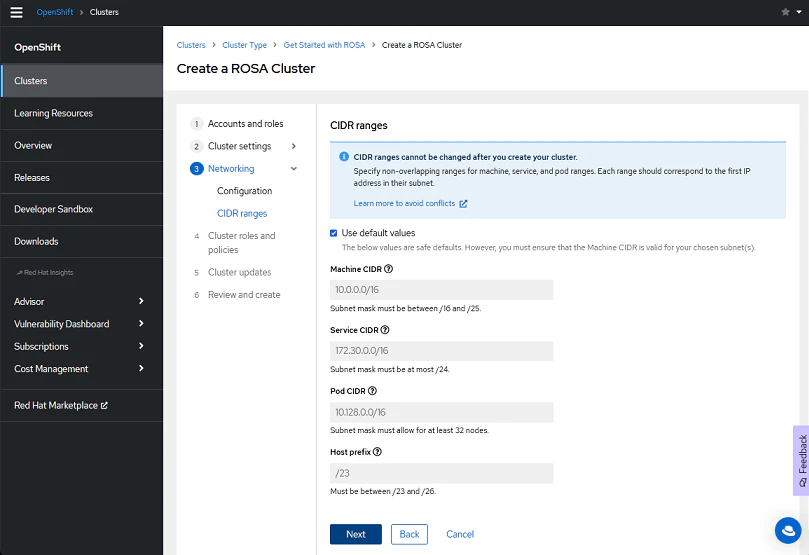
[Networking CIDR ranges]画面で、希望の設定を選択し、Nextをクリックします。
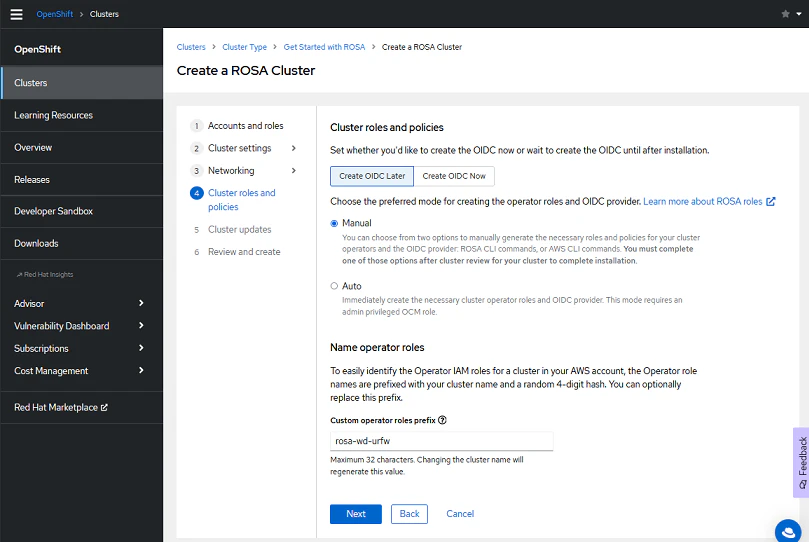
[Cluster roles and policies]画面で、希望の設定を選択し、Nextをクリックします。
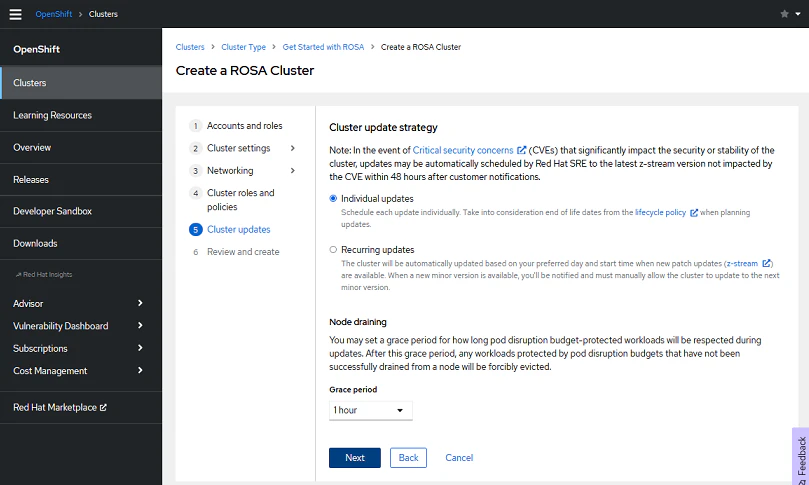
[Cluster update strategy]画面で、希望の設定を選択し、Nextをクリックします。
[Review your ROSA cluster]画面で、設定を確認し、Create clusterをクリックします。

Create clusterをクリックすると間もなく、operator roles と OIDC provider を作成するようポップアップが表示されます。([Cluster roles and policies]画面での選択によります)
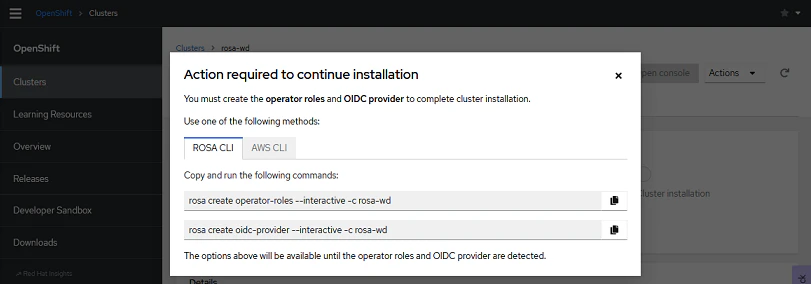
示された2つのrosaコマンドを実行します。
# rosa create operator-roles --interactive -c rosa-wd
? Role creation mode: auto
? Permissions boundary ARN (optional):
I: Creating roles using 'arn:aws:iam::xxxxxxxxxxxx:user/xxxxxx@yy.zzz.com'
I: Created role 'rosa-wd-clpc-openshift-cloud-network-config-controller-cloud-cre' with ARN 'arn:aws:iam::xxxxxxxxxxxx:role/rosa-wd-clpc-openshift-cloud-network-config-controller-cloud-cre'
I: Created role 'rosa-wd-clpc-openshift-machine-api-aws-cloud-credentials' with ARN 'arn:aws:iam::xxxxxxxxxxxx:role/rosa-wd-clpc-openshift-machine-api-aws-cloud-credentials'
I: Created role 'rosa-wd-clpc-openshift-cloud-credential-operator-cloud-credentia' with ARN 'arn:aws:iam::xxxxxxxxxxxx:role/rosa-wd-clpc-openshift-cloud-credential-operator-cloud-credentia'
I: Created role 'rosa-wd-clpc-openshift-image-registry-installer-cloud-credential' with ARN 'arn:aws:iam::xxxxxxxxxxxx:role/rosa-wd-clpc-openshift-image-registry-installer-cloud-credential'
I: Created role 'rosa-wd-clpc-openshift-ingress-operator-cloud-credentials' with ARN 'arn:aws:iam::xxxxxxxxxxxx:role/rosa-wd-clpc-openshift-ingress-operator-cloud-credentials'
I: Created role 'rosa-wd-clpc-openshift-cluster-csi-drivers-ebs-cloud-credentials' with ARN 'arn:aws:iam::xxxxxxxxxxxx:role/rosa-wd-clpc-openshift-cluster-csi-drivers-ebs-cloud-credentials'

# rosa create oidc-provider --interactive -c rosa-wd
? OIDC provider creation mode: auto
I: Creating OIDC provider using 'arn:aws:iam::xxxxxxxxxxxx:user/xxxxxx@yy.zzz.com'
? Create the OIDC provider for cluster 'rosa-wd'? Yes
I: Created OIDC provider with ARN 'arn:aws:iam::xxxxxxxxxxxx:oidc-provider/rh-oidc.s3.us-east-1.amazonaws.com/252mr0g8tqh9k0p1co2pbc12cn3cibb7'
ROSAコマンド実行後、自動でインストール画面が進みます。
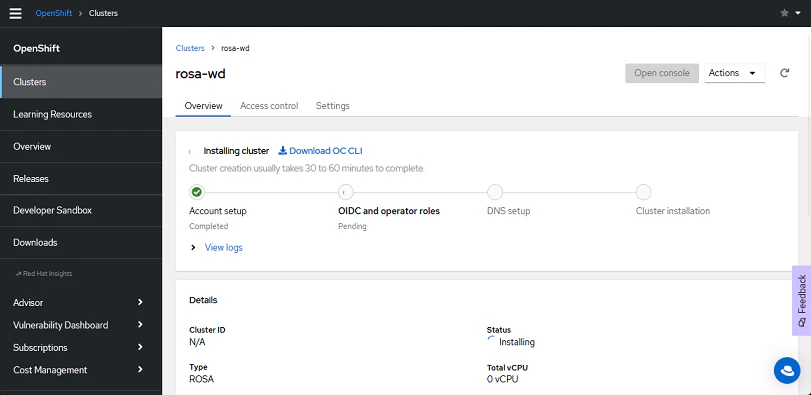
今回は1時間弱でインストールが完了しました。

OpenShift ユーザーの作成
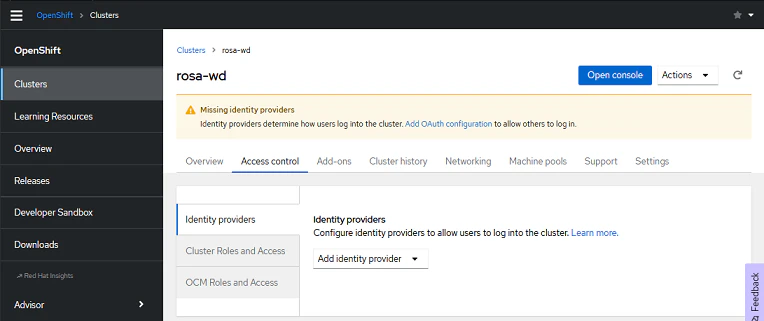
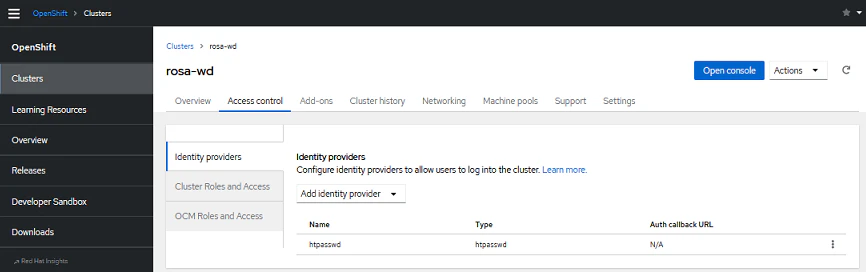
Missing identity providers の警告メッセージに表示された Add OAuth configuration のリンクをクリックすると、Access controlのタブが表示されます。
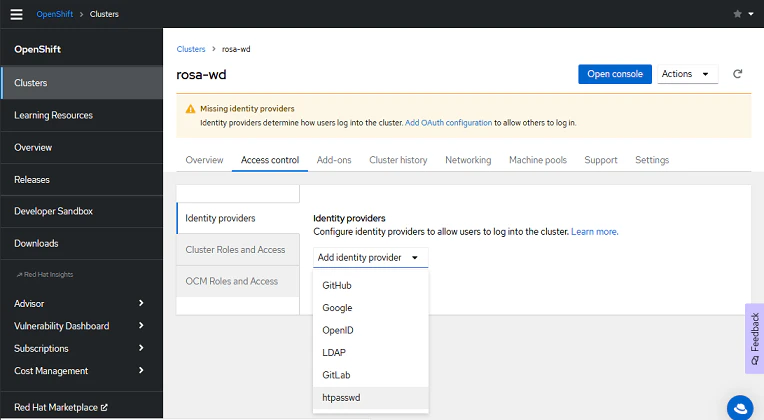
Add identity providerで htpasswd を選択します。
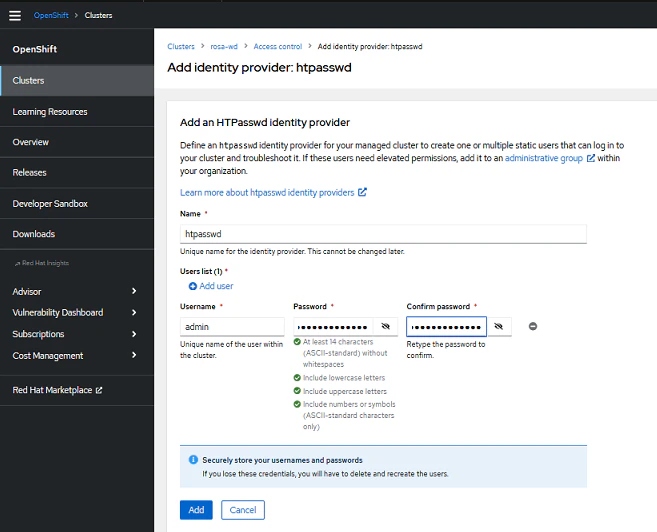
ユーザー名とパスワードを指定して Add をクリックします。
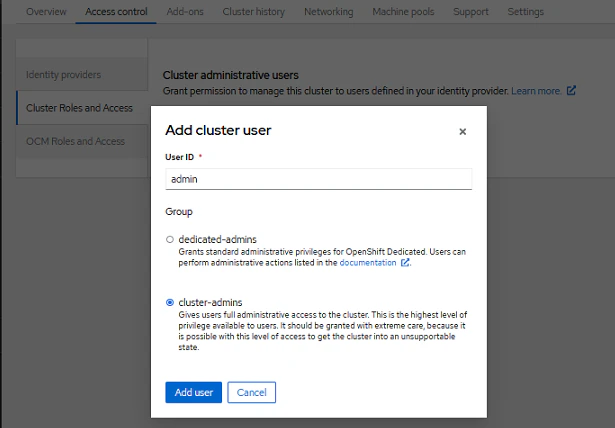
続いて、作成したユーザーに権限を付与します。クラスター管理者権限を付与するためには Cluster Roles and Access をクリックします。
Add user をクリックします。

User IDに作成済みのユーザーを入力し、Groupに cluster-admins にチェックして Add user をクリックします。
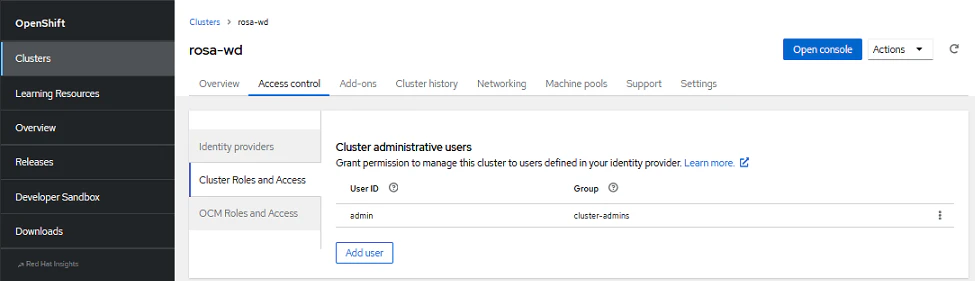
クラスター管理者としてadminユーザーが作成されました。
Open console をクリックします。
設定済みのidentity providerが表示されますのでクリックし、作成済みのユーザーでログインします。
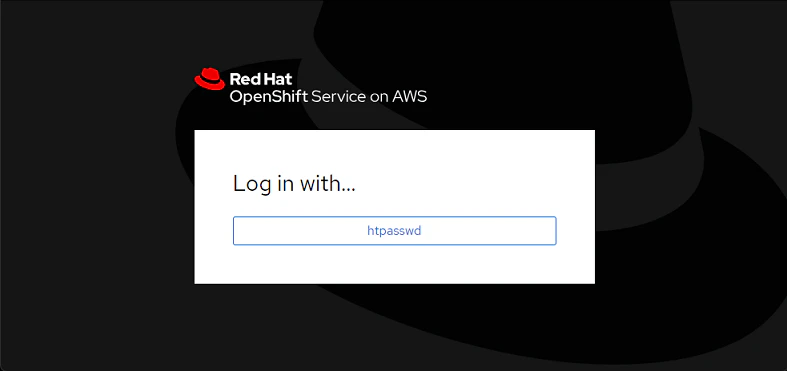
(注)設定後、identity providerによるログイン画面が表示されるまで数分かかる場合があります。
こちらのidentity providerの表示のないログイン画面からは、先ほど作成したユーザーではログインできません。
参考