クソアプリ Advent Calendar 2022 3 15日目を担当させていただきます😎
🏋はじめに
皆さんは「重すぎる言葉」を言われたことはありますか?
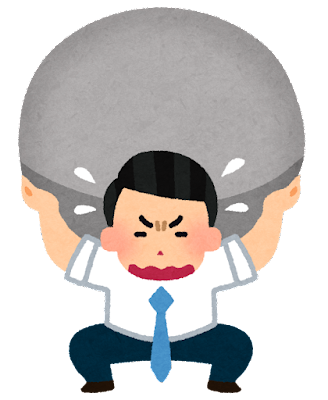
あいにく私は言われたことがないので、その心情があまりわからないのですが、友人が体験していたのをまじかに見て「重すぎる言葉」を受け止めるのは 大変そうだなあ と感じています
そこで、重すぎる言葉には 物理的な重さ を持たせてしまいましょう。
百聞は一見にしかず、まずはご覧下さい。
🏋重すぎチャット

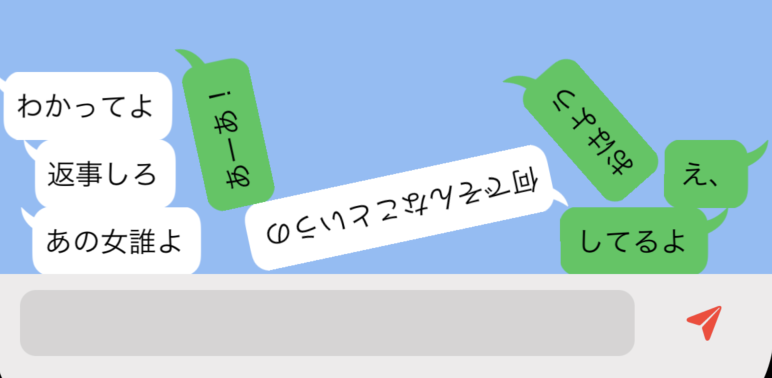
ご覧の通り,このチャットアプリもどきはいわゆる「重そうな言葉」を含んでいると会話の途中であっても,強制的に重力加速度が加わり,会話内容が自由落下します.
これによって,なんぼでも重い言葉を言われようが,重い言葉は重いので落下し,会話を回避すること & ネタに昇華すること ができるようという素晴らしいチャットアプリです.
一度重い発言があれば,それまでの会話内容を水に流すために全て落下するようにしました.
重さのコントロールは重力加速度を変更することで行なっています.
つまり,比較的軽い発言は ふわふわ と落ちます.
🏋加速度付与のルール
| 条件 | 加速度 9.8 の倍率 |
|---|---|
| 重すぎる言葉集JSONファイルに定義される文言が含まれるとき | + 1.0倍 |
| 一文字毎の加算 | + 0.0001倍 |
| 200文字を超える場合 | + 0.1倍 |
🏋返答の内容
JSONファイルに定義されている定義されている文言をランダムで返します
🏋環境
このアプリはiOS向けです.
Xcode 14.1を使用しました.
特にこれといって変わったことはありませんね.
iOSフレームワークにはいつものUIKit/コードベース(StoryBoardは使用しない)で開発しました.
🏋技術的なお話(の前に)
「なんだこれはチャットアプリじゃないではないか」と思われている方も多いかと思います.
JSONファイルの内容をランダムで投げかける「心」を無くしたJSON投げマシーンアプリになってしまいました。
すみませんでした。
🏋(技術的なお話?) ソースコードについて
🏋チャットアプリ画面
チャットアプリ画面はChatViewController.swiftにまとめています. UIKitには落下アニメーションが組み込みで存在するのでただ単にUIDynamicAnimatorとUIGravityBehaviorを組み合わせるだけで実現可能です.
UICollisionBehaviorを用いれば, 衝突アニメーションもつけることができます.
この辺はお好みですかね?
チャット画面の会話バルーン(文字を表示する部分)にはAutoLayoutは使用しておらず, CGRectで大きさを計算して描画しています.
以下,ソースコードの一部です.
import UIKit

class ChatScrollViewController: UIViewController, ChatInputViewDelegate, ChatManageDelegate{
 // 略
    var dropViews: [ChatBalloon] = []
    var dynamicAnimator: UIDynamicAnimator!
    let gBehavior = UIGravityBehavior()
 // 略
    func addMessageDropView(dropMag: Float, message: String, isMe: Bool, isCollision: Bool = false){
        let dView = ChatBalloon(frame: CGRect(x: 0, y: 0, width: 0, height: 0))
        self.scrollView.addSubview(dView)
        dView.setIsMe(isMe: isMe)

        dView.text = message
        dView.numberOfLines = 0;

        let size       = dView.sizeThatFits(CGSize(width: self.width * 0.8, height: height*100))
        let sizeForFit = dView.sizeThatFits(CGSize(width: self.width * 0.8, height: height*100))

        if(isMe){
            if size.width != sizeForFit.width{
                dView.frame = CGRectMake(width - size.width - offset,       mostBottomPosition, size.width,       size.height)
            }else{
                dView.frame = CGRectMake(width - sizeForFit.width - offset, mostBottomPosition, sizeForFit.width, sizeForFit.height)
            }
        }else{
            if size.width != sizeForFit.width{
                dView.frame = CGRectMake(offset, mostBottomPosition, size.width,       size.height)
            }else{
                dView.frame = CGRectMake(offset, mostBottomPosition, sizeForFit.width, sizeForFit.height)
            }
        }


        if(dropMag < 0.001){
            mostBottomPosition += size.height + offset
            self.chatViewHeightConstraint.isActive = false
            let h = (mostBottomPosition < self.height) ? self.height : self.height + mostBottomPosition
            self.chatViewHeightConstraint = self.chatView.heightAnchor.constraint(equalToConstant: h)
            self.chatViewHeightConstraint.isActive = true

            chatView.setNeedsLayout()

            scrollView.contentSize = chatView.frame.size
            scrollView.flashScrollIndicators()

            chatView.setNeedsDisplay()
        }else{
            mostBottomPosition = 0
        }

        dView.setNeedsDisplay()

        // 落下アニメーション
        gBehavior.addItem(dView)
        gBehavior.magnitude = CGFloat(dropMag)
        dynamicAnimator.addBehavior(gBehavior)

        // 衝突アニメーション
        if(isCollision){
            let cBehavior = UICollisionBehavior(items: self.dropViews)
            cBehavior.addItem(dView)
            cBehavior.translatesReferenceBoundsIntoBoundary = true
            dynamicAnimator.addBehavior(cBehavior)

            self.dropViews.append(dView)
        }
    }
    // 略
}
当たり前ですが,キーボード部分にいてはkeyboardLayoutGuide.topAnchorへの制約を使用してキーボードを閉じたり開いたりしても追従するようになっています.
チャット表示画面のUITapGestureRecognizerを利用してキーボードを閉じています.
ちなみにこの方法だとナビゲーションバーが存在する時, このViewControllerの支配下にないためキーボードが閉じないのでもう少しちゃんと作らないといけませんね.
import Foundation
import UIKit

class ChatBalloon: UILabel{
    public var padding: UIEdgeInsets = UIEdgeInsets(top: 8, left: 8, bottom: 8, right: 8)
    public var mePadding: UIEdgeInsets = UIEdgeInsets(top: 8, left: 12, bottom: 8, right: 8)

    public var balloonBox: CGFloat = 13
    private var isMe: Bool = true
    private var backColor: UIColor = .systemGreen

    override init(frame: CGRect) {
        super.init(frame: frame)
        self.font = .monospacedSystemFont(ofSize: 15.0, weight: .regular)
    }

    required init?(coder: NSCoder) {
        fatalError("init(coder:) has not been implemented")
    }

    public func setIsMe(isMe: Bool){
        self.isMe = isMe
        self.backgroundColor = .clear
        if(self.isMe){
            self.backColor = .systemGreen
        }else{
            self.backColor = .white
        }
    }

    override func draw(_ rect: CGRect) {
        let h: CGFloat = rect.height
        let w: CGFloat = rect.width

        let offset: CGFloat = 1

        let arrowPath = UIBezierPath()
        self.backColor.setFill()
        self.backColor.setStroke()

        var points: [[CGFloat]] = [
            [w - balloonBox - offset, balloonBox + offset],
            [w  - offset, 0 + offset, w  - offset - offset, balloonBox/1.5 + offset],
            [w - balloonBox - offset, balloonBox/2.0 + offset, w - balloonBox / 2.0 - offset, balloonBox/2.0 + offset],
            [w - balloonBox - offset, balloonBox/2.0 + offset, w - balloonBox - offset, balloonBox/2.0 + offset],
            [0, 0, w - balloonBox + 2, h]
        ]

        if(!self.isMe){
            for i in 0..<points.count-1{
                for j in 0..<points[i].count{
                    if j % 2 == 0{
                        points[i][j] *= -1.0
                        points[i][j] += w
                    }
                }
            }
            points[4][0] += balloonBox / 2.0;
        }

        arrowPath.move(to: CGPoint(x: points[0][0], y: points[0][1]))
        for i in 0..<3{
            let index = i + 1
            arrowPath.addQuadCurve(to: CGPoint(x: points[index][0], y: points[index][1]), controlPoint: CGPoint(x: points[index][2], y: points[index][3]))
        }

        arrowPath.close()
        arrowPath.fill()
        arrowPath.stroke()

        let contentPath = UIBezierPath(roundedRect: CGRect(x: points[4][0], y: points[4][1], width: points[4][2], height: points[4][3]), cornerRadius: 9.0)
        contentPath.stroke()
        contentPath.fill()

        super.draw(rect)
    }

    override func drawText(in rect: CGRect) {
        var insetPadding: UIEdgeInsets!
        if(self.isMe){
            insetPadding = self.padding
        }else{
            insetPadding = self.mePadding
        }

        super.drawText(in: rect.inset(by: insetPadding!))
    }

    override var intrinsicContentSize: CGSize {
        var retSize = super.intrinsicContentSize
        retSize.width  += padding.left
        retSize.height += padding.top  + padding.bottom

        if(self.isMe){
            retSize.width += padding.right * 2.5
        }else{
            retSize.width += padding.right * 2.0
        }

        return retSize
    }

    override func sizeThatFits(_ size: CGSize) -> CGSize {
        var retSize = super.sizeThatFits(size)
        retSize.width  += padding.left
        retSize.height += padding.top  + padding.bottom

        if(self.isMe){
            retSize.width += padding.right * 2.5
        }else{
            retSize.width += padding.right * 2.0
        }

        return retSize
    }
}
チャット部分はUILabelのサブクラスとして実装しました. draw関数で必要な描画を行います.
データの受け取りなどは, ChatSystemIntractorへのDelegateで処理しています.
protocol ChatManageDelegate{
    func onReceiveChatMessageFromServer(text: String) // 未実装
    func onReceiveChatMessageTest(text: String)
}
🏋最後に🏋
いかがだったでしょうか?
これであなたもいつでもどこでも,会話を自由落下させられますね.
私としては,改良したい点がいくつか(未実装...)あります.
- 重すぎ文言判定に自然言語処理を組み込みたかった (重すぎ文言をword2vecでcos類似度を測るなど)
- もっとしっかりUIもサーバサイドも構築して,普通のチャットサービスとして遜色ないレベルまで上げたかった
もう少しクオリティを上げたかったです.コードも雑で...すみませんほんと.
来年は前日に作り始めるのでなく,しっかり余裕を持って作ります!
頑張るぞ〜〜〜
LINEで働いている方!ぜひLINEアプリ本体への実装をお願いします!
ありがとうございました.
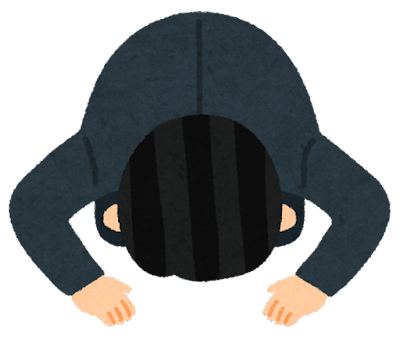
🏋P.S.
衝突アニメーションアリだとこんな感じです

明日は @kamimi01 さんの記事です.!