@shion21さんの『小学生でも簡単⁉RaspberryPiとScratchを使ったラジコン』を参考にして、
ラジコン操作を無線マウスで出来るようにしました。
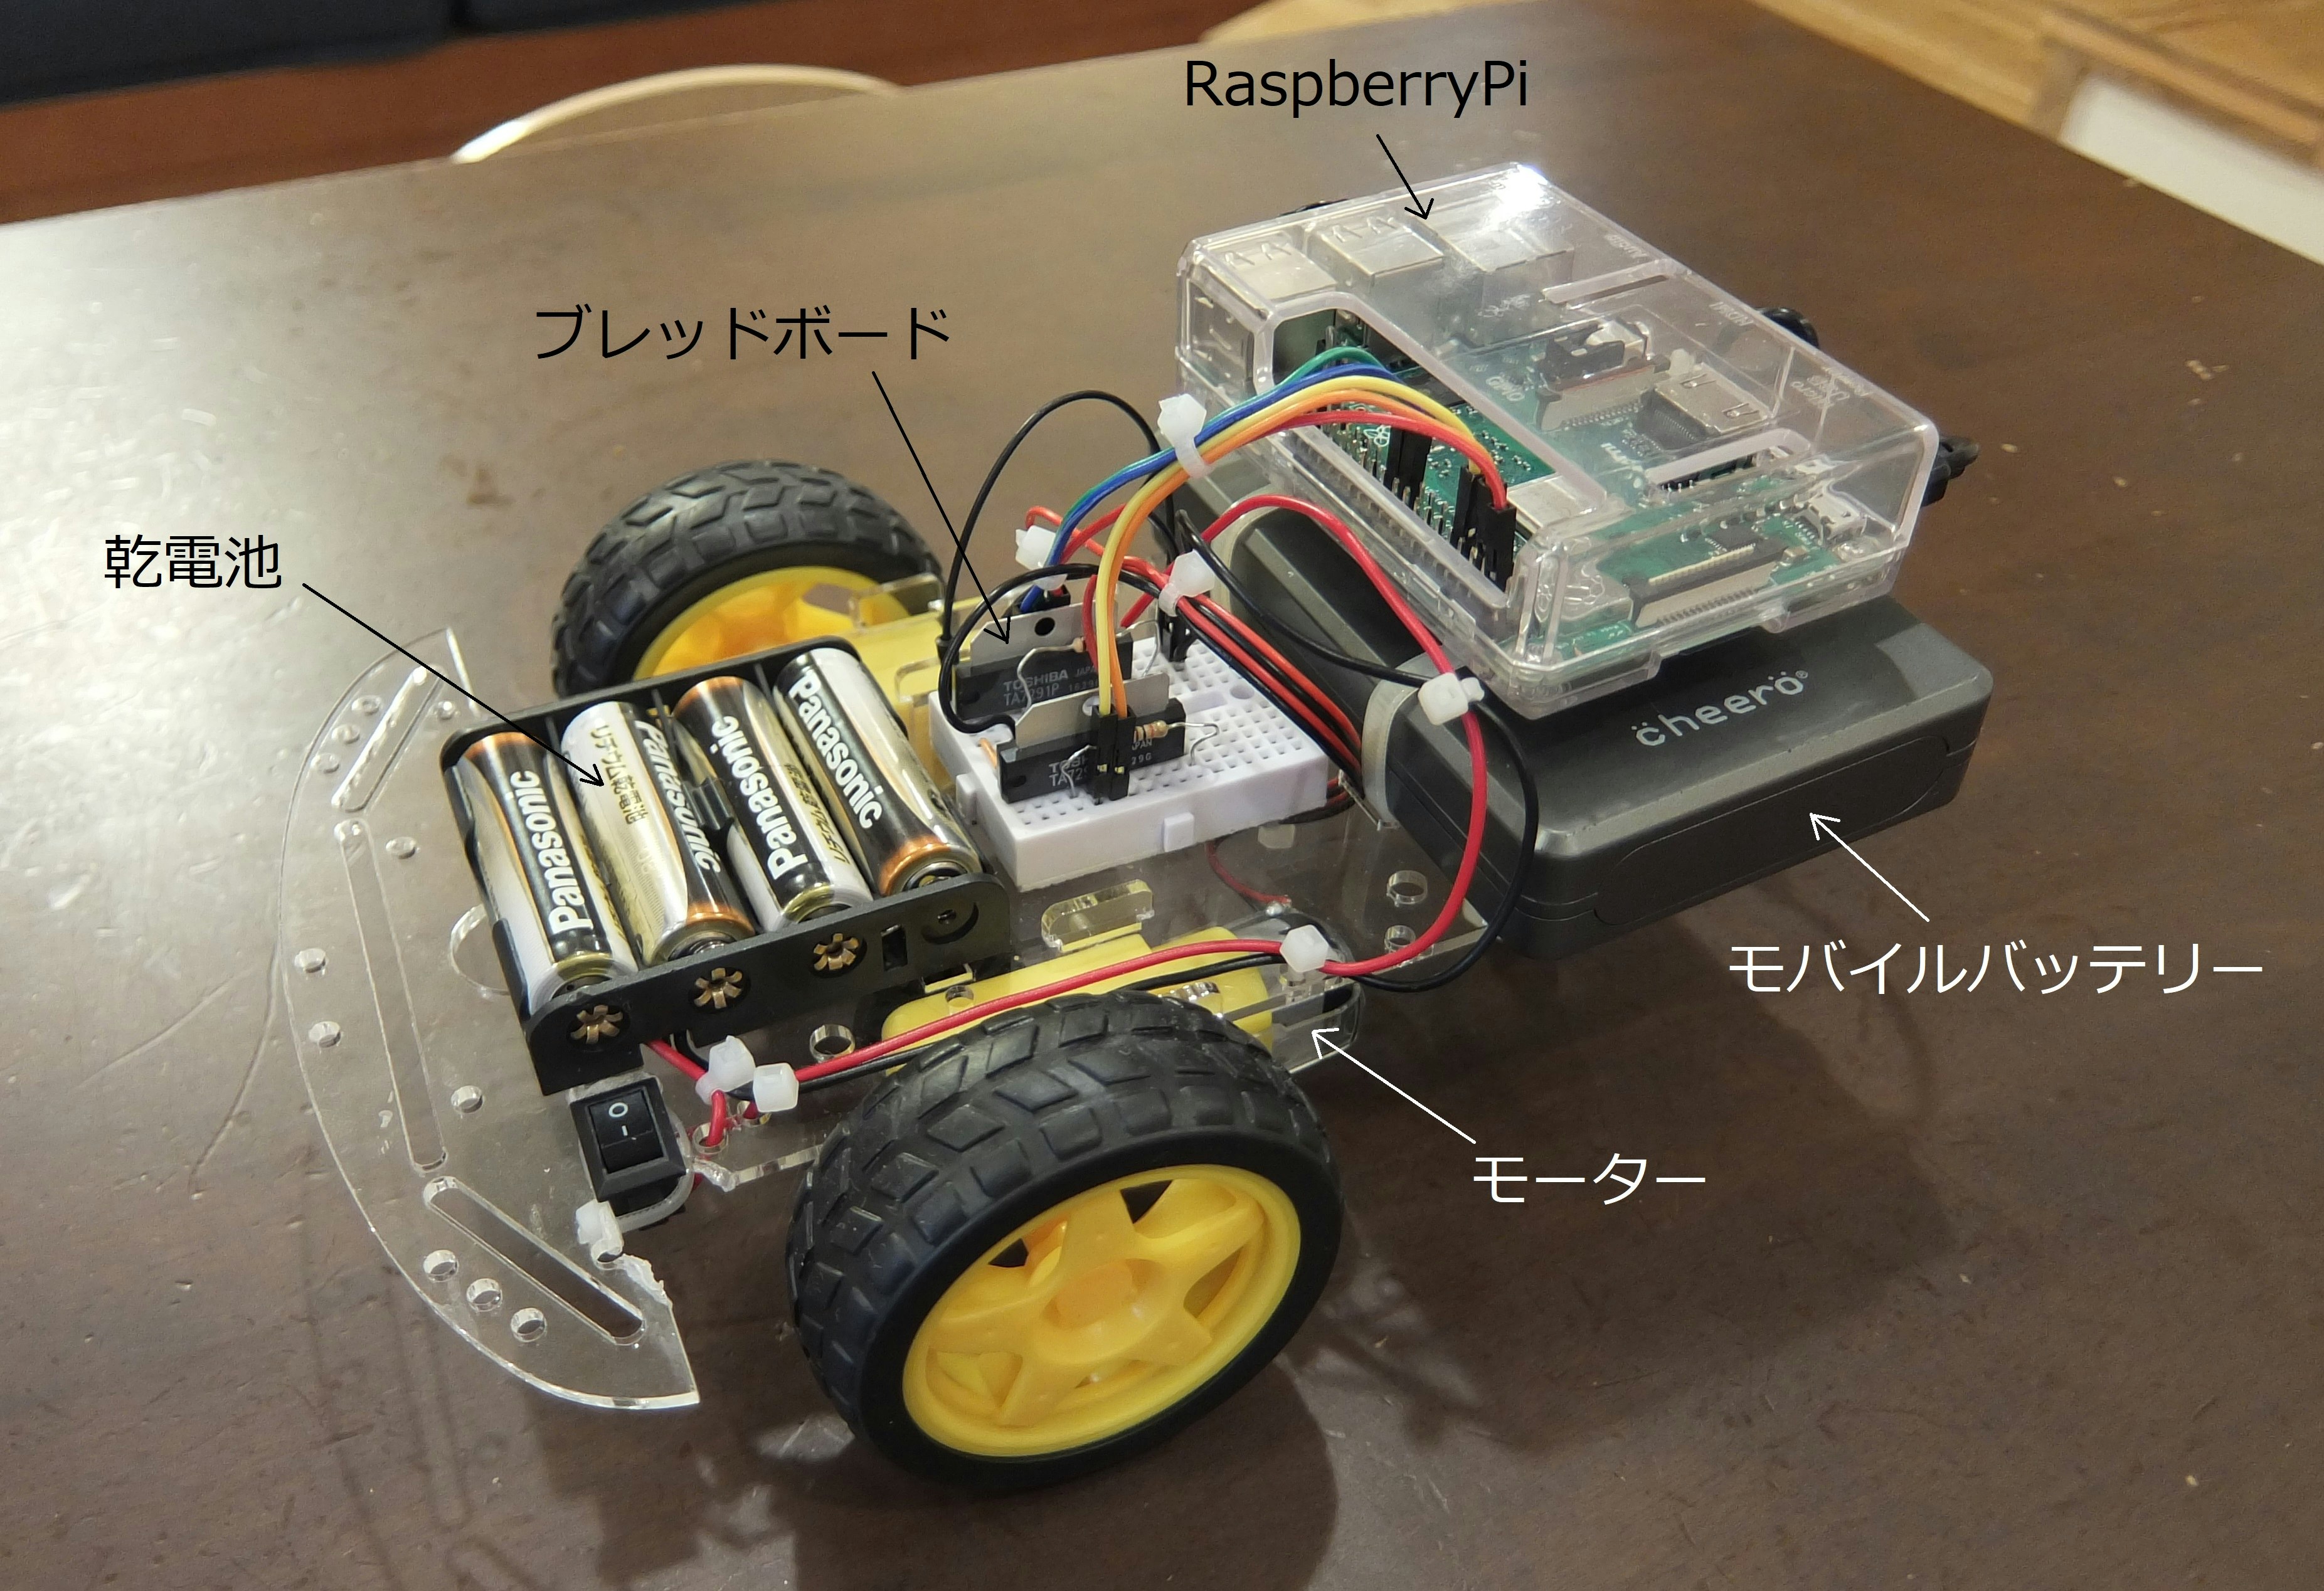
躯体はamazon The perseids 2WDロボットスマートカーシャーシを使いました。
amazon The perseids 2WDロボットスマートカーシャーシ
1.必要なもの
| 部品名 | 個数 |
|---|---|
| RaspberryPi | 1 |
| microUSBケーブル | 1 |
| HDMIケーブル | 1 |
| モニター(TV) | 1 |
| 無線マウス | 1 |
| キーボード | 1 |
| モバイルバッテリー | 1 |
| amazon The perseids 2WDロボットスマートカーシャーシ | 1 |
| モータードライバーTA7291P | 2 |
| 抵抗器 10kΩ | 2 |
| ブレッドボード 170タイポイント | 1 |
| ジャンパーワイヤー(オス-オス) | 10程度 |
| ジャンプワイヤー(オス-メス) | 10程度 |
| 単三電池 | 4 |
2.作り方
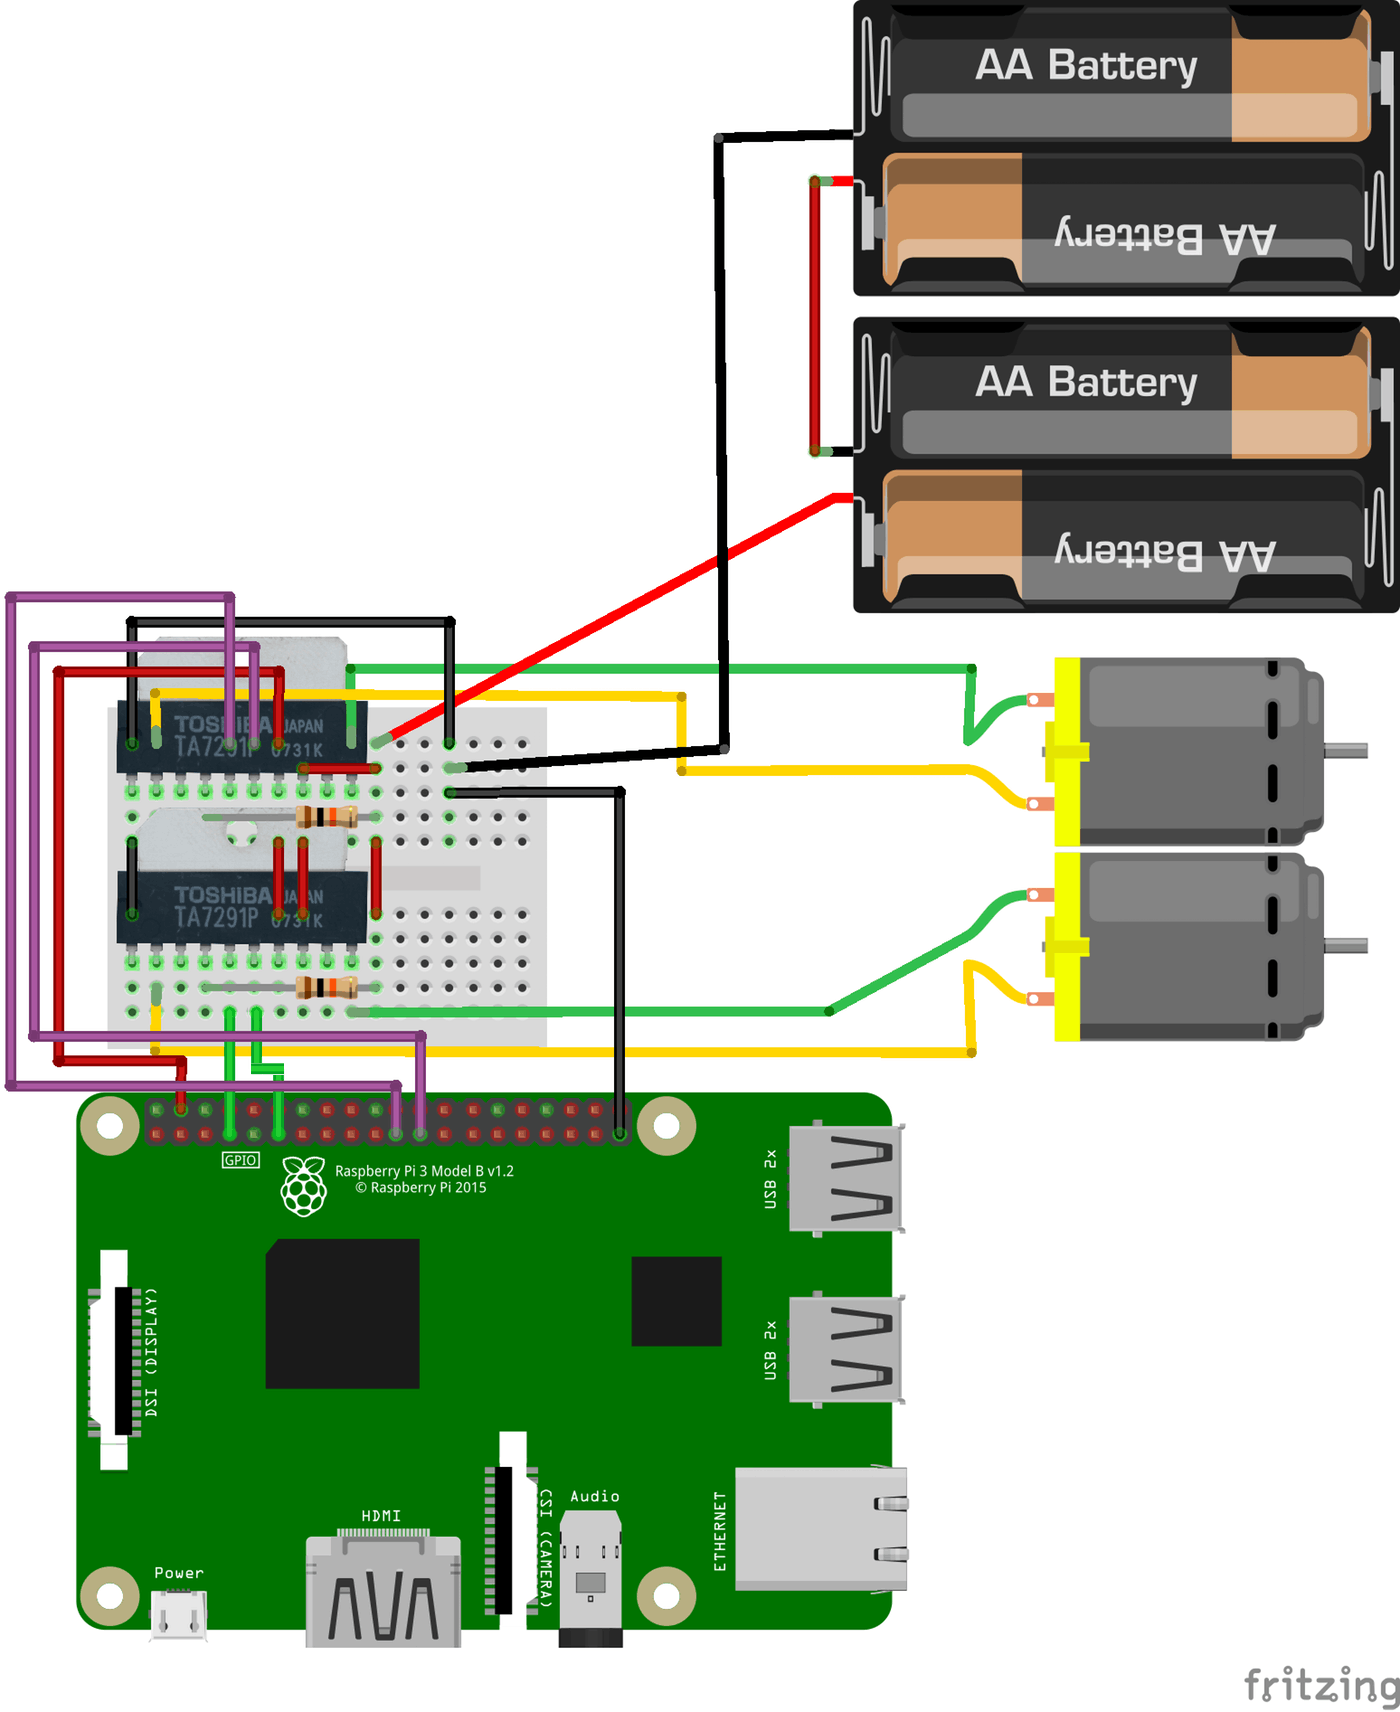
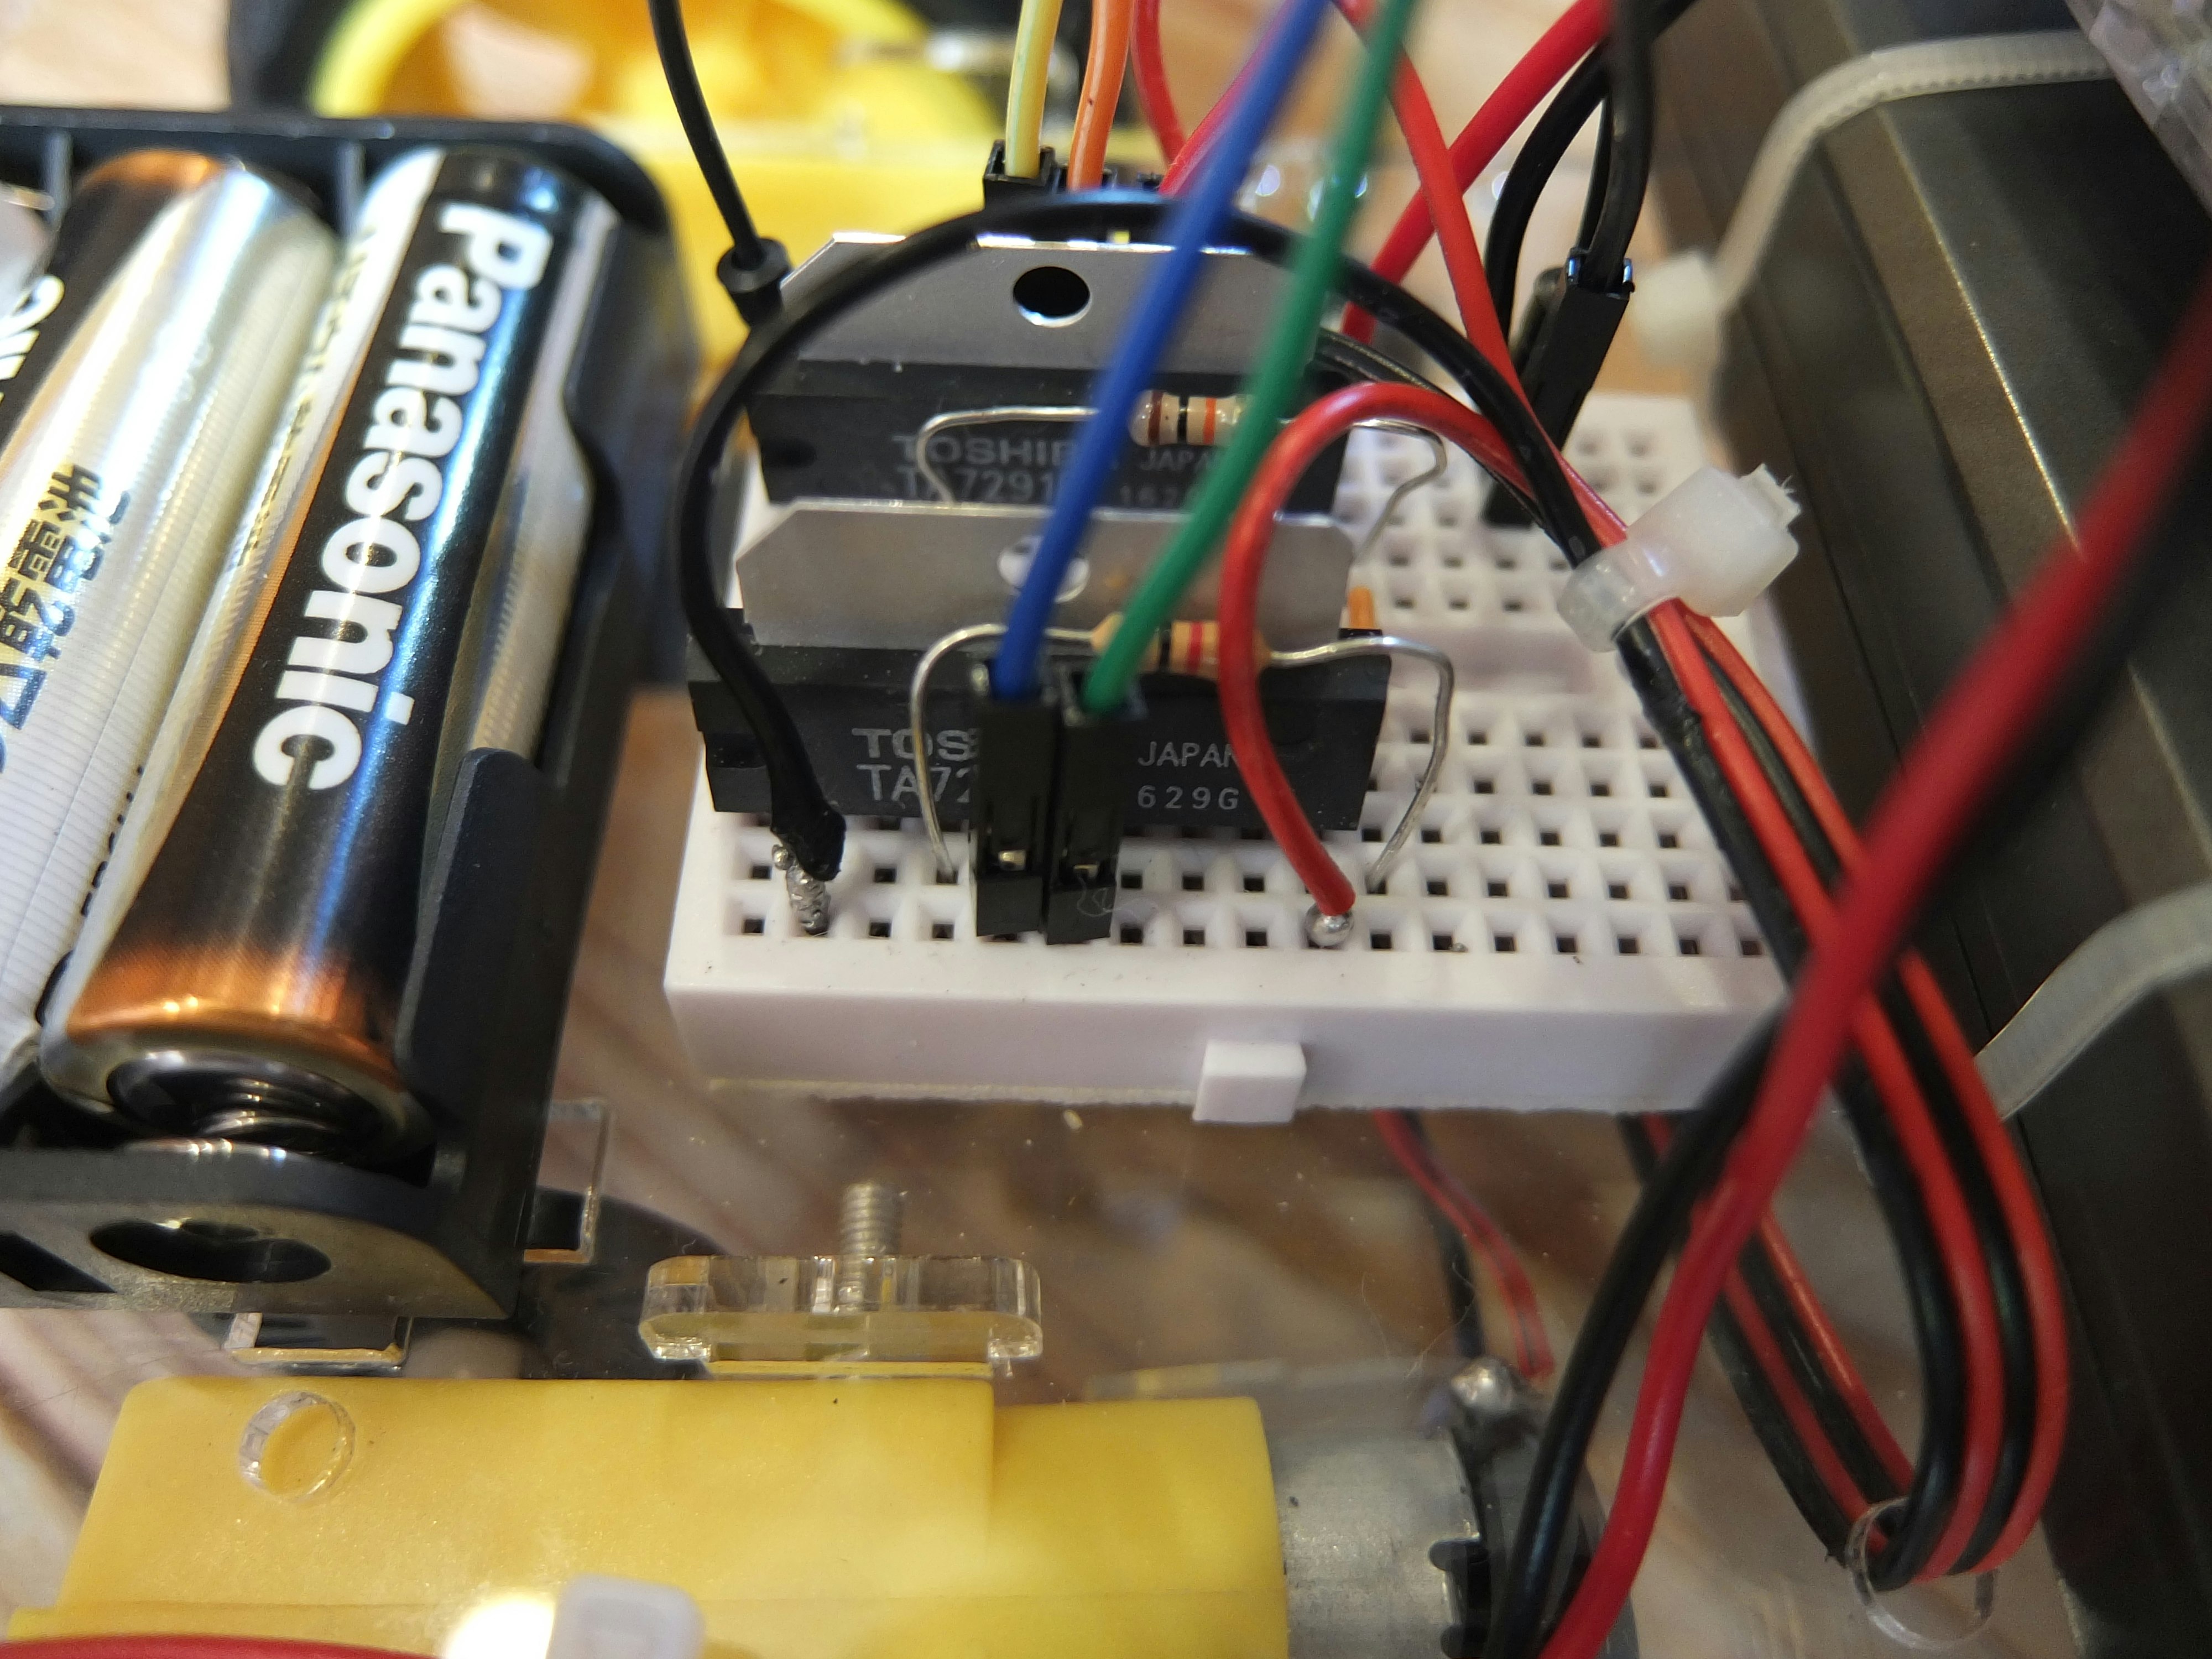
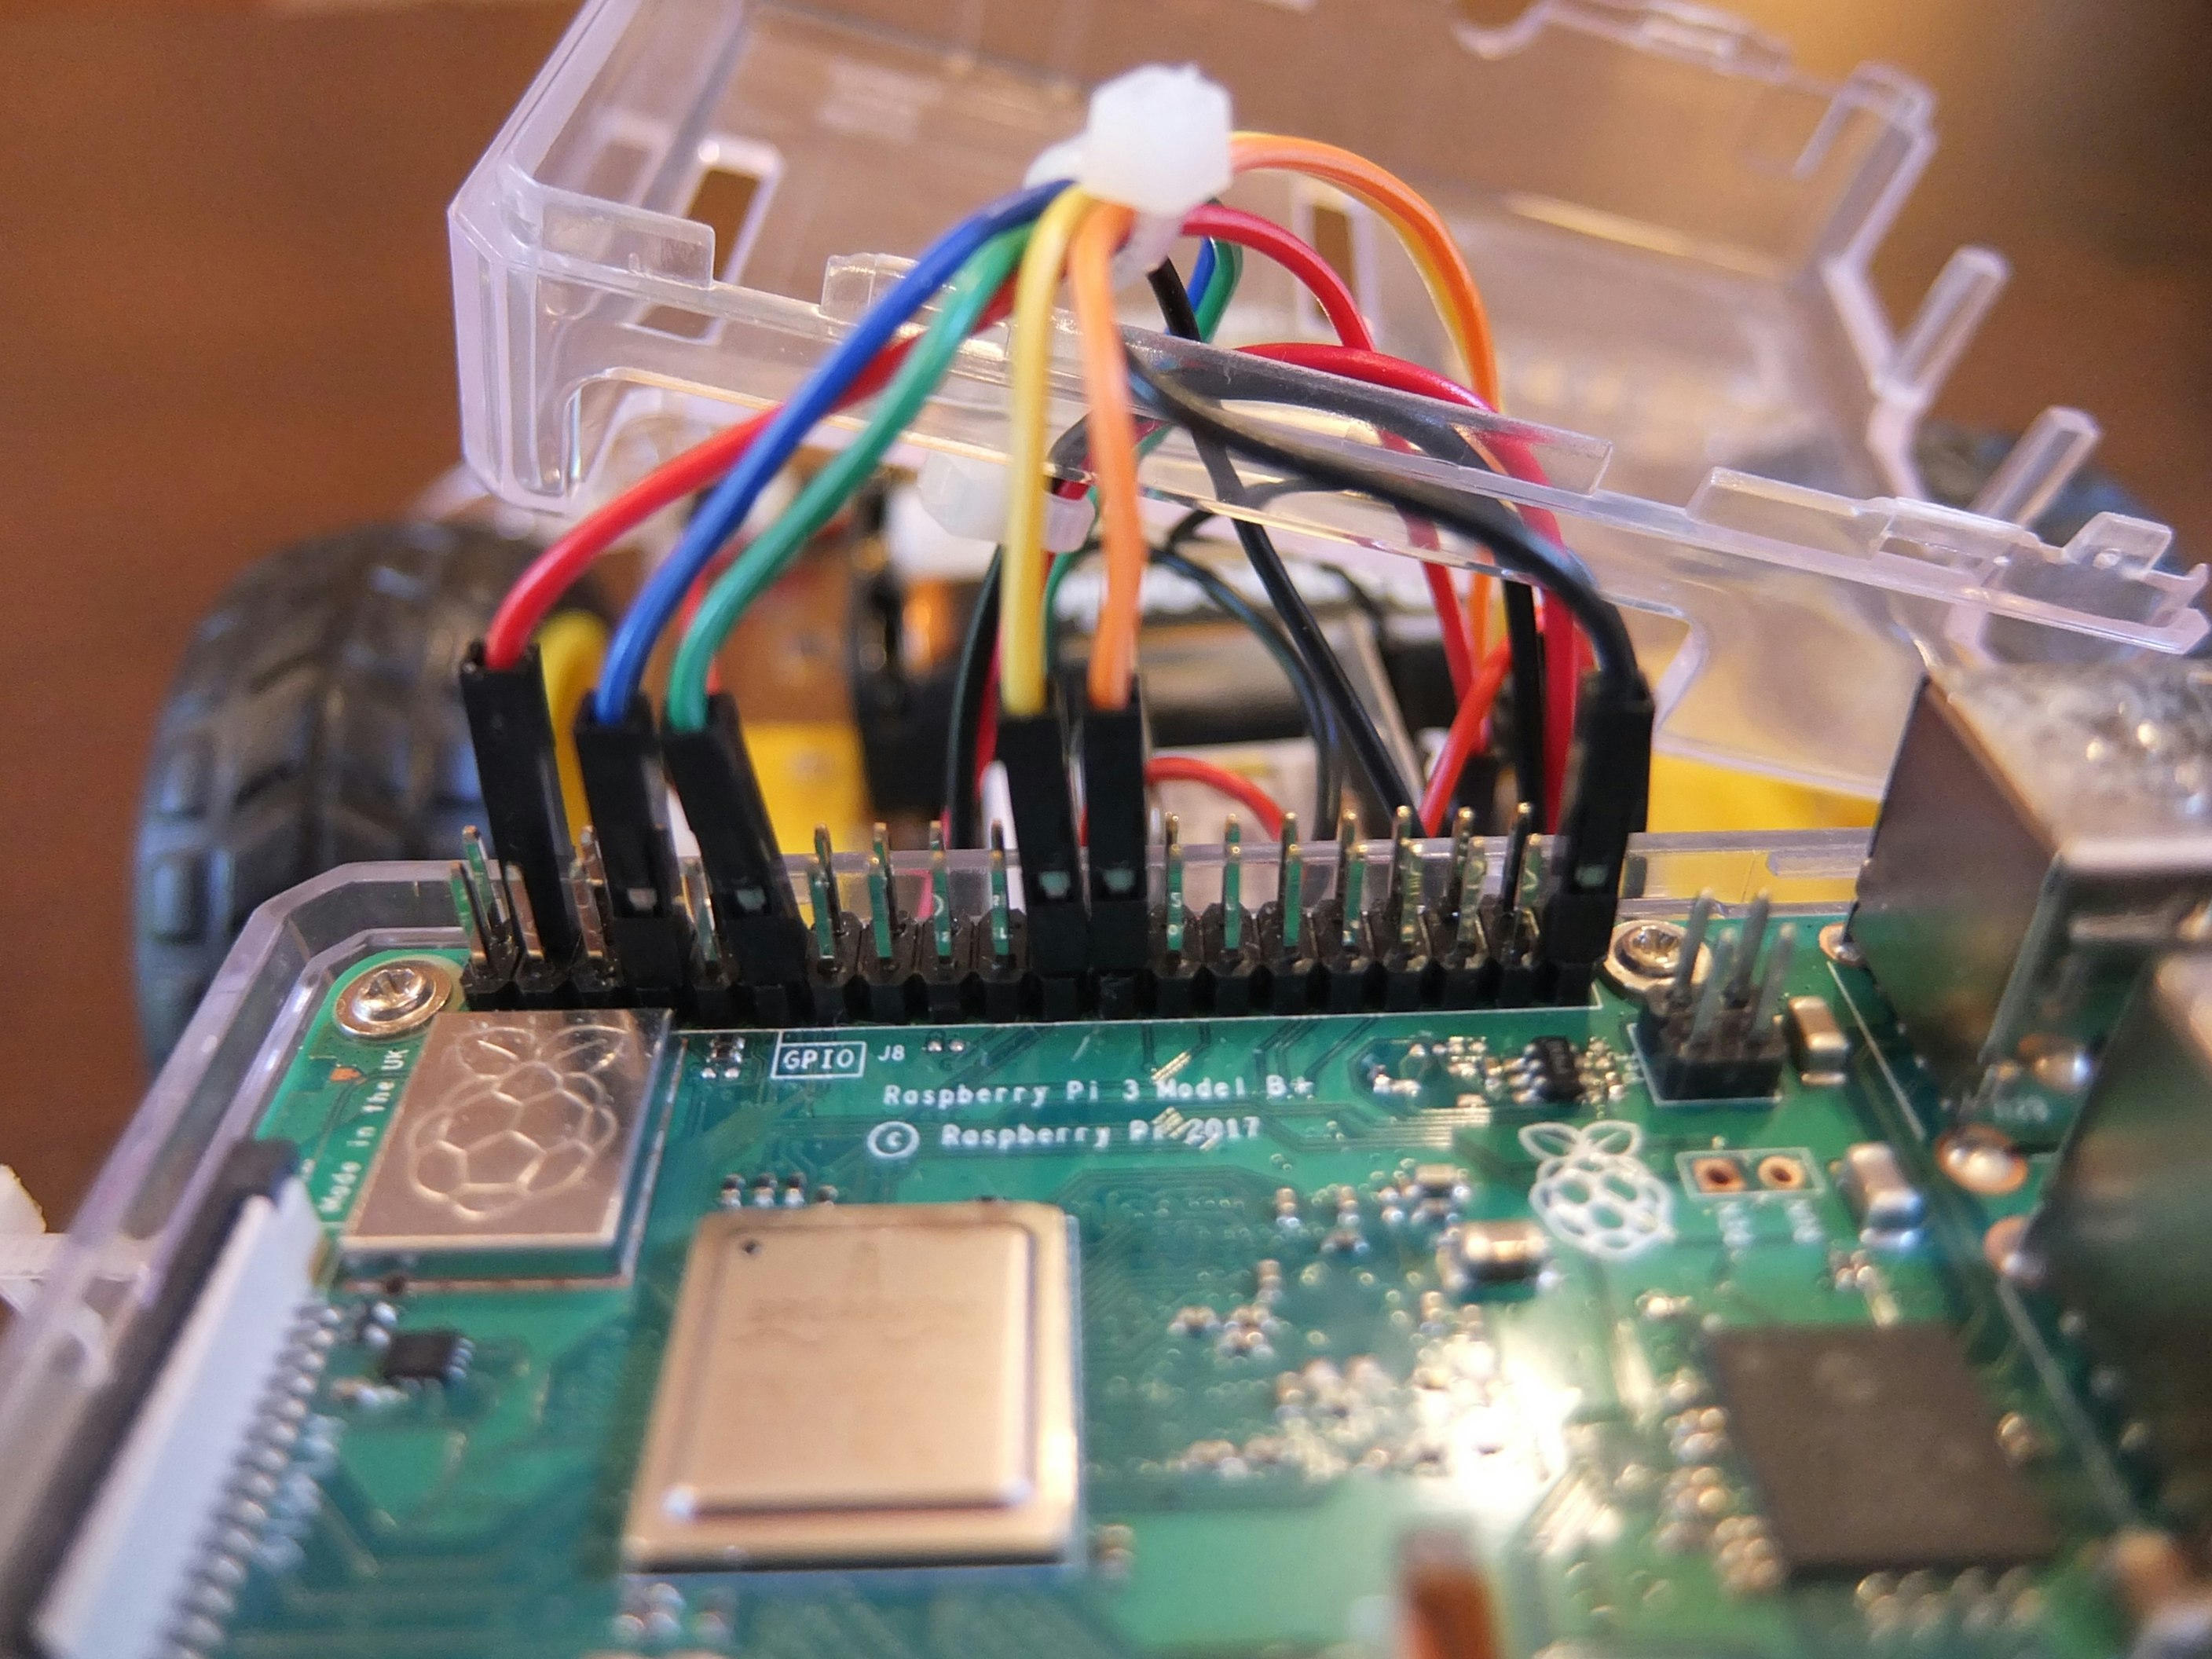
カーシャーシは先に組み立てておいてください。回路も出来上がったら、シャーシに乗っけてください。
回路は以下の通りです。

@shion21さんの『小学生でも簡単⁉RaspberryPiとScratchを使ったラジコン』を参考にして、
ちょっと配線を直してあります。


3.テスト
@shion21さんの小学生でも簡単⁉RaspberryPiとScratchを使ったラジコン
の『3.テスト』を参照してください。
4.プログラム
sudo vim mousebutton.py
下記コマンドを貼り付けてください。
pygameで黒スクリーンを作成して、スクリーン上でのマウス操作を
GPIO信号に割り当てます。
from pygame.locals import *
import pygame
import sys
import RPi.GPIO as GPIO
import time

GPIO.setmode (GPIO.BCM)
GPIO.setup(4, GPIO.OUT)
GPIO.setup(17, GPIO.OUT)
GPIO.setup(9, GPIO.OUT)
GPIO.setup(11, GPIO.OUT)


def main():
    pygame.init()
    screen = pygame.display.set_mode((400, 330))
    pygame.display.set_caption("mouse event")

    while True:
        for event in pygame.event.get():
            if event.type == QUIT:
                pygame.quit()
                sys.exit()
            if event.type == KEYDOWN:
                if event.key == K_ESCAPE:
                    pygame.quit()
                    sys.exit()

            if event.type == MOUSEBUTTONDOWN and event.button == 5:
                GPIO.output(4,1)
                GPIO.output(9,1)
                time.sleep(0.5)
                GPIO.output(4,0)
                GPIO.output(9,0)

            if event.type == MOUSEBUTTONDOWN and event.button == 4:
                GPIO.output(17,1)
                GPIO.output(11,1)
                time.sleep(0.5)
                GPIO.output(17,0)
                GPIO.output(11,0)

            if event.type == MOUSEBUTTONDOWN and event.button == 1:
                GPIO.output(4,1)
                GPIO.output(11,1)
                time.sleep(0.25)
                GPIO.output(4,0)
                GPIO.output(11,0)

            if event.type == MOUSEBUTTONDOWN and event.button == 3:
                GPIO.output(17,1)
                GPIO.output(9,1)
                time.sleep(0.25)
                GPIO.output(17,0)
                GPIO.output(9,0)

if __name__=="__main__":
    main()

GPIO.cleanup()
スクロールアップで『前進』
スクロールダウンで『後退』
左クリックで『左旋回』
右クリックで『右旋回』です。
RaspberryPiの起動時にプログラムを自動起動させるには
sudo vim /etc/rc.local
ファイルの最後にexit 0とあるので、その手前に起動時に実行したいプログラムを書きます。
$sudo python /home/pi/mousebutton.py
exit 0
5.まとめ
このラジコンは、親子で楽しく電子工作をしながらプログラミングもできると思います。
小学校2年の息子と楽しく作りました。
WiFi環境がなくても、無線USBマウスで操作できるので、学校に提出しても
実際に動くところをみんなに見て貰えます。
Qiitaで初めてHPを書いています。
初心者が書いているので間違いがあるかもしれません。間違っていたらコメントをください。
小学校4年生の娘とはMicroBitでSPY-Watchを作製中です。アドバイスとかあったらコメントください。
