はじめに
New Relicのサーバリソース監視サービスInfrastructureの新機能がリリースされました。
その名もon Host Integrationという機能です。
これはNew Relic Infrastructureで監視しているホストの上で動くミドルウェア(Webサーバやデータベースなど)の監視を行う機能となります。
on Host Integrationによって、Infrastructureでもともと監視可能なCPU、メモリなどのサーバリソース情報に加えて、Webサーバへのコネクション数やDBのクエリ数など、ミドルウェア周りの監視メトリクスも取得出来るようになりました。
従来であればPluginsで取得する必要のあったミドルウェア部分が、Infrastructure上で監視できるようになったことにより、New Relicでのフルスタック監視がより実現しやすくなったといえます。
現在、on Host Integrationに対応しているミドルウェアはMySQL、Cassandra、Nginxの3種類。
今回はon Host Integrationを使って、実際にNginxの監視を行ってみたいと思います。
設定を行う環境は下記のとおりです。
- 起動環境: AWS EC2
- OS: RHEL 7.4
- Nginx: 1.12.2
インストール手順
0. New Relic Infrastructureエージェントのインストール
まずは監視対象のNginxが動作するInfrastructure Agentをインストールします。手順については、New RelicのAPMとINFRASTRUCTUREを使って監視してみました(後半)の記事を参考に実施します。
まだNew Relicでアカウント作成されていない方はこちらから。
1.on Host Integration用パッケージのインストール
ここからOn Host Integrationの設定となります。
yumもしくはapt-getを用いて、on Host Integration用に用意されたパッケージをインストールします。
-
yumの場合
# sudo yum -q makecache -y --disablerepo='*' --enablerepo='newrelic-infra'
# sudo yum install newrelic-infra-integrations -
apt-getの場合
# sudo apt-get update
# sudo apt-get install newrelic-infra-integrations
2. Nginx設定ファイルの変更
On Host Integrationでは、NginxのStub Statusモジュールを介してメトリクスを取得します。Nginxの設定ファイルに当該モジュールを追記して…
# 追記箇所のみ記入
server{
    location /nginx_status {
        stub_status on;
    }
}
追記後、Nginxを再起動します。
#sudo systemctl restart nginx
3. On Host tegration用設定ファイルの変更
On Host Integration用の設定ファイルが保存されたディレクトリに移動し、サンプルファイルを元に設定ファイルを作成します。
# cd /etc/newrelic-infra/integrations.d
# sudo cp nginx-config.yml.sample nginx-config.yml
コピー後、nginx-config.ymlの設定一部を修正します。
# 変更箇所のみ記入
          status_url: http://127.0.0.1/nginx_status
変更後、Infrastructure Agentを再起動させます。
# sudo systemctl restart newrelic-infra
4. 画面の確認
それでは、実際にInfrastructureのOn Host Integrationにて、監視メトリクスが表示されるか確認してみましょう。
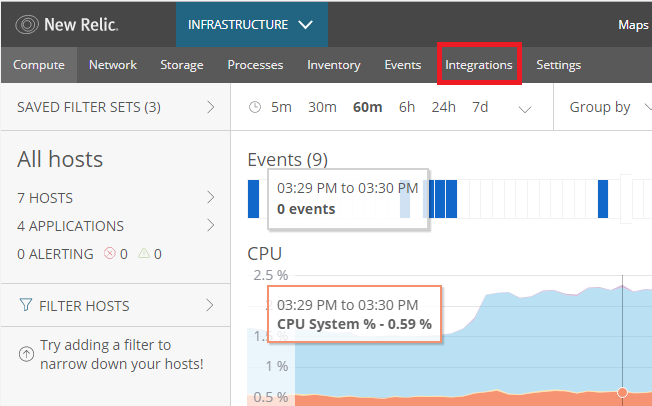
まず、InfrastructureのTOP画面上部のタブより\、Integrationを選択します。
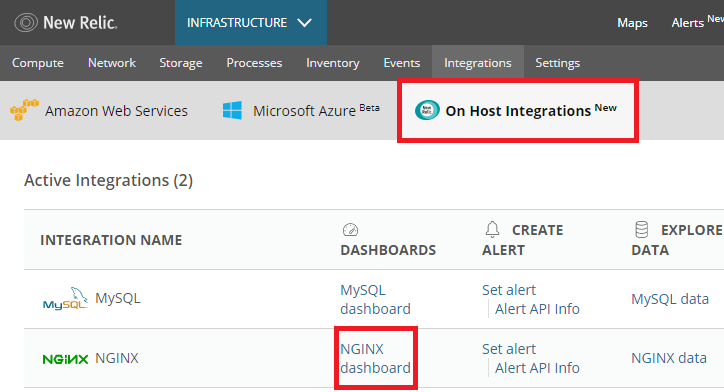
次に、上部のOn Host Integrationを選択し、当該画面にNGINXが表示されていればOn Host Integration for Nginxの設定は成功です!
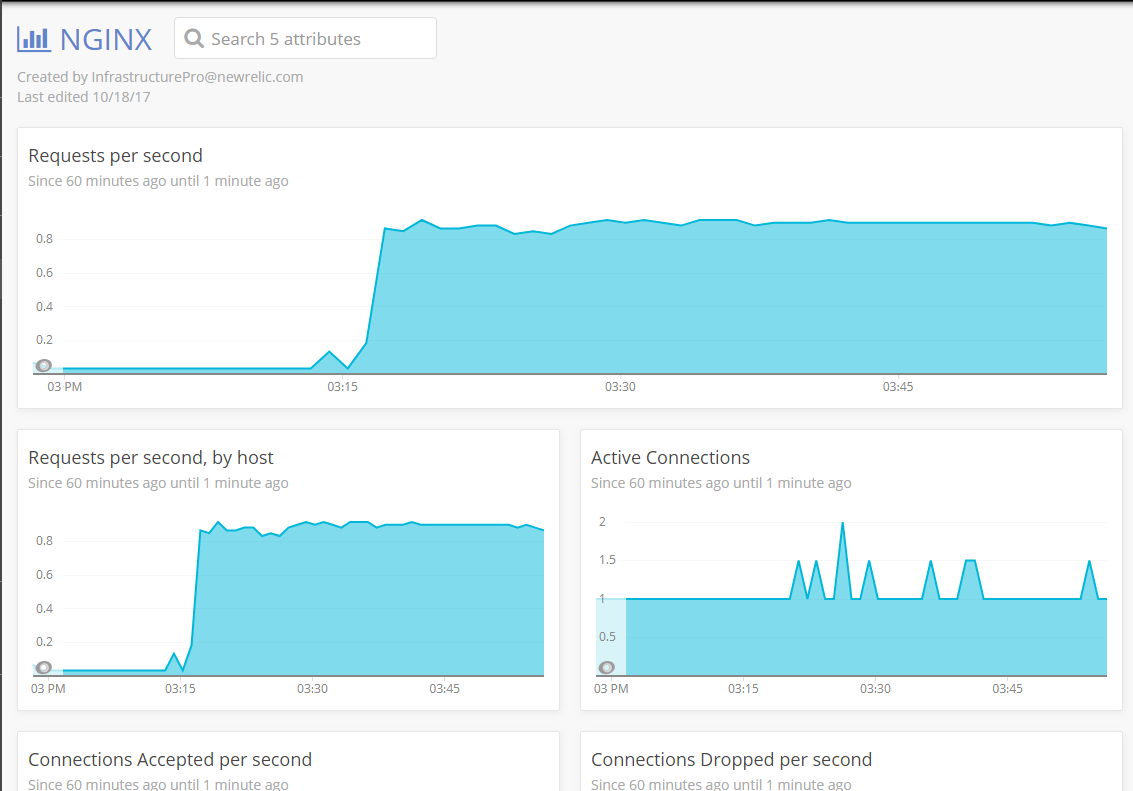
NGINX dashboardを押下して、実際のモニタリング画面を見てみましょう。ちなみに、On Host Integrationでは、Infrastructureエージェントが取得したNginx監視メトリクスをまとめてInsightsに表示します。リクエスト数やアクティブなコネクション数などのメトリクスを確認することができますね。
おわりに
従来であれば、New Relic Pluginsで監視することが求められたミドルウェア監視も、On Host Integrationによって、いくつかの簡単な設定のみでNew Relic上で監視することができるようになりました。
現在はOn Host Integrationに対応しているミドルウェアは3種類のみですが、今後は様々なミドルウェアが対応されるとのことです。New Relicのフルスタック監視ツールとしての使い勝手がより向上されるのは喜ばしいですね!


