はじめに
TypeScriptで型安全なフルスタック開発を実現したい、でも毎回のスキーマの同期や型定義に手間取る…そんな悩みを解消すべく、このガイドではNext.js×Expressによるスキーマ自動生成環境の構築方法を書いてみました。
tsoaでバックエンドのAPIスキーマを定義し、Prismaでデータベース操作を行います。
そして、Swaggerスキーマを活用してフロントエンドに型情報を自動生成し、Next.jsとChakra UIを使って柔軟なUIを構築します。
設定さえ済めば、手作業での型定義やコードの齟齬に悩むことなく、バックエンドとフロントエンドの連携がしやすくなると思います!
該当リポジトリ
関連記事
バックエンド: Docker環境構築
プロジェクトのルートディレクトリにbackendという名前のディレクトリを作成します。
mkdir backend
cd backend
Dockerfileとdocker-compose.ymlファイルをbackendディレクトリに作成します。
backend/Dockerfile
FROM node:18-alpine

WORKDIR /app

COPY package.json ./

RUN yarn install --production=false

COPY . .

EXPOSE 8080
CMD ["yarn", "dev"]
Dockerfile解説
-
FROM node:18-alpine- 軽量なNode.jsの公式イメージ(バージョン18)をベースにコンテナ(仮想の作業環境)を作ります。alpineは最小限の機能で構成されたLinuxなので、余計な機能が少なく、動作が速いです
-
WORKDIR /app- コンテナ内の作業フォルダ(プロジェクトを置く場所)として、/appというフォルダを指定しています。以降のファイルのコピーやコマンドは、この/appフォルダを基準に行われます
-
COPY package.json ./- package.jsonは、プロジェクトに必要なツールやライブラリ(=依存パッケージ)が記載されたファイルです。これをコンテナ内にコピーします。./は「今いる場所」を表します
-
RUN yarn install- yarn installというコマンドを使って、package.jsonに記載されたツールやライブラリをインストール(準備)します
-
COPY . .- 「.」は「今いる場所全部」を意味します。つまり、プロジェクトのすべてのファイルをコンテナ内にコピーしています。これにより、プロジェクト全体がコンテナ内で使用可能になります
-
EXPOSE 8080- コンテナが外部とやりとりするために、8080番ポートを開きます。これにより、コンテナ内の開発サーバーがインターネットに接続できます
-
CMD ["yarn", "dev"]- コンテナを起動したときに実行するコマンドです。ここでは、yarn devを使って開発サーバーを立ち上げます。このサーバーがコンテナ内で動き、開発環境として利用できるようになります
version: "3"
services:
  app:
    build: .
    container_name: test_app
    ports:
      - "8080:8080"
    volumes:
      - .:/app
    command: yarn dev
  db:
    image: mysql:8.0.33
    container_name: test_db
    environment:
      MYSQL_DATABASE: ${MYSQL_DATABASE}
      MYSQL_USER: ${MYSQL_USER}
      MYSQL_PASSWORD: ${MYSQL_PASSWORD}
      MYSQL_ROOT_PASSWORD: ${MYSQL_ROOT_PASSWORD}
    volumes:
      - mysql_data:/var/lib/mysql
    ports:
      - "3306:3306"
volumes:
  mysql_data:
docker-compose.yml解説
app(アプリケーションのサービス)
-
build: .- 現在のディレクトリ(.)にあるDockerfileを使って、appというコンテナを構築します
-
ports:"8080:8080"- 8080番ポートをホスト(PC)とコンテナの間で接続します。左側(ホスト側)の8080と右側(コンテナ側)の8080は、コンテナ内のサーバーにアクセスするための入り口として同じ番号にしています
-
volumes- 現在のディレクトリ(.)をコンテナ内の/appディレクトリとしてマウントします。これは「ホストとコンテナでファイルを共有」するためです。これにより、コードを変更するとコンテナ内にも即座に反映されます
-
command- yarn dev: コンテナ起動時に実行するコマンドを指定します。ここでは、開発サーバーを開始するためにyarn devを実行します。
db(データベースのサービス
-
image: mysql:8.0.33- MySQLのバージョン8.0.33を使ってコンテナを作成します。imageはDocker Hubなどから取得できる、特定のソフトウェアを実行するためのテンプレートです
-
environment- MYSQL_DATABASE: ${MYSQL_DATABASE}: データベース名を設定します。環境変数を使って外部の.envファイルから設定を読み込みます
- MYSQL_USER: ${MYSQL_USER}: データベースへの接続に使うユーザー名を指定します
- MYSQL_PASSWORD: ${MYSQL_PASSWORD}: ユーザーMYSQL_USERがデータベースに接続するためのパスワードを指定します
- MYSQL_ROOT_PASSWORD: ${MYSQL_ROOT_PASSWORD}: MySQLの管理者(rootユーザー)パスワードを指定します。このパスワードがないとデータベース管理操作ができません
-
volumes- データを永続化するための場所(/var/lib/mysql)をmysql_dataという名前で保存します。コンテナを再起動してもデータが失われないように設定しています
-
ports- MySQLがデフォルトで使用する3306番ポートをホストとコンテナ間で接続します
環境変数を管理するため、以下の.envファイルと.env.exampleファイルを作成します。
MYSQL_DATABASE=test_db
MYSQL_USER=user
MYSQL_PASSWORD=password
MYSQL_ROOT_PASSWORD=password
COMPOSE_PROJECT_NAME=test_express
MYSQL_DATABASE=
MYSQL_USERE=
MYSQL_PASSWORD=
MYSQL_ROOT_PASSWORD=
COMPOSE_PROJECT_NAME=test_express
Gitに不要なファイルが追加されないよう、.gitignoreファイルを設定します。
/node_modules
.env
簡単なpackage.jsonを作成し、プロジェクト名とバージョンを指定します。
{
  "name": "typescript-nextjs-express-onboarding",
  "version": "1.0.0",
  "license": "MIT"
}
backendディレクトリでDocker Composeを使用してコンテナを起動します。
docker compose up -d
データベース接続確認として今回はSequel Aceを使用します。
MYSQL_PASSWORDの値をパスワードとして入力してください。

バックエンド: Expressサーバーを立ち上げる
以下のpackage.jsonファイルは、プロジェクトの基本設定を記述しています。scriptsには開発サーバーの起動やビルドのコマンドが含まれ、dependenciesとdevDependenciesには必要なライブラリがリストされています。
{
  "name": "typescript-nextjs-express-onboarding",
  "version": "1.0.0",
  "license": "MIT",
  "scripts": {
    "dev": "nodemon",
    "build": "tsc"
  },
  "dependencies": {
    "express": "^4.21.1"
  },
  "devDependencies": {
    "@types/express": "^4.17.1",
    "@types/node": "^22.8.1",
    "nodemon": "^3.1.7",
    "ts-node": "^10.9.2",
    "typescript": "^5.6.3"
  }
}
nodemon.jsonはnodemonの設定ファイルです。nodemonはファイルの変更を検知してサーバーを自動で再起動するツールです。
{
  "watch": ["src"],
  "ext": "ts",
  "ignore": ["src/**/*.test.ts"],
  "exec": "ts-node src/index.ts"
}
TypeScriptプロジェクトのコンパイル設定を行います。
{
  "compilerOptions": {
    "target": "ES2020",
    "module": "commonjs",
    "outDir": "./dist",
    "strict": true,
    "esModuleInterop": true,
    "skipLibCheck": true,
    "forceConsistentCasingInFileNames": true,
    "experimentalDecorators": true,
    "emitDecoratorMetadata": true,
    "resolveJsonModule": true,
  },
  "include": ["src/**/*.ts"],
  "exclude": ["node_modules"]
}
tsconfig.json解説
-
target: "ES2020"- 変換後のJavaScriptのバージョンを指定します。ここではES2020(ECMAScript 2020)を指定しているので、コンパイルされたJavaScriptはこのバージョンの構文に対応するように変換されます
-
module: "commonjs"- モジュールの形式をcommonjsに設定します。commonjsは、Node.jsで広く使われているモジュールシステムで、requireやmodule.exportsを利用する構文です
-
outDir: "./dist"- コンパイル後のJavaScriptファイルを出力するディレクトリを指定します。ここでは、./distフォルダに変換後のファイルを保存します
-
strict: true- TypeScriptの厳格モードを有効にします。これにより、型の安全性をより強化し、エラーを見つけやすくします。たとえば、型が不明な変数やnullの値を扱う場合、警告やエラーが表示されるようになります
-
esModuleInterop: true- import構文でCommonJSモジュールをより互換性のある形で扱えるようにします。これを有効にすると、require構文で作られたパッケージをimportで読み込むことが簡単になります
-
skipLibCheck: true- node_modules内のライブラリファイルの型チェックをスキップします。これにより、コンパイル速度が向上します
-
forceConsistentCasingInFileNames: true- ファイル名の大文字と小文字の一貫性を強制します。たとえば、ファイル名の大文字・小文字の不一致によるエラーを防止します
-
include: ["src//*.ts"]- srcフォルダ内のすべての.tsファイルをコンパイル対象に含めます。**/*.tsは、srcフォルダ内のサブフォルダも含めて.tsファイルを再帰的に指定するパターンです
-
exclude: ["node_modules"]- node_modulesフォルダ内のファイルをコンパイル対象から除外します。この設定により、依存パッケージのファイルはコンパイルされず、無駄な時間やエラーを避けられます
-
experimentalDecorators- JavaScriptのデコレーター機能を有効にするオプション
-
emitDecoratorMetadata- デコレーターが適用されたクラスやメソッドに対して、メタデータ(データに関する情報)を自動的に生成し、追加するオプション
-
resolvejsonmodule- '.json' 拡張子を持つモジュールをインポートできるようにします
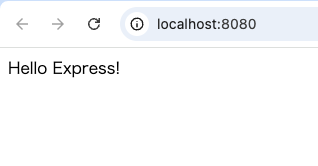
次に、Expressサーバーのエントリーポイントであるindex.tsを作成します。このファイルは、ルートエンドポイント/にアクセスしたとき「Hello Express!」と返す簡単なサーバーを作成します。
import express, { Request, Response } from "express";

const app = express();
const port = 8000;

app.get("/", (_: Request, res: Response) => {
  res.send("Hello Express!");
});

app.listen(port);
次に、backendディレクトリでDocker Composeを使って、appコンテナ内で依存関係をインストールします。
appコンテナを起動し、yarn installコマンドで依存関係をインストールします。--rmオプションにより、実行後にコンテナが自動で削除されます。
docker-compose run --rm app yarn install
インストールが完了したら、次にbackendディレクトリでdocker-compose upでアプリケーションとデータベースを起動します。
docker compose up -d
http://localhost:8080/ で以下のように表示されれば成功です
バックエンド: ESLint
TypeScriptのプロジェクトにESLintとPrettierを組み合わせ、コードの一貫性や可読性を向上させます。
ESLintとPrettier、さらにTypeScriptサポート用のプラグインを開発用の依存パッケージとして追加します。
backendディレクトリで以下のコマンドを実行してください。
docker-compose run --rm app yarn add -D @typescript-eslint/eslint-plugin @typescript-eslint/parser eslint eslint-config-prettier eslint-plugin-prettier
ESLintの設定を記述します。これにより、TypeScriptとPrettierのルールに沿ってコードをチェックできるようになります。下記ルールから好きにアレンジしてもOKです
const eslintPluginPrettier = require("eslint-plugin-prettier");
const eslintPluginTypescript = require("@typescript-eslint/eslint-plugin");
const eslintParserTypescript = require("@typescript-eslint/parser");

const commonConfig = [
  {
    files: ["**/*.{js,jsx,ts,tsx}"],
    languageOptions: {
      parser: eslintParserTypescript,
    },
    plugins: {
      prettier: eslintPluginPrettier,
      "@typescript-eslint": eslintPluginTypescript,
    },
    rules: {
      "prettier/prettier": "error",
      "no-console": ["error", { allow: ["error"] }],
      "@typescript-eslint/no-unused-vars": [
        "error",
        {
          args: "all",
          argsIgnorePattern: "^_",
          ignoreRestSiblings: false,
        },
      ],
      "@typescript-eslint/no-unused-expressions": "error",
    },
  },
];
module.exports = commonConfig;
"scripts": {
    "dev": "nodemon",
    "build": "tsc",
    "lint": "eslint src",
    "lint:fix": "eslint src --fix"
  }
VSCodeなどでESLintでコードチェックしたい場合はbackend/node_modulesの中を更新する必要がありますのでbackendディレクトリでyarn installしてください(今後追加するライブラリも同様です)
docker-compose run --rm app yarn install
この状態でconsole.logを仕込むと以下のようなエラーが出ます
(backendディレクトリで実行)
docker-compose run --rm app yarn lint
/app/src/index.ts
  11:1  error  Unexpected console statement  no-console

✖ 1 problem (1 error, 0 warnings)
バックエンド: Prisma導入
Prismaは、データベース操作を簡単にするためのツールです。
まず、backendディレクトリでPrismaとそのクライアントパッケージをインストールします。
docker-compose run --rm app yarn add prisma @prisma/client
次に、Prismaの初期設定を行い、backendディレクトリでスキーマファイルを生成します。
docker-compose run --rm app yarn prisma init
Prismaのschema.prismaファイルを開き、以下の内容に設定。
公式ドキュメントを参考にUserとPostモデルを定義。
この設定により、ユーザーとその投稿を管理するためのスキーマが作成されます。
generator client {
  provider = "prisma-client-js"
}

datasource db {
  provider = "mysql"
  url      = env("DATABASE_URL")
}

model User {
  id    Int     @id @default(autoincrement())
  email String  @unique
  password String
  name  String?
  posts Post[]
}

model Post {
  id        Int     @id @default(autoincrement())
  title     String
  content   String?
  published Boolean @default(false)
  author    User    @relation(fields: [authorId], references: [id])
  authorId  Int
}
MySQLデータベースとの接続情報を.envファイルに追加します。
MYSQL_DATABASE=test_db
MYSQL_USER=user
MYSQL_PASSWORD=password
MYSQL_ROOT_PASSWORD=password
COMPOSE_PROJECT_NAME=test_express
# 追加
DATABASE_URL=mysql://root:password@test_db:3306/test_db
MYSQL_DATABASE=
MYSQL_USERE=
MYSQL_PASSWORD=
MYSQL_ROOT_PASSWORD=
COMPOSE_PROJECT_NAME=test_express
# 追加
DATABASE_URL=
次に、Prismaのマイグレーションコマンドをbackendディレクトリで実行
docker-compose run --rm app yarn prisma migrate dev --name init
Sequel Aceでテーブルを確認すると新しくできることが確認できます。

バックエンド: tsoa導入
TypeScriptのデコレーターで簡単にAPIドキュメントを作成し、Swagger UIで閲覧できるようにします。
backendディレクトリでTsoaとSwagger UIをインストールし、開発環境と本番環境で必要なパッケージを分けて管理します。
docker-compose run --rm app yarn add tsoa swagger-ui-express
docker-compose run --rm app yarn add -D concurrently @types/swagger-ui-express
ドキュメントとルートの出力ディレクトリを指定します。
{
  "entryFile": "src/index.ts",
  "noImplicitAdditionalProperties": "throw-on-extras",
  "controllerPathGlobs": ["src/**/*Controller.ts"],
  "spec": {
    "outputDirectory": "build",
    "specVersion": 3
  },
  "routes": {
    "routesDir": "build"
  }
}
Userデータモデルを利用したユーザーの作成と取得のAPIを作成します。
import { Body, Controller, Get, Path, Post, Route, Response } from "tsoa";
import { PrismaClient, User } from "@prisma/client";

const prisma = new PrismaClient();

type UserCreationParams = Pick<User, "email" | "name" | "password">;
interface ValidateErrorJSON {
  message: "Validation failed";
  details: { [name: string]: unknown };
}

@Route("users")
export class UsersController extends Controller {
  @Get("{userId}")
  public async getUser(@Path() userId: number): Promise<User | null> {
    return await prisma.user.findUnique({
      where: { id: userId },
    });
  }

  @Response<ValidateErrorJSON>(422, "Validation Failed")
  @Post()
  public async createUser(
    @Body() requestBody: UserCreationParams,
  ): Promise<void> {
    await prisma.user.create({
      data: { ...requestBody },
    });
    return;
  }
}
Tsoaが生成するSwaggerドキュメントを/docsで提供し、エラーハンドリングも設定します。
import express, {
  json,
  urlencoded,
  Response as ExResponse,
  Request as ExRequest,
  NextFunction,
} from "express";
import swaggerUi from "swagger-ui-express";
import { RegisterRoutes } from "../build/routes";
import { ValidateError } from "tsoa";

const app = express();

app.use(urlencoded({ extended: true }));
app.use(json());

app.use("/docs", swaggerUi.serve, async (_req: ExRequest, res: ExResponse) => {
  const swaggerDocument = await import("../build/swagger.json");
  res.send(swaggerUi.generateHTML(swaggerDocument));
});

RegisterRoutes(app);

app.use((err: unknown, _: ExRequest, res: ExResponse, next: NextFunction) => {
  if (err instanceof ValidateError) {
    return res.status(422).json({
      message: "Validation Failed",
      details: err?.fields,
    });
  }
  if (err instanceof Error) {
    return res.status(500).json({
      message: "Internal Server Error",
    });
  }
  next();
});

const port = process.env.PORT || 8080;
app.listen(port);

export { app };
TsoaとTypeScriptのビルドスクリプトを追加
"scripts": {
    "dev": "concurrently \"nodemon\" \"nodemon -x tsoa spec-and-routes\"",
    "build": "tsoa spec-and-routes && tsc",
    "lint": "eslint src",
    "lint:fix": "eslint src --fix"
}
リポジトリに不要なファイルが含まれないようにします。
/node_modules
.env
build
dist
backendディレクトリでDocker Composeを使ってサーバーを再起動します。
docker-compose down
docker-compose up
ブラウザでhttp://localhost:8080/docs にアクセスし、Swagger UIが表示されることを確認


フロントエンド: 環境構築
フロントエンドプロジェクトを作成する前に、ルートディレクトリにいることを確認します。ルートにはbackendディレクトリが既に存在しています。
% ls
backend
ルートディレクトリで、Next.jsのプロジェクトを作成します。
プロジェクト名はfrontendとし、他はデフォルトでOK
npx create-next-app@latest
✔ What is your project named? … frontend
✔ Would you like to use TypeScript? … No / Yes
✔ Would you like to use ESLint? … No / Yes
✔ Would you like to use Tailwind CSS? … No / Yes
✔ Would you like your code inside a `src/` directory? … No / Yes
✔ Would you like to use App Router? (recommended) … No / Yes
✔ Would you like to use Turbopack for next dev? … No / Yes
✔ Would you like to customize the import alias (@/* by default)? … No / Yes
不要なものを削除します。
どこまで削除するかは自由ですが、この記事では下記の状況になってます。
pwd
/Users/ユーザー名/ルートディレクトリ名/frontend/src/app
app % tree
.
├── favicon.ico
├── layout.tsx
└── page.tsx
import type { Metadata } from "next";

export const metadata: Metadata = {
  title: "Create Next App",
  description: "Generated by create next app",
};

export default function RootLayout({
  children,
}: Readonly<{
  children: React.ReactNode;
}>) {
  return (
    <html lang="ja">
      <body>
        {children}
      </body>
    </html>
  );
}
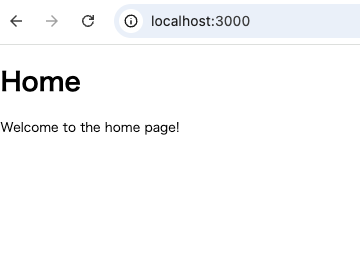
export default function Home() {
  return (
    <div>
      <h1>Home</h1>
      <p>Welcome to the home page!</p>
    </div>
  );
}
fronedendディレクトリでサーバー起動
npm run dev
http://localhost:3000/ で下記のような画面が表示されれば成功です
フロントエンド: ESLint
以下のコマンドで、ESLintと関連プラグインをインストールします。
npm install -D eslint eslint-plugin-prettier eslint-config-prettier prettier eslint-plugin-import eslint-plugin-react
eslintrc.jsonファイルを作成し、以下の内容を記述します。
ルールはサンプルになりますので好きに設定してOKです。
{
  "extends": [
    "next/core-web-vitals",
    "next/typescript",
    "plugin:react/recommended",
    "plugin:prettier/recommended"
  ],
  "plugins": [
    "prettier",
    "import",
    "react"
  ],
  "rules": {
    "prettier/prettier": "error",
    "import/order": "error",
    "no-console": [
      "error",
      {
        "allow": [
          "error"
        ]
      }
    ],
    "react/jsx-sort-props": "error",
    "react/react-in-jsx-scope": "off",
    "react/jsx-uses-react": "off",
    "@typescript-eslint/no-empty-object-type": "off"
  }
}
scriptsセクションに、Lintチェック用のコマンドを追加します。
"scripts": {
    "dev": "next dev",
    "build": "next build",
    "start": "next start",
    "lint": "eslint . --ext .ts,.tsx",
    "lint:fix": "eslint . --ext .ts,.tsx --fix"
}
この状態でconsole.logを仕込むと以下のようなエラーが出ます
(frontendディレクトリで実行)
npm run lint
13:3  error  Unexpected console statement  no-console

✖ 1 problem (1 error, 0 warnings)
Chakra UI導入
Chakra UIは、プロダクトをスピーディに構築するためのコンポーネントシステムです。
高品質なWebアプリやデザインシステムを構築するためのアクセシブルなReactコンポーネントです。
Chakra UIインストールできない場合はNext14系にしてください
変更箇所
package.jsonでバージョンを変更し、npm installし直します。
  "dependencies": {
    "next": "14.2.16",
    "react": "^18",
    "react-dom": "^18"
  }
next.config.tsからnext.config.mjsに変更
const config = {};

export default config;
次のコマンドをfrontendディレクトリで実行します。
npm i @chakra-ui/react @emotion/react
Chakra CLIを使用して、必要なスニペットを追加します。
npx @chakra-ui/cli snippet add
自動生成されたfrontend/src/components/ui内のコンポーネントをコードフォーマッターをルール通りにします。
npm run lint:fix
アプリ全体でChakra UIを使用できるようにします。
import { Provider } from "@/components/ui/provider";

export default function RootLayout(props: { children: React.ReactNode }) {
  const { children } = props;
  return (
    <html suppressHydrationWarning>
      <body>
        <Provider>{children}</Provider>
      </body>
    </html>
  );
}
バンドルサイズを最適化します。下記コードはNext14系の場合です。
const config = {
  experimental: {
    optimizePackageImports: ["@chakra-ui/react"],
  },
};

export default config;
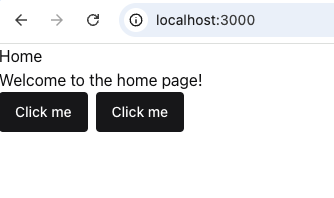
Chakra UIのコンポーネントが正常に動作するか確認します。
import { HStack } from "@chakra-ui/react";
import { Button } from "@/components/ui/button";

export default function Home() {
  return (
    <div>
      <h1>Home</h1>
      <p>Welcome to the home page!</p>
      <HStack>
        <Button>Click me</Button>
        <Button>Click me</Button>
      </HStack>
    </div>
  );
}
http://localhost:3000/ にアクセスして以下のように表示されればOKです
フロントエンド: React Hook Form導入
react-hook-formはパフォーマンス、柔軟性、拡張性に優れたフォームと、使いやすいバリデーションのフォームライブラリです。
必要なパッケージをインストール
npm install react-hook-form zod @hookform/resolvers
各入力フィールドがフォームの制御にアクセスできるよう、useControllerを使ったカスタムフックを定義します。
import { Control, FieldValues, Path, useController } from "react-hook-form";

export type UseFieldInputProps<T extends FieldValues> = {
  control: Control<T>;
  name: Path<T>;
};

export const useFieldInput = <T extends FieldValues>({
  name,
  control,
}: UseFieldInputProps<T>) => {
  const {
    field: { value, onChange, onBlur },
    fieldState: { invalid },
    formState: { errors },
  } = useController({ name, control });

  return { value, invalid, errors, onChange, onBlur };
};
Chakra UIのInputとReact Hook Formを組み合わせて、フォームフィールドのコンポーネントを作成します。
エラーメッセージが表示されるよう、errorMessageも取得しています。
import { Input, InputProps } from "@chakra-ui/react";
import { FieldValues } from "react-hook-form";
import { useFieldInput, UseFieldInputProps } from "./FieldInput.hooks";
import { Field, FieldProps } from "@/components/ui/field";

type FieldInputProps<T extends FieldValues> = UseFieldInputProps<T> & {
  fieldProps?: FieldProps;
  inputProps?: InputProps;
};

export const FieldInput = <T extends FieldValues>({
  name,
  control,
  fieldProps,
  inputProps,
}: FieldInputProps<T>) => {
  const { value, invalid, errors, onChange, onBlur } = useFieldInput({
    name,
    control,
  });
  const errorMessage = errors[name]?.message as string | undefined;
  return (
    <Field
      errorText={errorMessage}
      invalid={invalid}
      label={name}
      {...fieldProps}
    >
      <Input
        name={name}
        onBlur={onBlur}
        onChange={onChange}
        value={value ?? ""}
        {...inputProps}
      />
    </Field>
  );
};
インポート側でのコードがシンプルになるよう設定
export * from "./FieldInput";
useFormを使ってフォームの制御を行い、
送信ボタンをクリックすると入力データがバリデーションされるようにします。
"use client";

import { useForm } from "react-hook-form";
import { z } from "zod";
import { zodResolver } from "@hookform/resolvers/zod";
import { Button, Flex } from "@chakra-ui/react";
import { FieldInput } from "@/components/template/fieldInput";

const REQUIRED_MESSAGE = "必須項目です";
const NAME_MAX_LENGTH_MESSAGE = "20文字以内で入力してください";
const EMAIL_MESSAGE = "メールアドレスの形式で入力してください";
const PASSWORD_MIN_LENGTH_MESSAGE = "パスワードは8文字以上で入力してください";

const schema = z.object({
  name: z
    .string({
      invalid_type_error: REQUIRED_MESSAGE,
      required_error: REQUIRED_MESSAGE,
    })
    .max(20, NAME_MAX_LENGTH_MESSAGE),
  email: z
    .string({
      invalid_type_error: REQUIRED_MESSAGE,
      required_error: REQUIRED_MESSAGE,
    })
    .email(EMAIL_MESSAGE),
  password: z
    .string({
      invalid_type_error: REQUIRED_MESSAGE,
      required_error: REQUIRED_MESSAGE,
    })
    .min(8, PASSWORD_MIN_LENGTH_MESSAGE),
});

type UseFormProps = {
  name: string;
  email: string;
  password: string;
};

export const Home = () => {
  const { control, handleSubmit } = useForm<UseFormProps>({
    mode: "onTouched",
    resolver: zodResolver(schema),
  });

  const onSubmit = async (data: UseFormProps) => {
    alert(JSON.stringify(data));
  };

  return (
    <Flex direction="column" gap="32px" padding="16px">
      <FieldInput
        control={control}
        inputProps={{ width: "400px" }}
        name="name"
      />
      <FieldInput
        control={control}
        inputProps={{ width: "400px" }}
        name="email"
      />
      <FieldInput
        control={control}
        inputProps={{ width: "400px" }}
        name="password"
      />
      <Button onClick={handleSubmit(onSubmit)} width="200px">
        送信
      </Button>
    </Flex>
  );
};
インポート側でのコードがシンプルになるよう設定
export * from "./Home";
/にアクセスした時のコンポーネントを定義
import { Home } from "@/components/pages/home";

export default function Top() {
  return <Home />;
}
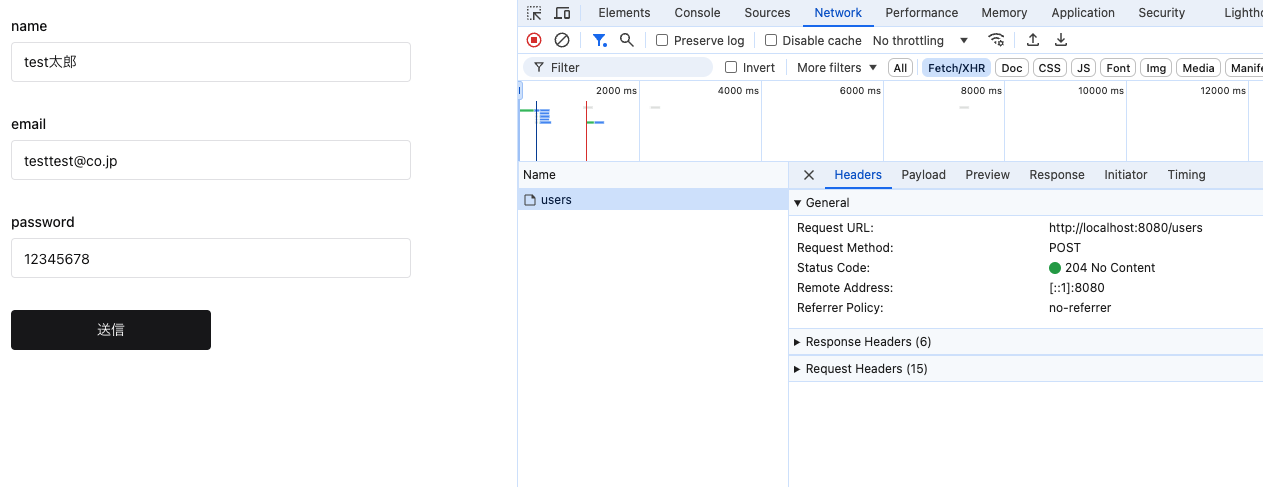
http://localhost:3000/ にアクセスすると以下のような画面が表示されます
バックエンド: APIクライアントの自動生成
swagger-typescript-apiを使用してバックエンドのSwaggerスキーマから自動的にフロントエンド用の型定義とAPIクライアントを生成します。
backendディレクトリで以下のコマンドを実行して必要なパッケージをインストールします。
docker-compose run --rm app yarn add -D cors @types/cors swagger-typescript-api
backend/build/swagger.jsonからfrontend/schemaに自動生成します。
  "scripts": {
    "generate": "swagger-typescript-api -p ./build/swagger.json -o ../frontend/schema -n api.ts --modular --unwrap-response-data"
  }
コマンド解説
-
-p ./build/swagger.json:生成する元となるAPIの構造を記述したSwaggerスキーマファイルのパスを指定します。ここでは、backend/build/swagger.jsonという場所にあるファイルを読み取ります。このファイルには、エンドポイントやそのパラメータ、レスポンスの形式などが定義されています -
-o ../frontend/schema:フロントエンドのschemaディレクトリに生成したコードを保存するためのパスを指定します。これにより、frontend/schemaにAPIクライアントや型定義ファイルが出力されます -
--modular:生成するコードを、エンドポイントごとに個別のファイルとして分けます。こうすることで、例えばUsersエンドポイント用のファイル、Productsエンドポイント用のファイルなど、ファイル単位でAPIを管理でき、コードが整理しやすくなります -
--unwrap-response-data:APIレスポンスのデータ部分だけを取り出しやすくするためのオプション。APIからのレスポンスが{ data: {...} }のようにラップされている場合、このオプションを指定することで、直接{...}のデータ部分のみを取り出すようになります
CORSの許可URLとしてフロントエンドのURLを指定します
# 追加
FRONTEND_URL=http://localhost:3000
# 追加
FRONTEND_URL=http://localhost:3000
CORSの設定を追加し、フロントエンドからのリクエストを許可します。
import cors from "cors";
// 省略

const app = express();
// 追加
app.use(cors({ origin: process.env.FRONTEND_URL }));
backendディレクトリで以下のコマンドを実行し、APIクライアントの自動生成を行います。
compose runコマンドではない理由
docker-compose.ymlに../frontend:/app/frontendのボリューム設定することで、compose runコマンドでコードを自動生成することもできます。
ただし、このボリューム設定により、Dockerコンテナを起動するとbackendディレクトリ内に空のfrontendディレクトリが作成されてしまうため、コンテナ内でのコマンド実行は避けています。(まあ、backendディレクトリ内に空のfrontendディレクトリが作成されても実装に影響はないですが...)
yarn generate
swagger-typescript-apiによって以下のファイルが生成されていれば成功です。
frontend/schema
├── Users.ts           # エンドポイントごとのモジュール
├── data-contracts.ts  # 型定義
└── http-client.ts     # HTTPクライアント
フロントエンド: API繋ぎ込み
実際に自動生成されたAPIクライアントを使ってみましょう
(本来はnew Users を生成するだけのエンドポイントファイルを作ると思いますが、簡略化するための直接クラス生成してます)
"use client";

import { useForm } from "react-hook-form";
import { zodResolver } from "@hookform/resolvers/zod";
import { Button, Flex } from "@chakra-ui/react";
import { Users } from "../../../../schema/Users";
import { FieldInput } from "@/components/template/fieldInput";

// 省略

  const onSubmit = async (data: UseFormProps) => {
    const users = new Users({ baseUrl: "http://localhost:8080" });
    await users.createUser({ ...data });
  };
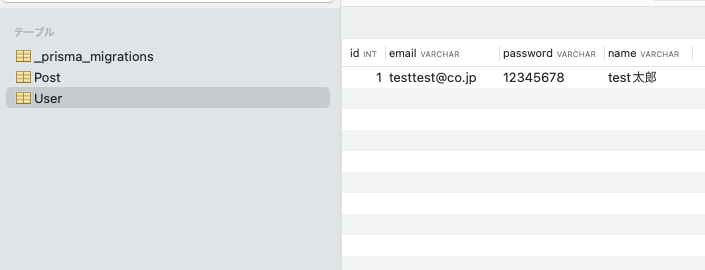
http://localhost:3000/ で送信ボタンクリックした時、DBにレコード生成れれば成功です!
バックエンド: テストコード
Jestの設定ファイルを生成しています。これにより、Expressバックエンドのテスト環境が整備され、モックデータを使ったテストが可能になります。
docker-compose run --rm app yarn add -D jest supertest ts-jest @faker-js/faker @types/jest @types/supertest
ts-jest の設定ファイルを生成
docker-compose run --rm app yarn ts-jest config:init
Jest の設定でforceExit: trueを利用して、テストが完全に終了した際にプロセスを強制終了するようにしています。
/** @type {import('ts-jest').JestConfigWithTsJest} **/
module.exports = {
  testEnvironment: "node",
  transform: {
    "^.+.tsx?$": ["ts-jest", {}],
  },
  roots: ["<rootDir>/src"],
  forceExit: true,
};
ユーザーAPIのテストコードを記載。
本来はテストで作成したデータは削除すべきですが、実装を簡略化するためそのままにしてます。
import request from "supertest";
import { app } from "..";
import { PrismaClient } from "@prisma/client";
import { faker } from "@faker-js/faker";

const prisma = new PrismaClient();

describe("ユーザー API", () => {
  it("IDでユーザーを取得する", async () => {
    const testUser = await prisma.user.create({
      data: {
        email: faker.internet.email(),
        name: faker.person.fullName(),
        password: faker.internet.password(),
      },
    });
    const testUserId = testUser.id;
    const response = await request(app).get(`/users/${testUserId}`);
    expect(response.status).toBe(200);
    expect(response.body).toHaveProperty("id", testUserId);
  });

  it("ランダムなデータで新しいユーザーを作成する", async () => {
    const newUser = {
      email: faker.internet.email(),
      name: faker.person.fullName(),
      password: faker.internet.password(),
    };
    const response = await request(app).post("/users").send(newUser);
    expect(response.status).toBe(204);
  });
});
終わりに
今回のプロジェクトでは、TypeScriptを活用しながら、フロントエンドとバックエンドで統一されたスキーマを自動生成する環境を構築しました。手動でAPI仕様や型定義を管理する必要がなくなり、コードの整合性とメンテナンス性が大幅に向上したのではないでしょうか。特に、yamlファイルを記述することなく、TsoaとSwaggerを用いてスキーマ生成ができるのは、大きな生産性向上のポイントです。
今後は、Storybookを追加して、コンポーネントやAPIの動作確認をより効率的に行えるようにしていく予定です。また、認証・認可の仕組みやデプロイメント、CI/CDの構築にも取り組み、より実践的なプロダクション環境に近い形を目指します。
最後までお読みいただきありがとうございます!
