0
0

Delete article

Deleted articles cannot be recovered.

Draft of this article would be also deleted.

Are you sure you want to delete this article?

More than 3 years have passed since last update.

AWS MailCatcher用のセキュリティグループを追加する

Posted at

目的

  • MailCatcher用のセキュリティグループの作成方法をまとめる

前提条件

  • AWSのアカウントを所持しログインすることができること。

前提情報

読後感

  • MailCatcher用のセキュリティグループの作成を行うことができる。

詳細

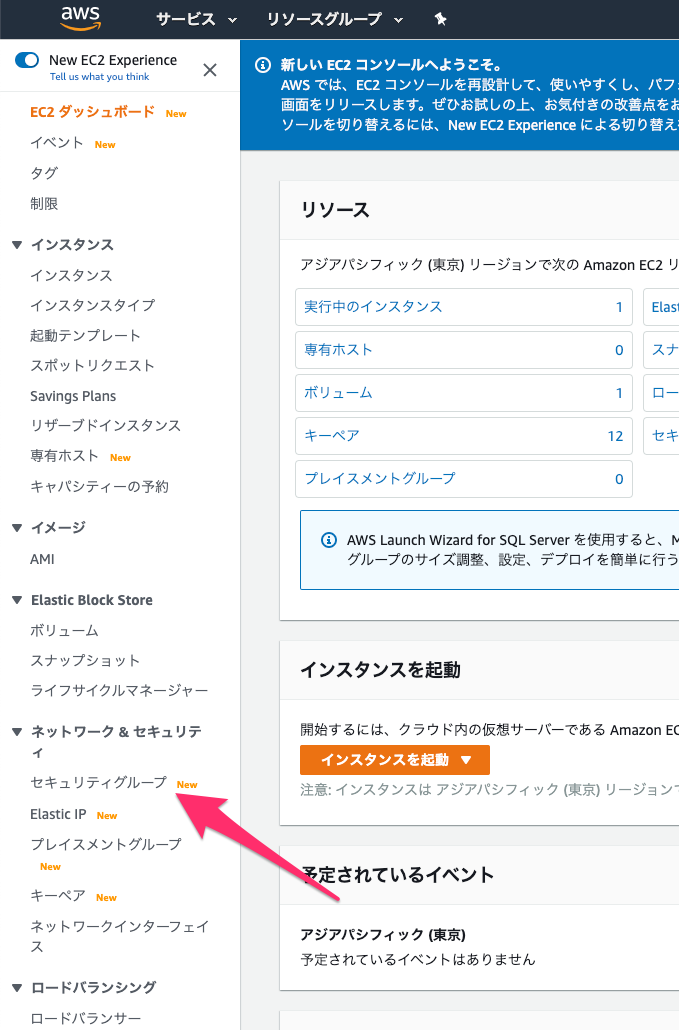
  1. AWSにログインし下記後、EC2のダッシュボードにアクセスする。

  2. サイドバーにある「セキュリティグループ」をクリックする。

    ダッシュボード___EC2_Management_Console.png

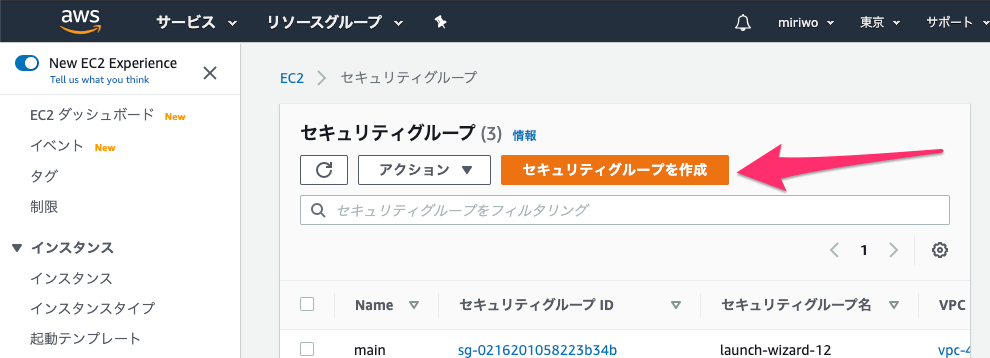
  3. 「セキュリティグループを作成」をクリックする。

    EC2_Management_Console.png

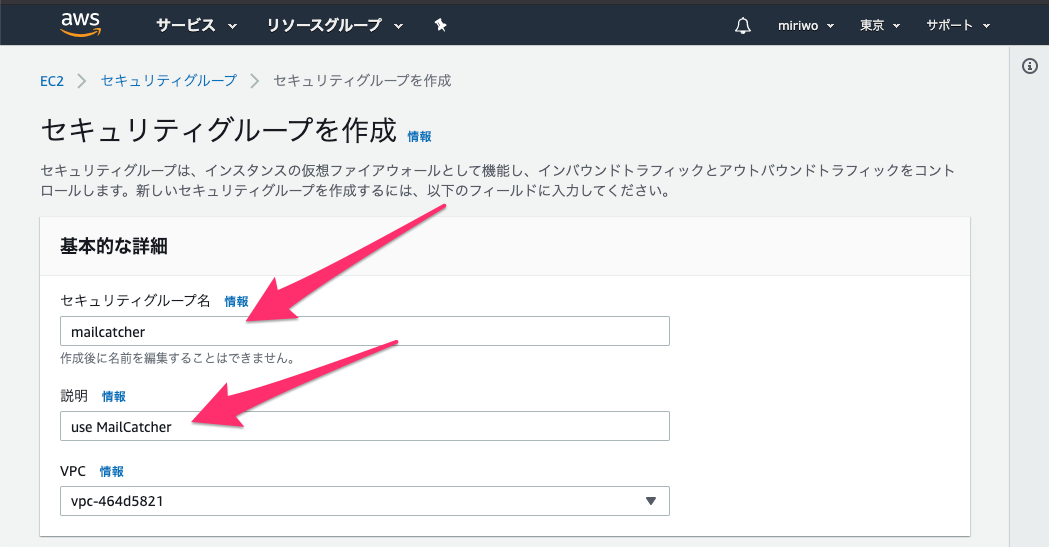
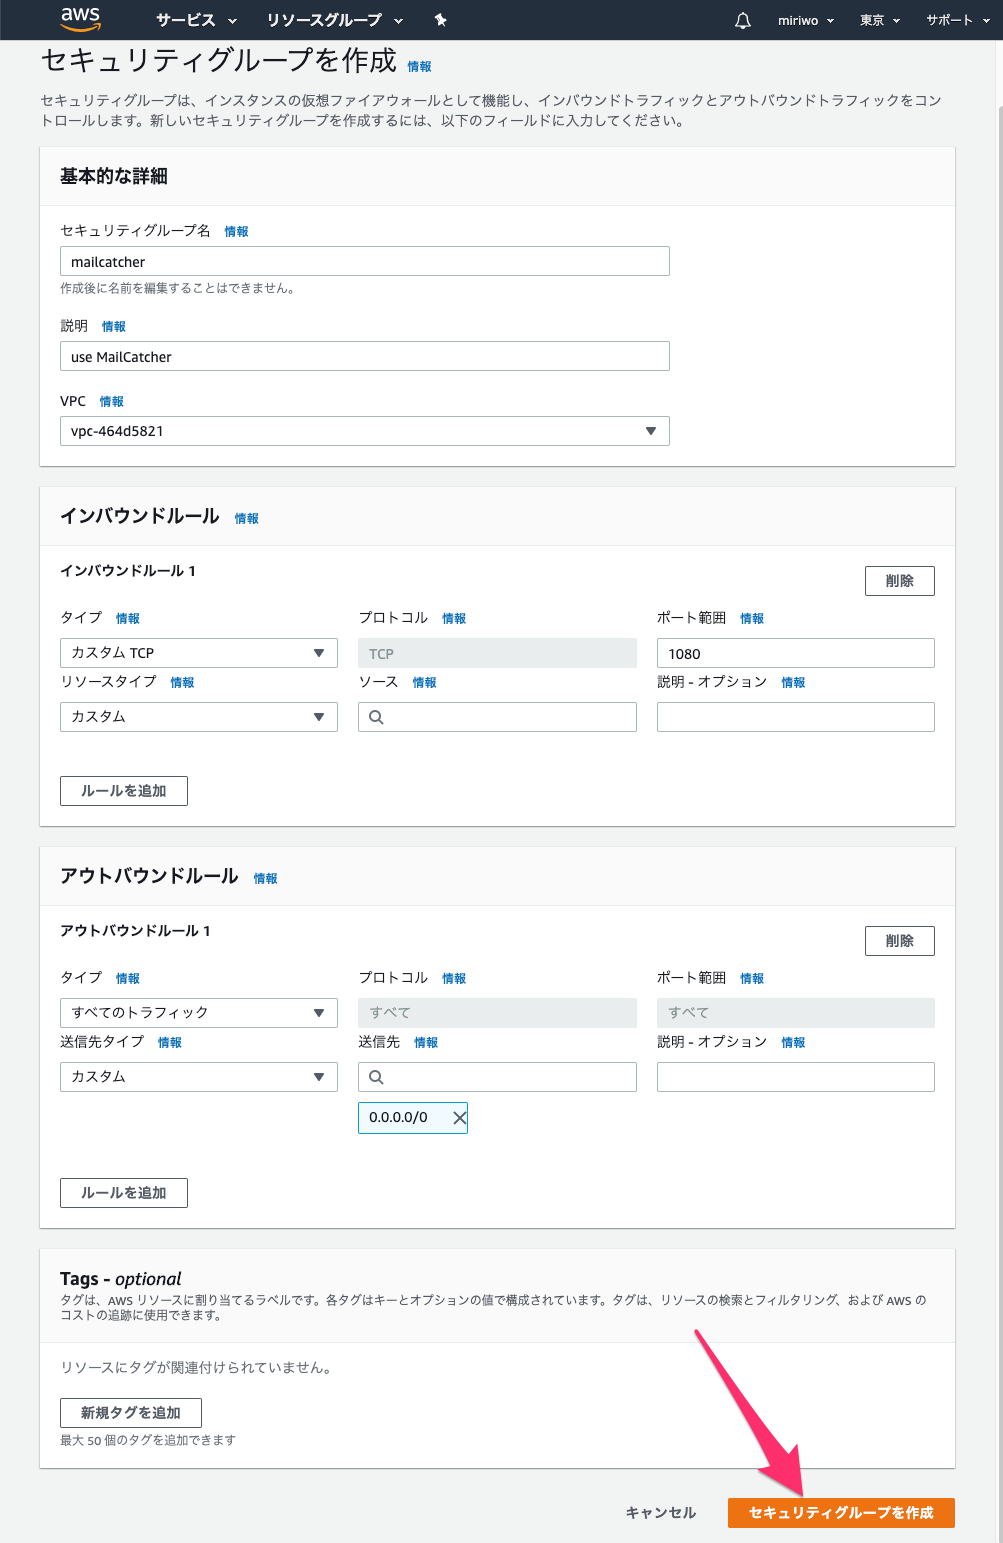
  4. 下記の情報を入力する。

    • セキュリティグループ名: mailcatcher
    • 説明: use MailCatcher

    EC2_Management_Console.png

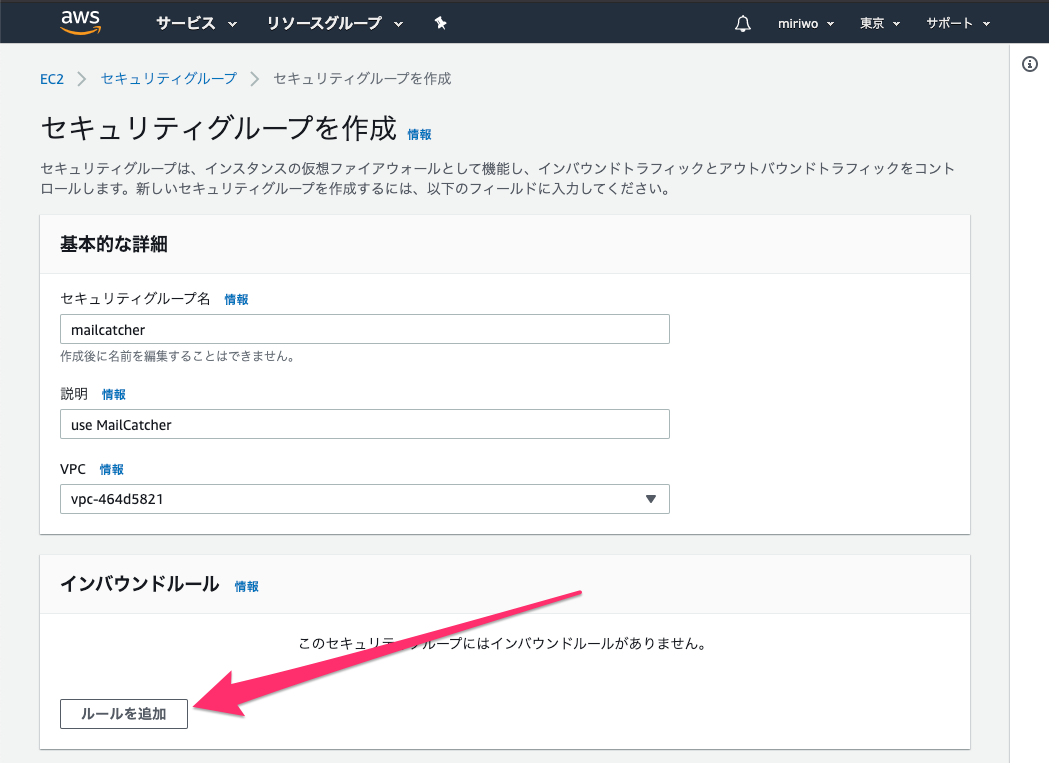
  5. 「インバウンドルール」の「ルールを追加」をクリックする。

    EC2_Management_Console-3.png

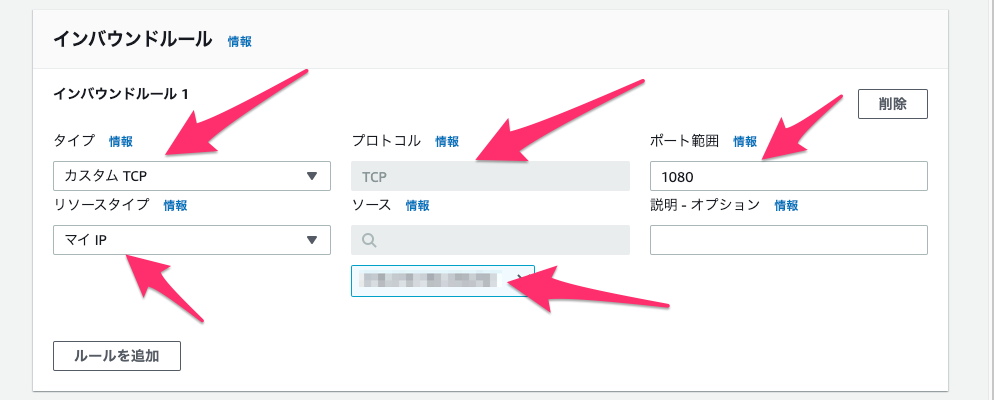
  6. 下記の情報を入力する。

    • タイプ: カスタムTCP
    • プロトコル: TCP
    • ポート範囲: 1080
    • リソースタイプ: マイIP
    • マイIPを選択した時にソースの下にIPアドレスが表示されることを確認する。

    EC2_Management_Console-6.png

  7. その他はとくに入力することなく、内容を確認して「セキュリティグループを作成」をクリックする。

    EC2_Management_Console-5.png

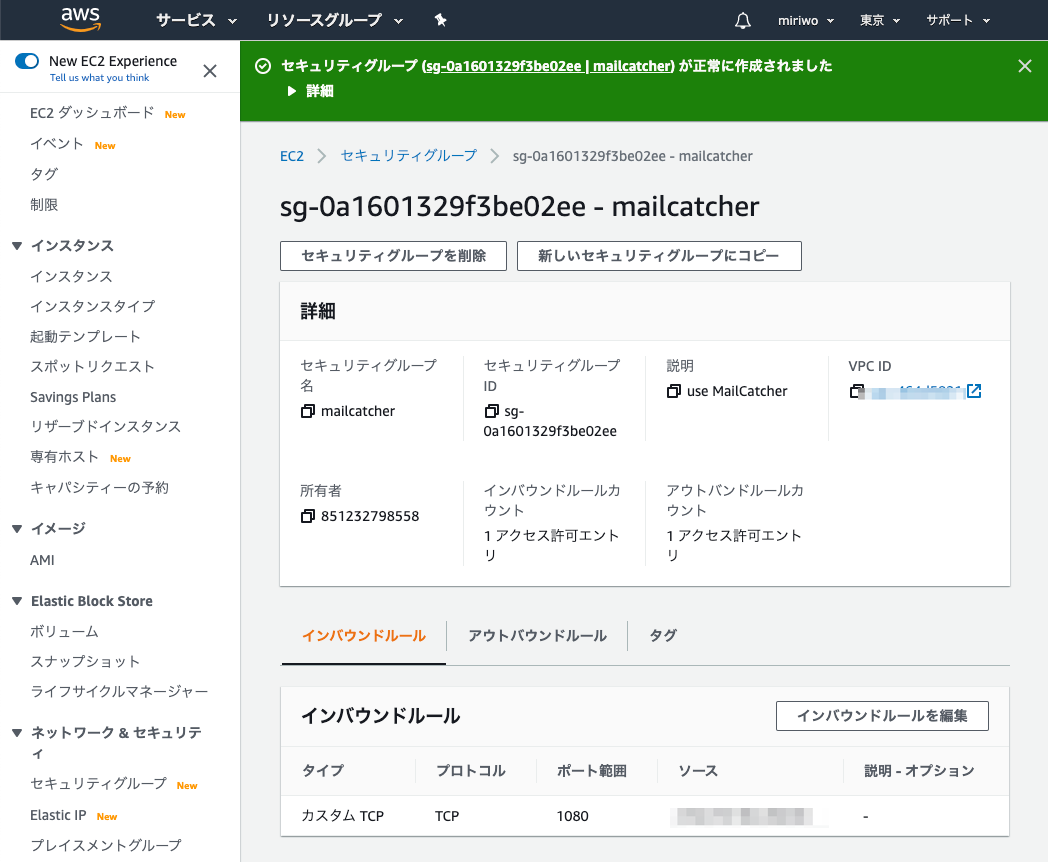
  8. セキュリティグループが作成されたことを確認する。

    EC2_Management_Console-9.png

  9. サイドバーにある「セキュリティグループ」をクリックする。

    ダッシュボード___EC2_Management_Console.png

  10. 今作成したセキュリティグループのName部分にマウスカーソルを当てた時に表示されるボタンをクリックし「mailcatcher」と入力して保存する。

    スクリーンショット_2020-08-27_17_32_25.png

  11. 一覧に下記にの様に表示されれば作業完了である。

    EC2_Management_Console.png

0
0
0

Register as a new user and use Qiita more conveniently

  1. You get articles that match your needs
  2. You can efficiently read back useful information
  3. You can use dark theme
What you can do with signing up
0
0

Delete article

Deleted articles cannot be recovered.

Draft of this article would be also deleted.

Are you sure you want to delete this article?