目的
- ファイル添付することのできるメール送信機能を作成する方法をまとめる
実施環境
- ハードウェア環境
| 項目 | 情報 |
|---|---|
| OS | macOS Catalina(10.15.5) |
| ハードウェア | MacBook Pro (13-inch, 2020, Four Thunderbolt 3 ports) |
| プロセッサ | 2 GHz クアッドコアIntel Core i5 |
| メモリ | 32 GB 3733 MHz LPDDR4 |
| グラフィックス | Intel Iris Plus Graphics 1536 MB |
- ソフトウェア環境
| 項目 | 情報 | 備考 |
|---|---|---|
| PHP バージョン | 7.4.11 | Homebrewを用いてこちらの方法で導入→Mac HomebrewでPHPをインストールする |
| Laravel バージョン | 6.X | commposerを用いてこちらの方法で導入→Mac Laravelの環境構築を行う |
| MySQLバージョン | 8.0.21 for osx10.15 on x86_64 | Homwbrewを用いてこちらの方法で導入→Mac HomebrewでMySQLをインストールする |
条件
- 下記記事の内容が完了していること。
情報
- 筆者はMacに直接作成したlaravelのローカル開発環境で本記事に記載したソースの検証を行っている。
- メール受信確認はMailCatcherを用いて行った。
- 各種アドレスは下記のように指定する。
- メール送信先アドレス: 「test@example」
- メール送信者アドレス: 「app@example」
- 特筆しない限り実行しているコマンドは前のコマンドと同じディレクトリで実行するものとする。
概要
- マイグレーションファイルの作成とマイグレート
- サービスクラスの作成と記載
- リポジトリクラスの作成と記載
- リポジトリのバインド
- コントローラクラスの記載
- メールクラスの記載
- バリデーションルールの追加
- 確認
詳細
-
モデルクラスとマイグレーションファイルの作成とマイグレート
-
アプリ名ディレクトリで下記コマンドを実行してモデルクラスのファイルとマイグレーションファイルを作成する。
$ php artisan make:model Models/MailAttachment -m -
作成されたマイグレーションファイルを開き下記の内容を追記する。
アプリ名ディレクトリ/app/Models/MailAttachment.php<?php namespace App\Models; use Illuminate\Database\Eloquent\Model; // 下記を追記 use Illuminate\Database\Eloquent\SoftDeletes; class MailAttachment extends Model { // 下記を追記 use SoftDeletes; } -
作成されたマイグレーションファイルを開き下記の内容を追記する。(マイグレーションファイル名は作成日時により異なる。)
アプリ名ディレクトリ/database/migrations/2021_01_12_091146_create_mail_attachments_table.php<?php use Illuminate\Database\Migrations\Migration; use Illuminate\Database\Schema\Blueprint; use Illuminate\Support\Facades\Schema; class CreateMailAttachmentsTable extends Migration { /** * Run the migrations. * * @return void */ public function up() { Schema::create('mail_attachments', function (Blueprint $table) { $table->bigIncrements('id'); // 下記を追記 $table->string('file_path')->comment('アップロードファイルパス'); $table->string('file_name')->comment('アップロードファイルのオリジナルファイル名'); $table->softDeletes(); // 上記までを追記 $table->timestamps(); }); } /** * Reverse the migrations. * * @return void */ public function down() { Schema::dropIfExists('mail_attachments'); } } -
下記コマンドを実行してマイグレートを実行する。
$ php artisan migrate
-
-
サービスクラスの作成と記載
-
下記コマンドを実行してサービスクラスのファイルを格納するディレクトリを作成する。
$ mkdir -p app/Services/ -
下記コマンドを実行してサービスクラスのファイルを作成して開く。
$ vi app/Services/MailAttachmentService.php -
開いたファイルに下記内容を追記して保存する。
アプリ名ディレクトリ/app/Services/MailAttachmentService.php<?php namespace App\Services; use App\Repositories\MailAttachmentRepositoryInterface as MailAttachmentRepository; use Illuminate\Support\Facades\Storage; class MailAttachmentService { /** * @var MailAttachmentRepositoryInterface */ private $mailAttachmentRepository; public function __construct(MailAttachmentRepository $mailAttachmentRepository) { $this->mailAttachmentRepository = $mailAttachmentRepository; } /** * メール添付ファイルのアップロード * * @param [type] $file * @return void */ public function saveFile($file) { $fileName = $file->getClientOriginalName(); $filePath = Storage::putFile('/mail_attachments', $file); $putFileInfo = [ 'fileName' => $fileName, 'filePath' => $filePath ]; return $this->mailAttachmentRepository->saveFile($putFileInfo); } }
-
-
リポジトリクラスの作成と記載
-
下記コマンドを実行していリポジトリクラスのファイルを格納するディレクトリを作成する。
$ mkdir -p app/Repositories -
下記コマンドを実行してリポジトリインタフェイスクラスのファイルを作成して開く。
$ vi app/Repositories/MailAttachmentRepositoryInterface.php -
開いたファイルに下記の内容を追記する。
アプリ名ディレクトリ/app/Repositories/MailAttachmentRepositoryInterface.php<?php namespace App\Repositories; interface MailAttachmentRepositoryInterface { /** * @param file $putFileInfo * @return fileName|filePath */ public function saveFile($putFileInfo); } -
下記コマンドを実行してリポジトリクラスのファイルを作成して開く。
$ vi app/Repositories/MailAttachmentRepository.php -
開いたファイルに下記の内容を追記する。
アプリ名ディレクトリ/app/Repositories/MailAttachmentRepository.php<?php namespace App\Repositories; use App\Models\MailAttachment; class MailAttachmentRepository implements MailAttachmentRepositoryInterface { /** * @var MailAttachment */ private $mailAttachment; public function __construct(MailAttachment $mailAttachment) { $this->mailAttachment = $mailAttachment; } /** * メール添付ファイル情報の保存 * * @param array $putFileInfo * @return array $putFileInfo */ public function saveFile($putFileInfo) { $fileInfo = $this->mailAttachment; $fileInfo->file_path = $putFileInfo['filePath']; $fileInfo->file_name = $putFileInfo['fileName']; $fileInfo->save(); return $putFileInfo; } }
-
-
リポジトリのバインド
-
下記コマンドを実行してリポジトリインタフェイスとリポジトリを紐付ける登録を行うファイルを開く。
$ vi app/Providers/AppServiceProvider.php -
開いたファイルに下記のように追記する。
アプリ名ディレクトリ/app/Providers/AppServiceProvider.php<?php namespace App\Providers; use Illuminate\Support\ServiceProvider; class AppServiceProvider extends ServiceProvider { /** * Register any application services. * * @return void */ public function register() { // 下記を追記 $this->app->bind( \App\Repositories\MailAttachmentRepositoryInterface::class, \App\Repositories\MailAttachmentRepository::class ); // 上記までを追記 } /** * Bootstrap any application services. * * @return void */ public function boot() { // } }
-
-
既存コントローラクラスの記載
-
NoticeController.phpを開き下記のように内容を追記する。
アプリ名ディレクトリ/app/Http/Controllers/NoticeController.php<?php namespace App\Http\Controllers; use Illuminate\Http\Request; use App\Http\Requests\MailRequest; use Illuminate\Support\Facades\Mail; use App\Mail\AppMail; // 下記を追記 use App\Services\MailAttachmentService; class NoticeController extends Controller { // 下記を追記 /** * @var MailAttachmentService */ private $mailAttachmentService; public function __construct(MailAttachmentService $mailAttachmentService) { $this->mailAttachmentService = $mailAttachmentService; } // 上記をまでを追記 public function index() { return view('notices.index'); } public function mailMake() { return view('notices.mails.make'); } public function mailConfirm(MailRequest $mailRequest) { $postData = $mailRequest->all(); // 下記を追記 if (isset($postData['file'])) { $postData['putFileInfo'] = $this->mailAttachmentService->saveFile($postData['file']); } // 上記までを追記 $viewData = [ 'postData' => $postData ]; return view('notices.mails.confirm', ['viewData' => $viewData]); } public function mailSend(Request $request) { $postData = $request->all(); Mail::to('test@example')->send(new AppMail($postData)); return redirect(route('notice.index')); } }
-
-
メールクラスの記載
-
AppMail.phpを開き下記のように内容を修正する。
アプリ名ディレクトリ/app/Mail/AppMail.php<?php namespace App\Mail; use Illuminate\Bus\Queueable; use Illuminate\Contracts\Queue\ShouldQueue; use Illuminate\Mail\Mailable; use Illuminate\Queue\SerializesModels; class AppMail extends Mailable { use Queueable, SerializesModels; /** * メール送信引数 * * @var array */ private $postData; /** * Create a new message instance. * * @return void */ public function __construct($postData) { $this->postData = $postData; } /** * Build the message. * * @return $this */ public function build() { // 下記を修正 if (isset($this->postData['filePath'])) { return $this->from('app@example') ->subject($this->postData['subject']) ->attachFromStorage($this->postData['filePath'], mb_encode_mimeheader($this->postData['fileName'])) ->text('mail_templates.text_mail', ['postData' => $this->postData]); } else { return $this->from('app@example') ->subject($this->postData['subject']) ->text('mail_templates.text_mail', ['postData' => $this->postData]); } // 上記までを修正 } }
-
-
バリデーションルールの追加
-
MailRequest.phpを開き下記のように内容を修正する。
アプリ名ディレクトリ/app/Http/Requests/MailRequest.php<?php namespace App\Http\Requests; use Illuminate\Foundation\Http\FormRequest; class MailRequest extends FormRequest { /** * Determine if the user is authorized to make this request. * * @return bool */ public function authorize() { return true; } /** * Get the validation rules that apply to the request. * * @return array */ public function rules() { return [ 'subject' => 'required', 'content' => 'required', // 下記を追記 'file' => 'file|max:10000|mimes:jpeg,png,jpg,pdf', ]; } /** * バリデーションエラーメッセージ * * @return array */ public function messages() { return [ 'subject.required' => 'メール件名を記入してください。', 'content.required' => 'メール本文を記入してください。', // 下記を追記 'file.max' => '10MBを超えるファイルは添付できません。', 'file.mimes' => '指定のファイル形式以外は添付できません。', // 上記までを追記 ]; } }
-
-
ビューの記載
-
make.blade.phpを開き下記のように内容を追記する。
アプリ名ディレクトリ/resources/views/notices/mails/make.blade.php@extends('layouts.app') @section('content') <form action="{{ route('notice.mail.confirm') }}" method="post" enctype="multipart/form-data"> @csrf <div class="subject"> <label>件名</label> <input type="text" name="subject" value="{{ old('subject') }}"> </div> @if ($errors->has('subject')) @foreach ($errors->get('subject') as $detail_errors) <p>{{$detail_errors}}</p> <br> @endforeach @endif <div class="content"> <label>内容</label> <textarea name="content" cols="30" rows="10">{{ old('content') }}</textarea> </div> @if ($errors->has('content')) @foreach ($errors->get('content') as $detail_errors) <p>{{$detail_errors}}</p> <br> @endforeach @endif {{-- 下記を追記 --}} <div class="file"> <label>添付ファイル</label> <input type="file" name="file"> </div> @if ($errors->has('file')) @foreach ($errors->get('file') as $detail_errors) <p>{{$detail_errors}}</p> <br> @endforeach @endif {{-- 上記までを追記 --}} <button type="submit">確認</button> </form> @endsection -
confirm.blade.phpを開き下記のように内容を追記する。
アプリ名ディレクトリ/resources/views/notices/mails/confirm.blade.php@extends('layouts.app') @section('content') <form action="{{ route('notice.mail.send') }}" method="post"> @csrf <div class="subject"> <label>件名</label> <p>{{ $viewData['postData']['subject'] }}</p> <input type="hidden" name="subject" value="{{ $viewData['postData']['subject'] }}"> </div> <div class="content"> <label>内容</label> <p>{!! nl2br(e($viewData['postData']['content'])) !!}</p> <input type="hidden" name="content" value="{{ $viewData['postData']['content'] }}"> </div> {{-- 下記を追記 --}} @if (isset($viewData['postData']['putFileInfo'])) <div class="file"> <label>添付ファイル</label> <p>{{ $viewData['postData']['putFileInfo']['fileName'] }}</p> <input type="hidden" name="filePath" value="{{ $viewData['postData']['putFileInfo']['filePath'] }}"> <input type="hidden" name="fileName" value="{{ $viewData['postData']['putFileInfo']['fileName'] }}"> </div> @endif {{-- 上までを追記 --}} <button type="submit">送信</button> </form> @endsection
-
-
確認
-
2 MB以下の「jpeg」「jpg」「png」「pdf」ファイルを用意する。(バリデーションでは10 MB以下に設定しているがphp.iniの設定で2 MB以下しかアップロードできない。こちらの方法でアップロード条件を変更する事ができる。→Laravel ファイルアップロード時にバリデーションで「The file failed to upload.」と表示される)
-
下記コマンドを実行してローカルサーバを起動する。
$ php artisan serve -
下記にアクセスする。
-
「件名」「内容」を入力後に「ファイルを選択」をクリックして先に用意したファイルを選択し「確認」をクリックする。

-
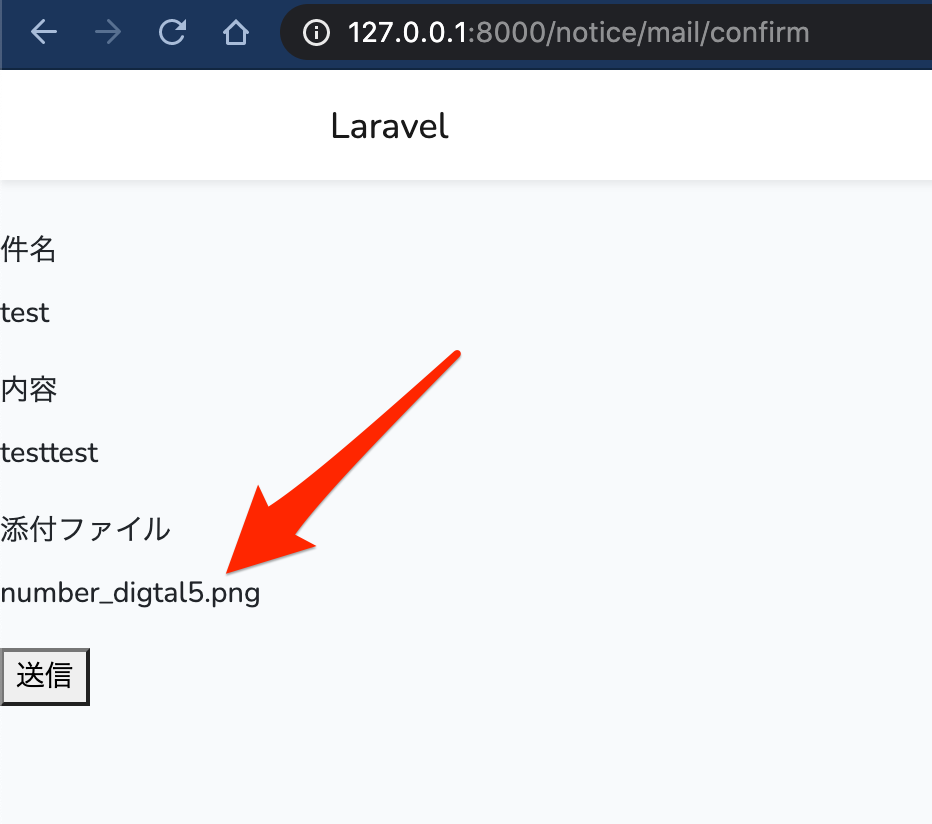
メール送信確認画面で件名と内容に加えて添付するファイルのファイル名が表示されていることを確認し「送信」をクリックする。
-
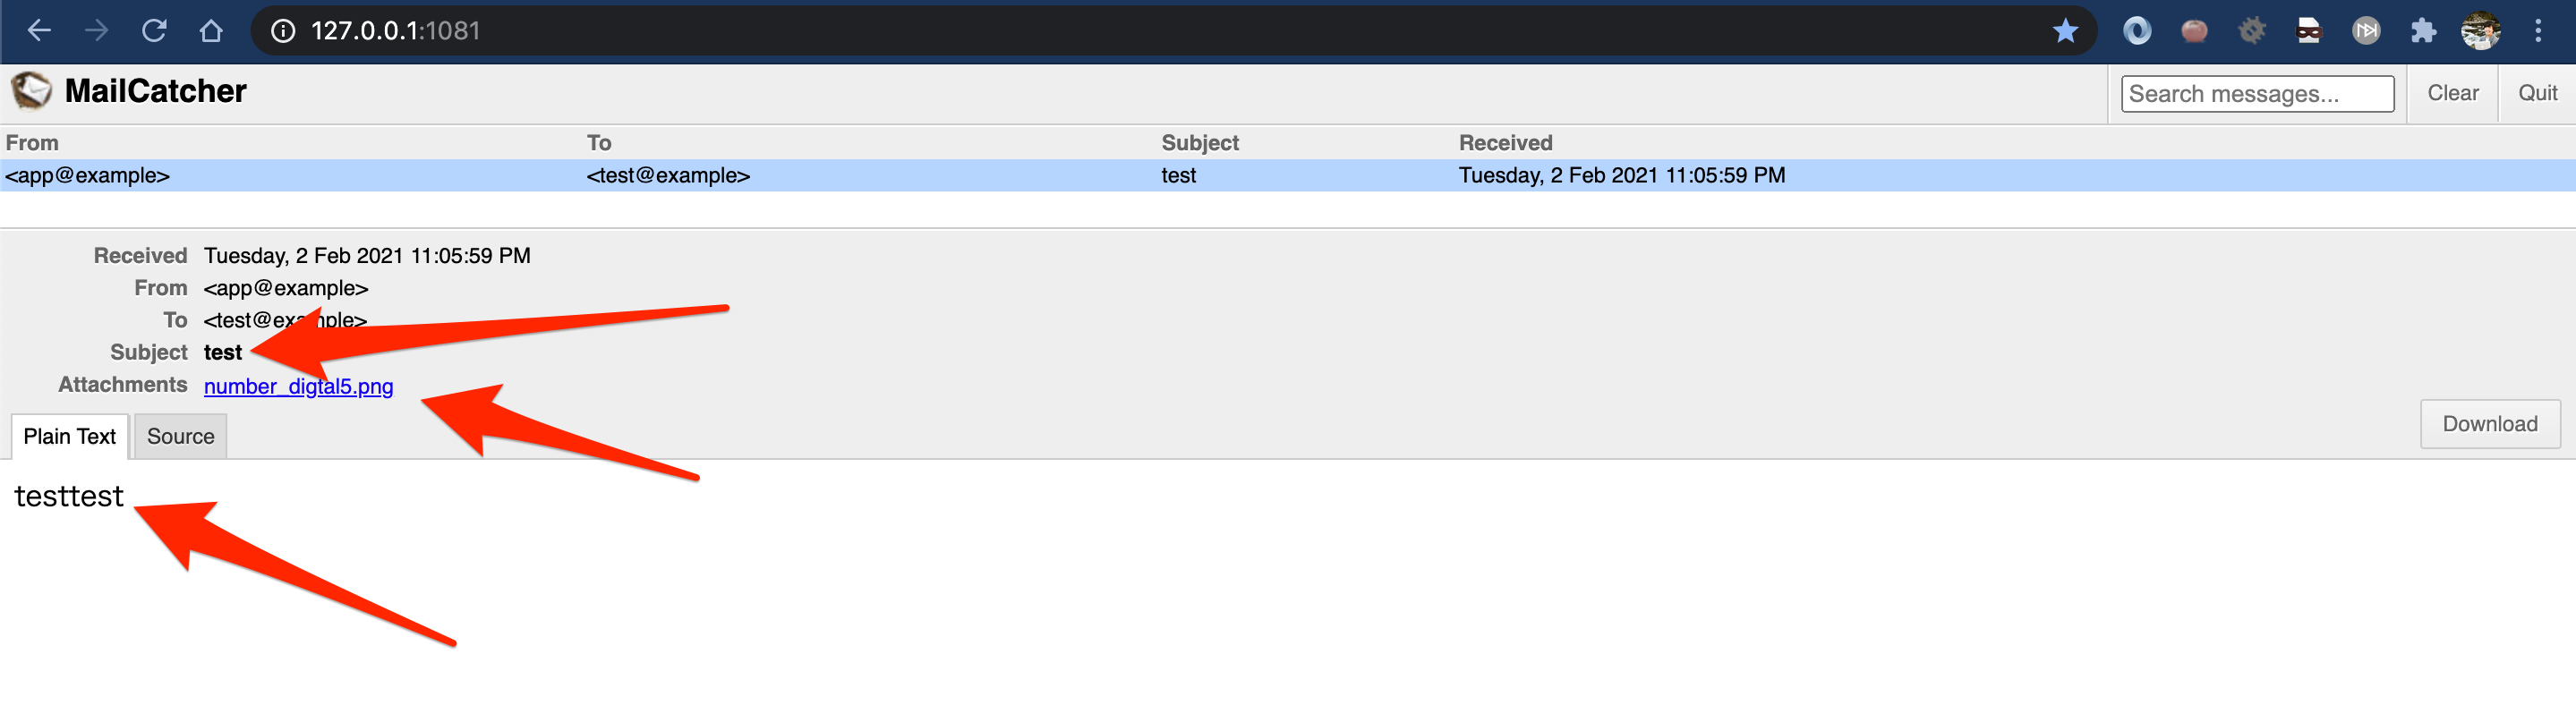
件名と内容と添付ファイルが正しく受信されることを確認する。
-