0. はじめに
X(twitter)の自動投稿用に、windowsのデスクトップPCで定期実行をさせた際の備忘録です。
環境整備から、APIキーの取得、windowsでの定期実行の流れまで解説していきます。
想定読者
- windowsPCしか持っていないが、botづくりをしたい方
- Macやlinuxで構築したbotのコードをdockerにして、windowsPCへ移管したい方
- WindowsPCでdockerコマンドの定期実行を実施したい方
筆者環境
- window11 Home
- Git
- Docker Desktop for Windows
1. Docker環境の構築
DockerDesktopのインストール
Windows PCでdocker環境を使用するため、こちらからダウンロードください。
※Dockerをwindowsに入れるところでつまずいた方は、下記リンクをご参考までに、
- https://qiita.com/gahoh/items/7b21377b5c9e3ffddf4a
- https://qiita.com/zembutsu/items/a98f6f25ef47c04893b3
2. tweepy用のdocker環境用コードのclone
こちらにtweepy を使用して、localに保存された画像+テキストをつぶやくコードを作成しました。
git clone https://github.com/milky1210/docker_tweepy
にてご利用ください。
(もしよろしければ、モチベーションにつながるので、![]() をいただけると幸いです)
をいただけると幸いです)
各コードの解説
コードの内容に興味のない方は読み飛ばしてください。
FROM python:3
USER root

COPY requirements.txt .
RUN pip install --upgrade pip
RUN pip install -r requirements.txt
python3をベースに必要なライブラリをrequirements.txtに記載してimportしていっています。
opencv-python-headless==4.10.0.84
tweepy==4.14.0
tweepyを執筆当時最新のものを利用しています。
画像呼び出し用に、opencvを利用しています。
services:
  docker_tweepy:
    restart: always
    build: .
    container_name: 'docker_tweepy'
    working_dir: '/root/app'
    tty: true
    volumes:
      - ./app:/root/app
docker環境のコンテナの構成になります。app以下のフォルダをマウントしており、起動後すぐに終了しないよう、ttyをtrueにし、コード編集があった際に自動で再起動をかけるために、restartをalwaysにしています。
import tweepy

import config


def shorten_text(txt):
    if len(txt) > 135:
        return txt[:135] + "..."
    return txt


def tweet_img(filename, txt):
    CK = config.CONSUMER_KEY
    CS = config.CONSUMER_SECRET
    AT = config.ACCESS_TOKEN
    ATS = config.ACCESS_TOKEN_SECRET
    auth = tweepy.OAuthHandler(CK, CS)
    auth.set_access_token(AT, ATS)
    api = tweepy.API(auth)
    client = tweepy.Client(
        consumer_key=CK, consumer_secret=CS, access_token=AT, access_token_secret=ATS
    )
    media = api.media_upload(filename=filename)
    client.create_tweet(text=shorten_text(txt), media_ids=[media.media_id])


def tweet_txt(txt):
    CK = config.CONSUMER_KEY
    CS = config.CONSUMER_SECRET
    AT = config.ACCESS_TOKEN
    ATS = config.ACCESS_TOKEN_SECRET
    client = tweepy.Client(
        consumer_key=CK, consumer_secret=CS, access_token=AT, access_token_secret=ATS
    )

    client.create_tweet(text=shorten_text(txt))


if __name__ == "__main__":
    pass
    # 検証用スクリプト
    # tweet_txt('tweepyからこんにちは')
こちらが、APIキーを用いて、画像+テキストをつぶやく関数と、テキスト単体をつぶやく関数になります。
画像をつぶやく際に140時の制限があるため、入力を140字以内にするshorten_textという関数も作成しました。
from datetime import datetime, timedelta, timezone
from pathlib import Path

import tweepy_utils

# 日本標準時 (JST) タイムゾーンを定義
JST = timezone(timedelta(hours=9))

# ディレクトリのパス
tweet_data_dir = Path("tweet_data")

# 現在の日付をJSTで取得
current_date = datetime.now(JST)

# 午後かどうかを判定
is_pm = current_date.hour >= 12

# パスを生成
if is_pm:
    img_path = tweet_data_dir / current_date.strftime("%Y-%m-%d") / "pm.jpeg"
    txt_path = tweet_data_dir / current_date.strftime("%Y-%m-%d") / "pm.txt"
else:
    img_path = tweet_data_dir / current_date.strftime("%Y-%m-%d") / "am.jpeg"
    txt_path = tweet_data_dir / current_date.strftime("%Y-%m-%d") / "am.txt"


# ファイルを読み込み、内容を文字列として格納
if not txt_path.exists():
    print(f"Error(404): {txt_path} is not found.")
if not txt_path.exists():
    print(f"Error(404): {img_path} is not found.")
with txt_path.open("r", encoding="utf-8") as file:
    tweet_txt = file.read()

tweepy_utils.tweet_img(img_path, tweet_txt)
main.pyはツイートする内容などにかかわる部分で、botの運用方針に沿って画像とテキストを読みだしたり、逐次生成する良いと思います。
今回の実装では、作成済みのデータを読みだして、ツイートするという実装になっており、実行時の時刻を取得し、その時刻に基づいた参照先から画像とテキストを読み込んで、ツイートするコードになっております。
3. twitterのAPIキーの取得
以下参考リンクを張り付けておきます。
- https://qiita.com/neru-dev/items/857cc27fd69411496388
- https://qiita.com/Naoya_pro/items/f1bdba5260bda054f6d2
以下のような config.pyをapp/に置くことで動作いたします。
CONSUMER_KEY = "ABCDEFGHIJKLMNOP123456789"
CONSUMER_SECRET = "ABCDEFGHIJKLMNOPQRSTUVWXYZ0123456789abcdefghijklmn"
ACCESS_TOKEN = "ABCDEFGHIJKLMNOPQRSTUVWXYZ0123456789abcdefghijklmn"
ACCESS_TOKEN_SECRET = "ABCDEFGHIJKLMNOPQRSTUVWXYZ0123456789abcdefghi"
こちらのAPIキーはネット上に誤ってアップしないように細心の注意を図ってください!!
4. データの格納
筆者は、午前・午後それぞれ一回ずつ毎日つぶやくbotを制作しているため、下記のようにtweet用のデータを用意しました。(このデータ形式にmain.pyは準拠しています。)
- app
- main.py
- tweeter.py
- config.py
- tweet_data
- 2024-09-09
- am.txt
- am.jpeg
- pm.txt
- pm.jpeg
- 2024-09-09
ここまで完了したら、コマンドプロンプトにて、下記を実行して、画像がツイートされるかを確認しましょう。
docker compose up docker_tweepy -d
docker compose exec docker_tweepy python main.py
5. Windowsのタスクスケジューラを用いた定期実行
Windowsのタスクスケジューラーに、dockerを立ち上げさせて、docker環境内でpython main.pyを実行し、dockerを環境を閉じて終了するというのが目標になります。
タスクスケジューラーに複数行のコマンドを実行させるために、PSファイルという実行命令を羅列させたファイル(exec.ps1)を作成します。
cd C:(docker_tweepyまでの絶対パス)
docker compose up docker_tweepy -d
docker compose exec docker_tweepy python main.py
docker compose down docker_tweepy
作成したexec.ps1が正しく動作するかをコマンドラインで確認するには、エクスプローラーにてexec.ps1を右クリックし、powershellで実行を選択することで、powershellが立ち上がり、動作を検証できます。
動作が検証できれば、このファイルをタスクスケジューラーに登録するのみです。
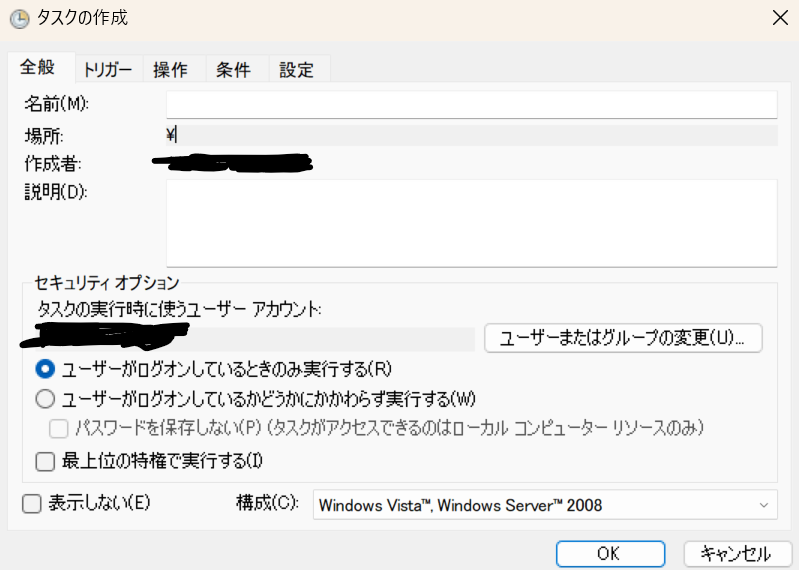
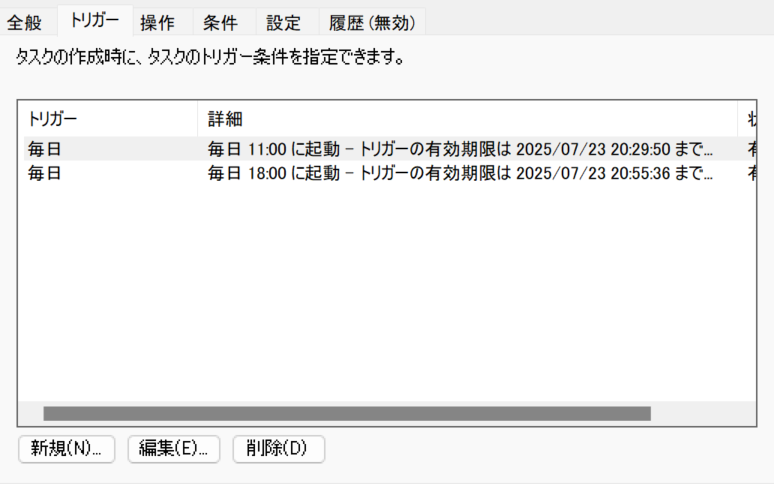
タスクスケジューラーへの登録手順は下記のようになります。
-
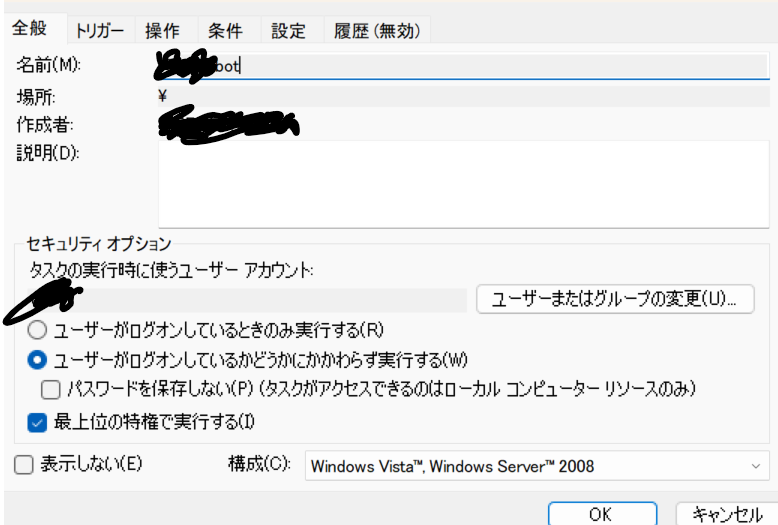
[全般タブ]管理しやすい名前を設定し、ログオンしているかどうかにかかわらず実行にcheck・最上位の特権で実行するにもcheck

-
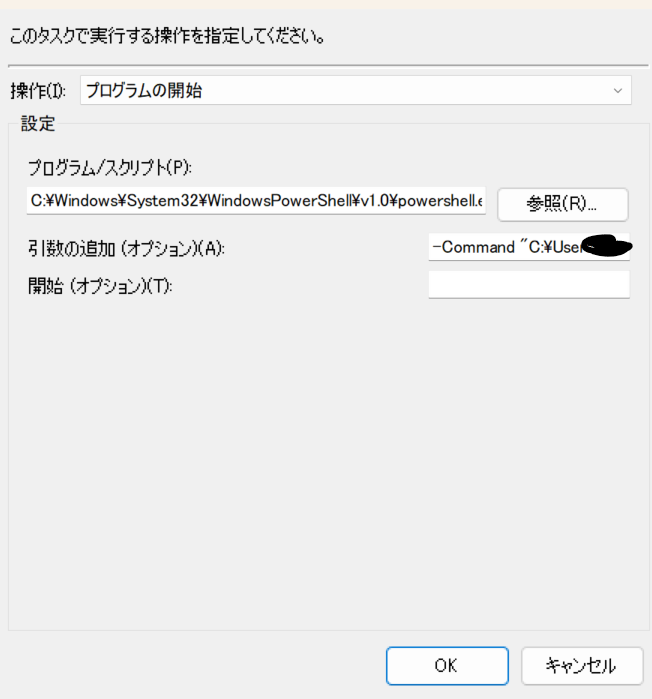
[操作タブ]powershellで、exec.ps1を実行する旨を記載します。
新規をクリック後、プログラム/スクリプト(P)の欄に、powershell.exeの絶対パスを記載します。
(筆者環境では、下記にありました)
C:\Windows\System32\WindowsPowerShell\v1.0\powershell.exe
その後、引数の追加にて、下記のように、ps1ファイルのパスを与えます。
-Command "C¥(exec.ps1への絶対パス)"
条件・設定のタブについては、初期設定のままで構いません。
設定を保存して、時間通りにbotが動作するかを確認しましょう!
6. 実施例
筆者の環境では、下記アカウントにて、生成AIが生成したラーメンの食レポを投稿するbotを作成しています。
https://x.com/ramen_ai_gen
7. おわりに
Dockerを用いて、WindowsのデスクトップPCをサーバーとして運用する試みを行い、タスクスケジューラを用いて、twitterのAPIを定期実行するスクリプトを紹介しました!
皆様の遊休機を活用した、個人用サーバーを立ちあげの助けになればと思います。


