Payment IntentとElementsを使った記事に引き続き、Stripe CheckoutでStripeによって生成されるページをWebViewで使用してみます。
Checkoutページに遷移させるにはStripe.jsのredirectToCheckoutメソッドを使用しますが、その際、skuを指定する場合(Checkout クライアント専用組み込み)と、サーバー側でセッションを作成してからsessionIdを指定する場合と2種類の方法があります。
クライアント専用組み込みの場合はサーバー側の実装が不要ですが、リダイレクト元に関して設定の必要と制限がある*ため、この記事では後者の方法をとります。
[2020/1/16追記]クライアント専用組み込みも使ってみました
*URLスキームがhttp(s)に限られるので、WebView上の非ホスティングのHTMLから直接リダイレクトできない。
1. サーバーサイドの準備
PaymentIntentの時と同じように、今度はセッションを作成してアプリに返すAPIを作成します。
セッションの内容は適当に入れているので、用途に合わせて適宜変更してください。
const functions = require('firebase-functions');

const app = require('express')();
const stripe = require('stripe')('sk_test_...'); // 秘密鍵
const cors = require('cors');
const bodyParser = require('body-parser');

app.use(require('body-parser').text());
app.use(cors());
app.use(bodyParser.urlencoded({ extended: true }));
app.use(bodyParser.json());

const SUCCESS_URL = 'https://.../loading.html#succcess'; // 成功時のコールバックURL
const CANCEL_URL = 'https://.../loading.html#canceled'; // キャンセル時のコールバックURL

app.post('/createSession', async (req, res) => {
  const { amount, currency, locale } = req.body;
  const result = await stripe.checkout.sessions.create({
    success_url: SUCCESS_URL,
    cancel_url: CANCEL_URL,
    locale,
    payment_method_types: ['card'],
    line_items: [
      {
        name: 'test item',
        description: 'test description',
        amount,
        currency,
        quantity: 1
      }
    ]
  });
  res.json(result);
});

exports.api = functions.https.onRequest(app);
上記のように、Checkoutの際はsuccess_urlとcancel_urlとしてコールバックURLを指定する必要があります。
最初はこれらのリダイレクト先をどこにもホスティングせずWebViewでなんとかしようとしたのですが思うように制御できなかったため、とりあえずローディング画面のようなページだけはどこかに用意することにしました。
成功/キャンセルページを作成
See the Pen dyPKpXg by mildsummer (@mildsummer) on CodePen.
ほとんど見えないページなのでなんでもよいです。
このような感じで何もしないページをどこかにホスティングして、先ほどのAPIでURLを返すようにします。
2. アプリ側を作成
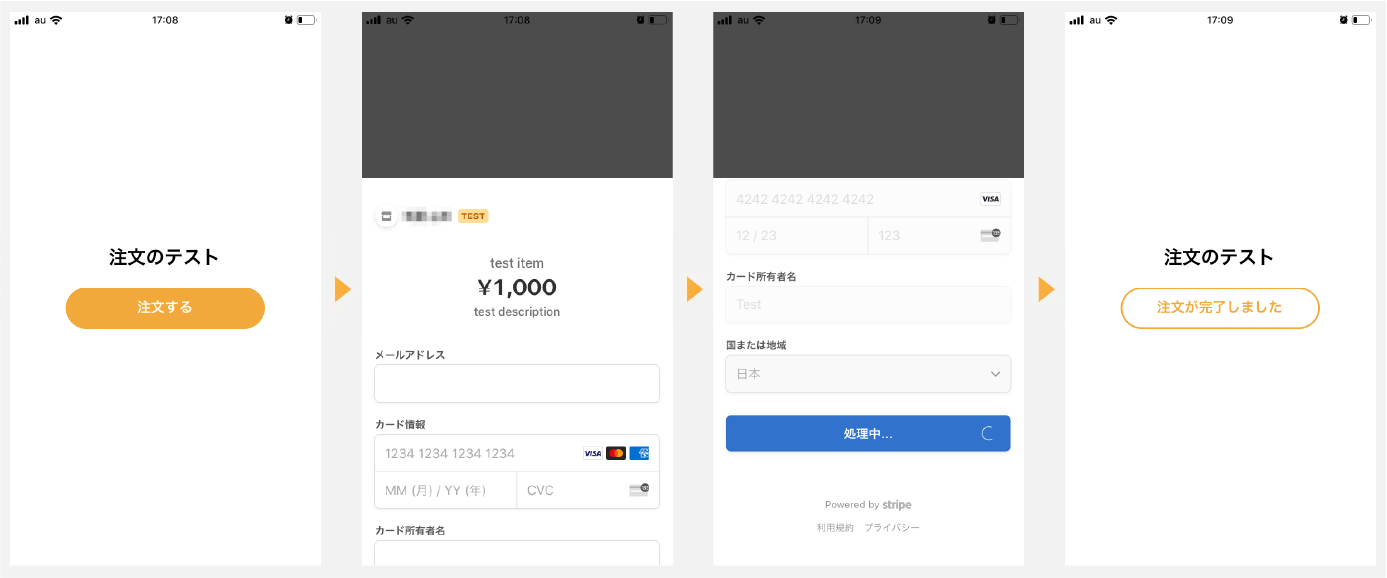
完成イメージ
ボタンを押したらモーダル内のWebViewでCheckoutページを表示するような形にします。

WebViewを使ったコンポーネントを作成
import React, { Component } from 'react';
import { View, ActivityIndicator } from 'react-native';
import * as PropTypes from 'prop-types';
import { WebView } from 'react-native-webview';

/**
 * Stripe決済をWebViewを介して行うコンポーネント
 */
class StripeCheckout extends Component {
  constructor(props) {
    super(props);
    this.state = {
      ready: false,
      session: null
    };
    this.init();
  }

  /**
   * セッションを作成
   * @returns {Promise<void>}
   */
  init = async () => {
    const { amount, currency, locale } = this.props;
    const response = await fetch('https://[リージョン]-[プロジェクトID].cloudfunctions.net/api/createSession', {
      method: 'POST',
      headers: {
        'Content-type': 'application/json'
      },
      body: JSON.stringify({
        amount,
        currency,
        locale
      })
    });
    const session = await response.json();
    this.setState({ session });
  };

  /**
   * WebViewからのデータを処理
   * @param event
   */
  onMessage = (event) => {
    const json = JSON.parse(event.nativeEvent.data);
    console.log(json);
  };

  /**
   * ページ読み込み完了時
   */
  onLoadEnd = (event) => {
    const { session } = this.state;
    const { url } = event.nativeEvent;
    const { onSucceeded, onCanceled } = this.props;
    if (url === session.success_url) {
      onSucceeded();
    } else if (url === session.cancel_url) {
      onCanceled();
    } else if (url !== 'about:blank') {
      this.setState({ ready: true });
    }
  };

  render() {
    const { ready, session } = this.state;
    const {
      publicKey,
      style
    } = this.props;
    const html = session && `
      <!DOCTYPE html>
      <html>
        <head>
        </head>
        <body>
          <script src="https://js.stripe.com/v3/"></script>
          <script>
            var stripe = Stripe('${publicKey}');
            try {
              stripe
                .redirectToCheckout({ sessionId: '${session.id}' })
                .then(function(result) {
                  postMessage(result.error.message);
                }).catch(function(e) {
                  postMessage(e.message);
                });
            } catch (e) {
              postMessage(e.message);
            }

            /**
             * アプリ側にデータを送る
             * @param data
             */
            function postMessage(data) {
              window.ReactNativeWebView.postMessage(JSON.stringify(data));
            }
          </script>
        </body>
      </html>
    `;
    return (
      <View style={style}>
        {!ready && <ActivityIndicator style={{ width: '100%', height: '100%' }}/>}
        {session && (
          <WebView
            onLoadEnd={this.onLoadEnd}
            javaScriptEnabled={true}
            source={{ html }}
            onMessage={this.onMessage}
            style={{
              width: '100%',
              height: '100%'
            }}
          />
        )}
      </View>
    );
  }
}

StripeCheckout.propTypes = {
  publicKey: PropTypes.string.isRequired,
  amount: PropTypes.number.isRequired,
  currency: PropTypes.string,
  locale: PropTypes.string,
  style: PropTypes.object,
  onSucceeded: PropTypes.func.isRequired,
  onCanceled: PropTypes.func.isRequired
};

StripeCheckout.defaultProps = {
  currency: 'JPY',
  locale: 'ja',
  style: null
};

export default StripeCheckout;
ActivityIndicatorなど適宜表示しつつ、コンポーネント初期化時に先ほどのAPIでセッションを作成し、その後WebViewを表示。
WebViewのロードイベントをハンドリングすることでどのページが読み込まれているかどうかを判断して、コールバックURLに遷移した時にprops経由で親要素に通知します。
画面を作成
上記のコンポーネントをモーダル内に表示して、支払いの流れを作ります。
モーダルはreact-native-modalを使用します。
import React, { Component } from 'react';
import { StyleSheet, Text, TouchableOpacity, View } from 'react-native';
import Modal from 'react-native-modal';
import StripeCheckout from './StripeCheckout';

export default class App extends Component {
  constructor(props) {
    super(props);
    this.state = {
      isCheckout: false,
      succeeded: false
    };
  }

  /**
   * Checkoutモーダルを表示
   */
  checkout = () => {
    this.setState({ isCheckout: true });
  };

  /**
   * Checkoutをキャンセル
   */
  cancel = () => {
    this.setState({ isCheckout: false });
  };

  /**
   * Checkout成功
   */
  onSucceeded = () => {
    this.setState({ isCheckout: false, succeeded: true });
  };

  render() {
    const { isCheckout, succeeded } = this.state;
    return (
      <View style={styles.container}>
        <Text style={styles.title}>注文のテスト</Text>
        <TouchableOpacity onPress={this.checkout} disabled={succeeded}>
          <View
            style={[
              styles.button,
              succeeded && styles.succeededButton
            ]}
          >
            <Text
              style={[styles.buttonText, succeeded && styles.succeededButtonText]}
            >
              {succeeded ? '注文が完了しました' : '注文する'}
            </Text>
          </View>
        </TouchableOpacity>
        <Modal
          isVisible={isCheckout}
          style={styles.modal}
          onBackButtonPress={this.cancel}
          onBackdropPress={this.cancel}
        >
          <StripeCheckout
            style={styles.modalInner}
            amount={1000}
            publicKey="pk_test_..." // 公開鍵
            onSucceeded={this.onSucceeded}
            onCanceled={this.cancel}
          />
        </Modal>
      </View>
    );
  }
}

const styles = StyleSheet.create({
  container: {
    flex: 1,
    height: '100%',
    width: '100%',
    backgroundColor: '#ffffff',
    alignItems: 'center',
    justifyContent: 'center'
  },
  title: {
    position: 'relative',
    fontSize: 24,
    fontWeight: 'bold',
    marginBottom: 24
  },
  modal: {
    justifyContent: 'flex-end',
    margin: 0
  },
  modalInner: {
    height: '70%',
    backgroundColor: '#ffffff'
  },
  button: {
    position: 'relative',
    width: 240,
    height: 50,
    borderRadius: 25,
    justifyContent: 'center',
    alignItems: 'center',
    backgroundColor: 'orange'
  },
  succeededButton: {
    borderColor: 'orange',
    borderWidth: 2,
    backgroundColor: 'transparent'
  },
  buttonText: {
    fontSize: 18,
    fontWeight: 'bold',
    color: '#ffffff'
  },
  succeededButtonText: {
    color: 'orange'
  }
});
これで完成です。ダッシュボードでも決済が確認できました。
クライアント専用組み込みのパターン
クライアント専用組み込みのパターンも試してみました。
どちらにしろ何かしらHTMLをホスティングする必要はあったため、こちらの方がサーバー側のソースを用意する必要が無い分簡単です。
ただしskuを指定することになるため、金額を動的に変更することはできません(商品個数は変更できます)。
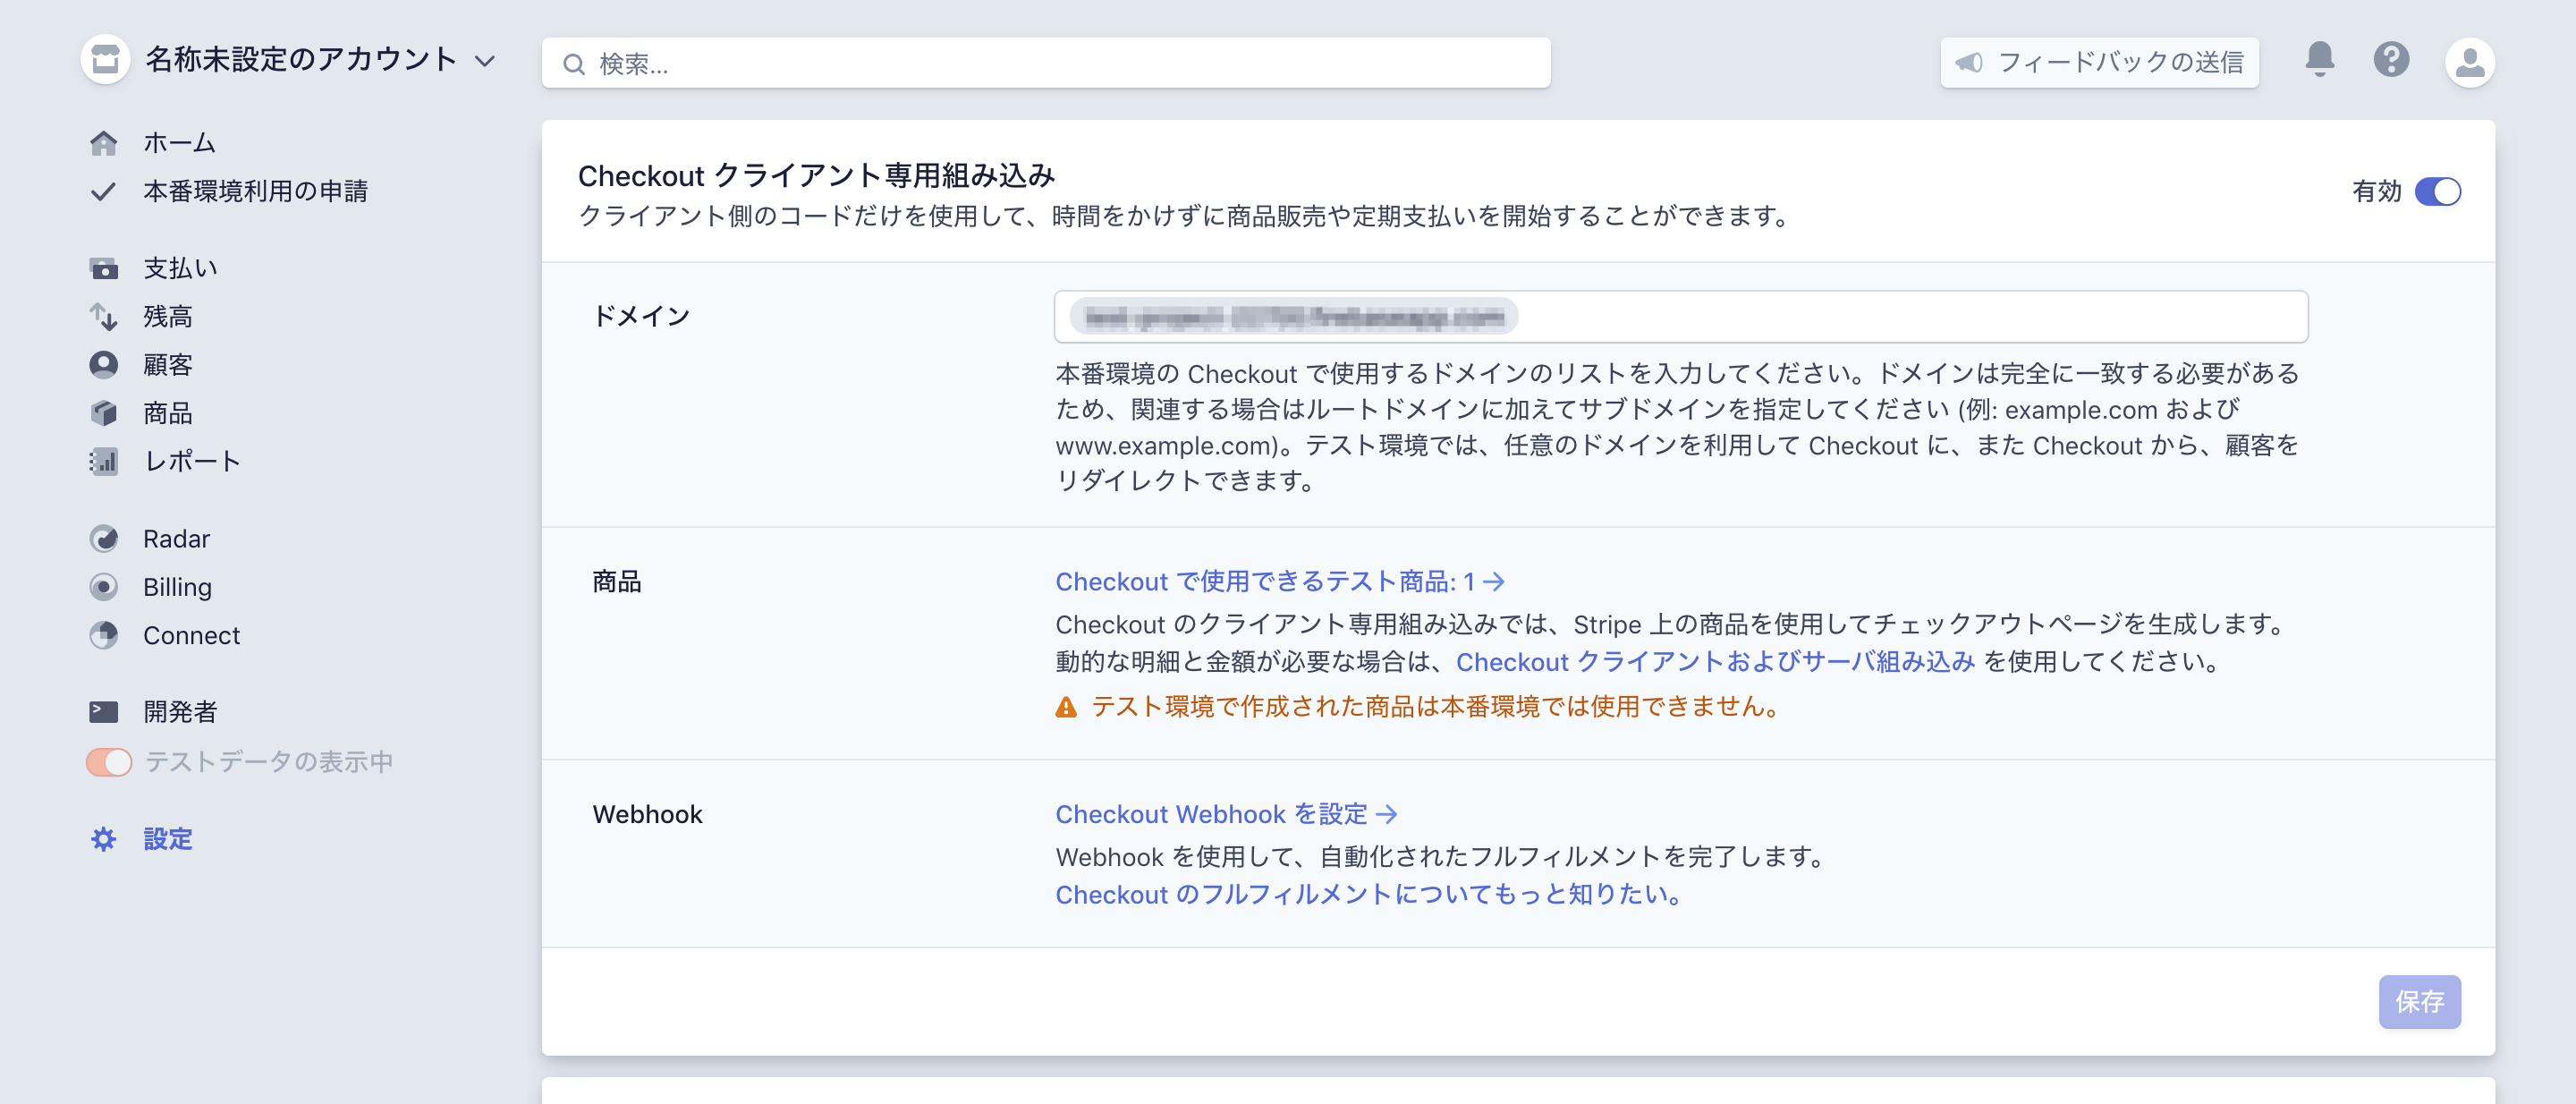
1. Stripe側の設定
「Checkout クライアント専用組み込み」を有効にし、本番用にリダイレクト前後のドメインを追加します。

2. アプリ側
コンポーネントを作成
直接HTMLを生成するのではなく、先ほど用意したHTMLのURLを指定してWebViewで表示します。
Stripe.jsはHTMLの方で読み込んでもいいのですが、できる限りアプリ側に処理を持たせるという意味で、WebViewの外でfetchしinjectします。
import React, { Component } from 'react';
import { View, ActivityIndicator } from 'react-native';
import * as PropTypes from 'prop-types';
import { WebView } from 'react-native-webview';

const URL = 'https://.../loading.html'; // リダイレクト前後に用意するURL
const SUCCESS_URL = `${URL}#success`;
const CANCEL_URL = `${URL}#cancel`;
const STRIPE_JS_URL = 'https://js.stripe.com/v3/';

let stripeJavaScript = null;

/**
 * Stripe決済をWebViewを介して行うコンポーネント
 */
class StripeClientCheckout extends Component {
  state = {
    ready: false
  };

  /**
   * Stripe.jsを読み込む
   * @returns {Promise<string>}
   */
  getStripeJs = async () => {
    if (stripeJavaScript) {
      return stripeJavaScript;
    } else {
      const response = await fetch(STRIPE_JS_URL);
      return await response.text();
    }
  };

  /**
   * JSをinjectする
   * @returns {Promise<void>}
   */
  init = async () => {
    const stripeJS = await this.getStripeJs();
    this.webview.injectJavaScript(stripeJS);
    const {
      publicKey,
      locale,
      sku,
      quantity
    } = this.props;
    const javascript = `
      try {
        var stripe = Stripe('${publicKey}');
        stripe
          .redirectToCheckout({
            items: [{ sku: '${sku}', quantity: ${quantity} }],
            successUrl: '${SUCCESS_URL}',
            cancelUrl: '${CANCEL_URL}',
            locale: '${locale}'
          })
          .then(function(result) {
            postMessage(result.error.message);
          }).catch(function(e) {
            postMessage(e.message);
          });
      } catch (e) {
        postMessage(e.message);
      }

      /**
       * アプリ側にデータを送る
       * @param data
       */
      function postMessage(data) {
        window.ReactNativeWebView.postMessage(JSON.stringify(data));
      }
    `;
    this.webview.injectJavaScript(javascript);
  };

  /**
   * WebViewからのデータを処理
   * @param event
   */
  onMessage = (event) => {
    const json = JSON.parse(event.nativeEvent.data);
    console.log(json);
  };

  /**
   * ページ読み込み完了時
   */
  onLoadEnd = (event) => {
    const { url } = event.nativeEvent;
    const { onSucceeded, onCanceled } = this.props;
    if (url === URL) {
      this.init();
    } else if (url === SUCCESS_URL) {
      onSucceeded();
    } else if (url === CANCEL_URL) {
      onCanceled();
    } else if (url !== 'about:blank') {
      this.setState({ ready: true });
    }
  };

  render() {
    const { ready } = this.state;
    const { style } = this.props;
    return (
      <View style={style}>
        {!ready && <ActivityIndicator style={{ width: '100%', height: '100%' }}/>}
        <WebView
          ref={(ref) => {
            if (ref) {
              this.webview = ref;
            }
          }}
          onLoadEnd={this.onLoadEnd}
          javaScriptEnabled={true}
          source={{ uri: URL }}
          onMessage={this.onMessage}
          style={{
            width: '100%',
            height: '100%'
          }}
        />
      </View>
    );
  }
}

StripeClientCheckout.propTypes = {
  publicKey: PropTypes.string.isRequired,
  sku: PropTypes.string.isRequired,
  quantity: PropTypes.number,
  locale: PropTypes.string,
  style: PropTypes.object,
  onSucceeded: PropTypes.func.isRequired,
  onCanceled: PropTypes.func.isRequired
};

StripeClientCheckout.defaultProps = {
  locale: 'ja',
  quantity: 1,
  style: null
};

export default StripeClientCheckout;
使用例
<StripeCheckout
  style={styles.modalInner}
  sku="sku_..." // skuを指定
  quantity={2} // 数量
  publicKey="pk_test_..." // 公開鍵
  onSucceeded={this.onSucceeded}
  onCanceled={this.cancel}
/>
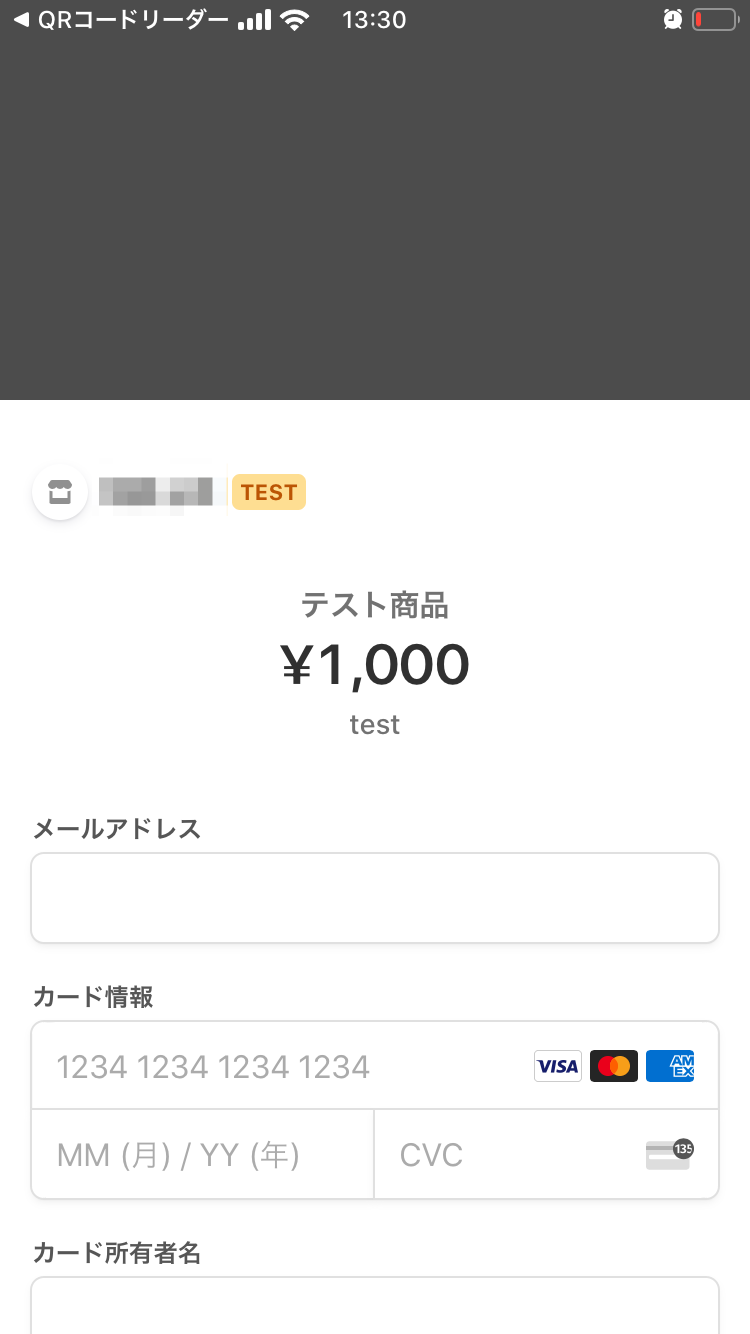
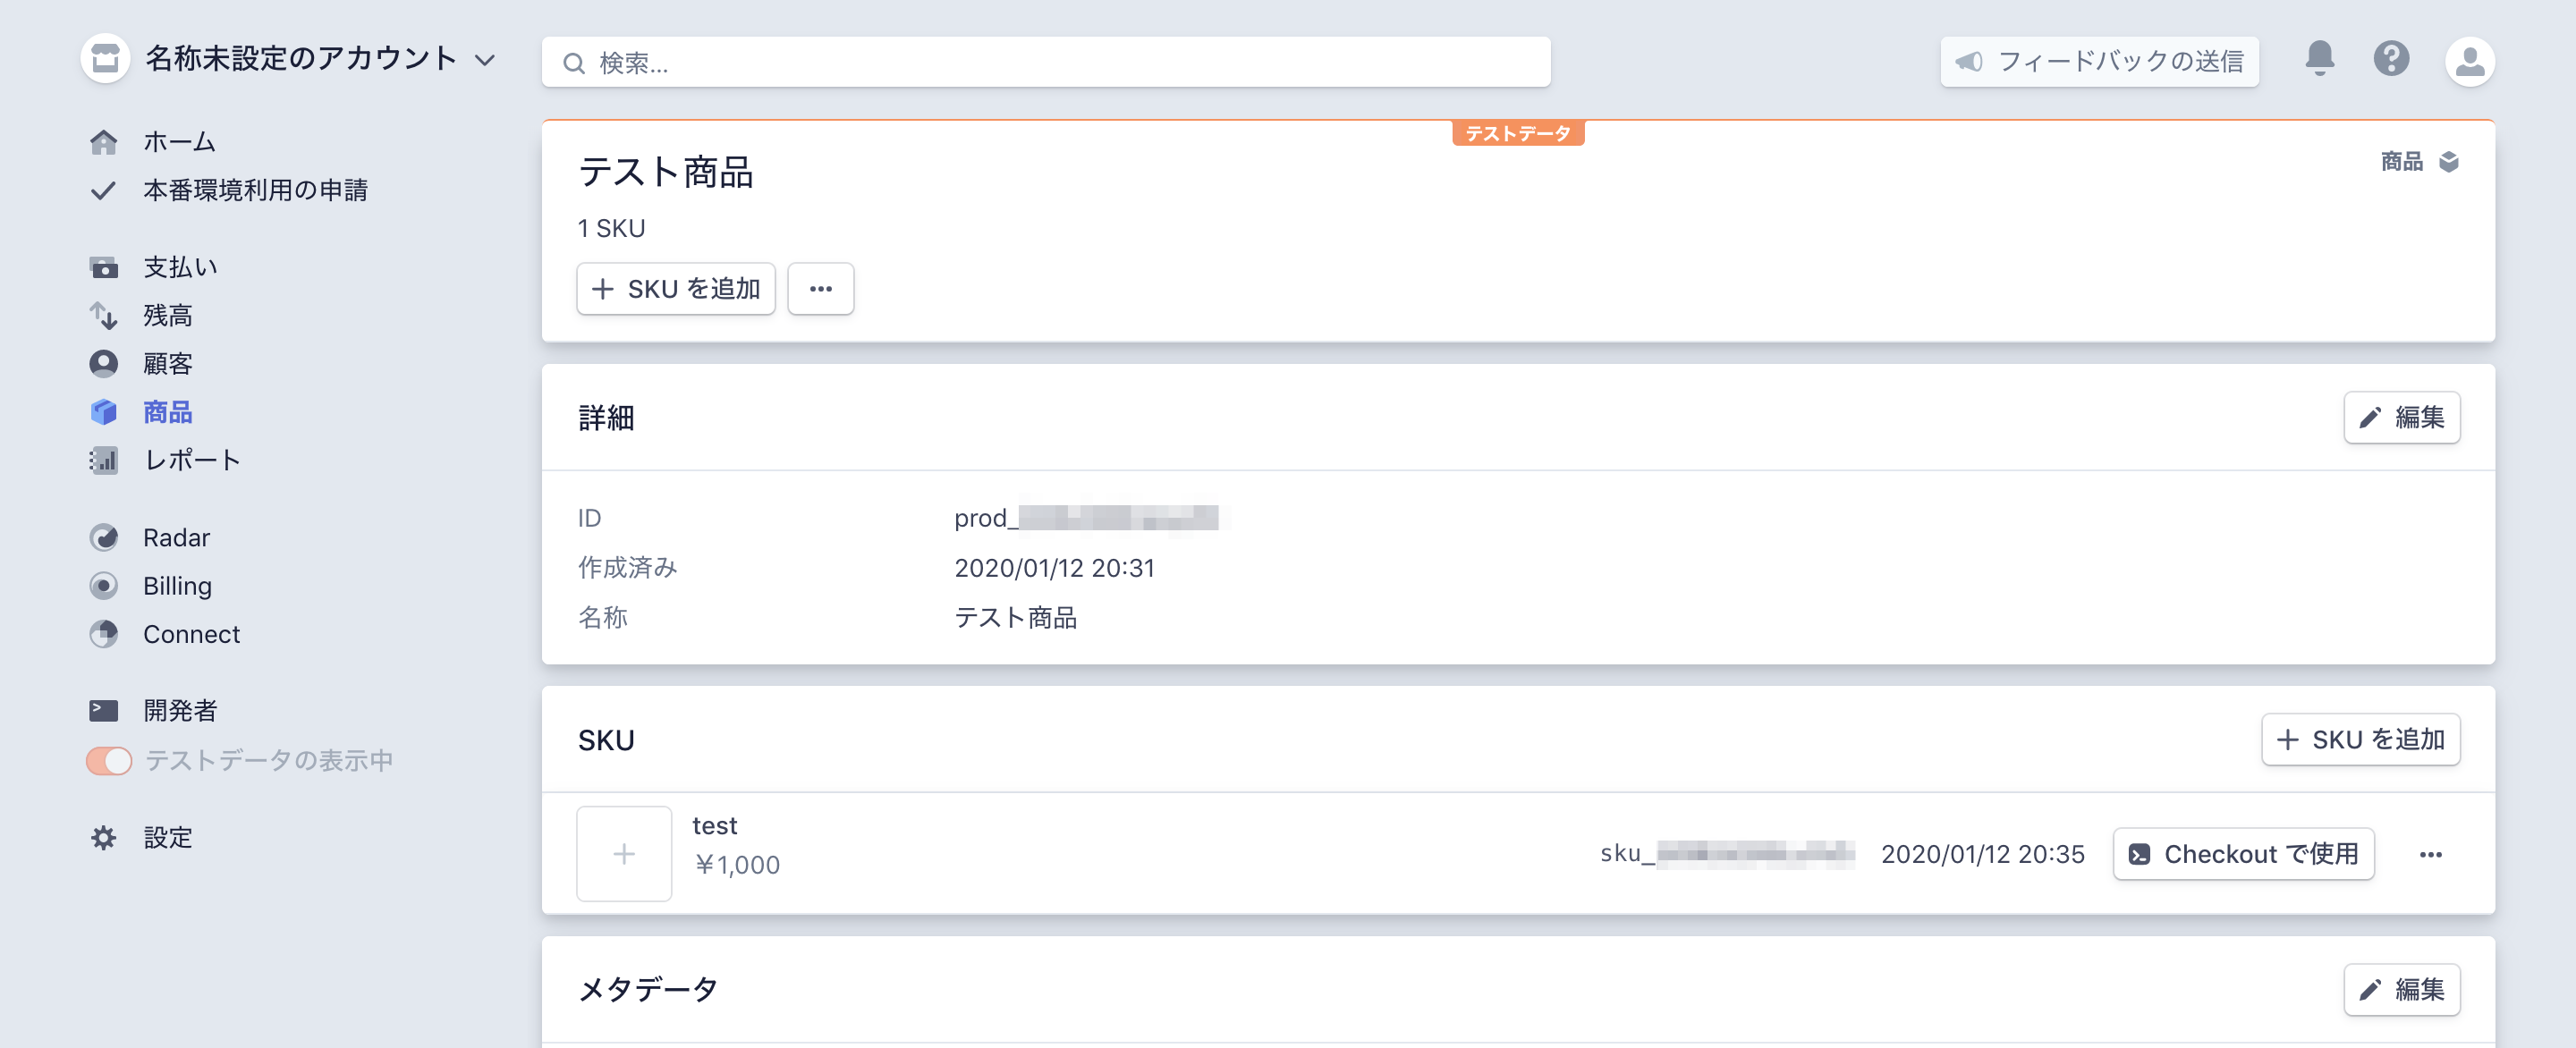
チェックアウト画面にはStripeダッシュボードで設定した商品名や説明などが表示されます。

