Expoでの開発からejectした場合にNotificationsを使用できないことを考慮し、素のReactNativeプロジェクト(といっても、Expo Bare Workflow)で、FCM(Firebase Cloud Messaging)を使ってPush通知を送る手順を確認しました。
事前準備および前提条件
-
ReactNativeプロジェクト
この記事ではExpoプロジェクトを作成後、app.jsonのexpo.ios.bundleIdentifierおよびexpo.android.packageを最低限入力した後にexpo ejectしBare Workflowを選択した状態のプロジェクトを前提としています。
もちろんExpoを通さず作成したReactNativeプロジェクトでも問題はないと思いますが確認していません。
また、FCMの導入に関連しないビルドエラーの解決方法等は記載していません。 -
Firebaseプロジェクト
Googleアカウント、Firebaseプロジェクトを用意していください。 -
Apple Developer Programアカウント
APNsキーを作成する必要があります。 -
react-native-firebaseのインストール
最新のv6は@react-native-firebase/appですが、ドキュメントが未完成なためこの記事ではv5を使用します。
iOSの設定
1. iOSアプリにFirebase SDKを導入
Firebaseプロジェクトの設定ページ、「全般」タブからiOSアプリを追加します。
流れに従ってアプリ側の設定を行います。
①アプリの登録
バンドルIDはReactNative側で指定したものを入力します。
②設定ファイルのダウンロード
GoogleService-Info.plistをダウンロードし、プロジェクトのディレクトリにファイルを移動します。
この際、XCodeでプロジェクトディレクトリを右クリック→Add Files to ...を選択するか、XCode上のプロジェクトディレクトリにドラッグ&ドロップするかしてプロジェクトに紐づける必要があります。
(紐付けが上手くいっていないと、この後のビルド時にGoogleService-Info.plistが認識できないというエラーが発生します)
③Firebase SDKの追加
CocoaPodsでFirebase SDKを追加します。
pod 'Firebase/Analytics' // Analyticsを追加
pod 'Firebase/Messaging' // Cloud Messagingを追加
iosディレクトリでポッドをインストールします。
$ cd ios
$ pod install
④初期化コードの追加
ios/プロジェクト名/AppDeligate.mを編集します。
@import Firebase; // + SDKをインポート(ファイル最上部)

// 省略

- (BOOL)application:(UIApplication *)application didFinishLaunchingWithOptions:(NSDictionary *)launchOptions
{
  // 省略

  [FIRApp configure]; // + FirebaseSDKを初期化
  return YES;
}

// 省略
これでiOSアプリへのFirebase SDKの導入は完了です。
2. APNs認証キーを取得・Firebaseプロジェクトにアップロード
FCM での APNs の構成
https://firebase.google.com/docs/cloud-messaging/ios/certs?hl=JA#create_the_authentication_key
上記の記事の「認証キーを作成する」セクション(だけ)に従ってApple Developer ProgramのアカウントページでAPNs認証キーを取得します。キーの登録時、Key IDをメモしておきます。
APNs認証キーは一回しかダウンロードできないので注意してください。
適切な場所に保管してから、Firebaseプロジェクトの設定ページ、「Cloud Messaging」タブ→「iOS アプリの設定」からiOSアプリを選択し、取得した認証キーをアップロードしてください。
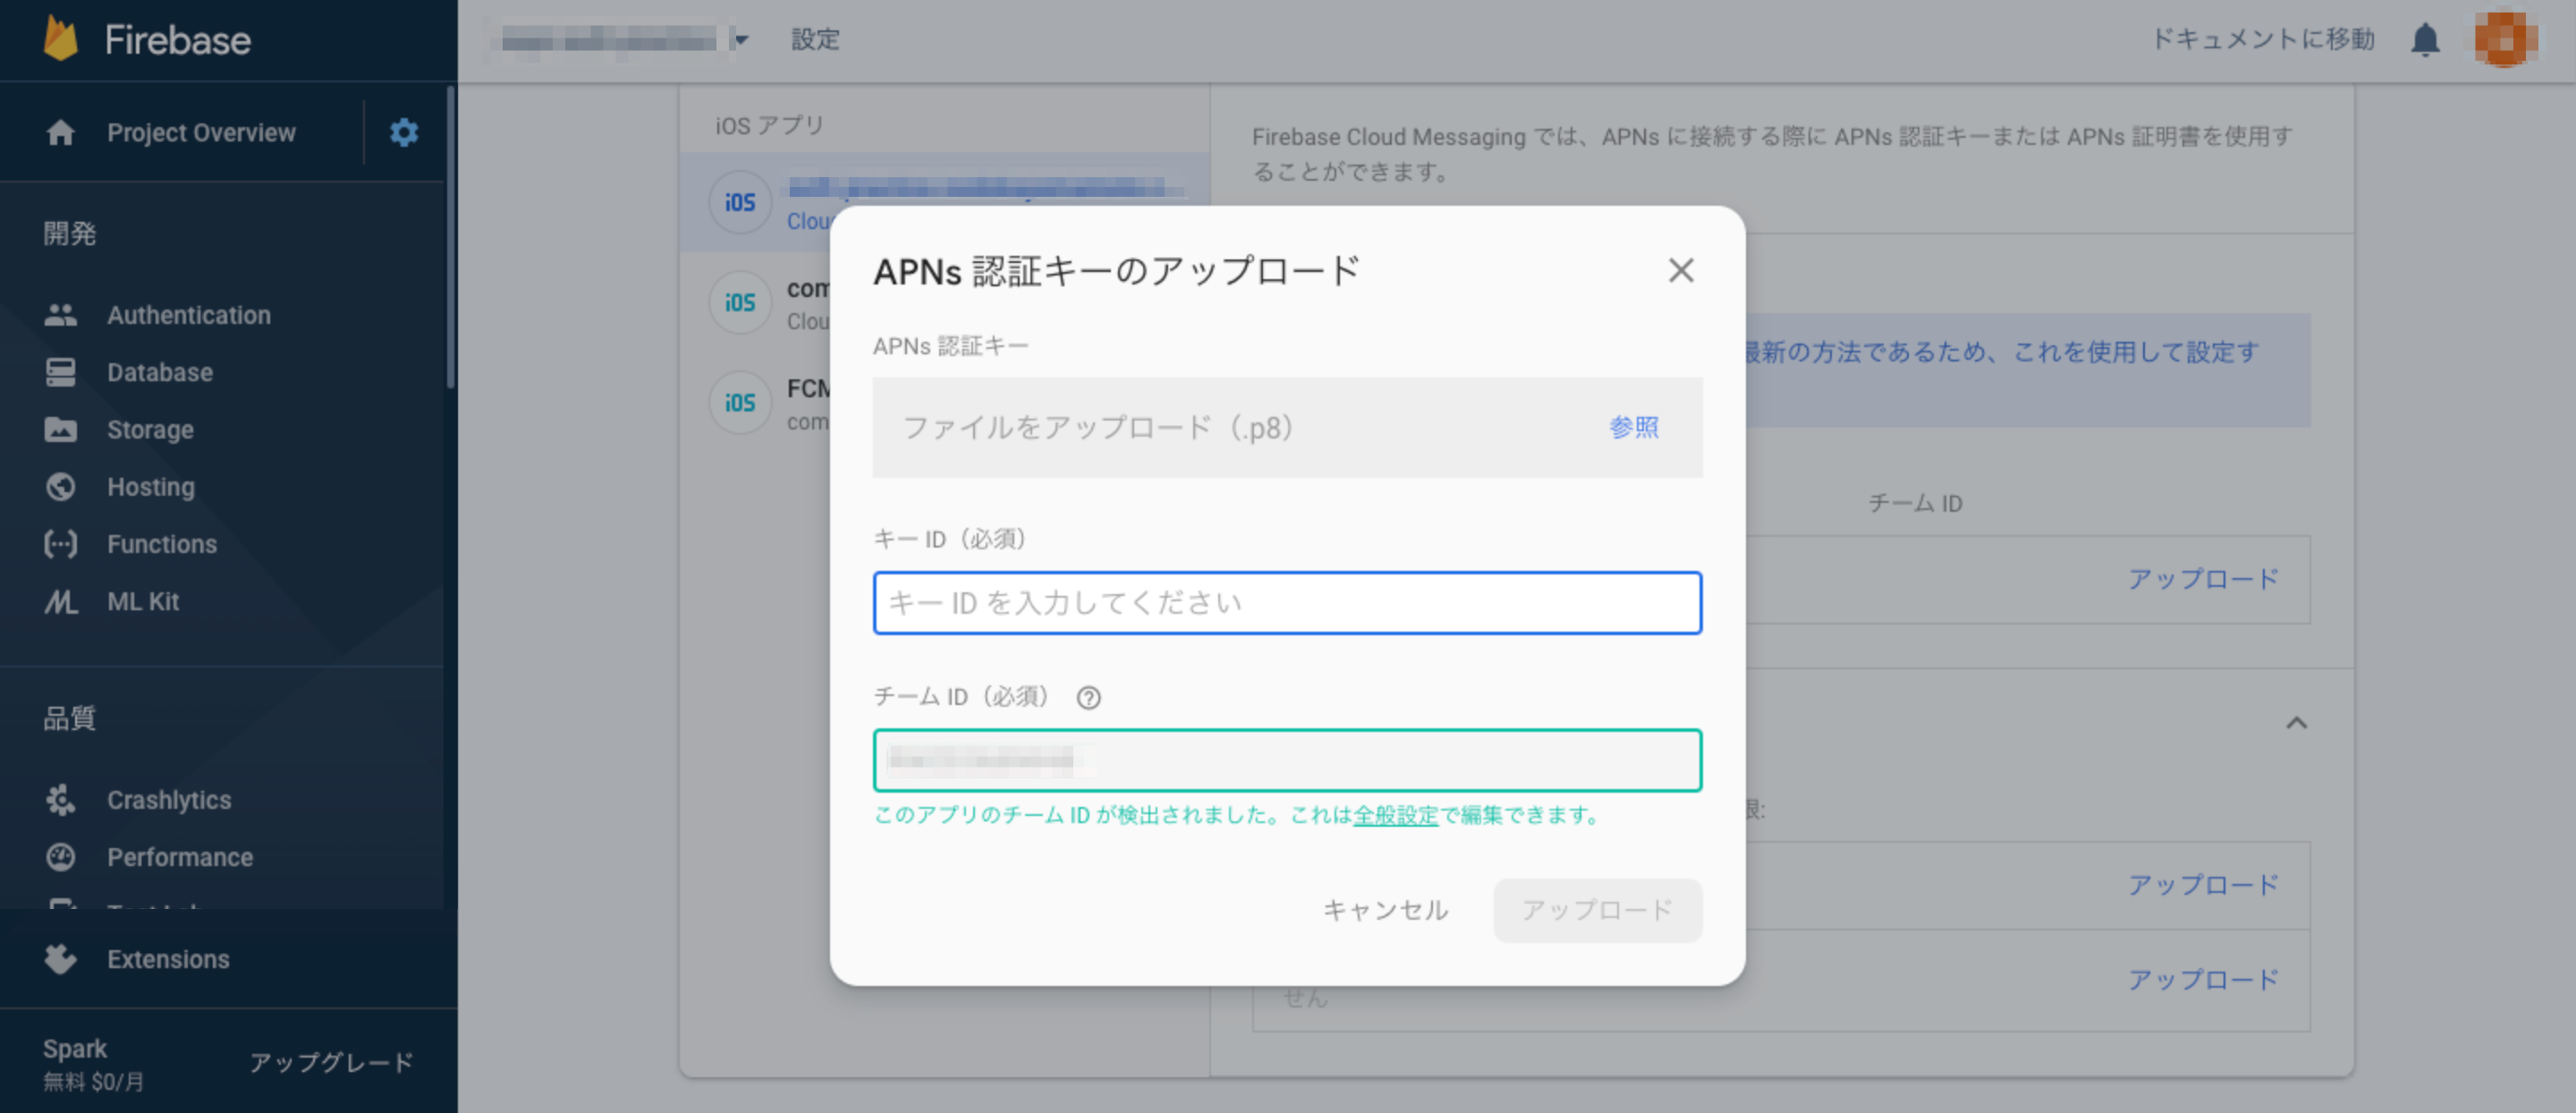
キーIDには先ほどのIDを、チームIDはApple Developer Programのアカウント情報ページで確認し入力します。
3. Capabilityを設定
XCodeでプロジェクトを開き、「TARGETS」、「Signing & CapabilitiesSigning & Capabilities」を開き「Push Notification」と「Background Modes」(Remote Notificationsをチェック)を追加します。
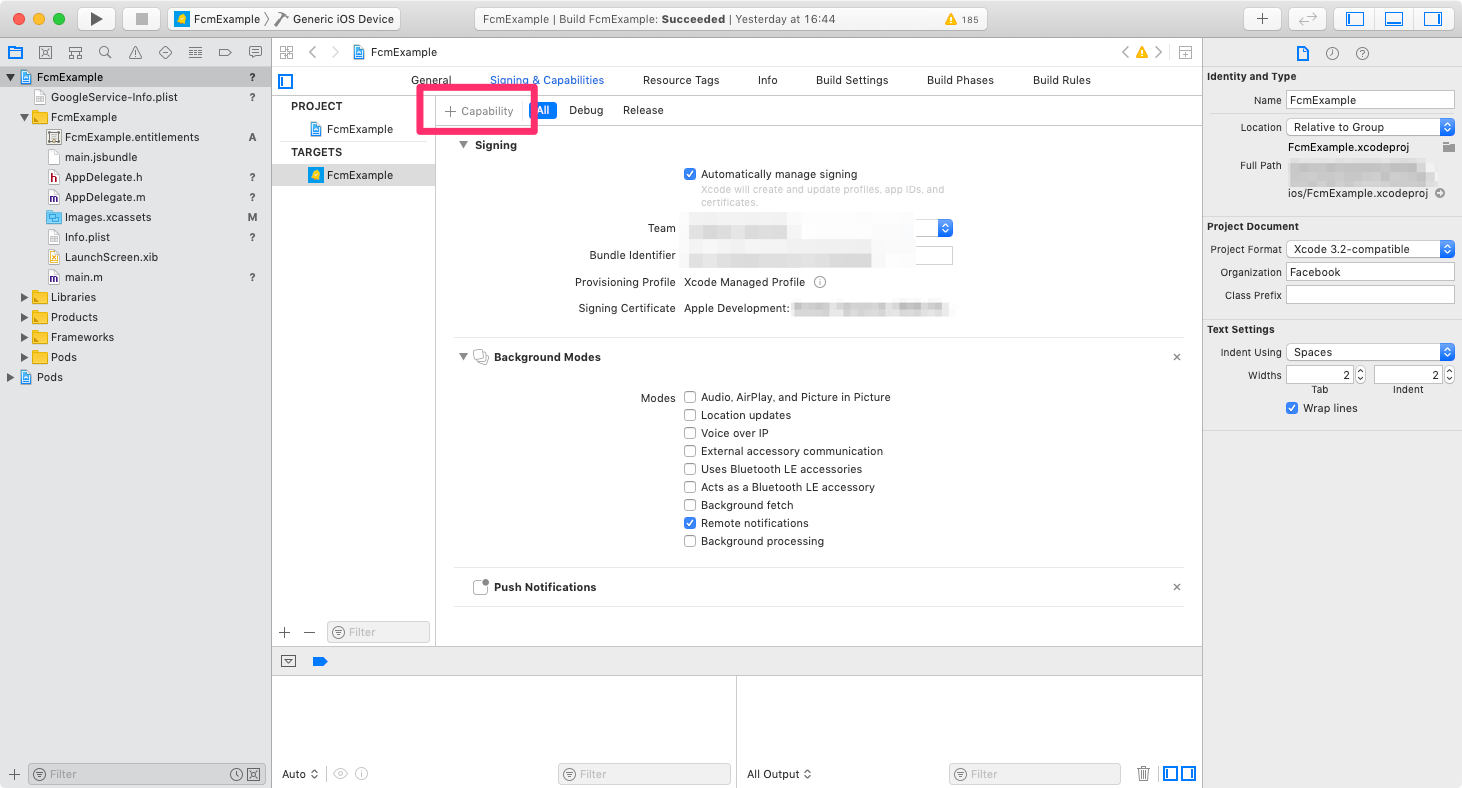
これでFCMの通知メッセージをiOSで利用する準備が整いました。
Androidの設定
AndroidアプリにFirebase SDKを導入していきます。
Firebaseプロジェクトの設定ページ、「全般」タブからAndroidアプリを追加します。
流れに従ってアプリ側の設定を行います。
①アプリの登録
パッケージ名はReactNative側で指定したものを入力します。
②設定ファイルのダウンロード
google-services.jsonをダウンロードし、android/app/ディレクトリにファイルを移動します。
③Firebase SDKの追加
まずはandroid/build.gradle(プロジェクトレベルのビルド設定)を編集します。これはチュートリアル通りです。
buildscript {
  repositories {
    // Check that you have the following line (if not, add it):
    google()  // Google's Maven repository
  }
  dependencies {
    ...
    // Add this line
    classpath 'com.google.gms:google-services:4.3.2'
  }
}

allprojects {
  ...
  repositories {
    // Check that you have the following line (if not, add it):
    google()  // Google's Maven repository
    ...
  }
}
android/app/build.gradleの方(アプリレベルのビルド設定)を編集します。
apply plugin: 'com.google.gms.google-services' // ファイル最上部

// 省略

dependencies {
  // 省略
  implementation 'com.google.firebase:firebase-analytics:17.2.0' // Analyticsを追加
    implementation "com.google.firebase:firebase-messaging:20.0.0" // Cloud Messagingを追加
    implementation "me.leolin:ShortcutBadger:1.1.21@aar" // バッジを利用する場合
  // 省略
}
// 省略
④初期化コードの追加
android/app/src/main/java/.../MainApplication.javaを編集します。
// 省略
// React-Native-Firebaseのパッケージをインポート
import io.invertase.firebase.messaging.RNFirebaseMessagingPackage;
import io.invertase.firebase.notifications.RNFirebaseNotificationsPackage;
// 省略

public class MainApplication extends Application implements ReactApplication {
  // 省略
  private final ReactNativeHost mReactNativeHost = new ReactNativeHost(this) {
    // 省略
    @Override
    protected List<ReactPackage> getPackages() {
      List<ReactPackage> packages = new PackageList(this).getPackages();
      packages.add(new ModuleRegistryAdapter(mModuleRegistryProvider));
      packages.add(new RNFirebaseMessagingPackage()); // Cloud Messagingを初期化
      packages.add(new RNFirebaseNotificationsPackage()); // Notificationsを初期化
      return packages;
    }
// 省略
⑤マニフェストの編集
android/app/src/main/AndroidManifest.xmlを編集します。
<!-- 省略 -->
  <!-- 最低限のパーミッション -->
  <uses-permission android:name="android.permission.INTERNET" />
    <uses-permission android:name="android.permission.SYSTEM_ALERT_WINDOW"/>
  <uses-permission android:name="android.permission.RECEIVE_BOOT_COMPLETED" />
  <uses-permission android:name="android.permission.VIBRATE" />

  <!-- 省略 -->
  <!-- activityにandroid:launchMode属性を追加(多分通知をタップしてアプリが呼ばれた時のため) -->
    <activity
      android:launchMode="singleTop"
    >
      <!-- 省略 -->
      <!-- Cloud Messagingのserviceを追加 -->
      <service android:name="io.invertase.firebase.messaging.RNFirebaseMessagingService">
          <intent-filter>
              <action android:name="com.google.firebase.MESSAGING_EVENT" />
          </intent-filter>
      </service>
      <!-- 通知アイコンの画像・色を指定 -->
      <meta-data
        android:name="com.google.firebase.messaging.default_notification_icon"
        android:resource="@mipmap/ic_stat_ic_notification" />
      <meta-data
        android:name="com.google.firebase.messaging.default_notification_color"
        android:resource="@color/colorAccent" />
通知アイコンはandroid/app/src/main/res/フォルダにmipmap(ic_stat_ic_notification.png)を追加し、android/app/src/main/res/values/colors.xmlで用意した色を指定します。
その他、使いたい機能によって、オプショナルな設定があるので、以下のドキュメントを参照してください。
https://rnfirebase.io/docs/v5.x.x/messaging/android
https://rnfirebase.io/docs/v5.x.x/notifications/android
これでAndroidアプリへのFirebase SDKの導入は完了です。
JS側を実装
ひとまず確認のためのコードを全て載せます。
import React, { Component } from 'react';
import { Platform, StyleSheet, Text, View, Clipboard, Alert } from 'react-native';
import firebase from 'react-native-firebase';

const messaging = firebase.messaging();
const notifications = firebase.notifications();

export default class App extends Component {
  state = {
    deviceToken: null
  };

  componentDidMount() {
    this.init();
  }

  componentWillUnmount() {
    this.listenerRemovingFunctions && this.listenerRemovingFunctions.forEach(remove => remove());
  }

  componentDidUpdate() {
    Clipboard.setString(this.state.deviceToken);
  }

  init = async () => {
    const enabled = await messaging.hasPermission();
    if (enabled) {
      this.initFcm();
    } else {
      try {
        await messaging.requestPermission();
        this.initFcm();
      } catch (e) {
        console.log(e);
      }
    }
  };

  initFcm = async () => {
    const deviceToken = await messaging.getToken();
    this.setState({ deviceToken });
    this.listenerRemovingFunctions = [
      messaging.onTokenRefresh(this.onFcmTokenRefresh),
      notifications.onNotification(this.handleNotification('onNotification')),
      notifications.onNotificationOpened(this.handleNotification('onNotificationOpened')),
      notifications.onNotificationDisplayed(this.handleNotification('onNotificationDisplayed')),
      messaging.onMessage(this.onMessage)
    ];
    const notificationOpen = await notifications.getInitialNotification();
    if (notificationOpen) {
      this.handleNotification('initial')(notificationOpen);
    }
    const channel = new firebase.notifications.Android.Channel(
      'local',
      'local notification',
      firebase.notifications.Android.Importance.Max
    );
    await notifications.android.createChannel(channel);
  };

  onFcmTokenRefresh = (deviceToken) => {
    this.setState({ deviceToken });
  };

  onMessage = (message) => {
    Alert.alert('MESSAGE', JSON.stringify(message));
    this.setState({ notificationType: 'message' });
  };

  handleNotification = (type) => {
    return (notification) => {
      console.log(type, notification);
      if (type === 'onNotification') {
        if (Platform.OS === 'android') {
          const localNotification = notification
            .android.setChannelId('local')
            .android.setSmallIcon('ic_stat_ic_notification')
            .android.setColor('#1A73E8')
            .android.setPriority(firebase.notifications.Android.Priority.High);
          notifications
            .displayNotification(localNotification);
        } else if (Platform.OS === 'ios') {
          notifications
            .displayNotification(notification);
        }
      }
      Alert.alert('NOTIFICATION', type);
      this.setState({ notificationType: type });
    };
  };

  render() {
    const { deviceToken, notificationType } = this.state;
    return (
      <View style={styles.container}>
        {deviceToken && <Text>LISTENING...</Text>}
        {notificationType && <Text>{notificationType}</Text>}
      </View>
    );
  }
}

const styles = StyleSheet.create({
  container: {
    flex: 1,
    justifyContent: 'center',
    alignItems: 'center',
    backgroundColor: '#F5FCFF'
  }
});
以下のような流れになります。
- アプリを開いたら、通知パーミッションを取得(iOSのみダイアログが表示される)
- デバイストークンを取得し、クリップボードにコピー(実際はサーバーに送信してDBに保存するでしょう)
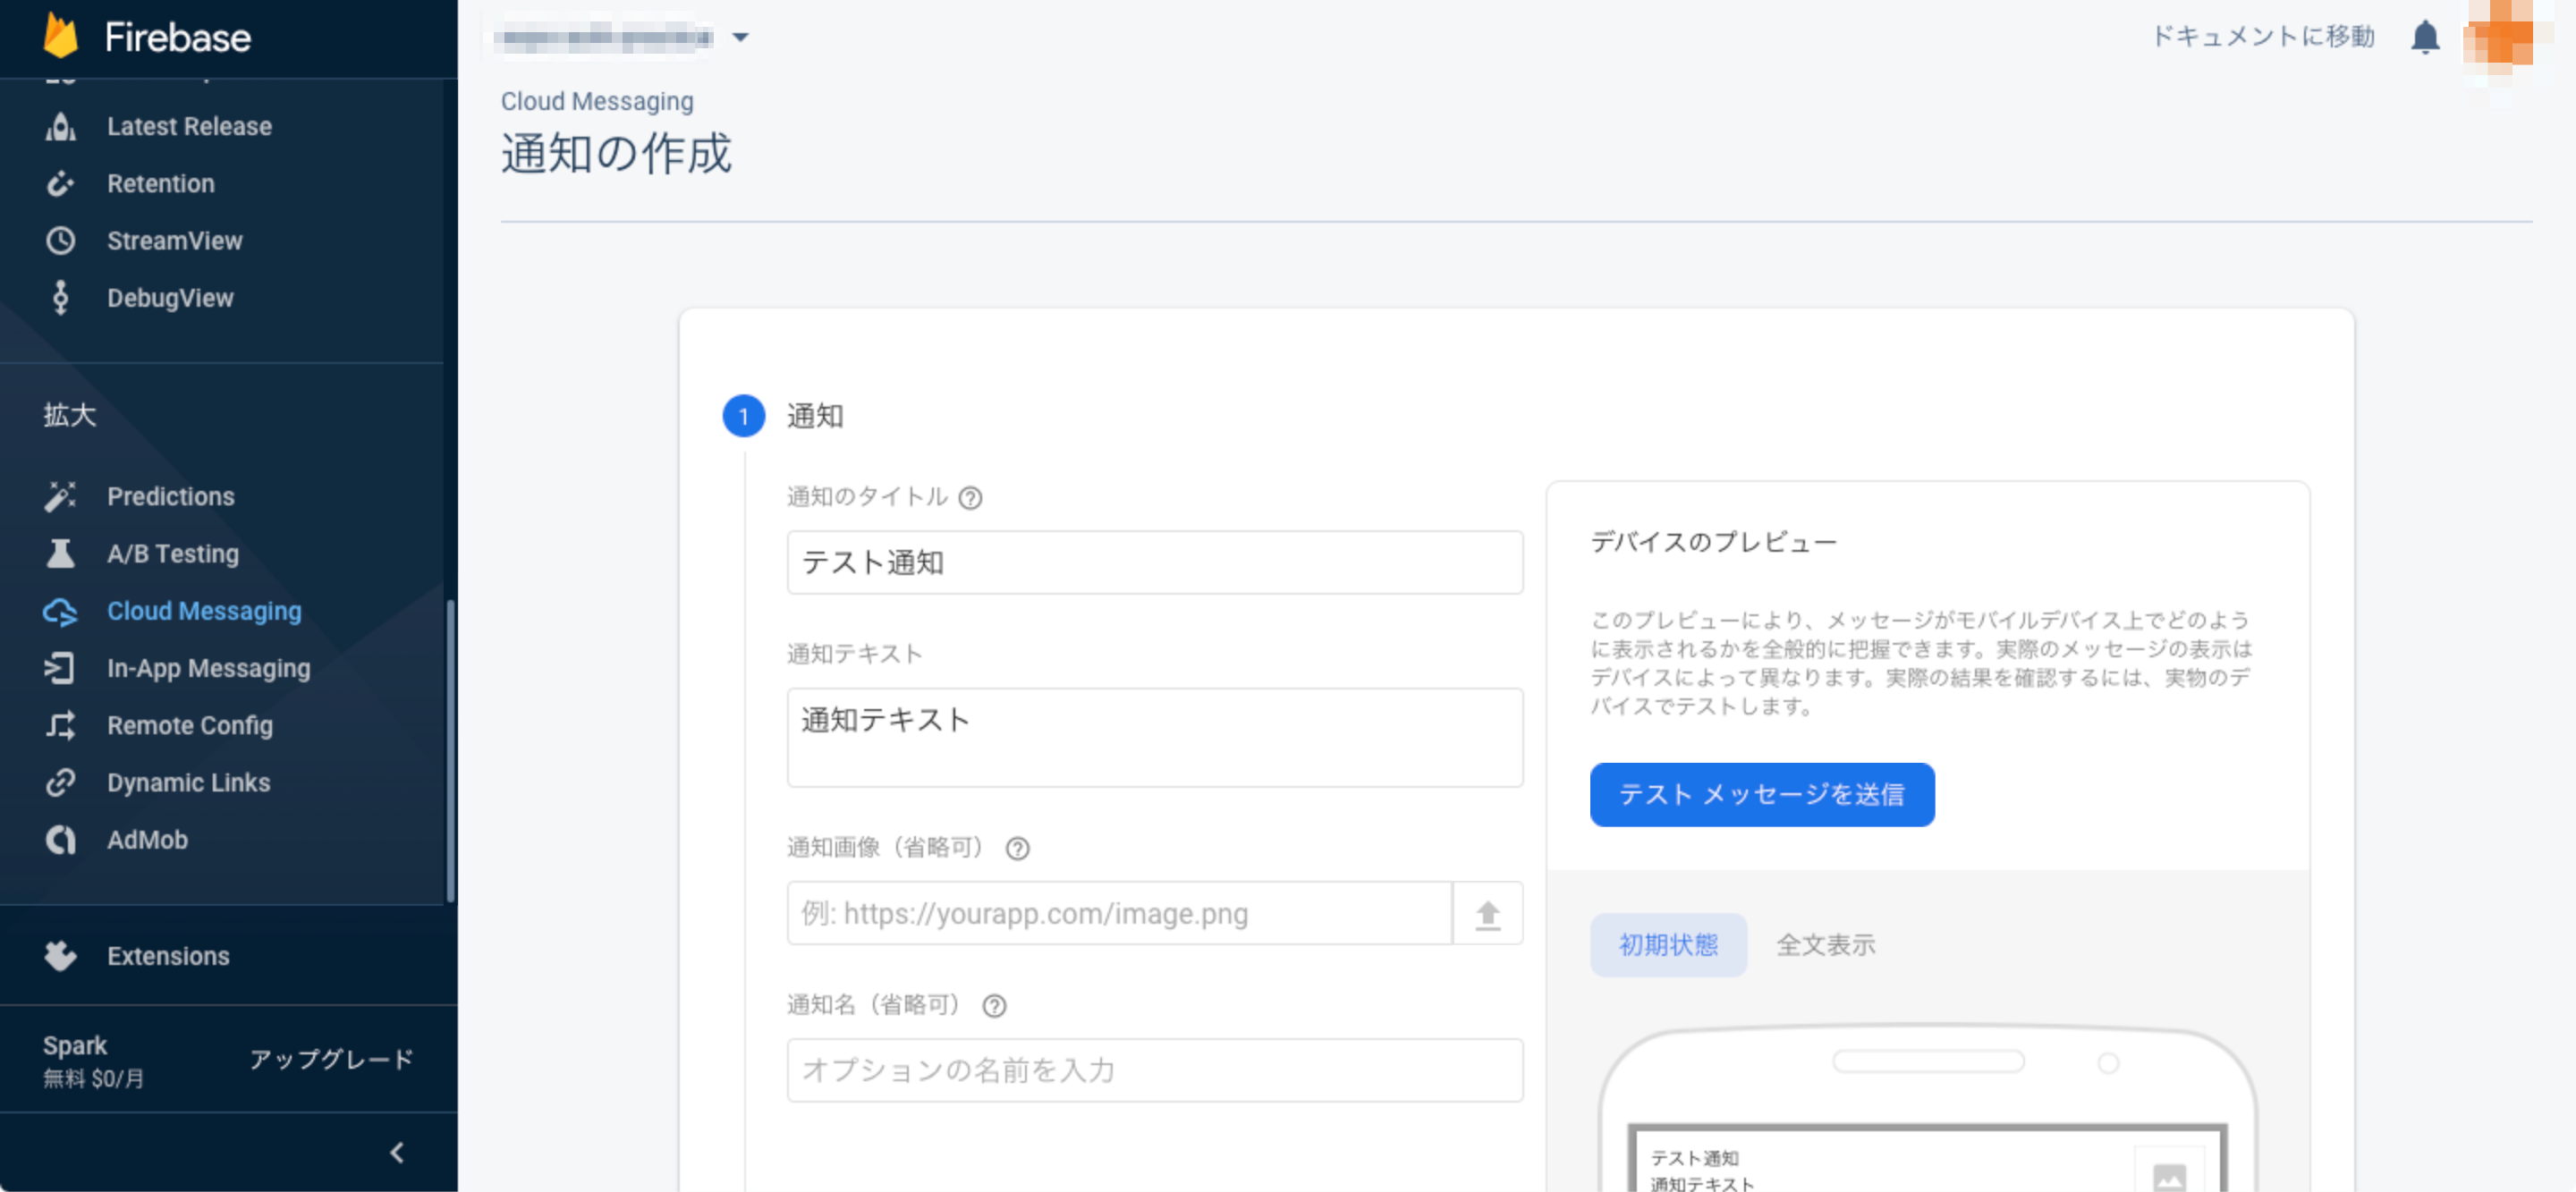
- Firebaseプロジェクトページの「Cloud Messaging」から通知を送信
デバイストークンを指定してプレビューすることもできます。 - アプリが通知を受信し、
onNotification、onNotificationOpened、onNotificationDisplayedに設定したコールバックのいずれかが呼ばれる
実際にデバイストークンを使ってテストメッセージを送信してみます。
iOS
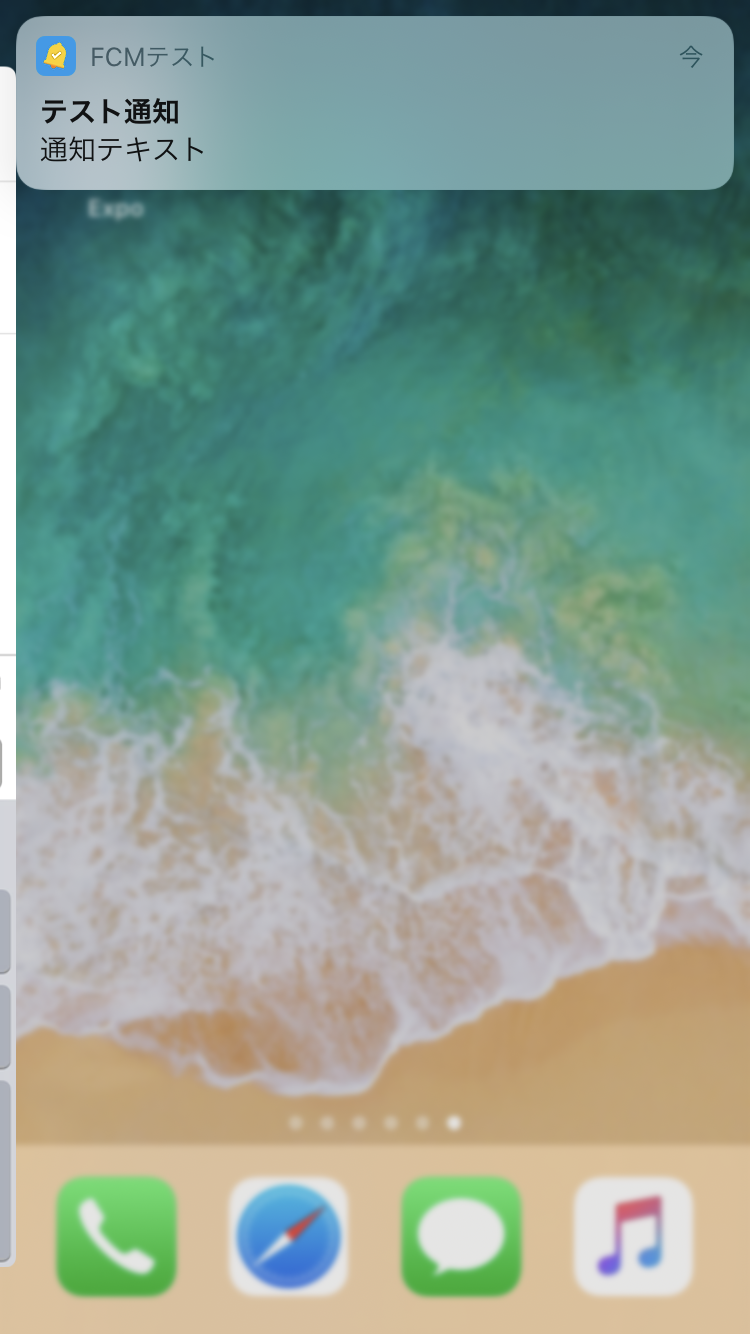
Android
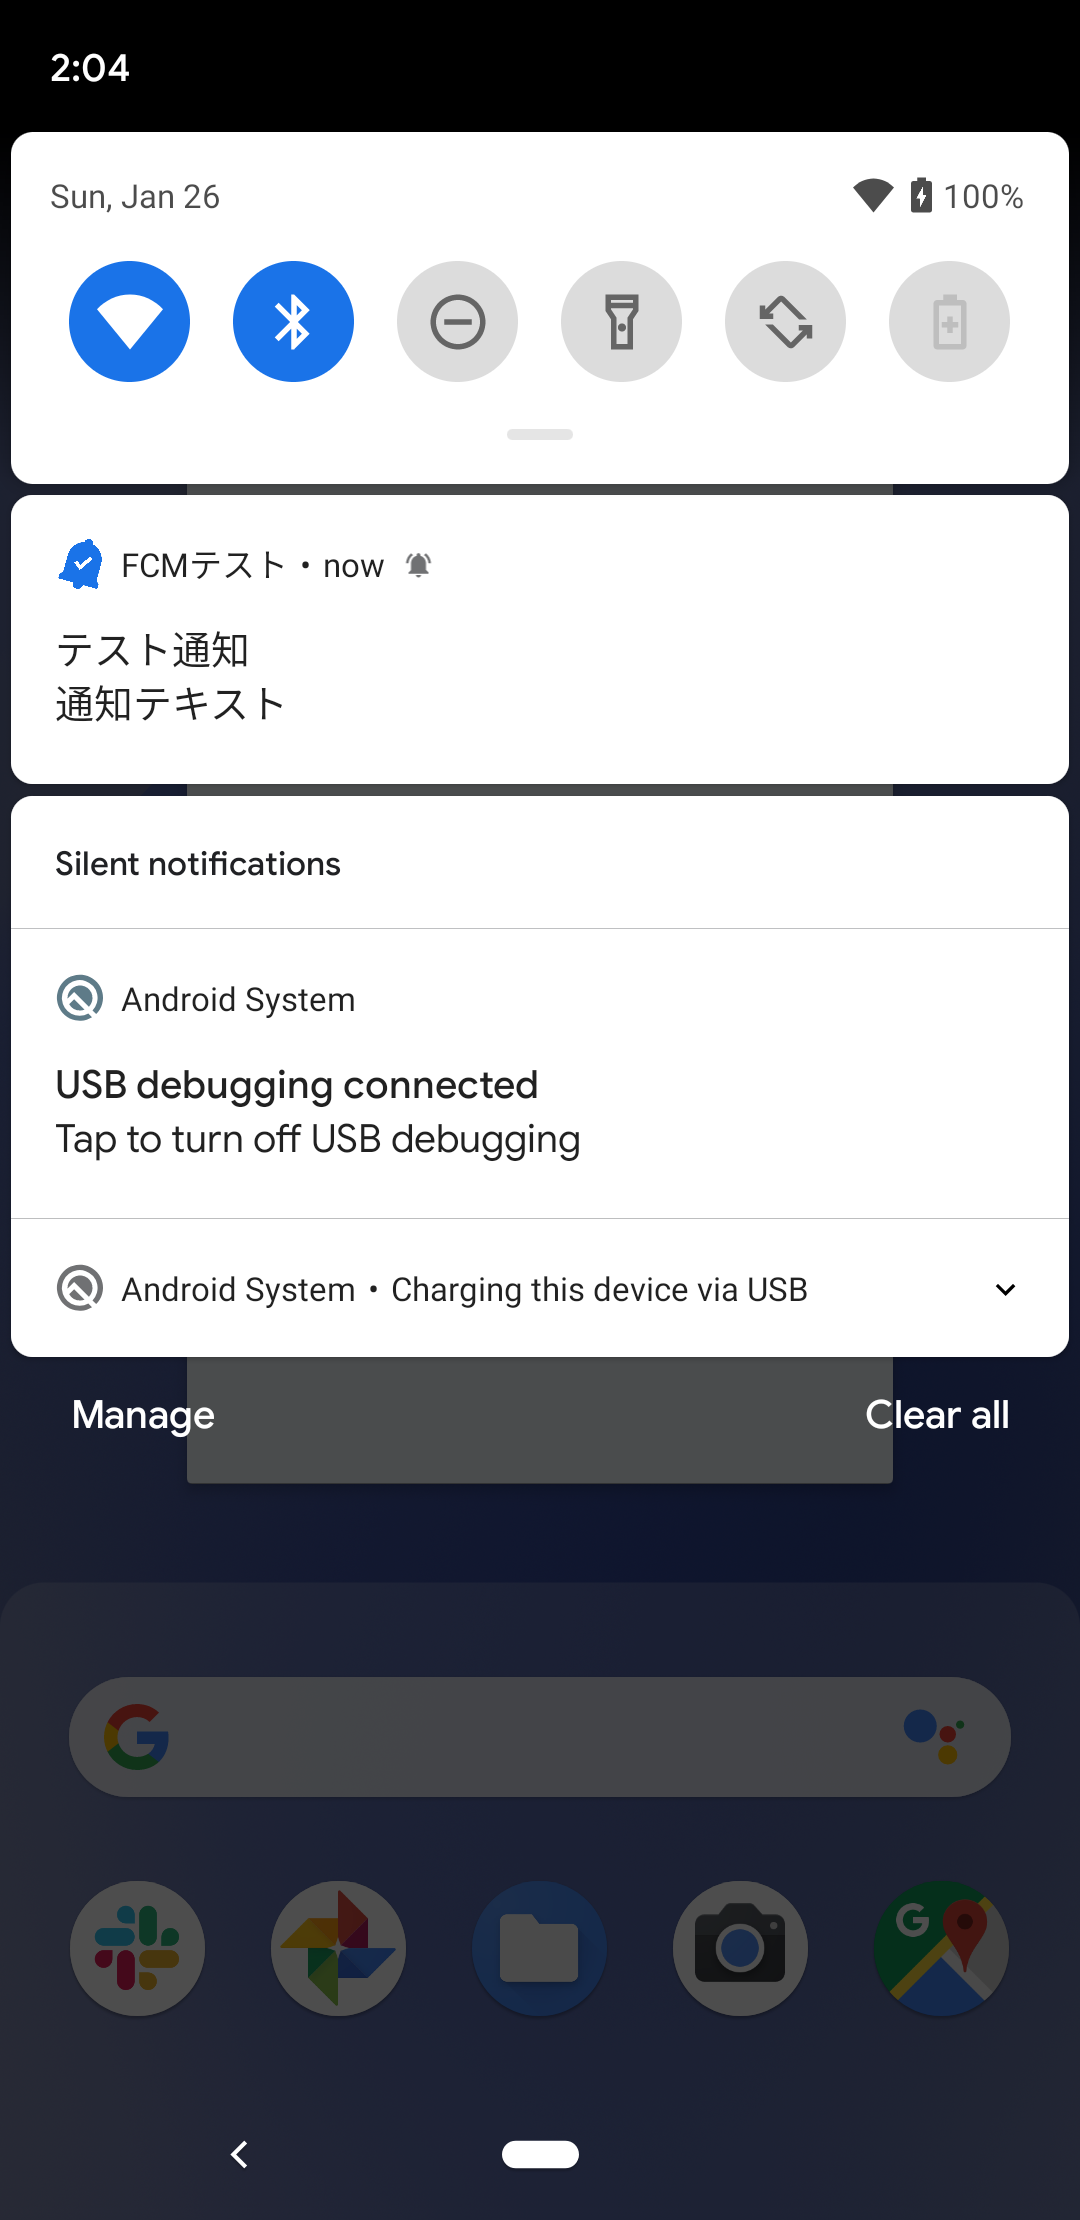
問題なく届きました。アプリがバックグラウンドの時に通知をタップすると、onNotificationOpenedのイベントハンドラーが呼ばれます。
また、以下の部分を見るとわかると思いますが、react-native-firebaseではアプリがフォアグラウンドの時の通知はそのままでは表示されず、Expoの_displayInForegroundのような挙動の実装は開発者に委ねられています。
iOSではハンドリングしたNotificationオブジェクトをそのままdisplayNotificationすれば表示されますが、Androidでは通知チャネルを作成しておいて、割り当てる必要があります。
この際面倒ですがアイコンは再度指定してあげないと表示されませんでした。
// 省略
    // Androidの通知チャネルを作成
    const channel = new firebase.notifications.Android.Channel(
      'local',
      'local notification',
      firebase.notifications.Android.Importance.Max
    );
    await notifications.android.createChannel(channel);
  };

// 省略

  handleNotification = (type) => {
    return (notification) => {
      if (type === 'onNotification') { // フォアグラウンドで通知が表示された時
        if (Platform.OS === 'android') {
          const localNotification = notification
            .android.setChannelId('local') // 用意した通知チャネルのIDを指定
            .android.setSmallIcon('ic_stat_ic_notification') // 通知アイコンのmipmapを指定
            .android.setColor('#1A73E8') // 通知アイコンの色を指定
            .android.setPriority(firebase.notifications.Android.Priority.High);
          notifications
            .displayNotification(localNotification);
        } else if (Platform.OS === 'ios') {
          notifications
            .displayNotification(notification);
        }
      }
      Alert.alert('NOTIFICATION', type);
      this.setState({ notificationType: type });
    };
  };
以上で基本的な動作の実装ができました。