macOS Mojava 10.14.6 / Xcode 11.3.1 / Swift 5.0
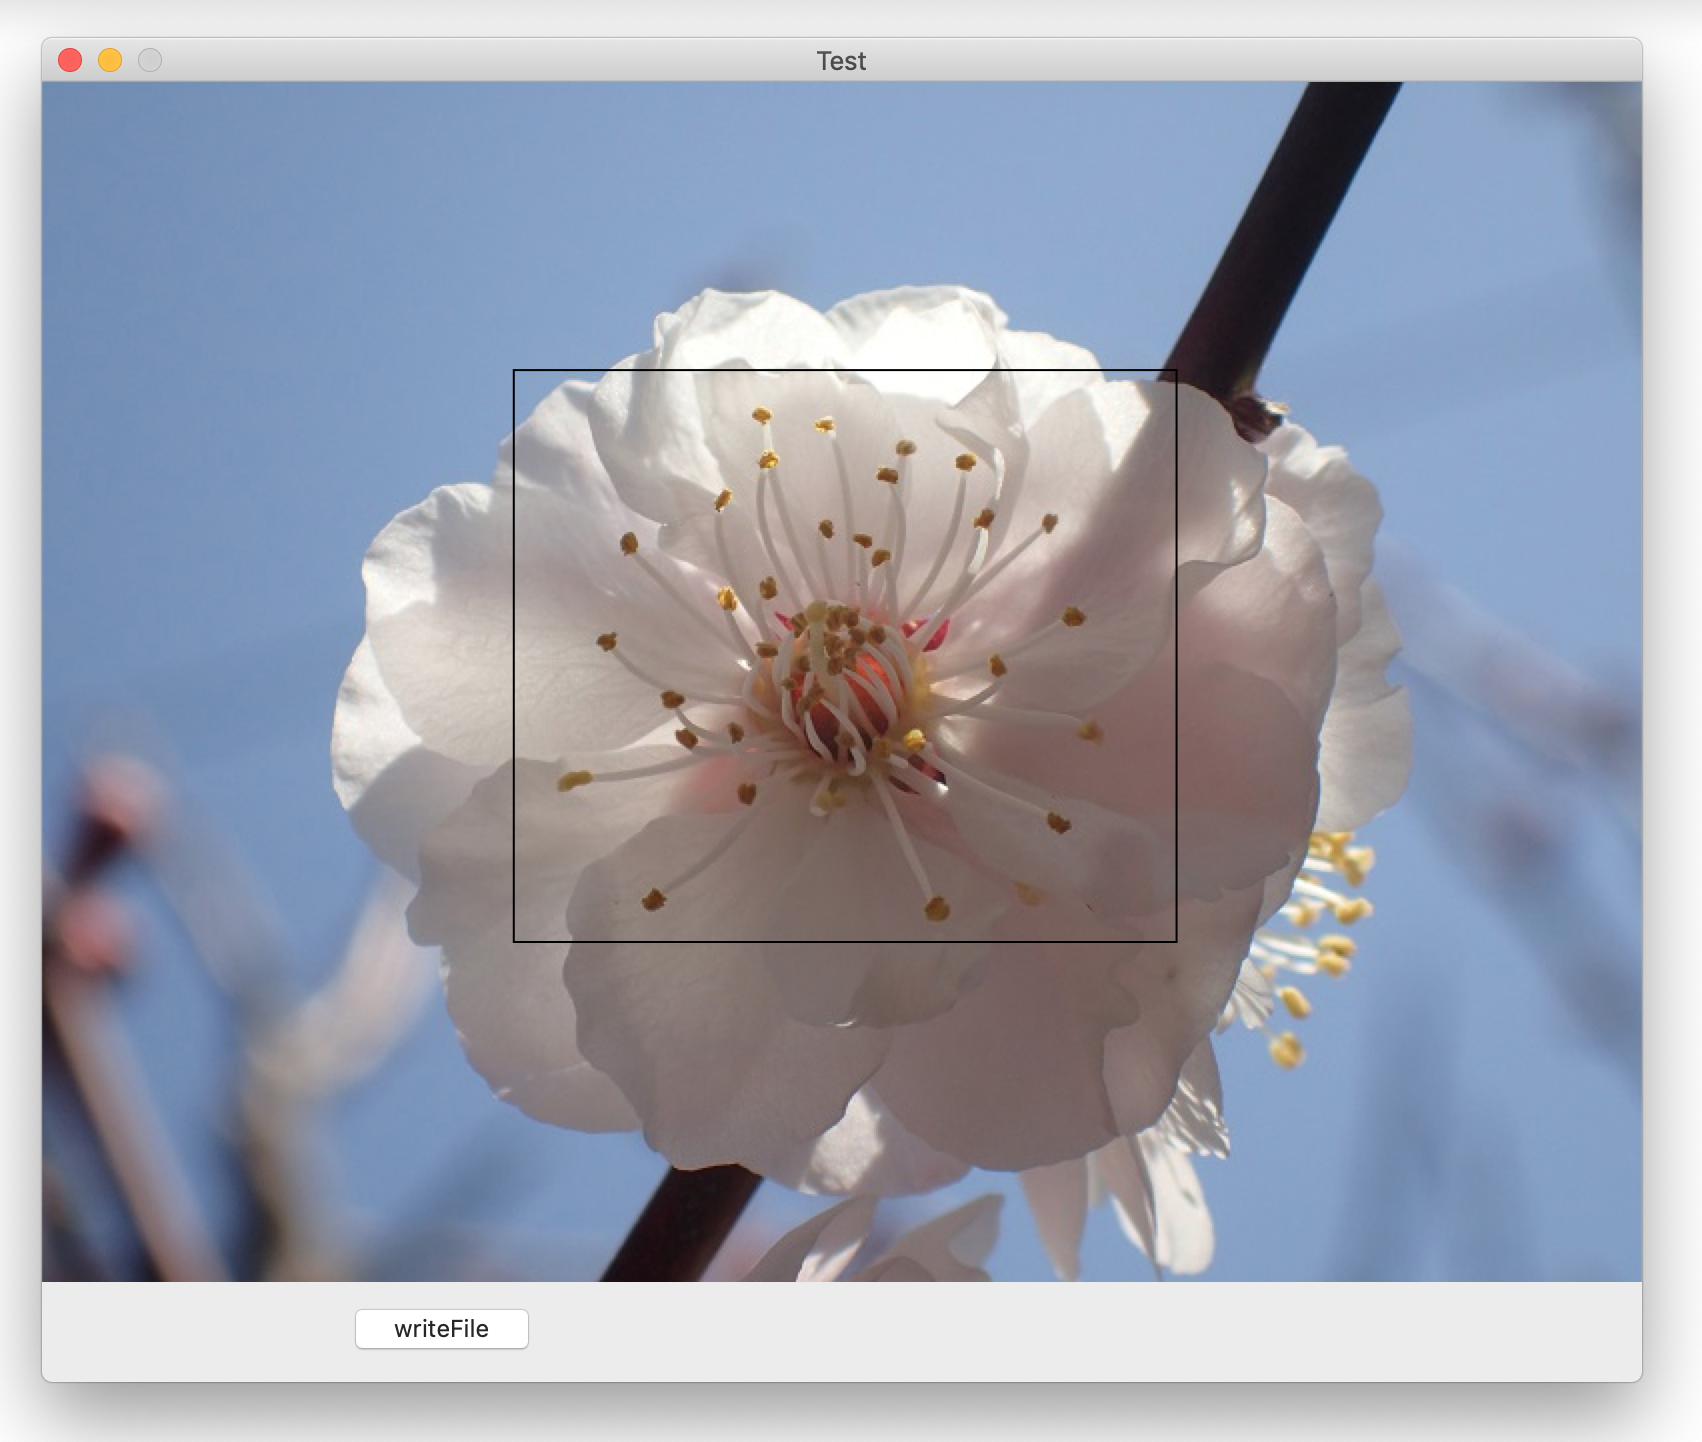
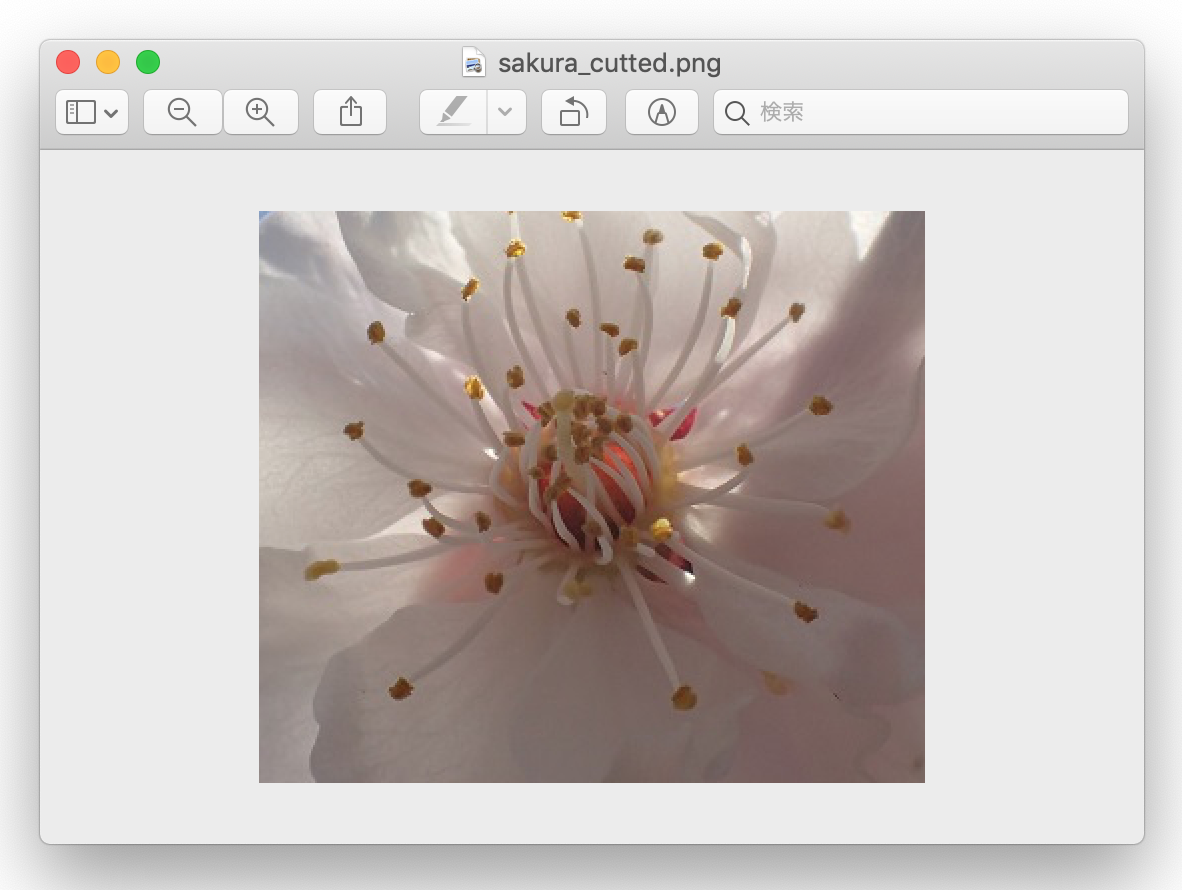
ビューに表示中のイメージから一部を切り出し、ファイルに出力する手順を紹介します。ファイルの読み込み、表示の方法については Core Graphics イメージの操作 ファイル入出力、表示、拡大・縮小、グレースケール化 を参照ください。
操作(1) マウスのドラッグにより切り出す領域を矩形で囲む。

操作(2) ファイル作成ボタンをクリックして、pngファイルを出力する。

NSViewクラスのサブクラスを作成する
プロパティ宣言と初期化
選択中の矩形を表示するビューは別に一つ作成し、親ビューに重ねる。
class UAView: NSView {
    var cgOriginalImage: CGImage? = nil //オリジナルイメージ
    var startPoint = CGPoint()  //ドラッグの開始点
    var rectView = RectView()   //選択矩形を表示するビュー
    //イニシャライザ
    override init(frame frameRect: NSRect) {
        super.init(frame: frameRect)
        self.wantsLayer = true
        self.layer?.backgroundColor = NSColor.black.cgColor
        self.readFile()
        rectView.frame = self.bounds
        self.addSubview(rectView)
    }
    ...
}
切り出す領域を矩形で囲む
//選択開始
override func mouseDown(with event: NSEvent) {
    if event.clickCount > 1 {
        //ダブルクリックにより選択を解除する
        startPoint = CGPoint()
        rectView.selectedRect = makeRect(endPoint: CGPoint())
        return
    }
    let point = self.convert(event.locationInWindow, from: nil)
    startPoint = point
}
//ドラッグ中
override func mouseDragged(with event: NSEvent) {
    let point = self.convert(event.locationInWindow, from: nil)
    rectView.selectedRect = makeRect(endPoint: point)
    rectView.needsDisplay = true //矩形を表示する
}
//領域(CGRect)の計算
private func makeRect(endPoint: CGPoint)->CGRect{
    return CGRect(x: startPoint.x,
                  y: startPoint.y,
              width: endPoint.x - startPoint.x ,
              height: endPoint.y - startPoint.y)
}
選択中の矩形を表示するクラス
グラフィックコンテキストに選択中の矩形を描画する。マウスのドラッグに従い形を変える。
class RectView: NSView {
    var selectedRect = CGRect() //選択領域
    //再描画
    override func draw(_ dirtyRect: NSRect) {
        let context:CGContext? = NSGraphicsContext.current?.cgContext
        context?.addRect(selectedRect)
        context?.setLineWidth(1.0)
        context?.setStrokeColor(NSColor.black.cgColor)
        context?.strokePath()
    }
}
イメージを切り出し、ファイルに出力する
CGImageクラスのcroppingメソッドは、元のイメージから指定した範囲を切り出し新しいイメージを作成する。
func writeFile(){
    let url = NSURL.fileURL(withPath: NSHomeDirectory() + "/Pictures/sakura_cutted.png")
    //イメージを切り出す
    let cgNewImage = cgOriginalImage?.cropping(to: rectView.selectedRect)
    //ビットマップイメージに変換する
    let bitmap = NSBitmapImageRep.init(cgImage: cgNewImage!)
    //png形式のDataオブジェクトに変換する
    guard  let data = bitmap.representation(using: .png, properties: [:]) else {
        print("bitmap.representation error")
        return
    }
    do {
        try data.write(to:url) //ファイル出力
    }catch{
        print(error.localizedDescription)
        return
    }
    let alert = NSAlert();
    alert.messageText = "ファイルし出力成功";
    alert.informativeText = url.path;
    alert.runModal()
}