Qiita初投稿。Go6 Advent Calendar 2019 21日目の投稿です。
Go歴浅いですが、月に一度、Women Who Go Tokyo でスタッフをしながら、ゆる〜く勉強をさせていただいております。
まず、最初にあやまっておく
Go の AdventCalendar なのに、Go のコードが1行たりとも出てきません(HUGOの部分だけ)。Go のなんたるかを期待してきてくれた人、ごめんなさい。
そして、HUGO は Cloud Runより Cloud Build + Firebase Hosting がいいよ! という @tenntennさんのツッコミアドバイスはちょっと脇に置いておく..(次回はそれを試してみたいと思います)
Cloud Runでは、課金プランを使用します。
HUGOを複数サイトで動的に切り替えて運用するとかなら Cloud Runでやるのもアリかもしれないけど、単に HUGO を完全無料で運用したい場合は、GitHub Pages がおすすめらしいです by @sakajunquality 氏。
このハンズオンは、自分メモのオレオレハンズオンです。
登場人物
HUGO
Goでつくられた 静的Webサイトを構築するジェネレーターです。記事はmarkdown形式でかくことができます。
おしゃれなテーマがいっぱい。
https://themes.gohugo.io/
Cloud Run
GCPのサーバーレスサービス。コンテナをサーバーレスで実行できます。
nginx
静的コンテンツ(サーバーにあるhtmlとかのファイル)を高速に配信するように設計されているオープンソースなWebサーバー。アプリサーバーと連携して動的配信も可能。イベント駆動で動いてくれる。ロードバランサーやHTTPキャッシュとしても利用できる。
Git
Gitに慣れるためちょっと使ってみた。
最近ここで遊んでます。
https://learngitbranching.js.org
GCP
みんな大好きGCP。
GCR
Container Registry。Googleが提供するPrivateなコンテナイメージのリポジトリ。Docker イメージ マニフェスト V2 と OCI(Container Initiative) イメージをサポートしている。
Firebase
今回は Firebase Hosting を使用。
結果だけ見たい人
内容が長くなってしまったので、何がどうだったの?を貼っておきます。
Xサーバー + WordPress
わたしのブログサイト。めちゃ遅いです。

Cloud Run + nginx + HUGO
動的・静的な違い、コンテンツがない等も関係するかもしれませんが、めちゃはやいです。

FirebaseHosting + Cloud Run + nginx + HUGO

作ったサイトは誰もアクセスしないので、自分がアクセスするまでインスタンスは起動していないのですが、日をおいてアクセスた時でもページが寸秒で表示さるのは感動します。
全体の流れ
- HUGO にチャレンジ
- GCP でプロジェクトを作成する
- Cloud Run API を有効化する
- HUGO + nginx を Docker で動かす
- HUGO + nginx を GCR にホスティングし Cloud Run にデプロイする
- Firebase のプロジェクトを作成する
- Firebase Hosting 経由で Cloud Run にアクセスする
HUGO にチャレンジ
はじめに、HUGO をローカルで動かしてみましょう。
HUGO をインストールする
brew install hugo でHugoをインストールします。brewをしばらく使ってない人はbrew updateもしましょう。
$ brew install hugo
サイトのプロジェクトを作成する
任意のディレクトリに移動し、hugo new site {サイト名} でHUGOのプロジェクトを作ります。
$ hugo new site mikkegt
以下のようになればOK。
Congratulations! Your new Hugo site is created in /Users/mikke/go/src/mikkegt.

Just a few more steps and you're ready to go:

1. Download a theme into the same-named folder.
   Choose a theme from https://themes.gohugo.io/ or
   create your own with the "hugo new theme <THEMENAME>" command.
2. Perhaps you want to add some content. You can add single files
   with "hugo new <SECTIONNAME>/<FILENAME>.<FORMAT>".
3. Start the built-in live server via "hugo server".

Visit https://gohugo.io/ for quickstart guide and full documentation.
Gitの設定
gitのリポジトリも作っておきます。
$ cd mikkegt/
$ git init
Initialized empty Git repository in /Users/mikke/go/src/mikkegt/.git/
gitに管理されたくないファイルを設定します。
$ touch .gitignore
.gitignoreに以下を記載します。
+ .DS_Store
+ /public
ここまでの作業を保存しておきます。
$ git add .
$ git commit -m "initial commit"
[master (root-commit) 5279ef0] initial commit
 3 files changed, 11 insertions(+)
 create mode 100644 .gitignore
 create mode 100644 archetypes/default.md
 create mode 100644 config.toml
テーマの選定とダウンロード
https://themes.gohugo.io/ ここからテーマを選びます。(たくさんあって迷うです)
↓ これにしてみました。
このページに適用方法も書いてあります。以下を実行。
$ git submodule add https://github.com/reuixiy/hugo-theme-meme.git themes/meme
Cloning into '/Users/mikke/go/src/mikkegt/themes/meme'...
remote: Enumerating objects: 64, done.
remote: Counting objects: 100% (64/64), done.
remote: Compressing objects: 100% (38/38), done.
remote: Total 1811 (delta 16), reused 46 (delta 12), pack-reused 1747
Receiving objects: 100% (1811/1811), 7.76 MiB | 2.53 MiB/s, done.
Resolving deltas: 100% (936/936), done.
テーマの更新があった場合は、git submodule update --rebase --remoteで最新にします。
作業を保存。
$ git add .
$ git commit -m "add theme meme"
[master 16dd028] add theme meme
 2 files changed, 4 insertions(+)
 create mode 100644 .gitmodules
 create mode 160000 themes/meme
HUGO を起動する
hugo server で HUGO を起動します。
$ hugo server
Building sites … WARN 2019/11/25 19:12:02 found no layout file for "HTML" for "home": You should create a template file which matches Hugo Layouts Lookup Rules for this combination.
WARN 2019/11/25 19:12:02 found no layout file for "HTML" for "taxonomyTerm": You should create a template file which matches Hugo Layouts Lookup Rules for this combination.
WARN 2019/11/25 19:12:02 found no layout file for "HTML" for "taxonomyTerm": You should create a template file which matches Hugo Layouts Lookup Rules for this combination.

                   | EN
+------------------+----+
  Pages            |  3
  Paginator pages  |  0
  Non-page files   |  0
  Static files     |  0
  Processed images |  0
  Aliases          |  0
  Sitemaps         |  1
  Cleaned          |  0

Total in 37 ms
Watching for changes in /Users/mikke/go/src/mikkegt/{archetypes,content,data,layouts,static}
Watching for config changes in /Users/mikke/go/src/mikkegt/config.toml
Environment: "development"
Serving pages from memory
Running in Fast Render Mode. For full rebuilds on change: hugo server --disableFastRender
Web Server is available at http://localhost:1313/ (bind address 127.0.0.1)
Press Ctrl+C to stop
たちあがったところで、以下にアクセスします。

・・・真っ白やんけ。
テーマを適用する
layoutsとstaticディレクトリのコピー
git submodule してきたテーマディレクトリにある「layouts」と「static」をプロジェクトのルートディレクトリにコピーします(上書き)。

config.tomlのコピー
テーマディレクトリの中から config.toml を探し、プロジェクトのルートディレクトリにコピーします(上書き)。

control+c で HUGO をストップし、もう一度 hugo server します。
$ hugo server
以下にアクセス。

できました! かわいい✨✨✨
作業を保存
get statusをしたら、themes/.DS_Storeというのができていたので、この除外設定もしておきます。
.gitignoreを開いて「**/.DS_Store」を追加しました。(あってるかな?)
+ .DS_Store
+ **/.DS_Store
+ /public
以下で作業を保存します。
$ git add .
$ git commit -m "Apply theme"
HUGO を Cloud Run にデプロイする
Cloud SDK が必要です。インストールはこちらを参考にしてください。
https://cloud.google.com/sdk/downloads?hl=JA
以降、以下の Firebase Hosting + Cloud Run を参考にしながらすすめます。
https://firebase.google.com/docs/hosting/cloud-run#write
gcloud components のインストールと更新
gcloud components のインストールと更新をします。
$ gcloud components install beta
$ gcloud components update
GCPでプロジェクトを作成する
GCPのコンソールを開きます。
https://console.cloud.google.com/
プロジェクトのプルダウンをクリックします。
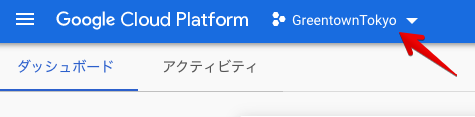
「新しいプロジェクト」をクリックします。
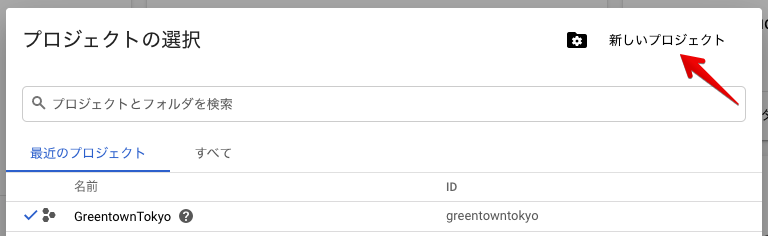
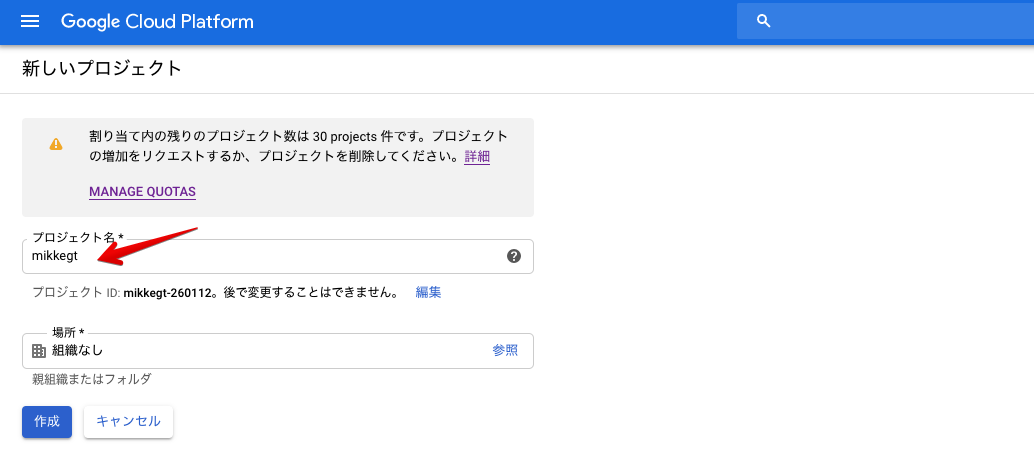
任意のプロジェクト名を入力します。
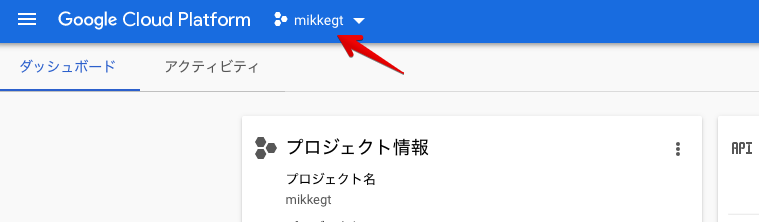
新しく作成したプロジェクトに切り替えます。
Cloud Run API を有効にする
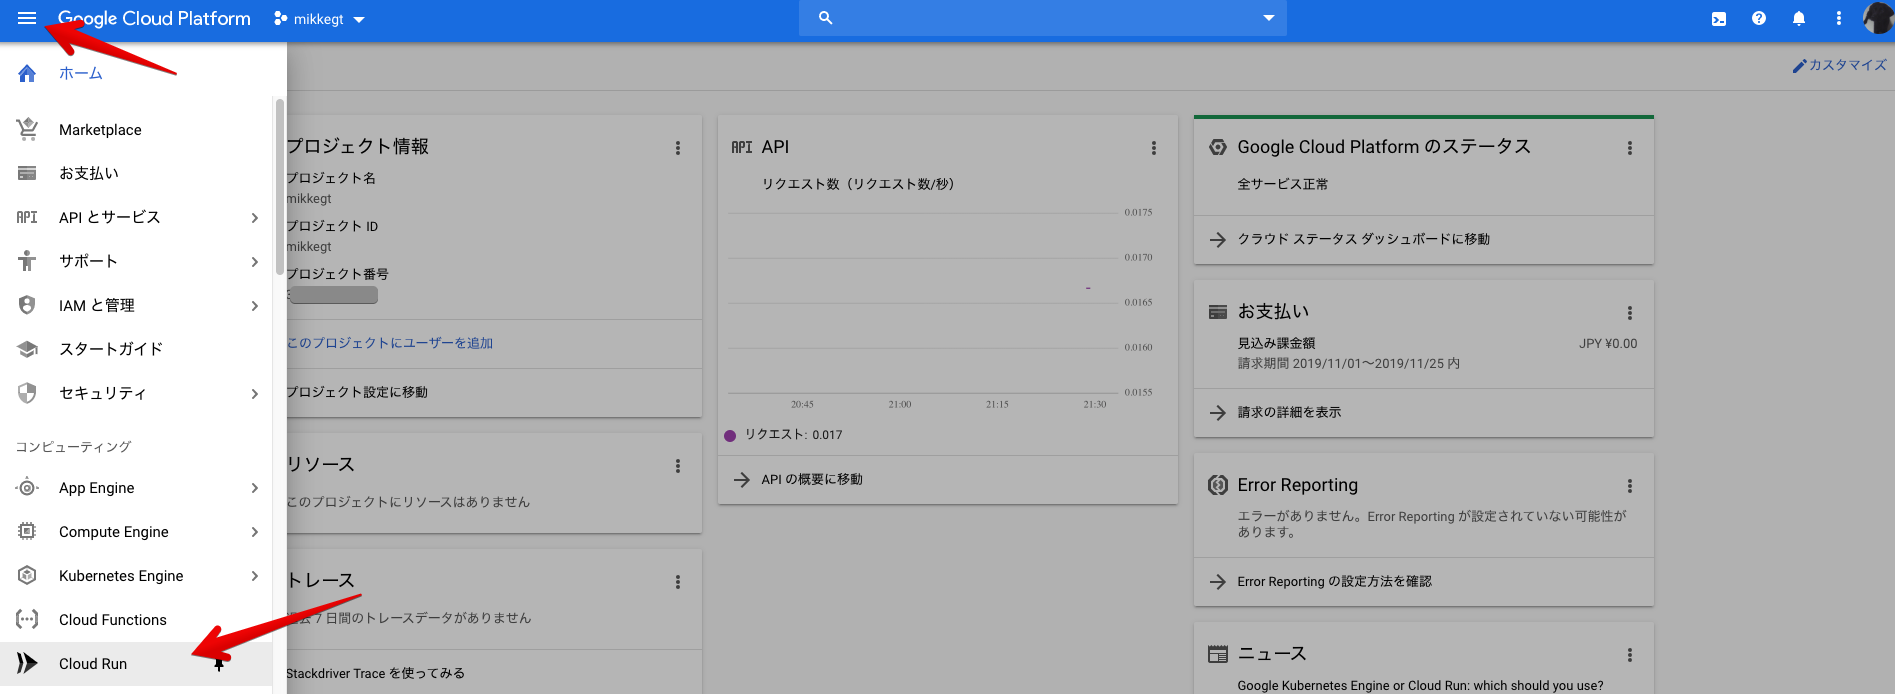
コンソソールのメニューを開き「Cloud Run」をクリックします。
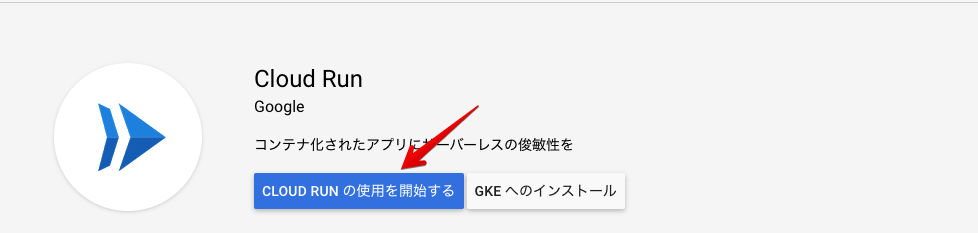
[CLOUD RUN の使用を開始する]をクリックします。
Dockerfileを作成する
プロジェクトのルートディレクトリ Dockerfile を作成します。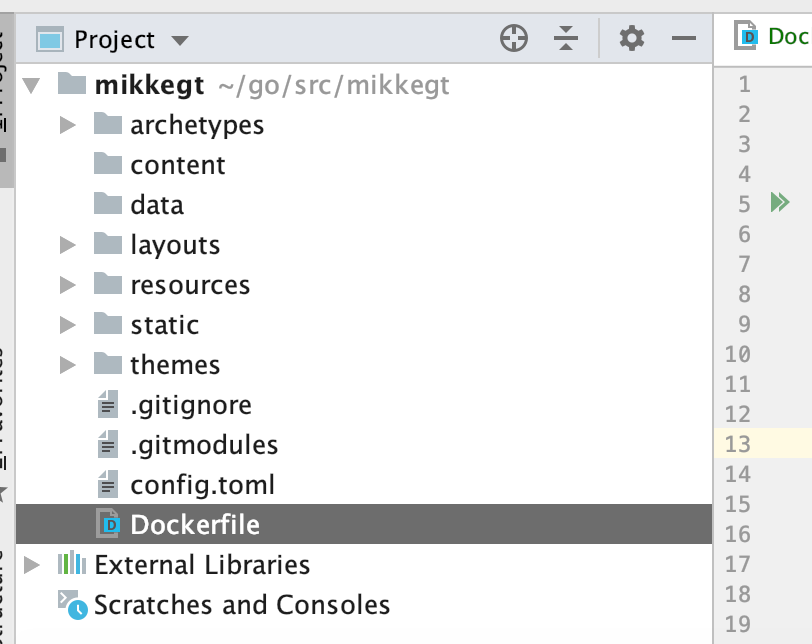
# Use a nginx Docker image
FROM nginx

# Copy the static HTMLs to the nginx directory
COPY public /usr/share/nginx/html

# Copy the nginx configuration template to the nginx config directory
COPY nginx/default.template /etc/nginx/conf.d/default.template

# Substitute the environment variables and generate the final config
CMD envsubst < /etc/nginx/conf.d/default.template > /etc/nginx/conf.d/default.conf && exec nginx -g 'daemon off;'
↑ COPY public って書いてるけど、先ほどのスクショを見るとルートディレクトリに publicディレクトリがないのでした。
HUGO を実行する
引数なしで hugo を実行します。
$ hugo
publicディレクトリが作成されました。

### 作業を保存
@peaceiris さんに、ご指摘を受けました!
$ git add public/
$ git commit -m "add hugo public"
↑ ここは
.gitignore に public を書いているようなので、上のコマンドは実行できていないと思います。 Hugo プロジェクトにおいて public 以下のファイルは生成物なので Git 管理下に置く必要もありません。
とのことで、ありがとうございました ![]()
default.template を作成する
プロジェクトのルートディレクトリに「nginx」ディレクトリを作成し、その中に「default.template」を作成します。

nginx/default.template に以下を書きます。
server {
    listen       ${PORT};
    server_name  localhost;
    location / {
        root   /usr/share/nginx/html;
        index  index.html index.htm;
    }
}
ここまでの作業を保存
$ git add Dockerfile nginx/default.template
$ git commit -m "add docker settings"
Dockerで試す
ローカルの Docker環境で動くか試します。Dockerがない人はこちらを参考に。
http://docs.docker.jp/index.html
以下を実行します。
$ docker build -t mikkegt .
$ docker run -p 1312:1312 -e PORT=1312 mikkegt
以下にアクセスします。
http://localhost:1312/

左がローカルで動いているサイトで、右がDockerで動いています。
SDKの設定を確認する
gcloud config list でSDKの設定を確認します。
$ gcloud config list
[core]
account = xxx@gmail.com
disable_usage_reporting = False
project = hogehoge
別のプロジェクトが設定されていたので、gcloud config set project {プロジェクトID} で紐付けを変更します。
$ gcloud config set project mikkegt
Updated property [core/project].
Cloud Build で GCR に保存する
コンテナイメージをビルドし、Container Registry に保存します。
gcloud builds submit --tag {ホスト名}/{GCPのプロジェクトID}/{任意のイメージ名}
$ gcloud builds submit --tag gcr.io/mikkegt/mikkegt-cloud-run
:
DONE
--------------------------------------------------------------------------------

ID                                    CREATE_TIME                DURATION  SOURCE                                                                             IMAGES                                      STATUS
a5108f06-e825-499f-be8c-0643f63b0156  2019-12-15T15:38:00+00:00  20S       gs://mikkegt_cloudbuild/source/1576424276.66-d1cbb9e33c544a729f639331bedeca2b.tgz  gcr.io/mikkegt/mikkegt-cloud-run (+1 more)  SUCCESS
DONE!! SUCCESS!!
どこに保存されたのか?
コンテナイメージがどこに保存されたのかは、GCPのコンソールから確認することができます。コンソールメニューから「Container Registry」を開くと見ることができます。

次のコマンドで、先ほど GCR に保存したコンテナイメージを Cloud Run にデプロイします。
gcloud beta run deploy {イメージ名} --image {ホスト名}/{GCPのプロジェクトID}/{任意のイメージ名}
$ gcloud beta run deploy mikkegt-cloud-run --image gcr.io/mikkegt/mikkegt-cloud-run
Please choose a target platform:
 [1] Cloud Run (fully managed)
 [2] Cloud Run for Anthos deployed on Google Cloud
 [3] Cloud Run for Anthos deployed on VMware
 [4] cancel
Please enter your numeric choice:  1
[1] Cloud Run (fully managed)を選択します。
[1]の Cloud Run (fully managed) は、Googleがインフラの面倒をすべて管理してくれます。[2]と[3]はKnativeというKubernetes上でサーバーレスを実現するプラットフォームを、自作したクラスターにデプロイします。クラスター内でスケーリングやプロビジョニングが自動で行われます。
Please specify a region: で [1] asia-northeast1 リージョンを選択します。
Please specify a region:
 [1] asia-northeast1
 [2] europe-west1
 [3] us-central1
 [4] us-east1
 [5] cancel
Please enter your numeric choice:  1
yを選択。
Allow unauthenticated invocations to [mikkegt-cloud-run] (y/N)?  y

Deploying container to Cloud Run service [mikkegt-cloud-run] in project [mikkegt] region [asia-northeast1]
✓ Deploying new service... Done.
  ✓ Creating Revision... Revision deployment finished. Waiting for health check to begin.
  ✓ Routing traffic...
  ✓ Setting IAM Policy...
Done.
Service [mikkegt-cloud-run] revision [mikkegt-cloud-run-00001-buf] has been deployed and is serving 100 percent of traffic at https://mikkegt-cloud-run-3dcryxryhq-an.a.run.app
デプロイ完了。ターミナルに表示されたURLにアクセスしてみます。
https://mikkegt-cloud-run-3dcryxryhq-an.a.run.app

できた ![]()
GCPの「Cloud Run」メニューから、デプロイされたコンテナを見ることができます。

Firebase Hosting 経由で Cloud Run にアクセスする
Firebaseのドキュメントサイトに
Cloud Run を使用した動的コンテンツの配信とマイクロサービスのホスティング
とか書いてあって、なんだか凄そうですがよくわかっていません。
Firebase CLI を最新バージョンに更新する
Firebase CLIのインストール方法と使い方はこちら
https://firebase.google.com/docs/cli?hl=ja#update-cli
以下のコマンドで最新に。
$ npm install -g firebase-tools
Firebase Hosting
Firebaseドキュメントサイトより
本番環境レベルのホスティングはグローバル コンテンツ配信ネットワーク(CDN)を基盤としています。ホスティングのデフォルトでは、コンテンツが SSL 経由で配信され、お客様所有のカスタム ドメインや、プロジェクトの web.app や firebaseapp.com の無料サブドメインで使用できます。
CDN とか SSL の設定とか自分でやらんでいいという。素敵すぎます。ということで、Firebase Hosting 経由で Cloud Run にアクセスする設定にレッツチャレンジ。
Firebase でプロジェクトを作成する
Firebaseのコンソールにログインし、プロジェクトを追加します。
https://console.firebase.google.com/

先ほど GCP で作成したプロジェクトを選択します。

[続行]をクリックします。(Firebaseは毎月UIが変わっている気がする...)

[プランを確認]をクリック。

[続行]をクリックします。

これも[続行]

適当に選択し、[Firebaseを追加]をクリックします。

しばし待つ。

[続行]をクリックします。

作成したプロジェクトのコンソールが表示されます。「>」をクリックします。

「アプリのニックネーム」に適当な名前を入力し「このアプリのFirebase Hosting も設定します。」にチェックを入れ、[アプリを登録]をクリックします。

このスクリプトはコピーしなくていいです。[次へ]をクリックします。

npm install -g firebase-tools は先程やったのでスキップします。[次へ]をクリック。

Firebase CLIを初めて触る人は、ターミナルからfirebase loginを実行して、認証します。

firebase init を HUGO プロジェクトのトップディレクトリで実行します。
「Hosting: Configure and deploy Firebase Hosting sites」を選択します。(選んだらスペースキーをクリックし、Enter)
$ pwd
/Users/mikke/go/src/mikkegt
$ firebase init

     ######## #### ########  ######## ########     ###     ######  ########
     ##        ##  ##     ## ##       ##     ##  ##   ##  ##       ##
     ######    ##  ########  ######   ########  #########  ######  ######
     ##        ##  ##    ##  ##       ##     ## ##     ##       ## ##
     ##       #### ##     ## ######## ########  ##     ##  ######  ########

You're about to initialize a Firebase project in this directory:

  /Users/mikke/go/src/mikkegt

? Which Firebase CLI features do you want to set up for this folder? Press Space to select feature
s, then Enter to confirm your choices. (Press <space> to select, <a> to toggle all, <i> to invert
selection)
 ◯ Database: Deploy Firebase Realtime Database Rules
 ◯ Firestore: Deploy rules and create indexes for Firestore
 ◯ Functions: Configure and deploy Cloud Functions
❯◉ Hosting: Configure and deploy Firebase Hosting sites
 ◯ Storage: Deploy Cloud Storage security rules
 ◯ Emulators: Set up local emulators for Firebase features
「Use an existing project」を選択し、Enter。
❯ Use an existing project
  Create a new project
  Add Firebase to an existing Google Cloud Platform project
  Don't set up a default project
先程作成したFirebaseのプロジェクトを選択し、Enter。
? Please select an option: Use an existing project
? Select a default Firebase project for this directory:
  greentowntokyo (GreentownTokyo)
❯ mikkegt (mikkegt)
  my-react-gopher (my-react-gopher)
  mycloudfirestore-go (mycloudfirestore-go)
Enter。
Your public directory is the folder (relative to your project directory) that
will contain Hosting assets to be uploaded with firebase deploy. If you
have a build process for your assets, use your build's output directory.

? What do you want to use as your public directory? (public)
Nを選択します。
Configure as a single-page app (rewrite all urls to /index.html)? No ←ここ
 File public/404.html already exists. Overwrite? No ←ここ
  Skipping write of public/404.html
 File public/index.html already exists. Overwrite? No ←ここ
  Skipping write of public/index.html

  Writing configuration info to firebase.json...
  Writing project information to .firebaserc...

✔  Firebase initialization complete!
Firebase コンソールに戻ります。
firebase deploy は、まだやらないのでスキップします。[コンソールに進む]をクリック。

firebase initを実行した時に、同ディレクトリにできた firebase.json を編集します。

hosting セクションに rewrite 構成を追加します。
変更前
{
  "hosting": {
    "public": "public",
    "ignore": [
      "firebase.json",
      "**/.*",
      "**/node_modules/**"
    ]
  }
}
変更変更後
{
  "hosting": {
    "public": "public",
    "ignore": [
      "firebase.json",
      "**/.*",
      "**/node_modules/**"
    ],
    "rewrites": [ {
      "source": "**",
      "run": {
        "serviceId": "mikkegt-cloud-run",
        "region": "asia-northeast1"
      }
    } ]
  }
}
serviceId には、Cloud Run にデプロイしたコンテナのイメージ名を書きます。
region リーションを指定します。今回は Cloud Run と同じところにしてみた。
ほんとは、これだけだとFirebase Hostingを使う意味がないらしいですが..とりあえずデプロイします。
firebase deploy を実行。
$ firebase deploy

=== Deploying to 'mikkegt'...

i  deploying hosting
i  hosting[mikkegt]: beginning deploy...
i  hosting[mikkegt]: found 21 files in public
✔  hosting[mikkegt]: file upload complete
i  hosting[mikkegt]: finalizing version...
✔  hosting[mikkegt]: version finalized
i  hosting[mikkegt]: releasing new version...
✔  hosting[mikkegt]: release complete

✔  Deploy complete!

Project Console: https://console.firebase.google.com/project/mikkegt/overview
Hosting URL: https://mikkegt.firebaseapp.com
ターミナルに表示されたURLにアクセスしてみましょう。
https://mikkegt.firebaseapp.com

Firebase 経由で Cloud Run にデプロイした HUGO サイトにアクセスできました✨
さいごに
いつかやってみよう、がたくさんあって、Advent Calendar の締め切りのおかげで、最近試したいことがいっぺんにほぼできました。ありがとうQiita。誰かに読んでもらうかも..と思うとちゃんと調べたり何度も試したりと、曖昧にできないのでアウトプット大事だなぁと思いました。
HUGO を教えてくれた @mi-bear さんや、Cloud Run推しの Diego氏 とか Cloud Run勉強会を開催してくれた GCPUG女子会の皆さま、勉強になりました。感謝!
ここまでお読みいただきありがとうございました。
参考サイト
https://qiita.com/bake0937/items/e0914efbd9434be474a4
https://medium.com/google-cloud/how-to-run-a-static-site-on-google-cloud-run-345713ca4b40