ここまでのおさらい
前回まででサーバサイドの作成が完了しました。
今回はNuxtとspringを結合してアプリケーションを完成させましょう。
axiosの準備
http clientにaxiosを使用します。
また、Nuxtのアプリケーションは3333で起動しSpringは28080で起動します。
:28080/apiへのリクエストを解決するためにNuxtのproxyモジュールを使用します。
併せてcross-envも追加しておきます。
 cd ~/study-auth0/nuxt-auth0/  #Nuxtプロジェクトルートへ移動
 yarn add @nuxtjs/axios @nuxtjs/proxy
 yarn add --dev cross-env
package.jsonを編集しNODE_ENVの設定を追加します。
  "scripts": {
    "dev": "cross-env NODE_ENV=development HOST=0.0.0.0 PORT=3333 nuxt",
nuxt.config.jsを編集し proxyの設定を切り替えます。
  modules: [
    '@nuxtjs/axios',
    '@nuxtjs/proxy'
  ]
}

if (process.env.NODE_ENV === 'development') {
  config.proxy = {
    '/api': 'http://localhost:28080'
  }
proxyの動作確認をします。
index.vueを編集してping publicとping privateというボタンを設置します。
また、返却されたメッセージを表示する領域も追加します。
        </nuxt-link>
      </div>
      <div class="field is-grouped">
        <p class="control">
          <button class="button is-info is-outlined" @click="pingPublic">ping public</button>
        </p>
        <p class="control">
          <button class="button is-link is-outlined" @click="pingPrivate">ping private</button>
        </p>
      </div>

      <div class="box">
        <article class="media">
          <div class="media-content">
            <div class="content">
              {{message}}
            </div>
          </div>
        </article>
      </div>
    </div>
  </section>

<script>
  export default {
    data: () => ({
      message: null
    }),
    methods: {
      loggedIn() {
        return this.$auth0.isAuthenticated();
      },
      async pingPublic() {
        const returnMessage = await this.$axios.$get('/api/v1/public');
        this.message = returnMessage;
      },
      async pingPrivate() {
        const returnMessage = await this.$axios.$get('/api/v1/private');
        this.message = returnMessage;
      }
    }
  };
</script>
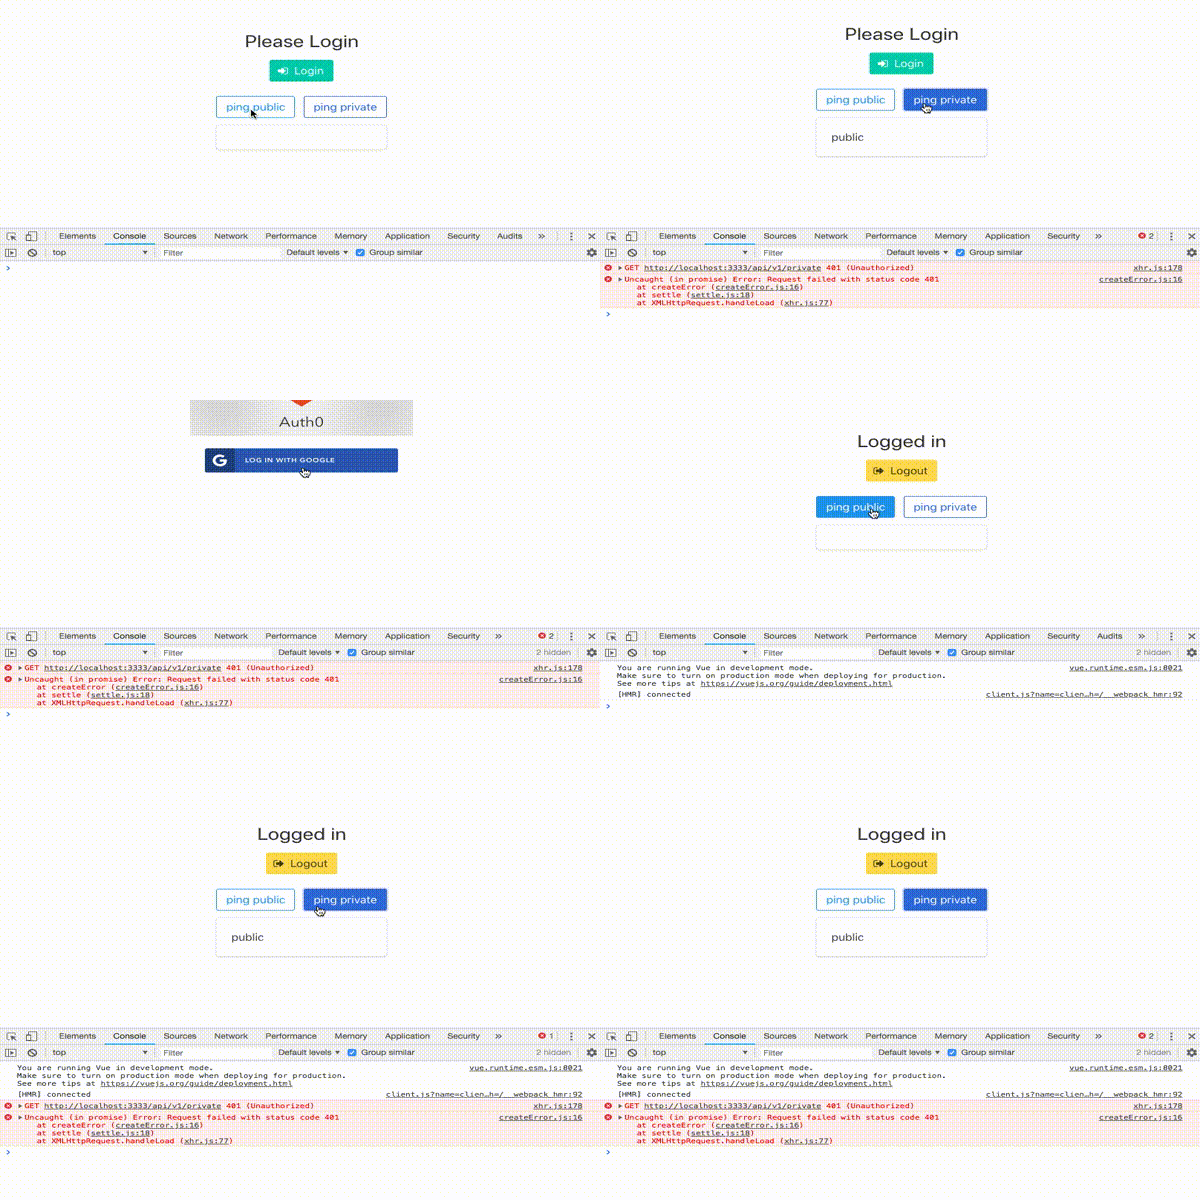
この時点でそれぞれのアプリケーションを起動して動作確認してみましょう。

まだ、リクエスト時にAuthorizationヘッダにidTokenを設定していないので
認証の可否関係なくping privateへのリクエストは 401が返ってきていますね。
idTokenをAuthorizationヘッダに追加する。
では、認証後のidTokenがLocal storageに保存されているので、それを用いてAuthorizationヘッダに設定しましょう。
auth0.jsにLocalStorageからidTokenを取得するメソッドを追加します。
  getIdToken() {
    return this.isAuthenticated() ? localStorage.getItem('idToken') : null
  }
index.vueのpingPrivateメソッドにAuthorizationヘッダを設定する処理を追加します
*ヘッダの設定はキレイにできるかとおもいますが、検証用のためにとりあえずここでやってしまっています。(ごめんなさい)
修正しました
async pingPrivate() {
        this.$axios.setHeader('Authorization', 'Bearer ' + this.$auth0.getIdToken()); //追加
        const returnMessage = await this.$axios.$get('/api/v1/private');
        this.message = returnMessage;
      }
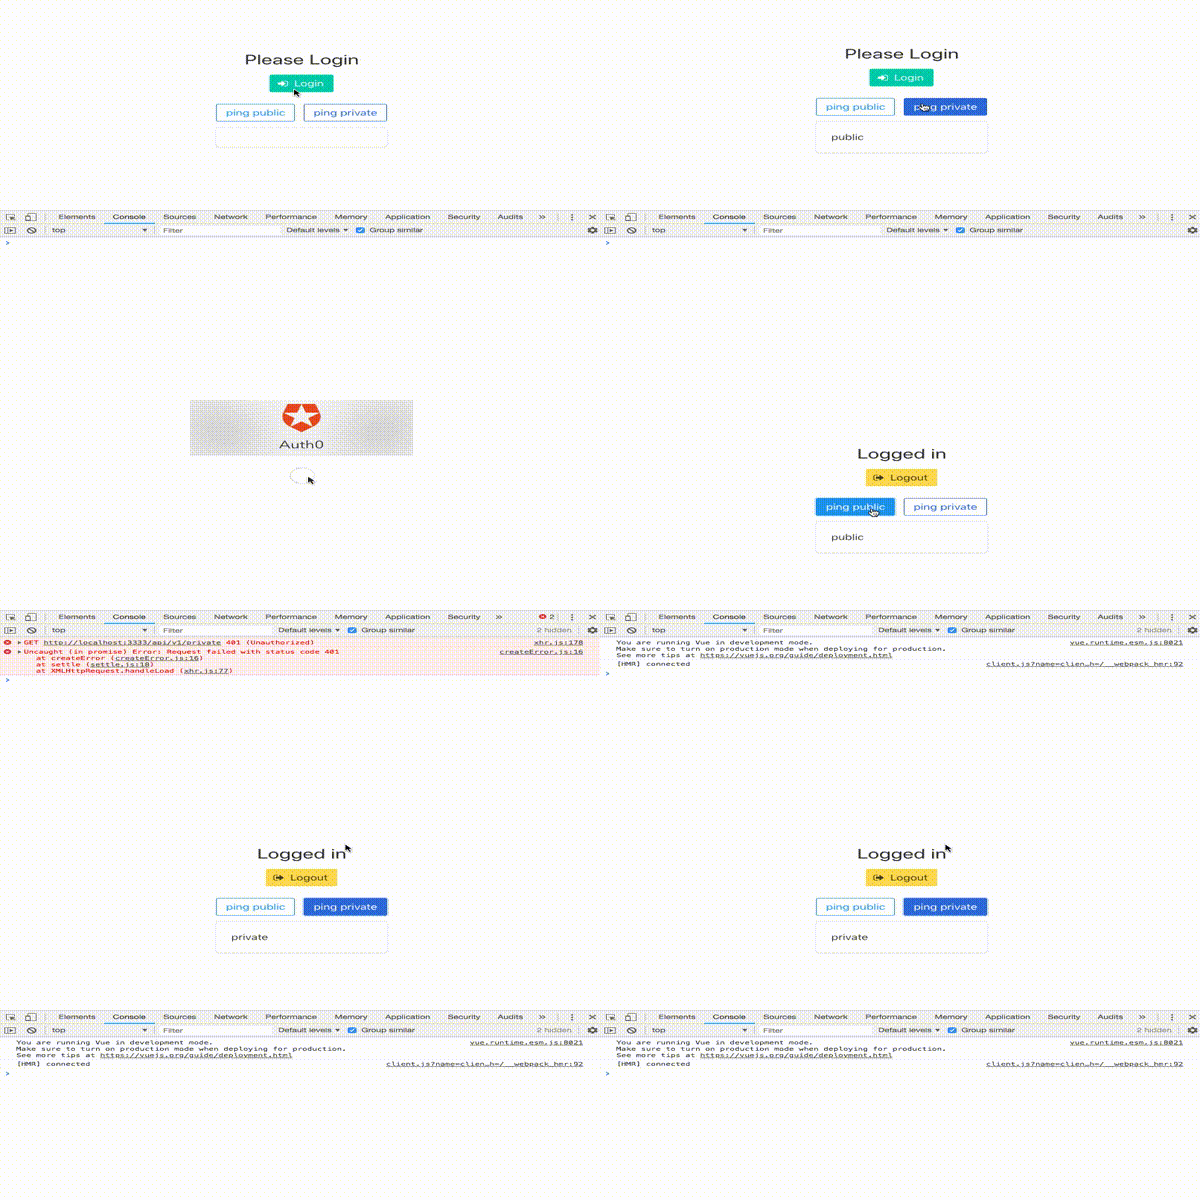
再度動作確認してみましょう
できた!
認証後のみping privateがメッセージを返してきていますね。
まとめ
簡単ですが、以上で【Nuxt.js + Auth0 + Spring Boot で作る認証付きSPA】は終わりです。
auth0にはまだまだたくさんの機能が備わっています。
これが何かのきっかけになってくだされば幸いです。
また、全般に渡って下記を大変参考にさせていただきました。
https://booth.pm/ja/items/830458
購入する価値が確実にあると私は思います。
この場を借りて素晴らしい本を発行してくださったころころぶっくす様に感謝の気持ちお伝えできたらと思います。
重ねて本当にありがとうございました。
おまけ
以下にAuthorizationヘッダの設定や、エラー時の処理などを修正した内容をまとめました。
