はじめに
前回の記事では、Zoom RTMS (Realtime Media Streams) の概要と基本的なセットアップについて紹介しました。
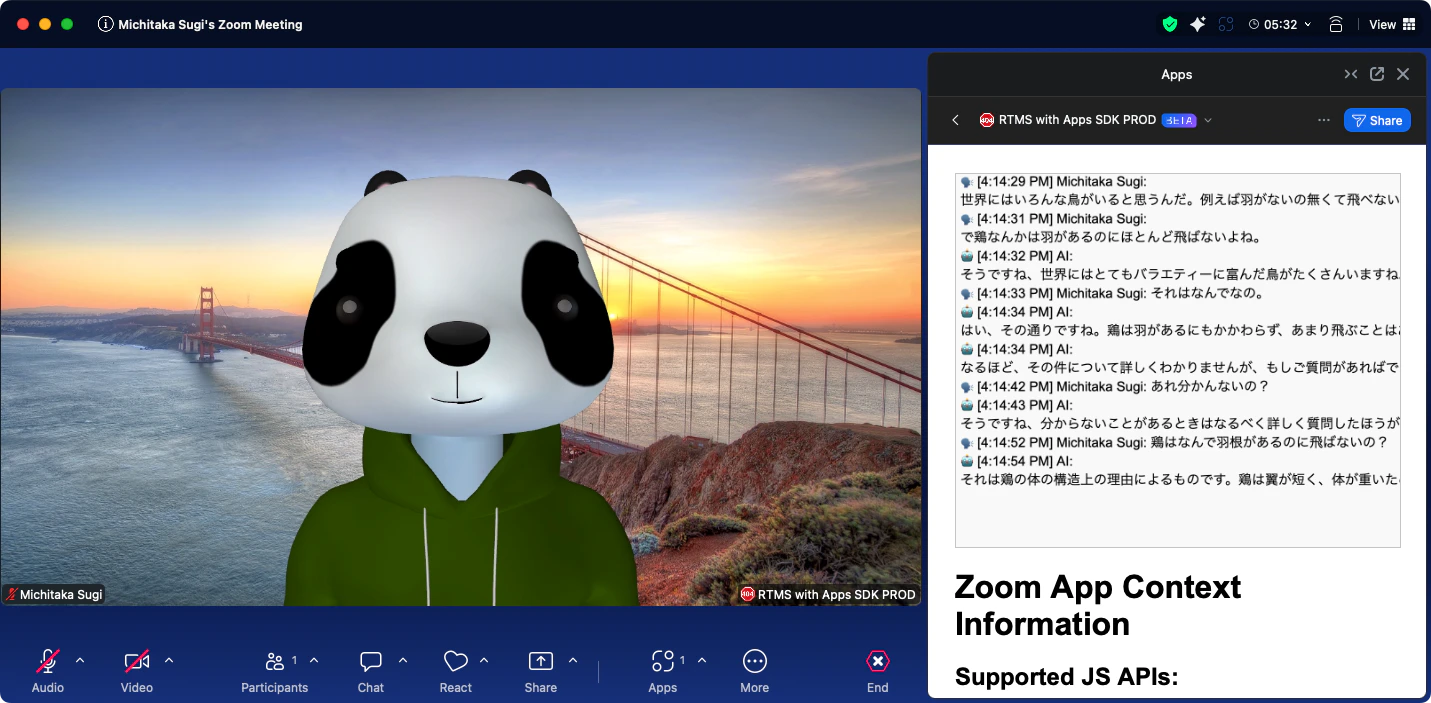
今回は応用編として、RTMSのTranscript(文字起こし)データを活用して、Zoomミーティング中にリアルタイムでAIと会話できるアプリを作ってみます。
今回作るもの
Zoomで話した内容が自動でAIに送られ、リアルタイムで回答が表示されるアプリです。(くだらない質問しててすみません)
RTMSで取得できるデータ
RTMS=リアルタイム「メディア」ストリームというと映像・音声のイメージが強いですが、実はチャットやTranscript(文字起こし)データもリアルタイムで取得できます。
| msg_type | データ種別 | 用途例 |
|---|---|---|
| 14 | Audio | 音声録音、外部STTサービス連携 |
| 15 | Video | 録画、物体検出、顔認識 |
| 16 | Screen Share | 画面共有の録画・配信 |
| 17 | Transcript | 今回使用!AIチャット、議事録、要約 |
| 18 | Chat | チャットログ、キーワード検知 |
今回はmsg_type: 17のTranscriptデータにフォーカスします。
アーキテクチャ
実装のポイント
1. プロジェクト構成
rtms-ai-chat/
├── index.js              # メインサーバー(RTMS WebSocket処理)
├── chatWithOpenrouter.js # OpenRouter API呼び出し
├── public/
│   └── index.html        # Zoom App用フロントエンド
├── package.json
└── .env
2. 必要な環境変数
PORT=3000
ZOOM_SECRET_TOKEN=your_zoom_secret_token
ZM_CLIENT_ID=your_zoom_client_id
ZM_CLIENT_SECRET=your_zoom_client_secret
WEBHOOK_PATH=/webhook
OPENROUTER_API_KEY=your_openrouter_api_key
3. OpenRouter API呼び出し
OpenRouterを使うと、Claude、GPT-4、Llamaなど様々なモデルを統一APIで利用できます。
// chatWithOpenrouter.js
import OpenAI from 'openai';

const openai = new OpenAI({
  apiKey: process.env.OPENROUTER_API_KEY,
  baseURL: 'https://openrouter.ai/api/v1',
});

export async function chatWithOpenRouter(message, model = 'anthropic/claude-3-haiku') {
  const response = await openai.chat.completions.create({
    model: model,
    messages: [{ role: 'user', content: message }],
  });
  return response.choices[0].message.content;
}
4. Transcriptデータの処理
RTMSから受信したTranscriptデータ(msg_type: 17)を処理し、AIに送信します。
// index.js(抜粋)

// 日本語プロンプトビルダー
function buildJapanesePrompt(transcript) {
  return `
あなたは親切な日本語アシスタントです。
ユーザーの発言に自然な日本語で返答してください。

ユーザーの発言:
${transcript}
`.trim();
}

// Media WebSocketのメッセージハンドラ内
if (msg.msg_type === 17 && msg.content && msg.content.data) {
  const transcript = msg.content.data;

  // ユーザーの発言をフロントエンドに送信
  broadcastToFrontendClients({
    type: 'user_speech',
    content: transcript,
    user: msg.content.user_name,
    timestamp: Date.now()
  });

  // AIに質問して応答を取得
  const prompt = buildJapanesePrompt(transcript);
  const response = await chatWithOpenRouter(prompt);

  // AI応答をフロントエンドに送信
  broadcastToFrontendClients({
    type: 'ai_response',
    content: response,
    user: 'AI',
    timestamp: Date.now()
  });
}
5. フロントエンドへのリアルタイム配信
サーバーからZoom App UIへWebSocketでリアルタイム配信します。
// index.js(抜粋)
import { WebSocketServer } from 'ws';

const frontendWss = new WebSocketServer({ server, path: '/ws' });
const frontendClients = new Set();

frontendWss.on('connection', (ws) => {
  frontendClients.add(ws);
  ws.on('close', () => frontendClients.delete(ws));
});

function broadcastToFrontendClients(message) {
  const json = JSON.stringify(message);
  for (const client of frontendClients) {
    if (client.readyState === WebSocket.OPEN) {
      client.send(json);
    }
  }
}
6. Zoom App UI(フロントエンド)
Canvas APIを使ってチャット履歴を表示します。
<!-- public/index.html(抜粋) -->
<canvas id="dataCanvas"></canvas>

<script>
  const wsProtocol = location.protocol === 'https:' ? 'wss:' : 'ws:';
  const socket = new WebSocket(`${wsProtocol}//${location.host}/ws`);

  socket.onmessage = (event) => {
    const msg = JSON.parse(event.data);

    if (msg.type === 'user_speech' || msg.type === 'ai_response') {
      const prefix = msg.type === 'ai_response' ? '🤖' : '🗣️';
      const line = `${prefix} ${msg.user}: ${msg.content}`;
      // Canvasに描画...
    }
  };
</script>
サンプルアプリで学ぶ
Zoomは公式で多数のRTMSサンプルアプリを公開しています。今回のようなAI連携以外にも、様々な応用が可能です。
公式サンプル一覧
まとめ
RTMSは映像・音声だけでなく、TranscriptやChatデータもリアルタイムで取得できる強力な機能です。
今回のサンプルでは:
- Transcriptデータ(
msg_type: 17)を受信 - OpenRouter経由でLLMに質問
- WebSocketでZoom App UIにリアルタイム表示
という流れを実装しました。
RTMSの応用方法は無限大です。ぜひ公式サンプルを参考に、あなただけのZoomアプリを作ってみてください!
今回のサンプル
今回のサンプルはこのリポジトリにありますので、よろしければ参考にしてみてください。
参考リンク