
1. はじめに
GitLab サーバを自分で立てて実際に触ってみたいと思い、Windows 環境の WSL 上に Docker を導入し、GitLab サーバを Docker コンテナとして構築してみた。
本記事では、その際に行った環境構築の手順やポイントをまとめている。
なお、Docker はほぼ未経験の状態から触り始めているため、初学者目線での内容になっている。
2. 前提条件
- Windows環境にWSLが実装されていること
- Docker Hubのアカウントを作成していること
- (必要に応じて)firewalld サービスが有効な環境では、Docker のポート公開に影響しないよう無効化または適切な例外設定がされていること
- 以下のコマンド操作は、特に断りのない限り root 権限で実行する
3. Dockerサーバ (rootful モード) の構築
rootful モードのDockerサーバをWSL上に構築する。podmanや旧バージョンのDocker関連のパッケージがインストールされている場合は、事前にアンインストールする。
dnf remove -y podman podman-docker runc docker-ce docker-ce-cli containerd.io
3.1. リポジトリの設定
必要なパッケージをインストールし、リポジトリを設定する。
dnf install yum-utils
dnf config-manager --add-repo https://download.docker.com/linux/centos/docker-ce.repo

Adding repo from: https://download.docker.com/linux/centos/docker-ce.repo
3.2. インストールするパッケージのバージョンの確認
インストール可能な Docker エンジンのバージョンを確認する。
dnf list docker-ce.x86_64 --showduplicates

...
Available Packages
...
docker-ce.x86_64            3:20.10.16-3.el9                docker-ce-stable
3.3. インストール
Docker CEをインストールする。
dnf install -y docker-ce docker-ce-cli containerd.io docker-compose-plugin --allowerasing
3.4. ストレージドライバの設定
Docker CEが使用するストレージドライバに関する設定を記述する。ファイルシステムに xfs を利用するOSでは、overlay2 を指定する。
mkdir -p /etc/docker
vi /etc/docker/daemon.json
{
  "storage-driver": "overlay2"
}
※ xfs ファイルシステムを使用する場合は、ftype=1 でフォーマットされている必要がある。
3.5. サービスの起動
systemdに設定ファイルの変更を通知し、Dockerエンジンを起動する。
systemctl daemon-reload

systemctl enable --now docker
Created symlink /etc/systemd/system/multi-user.target.wants/docker.service → /usr/lib/systemd/system/docker.service.

systemctl is-active docker
active
3.6. パラメータの確認
docker info コマンドを実行し、設定されているパラメータを確認する。
docker info | grep -iE "storage"
Storage Driver: overlay2
3.7. Docker クライアント、サーバ、API バージョンの確認
インストールしたDockerのクライアント、Dockerが稼働するOSのアーキテクチャ、DockerのサーバとAPIなどのバージョンなどを確認する。ClientとServerの両方のバージョンが表示されていることを確認する。
docker version

Client: Docker Engine - Community
 Version:           29.2.0
 API version:       1.53

...
Server: Docker Engine - Community
 Engine:
  Version:          29.2.0
  API version:      1.53 (minimum version 1.44)
...
3.8. Docker Hubへのログイン
- Docker HubのURL
上記のURLのサイトで作成したユーザ名とパスワードを使って、Docker Hubにログインする。
docker login

USING WEB-BASED LOGIN

i Info → To sign in with credentials on the command line, use 'docker login -u <username>'


Your one-time device confirmation code is: TWRT-VKRH
Press ENTER to open your browser or submit your device code here: https://login.docker.com/activate

Waiting for authentication in the browser…

WARNING! Your credentials are stored unencrypted in '/root/.docker/config.json'.
Configure a credential helper to remove this warning. See
https://docs.docker.com/go/credential-store/

Login Succeeded
Login Succeeded と表示されれば、Docker Hub へのログインは成功している。
4. GitLabサーバの構築
GitLabサーバの構築手順についてまとめる。
4.1. 公開ポートの設計
- HTTP: 8080 (ホスト) -> 80 (コンテナ)
- SSH: 20022 (ホスト) -> 22 (コンテナ)
この設計であれば、external_url は http://localhost:8080 である。
4.2. GitLab用のディレクトリ作成
GitLabサーバのデータを格納するために使うディレクトリを作成する。
mkdir -p /srv/gitlab/{config,logs,data}
chown -R $USER:$USER /srv/gitlab
ls -ld /srv/gitlab /srv/gitlab/config /srv/gitlab/logs /srv/gitlab/data
4.3. Dockerイメージの入手
GitLabは、Docker環境で簡単にインストールできる。
docker pull gitlab/gitlab-ce:latest
4.4. コンテナの起動
GitLab のコンテナを起動する。
docker run --detach \
  --hostname gitlab01 \
  --name gitlab01 \
  --restart always \
  --publish 8080:80 \
  --publish 20022:22 \
  --env GITLAB_OMNIBUS_CONFIG="external_url 'http://localhost:8080'; gitlab_rails['gitlab_shell_ssh_port'] = 20022" \
  --volume /srv/gitlab/config:/etc/gitlab \
  --volume /srv/gitlab/logs:/var/log/gitlab \
  --volume /srv/gitlab/data:/var/opt/gitlab \
  --shm-size 256m \
  gitlab/gitlab-ce:latest
コンテナを起動後、Webブラウザでアクセスできるようになるまで、5~10分程度時間がかかる。
5. 動作確認
5.1. コンテナの稼働確認
docker ps --filter name=gitlab01

CONTAINER ID   IMAGE                     COMMAND                  CREATED       STATUS                 PORTS                                                                                         NAMES
8d4b5886fd80   gitlab/gitlab-ce:latest   "/assets/init-contai…"   3 hours ago   Up 3 hours (healthy)   443/tcp, 0.0.0.0:20022->22/tcp, [::]:20022->22/tcp, 0.0.0.0:8080->80/tcp, [::]:8080->80/tcp   gitlab01
5.2. HTTPの応答確認
curl -I http://localhost:8080/

HTTP/1.1 302 Found
Server: nginx
Date: Tue, 03 Feb 2026 14:36:40 GMT
Content-Type: text/html; charset=utf-8
...
5.3. rootユーザによるログイン
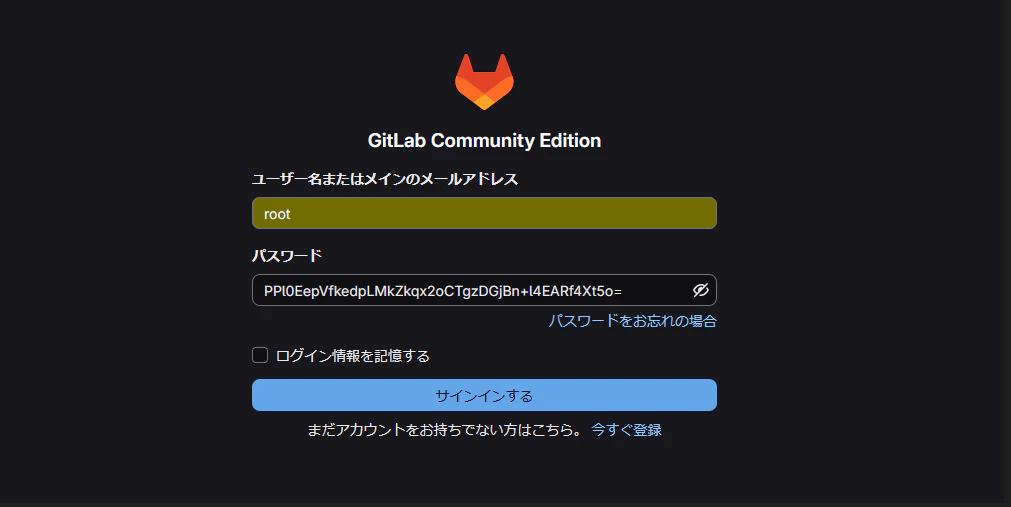
GitLabサーバの管理画面にrootユーザでログインする。パスワードは、gitlab01コンテナが提供する初期パスワードでログインする。gitlab01コンテナが提供するrootユーザの初期パスワードは以下のコマンドから確認できる。
docker exec -it gitlab01 grep 'Password:' /etc/gitlab/initial_root_password
Password: PPl0EepVfkedpLMkZkqx2oCTgzDGjBn+l4EARf4Xt5o=
/etc/gitlab/initial_root_password は初回起動後24時間で自動的に削除されるため、初回ログイン後は速やかにパスワードを変更すること。
Webブラウザのログイン画面のユーザ名に root を入力し、パスワード入力欄に、上記の初期パスワードを入力し、Sign in をクリックしてログインする。
6. トラブルシュート
6.1. 事象
コンテナを起動し、Webブラウザから http://localhost:8080/ にアクセスするが、GitLabにアクセスできなかった。
6.2. 原因
external_url GitLab 全体の外部公開 URL を指定するための設定項目であるが、external_url をポート付きで指定すると、GitLab の nginx のポートも自動的に同じポート (本ケースでは8080) に切り替わる挙動を示した。
--env GITLAB_OMNIBUS_CONFIG="external_url 'http://localhost:8080'; gitlab_rails['gitlab_shell_ssh_port'] = 20022"
6.3. 解決方法
GitLabのポートが被らないように、/etc/gitlab/gitlab.rb ファイルを以下のように編集する。
docker exec -it gitlab01 editor /etc/gitlab/gitlab.rb

# Fix puma port to avoid nginx 8080 conflict
puma["port"] = 8081

# Ensure nginx listens on 80 for Docker port mapping
nginx["listen_port"] = 80
以下のコマンドを実行し、構成内容を反映させる。
docker exec -it gitlab01 gitlab-ctl reconfigure
サービスを再起動する。
docker exec -it gitlab01 gitlab-ctl restart nginx
docker exec -it gitlab01 gitlab-ctl restart puma
最後に動作確認を実施する。
docker exec -it gitlab01 curl -I http://127.0.0.1/

HTTP/1.1 302 Found
Server: nginx
Date: Tue, 03 Feb 2026 15:21:43 GMT
Content-Type: text/html; charset=utf-8
...
7. 参考情報
-
古賀政純, 『Rocky Linux 9 & AlmaLinux 実践ガイド[サーバ構築編]』, インプレス, 2024.
-
Docker Docs, “OverlayFS storage driver”
https://docs.docker.com/engine/storage/drivers/overlayfs-driver/
(最終参考日: 2026-02-4) -
Zenn, “# GitLab に初めて管理者でログインする方法”
https://zenn.dev/yagyu/articles/92cc78365a5820
(最終参考日: 2026-02-4) -
Qiita, “# Docker(Docker-Compose)でGitlabを構築”
https://qiita.com/piityan1126/items/c76c46ae2047a4259a9e
(最終参考日: 2026-02-4)