はじめに
地理院地図Vector のベクトルデータを手軽に GeoJSON としてダウンロードできると、地理院地図を含めた、GIS ソフトなどでちょっとした地図作りに役立つと考えました。
Node.js 等で pbf を GeoJSON へ 1 対 1 で変換してもよいのですが、あくまで環境を選ばず手軽にということで、ブラウザ上で行います。
この記事では、ベクトルタイルを利用できる主なライブラリである Mapbox GL JS を用いて、ブラウザ上で取得する方法を整理してみます。
※以下は、ブラウザで取得した地理院地図Vector のデータを QGIS へ取り込んだ例です。
ベクトルタイルのデータ取得方法
Mapbox GL JS には、ベクトルタイルのデータを GeoJSON として取得できる関数として queryRenderedFeatures() と querySourceFeatures() があります。
queryRenderedFeatures
- レンダリングされた地物を取得します。
- 画面に表示された地物だけ取得されますが、デザインの関係で複数のスタイルレイヤを1つの地物に適用していると、その分だけ同じ地物が重複して取得されてしまいます。
-
style layer idの配列でフィルタリングできるほか、自分は試していないですが、スタイルと同じfilter条件でも絞り込みができるようです。 - また、クリック地点や領域を指定して、その範囲内の地物だけを取得することもできます。
querySourceFeatures
- タイルに含まれている地物を取得します。
- タイル単位で地物を取得するので、画面外の地物やスタイル上表示されていないデータも取得されます。
-
source-layerでフィルタリングできます。配列は受け付けていない模様。 - こちらも、スタイルと同じ
filter条件で絞り込みができるようです。
どっちが良いか?
結局は使い道次第なのですが、一括でデータが欲しい場合は、querySourceFeatures の方が便利かもしれません。逆に、細かいデータ(たとえば、クリックで選択した一部の地物のみ)がほしい場合は、queryRenderedFeatures の方が小回りが効きそうです。
なお、ベクトルタイルには、表示上の問題をなくすため、本来のタイル領域よりも余分にデータを保持していることがあります。(これを bufferと言います。)どちらの方法にせよ、この buffer のデータも含まれてしまいますので、しっかりとしたデータを取得したい場合は、もっと工夫が必要かもしれません。
サンプルコード
下準備
まず、Mapbox GL JS で地理院地図Vector のベクトルタイルを表示するように設定します。スタイル設定は、地理院地図Vector のベクトルタイルを読み込めていればよいのですが、たとえば国土地理院が提供している以下のスタイル設定を利用します。
<div id="map"></div>
const map = new mapboxgl.Map({
  container: 'map',
  hash: true,
  style: 'https://gsi-cyberjapan.github.io/gsivectortile-mapbox-gl-js/pale.json', // stylesheet location
  center: [139.78148, 35.768793],
  zoom: 15,
  maxZoom: 17.99,
  localIdeographFontFamily: ['MS Gothic', 'Hiragino Kaku Gothic Pro', 'sans-serif']
});
一括で表示範囲の地物を取得する
地図が準備できたら、querySourceFeatures を用いてデータをまとめて取得し、GeoJSON を返す関数を準備します。なお、source id と 取得したいデータの source layer の配列を指定できるようにしておきます。
const getGeojson = (sourceId, layerList) => {
  const styleLoadStatus = map.isStyleLoaded();
  if(styleLoadStatus){
    let allFeatures = [];
    for(i in layerList){
      const targetLayer = layerList[i];
      const features = map.querySourceFeatures(sourceId, {
         sourceLayer: targetLayer
      });
      allFeatures = allFeatures.concat(features);
    };
    const geojson = {
      "type": "FeatureCollection",
      "features": allFeatures
    };
    return geojson;
  }else{
    alert("まだ地図のスタイルを読み込めていません!");
  }
}
今回の例で使ったスタイル設定では、source id 名が gsibv-vectortile-source-1-4-16 となっていますので、たとえば、source layer が railway と road のデータのみ欲しい場合、以下のようにすれば取得できます。
const geojson = getGeojson("gsibv-vectortile-source-1-4-16", ["railway", "road"]);
console.log(geojson);
なお、少し前に私が調べた限りだと、地理院地図Vector のベクトルタイルには、以下の source layer が含まれているようです。
- symbol
- label
- boundary
- road
- railway
- searoute
- transp
- transl
- coastline
- river
- lake
- waterarea
- elevation
- contour
- landforma
- landformp
- landforml
- building
- structurea
- structurel
- wstructurea
クリックした一部の地物のみを取得する場合
クリックした一部の地物のみを取得する場合は、queryRenderedFeatures を利用した方が良さそうです。まず、クリック時に発火するように、on() に click イベントを指定し、callback にクリック地点の一番上に描画された地物を取得する関数を渡すことにします。Tips として、queryRenderedFeatures は、ポイントでも範囲を指定できますが、判定が厳しいので、クリック地点の周囲を含む領域を指定した方が良いです。ついでに、選択した地物を強調表示させてみます。
map.on("click", (e) => {
  const sv = 5;
  const bb = [
    [e.point.x - sv, e.point.y - sv],
    [e.point.x + sv, e.point.y + sv]
  ];

  const features = map.queryRenderedFeatures(bb);
  if(features.length < 1) return;

  const geojson = {
    "type": "FeatureCollection",
    "features": [features[0]]
  };
  console.log(geojson); // GeoJSON を取得

  //強調表示用
  highlightFeature(geojson);
});

const highlightFeature = (geojson) => {
  map.getSource("selected-feature").setData(geojson);
}

map.on("load", () => {
  map.addSource("selected-feature", {
    type: "geojson",
    data: {
      "type": "FeatureCollection",
      features: []
    }
  });

  map.addLayer({
    id: "selected-point-feature",
    type: "circle",
    source: "selected-feature",
    filter: ["any",
      ["==", ["geometry-type"], "Point"],
      ["==", ["geometry-type"], "MultiPoint"]
    ],
    layout: {},
    paint: {
      "circle-radius": 8,
      "circle-color": "#FF0000"
    }
  });

  map.addLayer({
    id: "selected-line-feature",
    type: "line",
    source: "selected-feature",
    filter: ["any",
      ["==", ["geometry-type"], "LineString"],
      ["==", ["geometry-type"], "MultiLineString"]
    ],
    layout: {},
    paint: {
      "line-width": 8,
      "line-opacity": 0.8,
      "line-color": "#FF0000"
    }
  });

  map.addLayer({
    id: "selected-fill-feature",
    type: "fill",
    source: "selected-feature",
    filter: ["any",
      ["==", ["geometry-type"], "Polygon"],
      ["==", ["geometry-type"], "MultiPolygon"]
    ],
    layout: {},
    paint: {
      "fill-opacity": 0.8,
      "fill-color": "#FF0000",
      "fill-outline-color": "#FF0000"
    }
  });
});
以下は、地物を選択した例です。地理院地図Vector のラインデータは細切れなことが多いため、あまり期待に沿ったデータは取れないかもしれません。

サンプルサイト
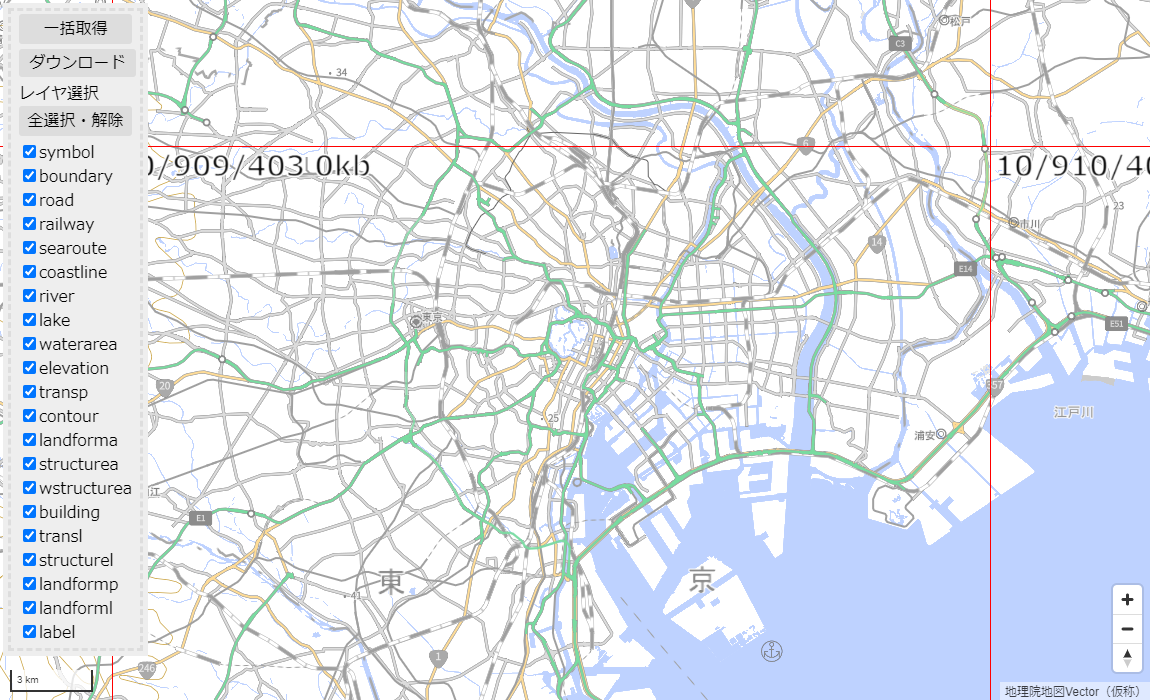
以下が上記のアイデアを用いたサンプルサイトです。
一括取得(source layer 単位)
- レイヤリストから、ダウンロードしたいレイヤ(source layer)にチェックを入れる。
- 「実行」ボタンをクリック。
- 「ダウンロード」ボタンからGeoJSONをダウンロード。
地物毎の取得
- 地図上で、取得したい地物をクリックして選択。
- 「ダウンロード」ボタンからGeoJSONをダウンロード。
レポジトリ
参考文献

