はじめに
2020年6月から縁あってCircleCIという会社でDeveloper Advocateを拝命しています 舟木将彦 と申します。そのCircleCIですが、ウェブサービスやモバイルアプリのビルド自動化(CI/CD)に関しては、こちらQiitaにもさまざまな体験例を投稿いただいているのですが(投稿して下さった皆さま、ありがとうございます![]() )、.NET系の例はあまりないのが現状ということでやってみました。
)、.NET系の例はあまりないのが現状ということでやってみました。
作ってみたもの
コマンドラインで指定した数字までのフィボナッチ数の総和を表示するだけのプログラムです。ちなみに、フィボナッチ数列をプロットするとアンモナイトではなくて、Sybaseのマークになります。

リポジトリはGitHub上にありますので、そちらをご覧ください(https://github.com/mfunaki/FiboNetApp)。
ライブラリコード
フィボナッチ数に関わる処理を定義したFiboクラス中を作成し、引数に指定された数までのフィボナッチ数の総和を求めるComputeメソッドを定義したごくごく単純なコードです。
using System;

namespace MyLibrary
{
    public class Fibo
    {
        public long Compute(int n)
        {
            if (n < 2)
            {
                return n;
            }
            return Compute(n - 1) + Compute(n - 2);
        }
    }
}
テストコード
Xunitを使ったごくごく簡単なユニットテストを定義したコードを用意しました。
using System;
using Xunit;
using MyLibrary;

namespace ClassLibraryTest
{

    public class FiboLibraryTest
    {
        private readonly Fibo fibo;

        public FiboLibraryTest()
        {
            fibo = new Fibo();
        }

        [Fact]
        public void TestCompute()
        {
            Assert.Equal(55, fibo.Compute(10));
            Assert.Equal(6765, fibo.Compute(20));
        }
    }
}
コマンド実行用コード
こちらはコマンドラインから引数に渡した数までのフィボナッチ数の総和を求め、出力するためのラッパーです。
using System;
using MyLibrary;

class Program
{
    static void Main(string[] args)
    {
        int num;
        num = int.Parse(args[0]);

        Fibo fibo = new Fibo();
        long result = fibo.Compute(num);
        Console.WriteLine(result);
    }
}
CircleCIのコンフィグファイル(config.yml)
先に紹介したソースコードは Hello World的にごく簡単なものでしたが、ビルド、テスト、リリースを自動化するためのコンフィグ定義(config.ymlファイル)の内容を紹介していきます。windows ORBを使うことで全体の記述を簡潔にしています。
version: 2.1

orbs:
  win: circleci/windows@2.4.0
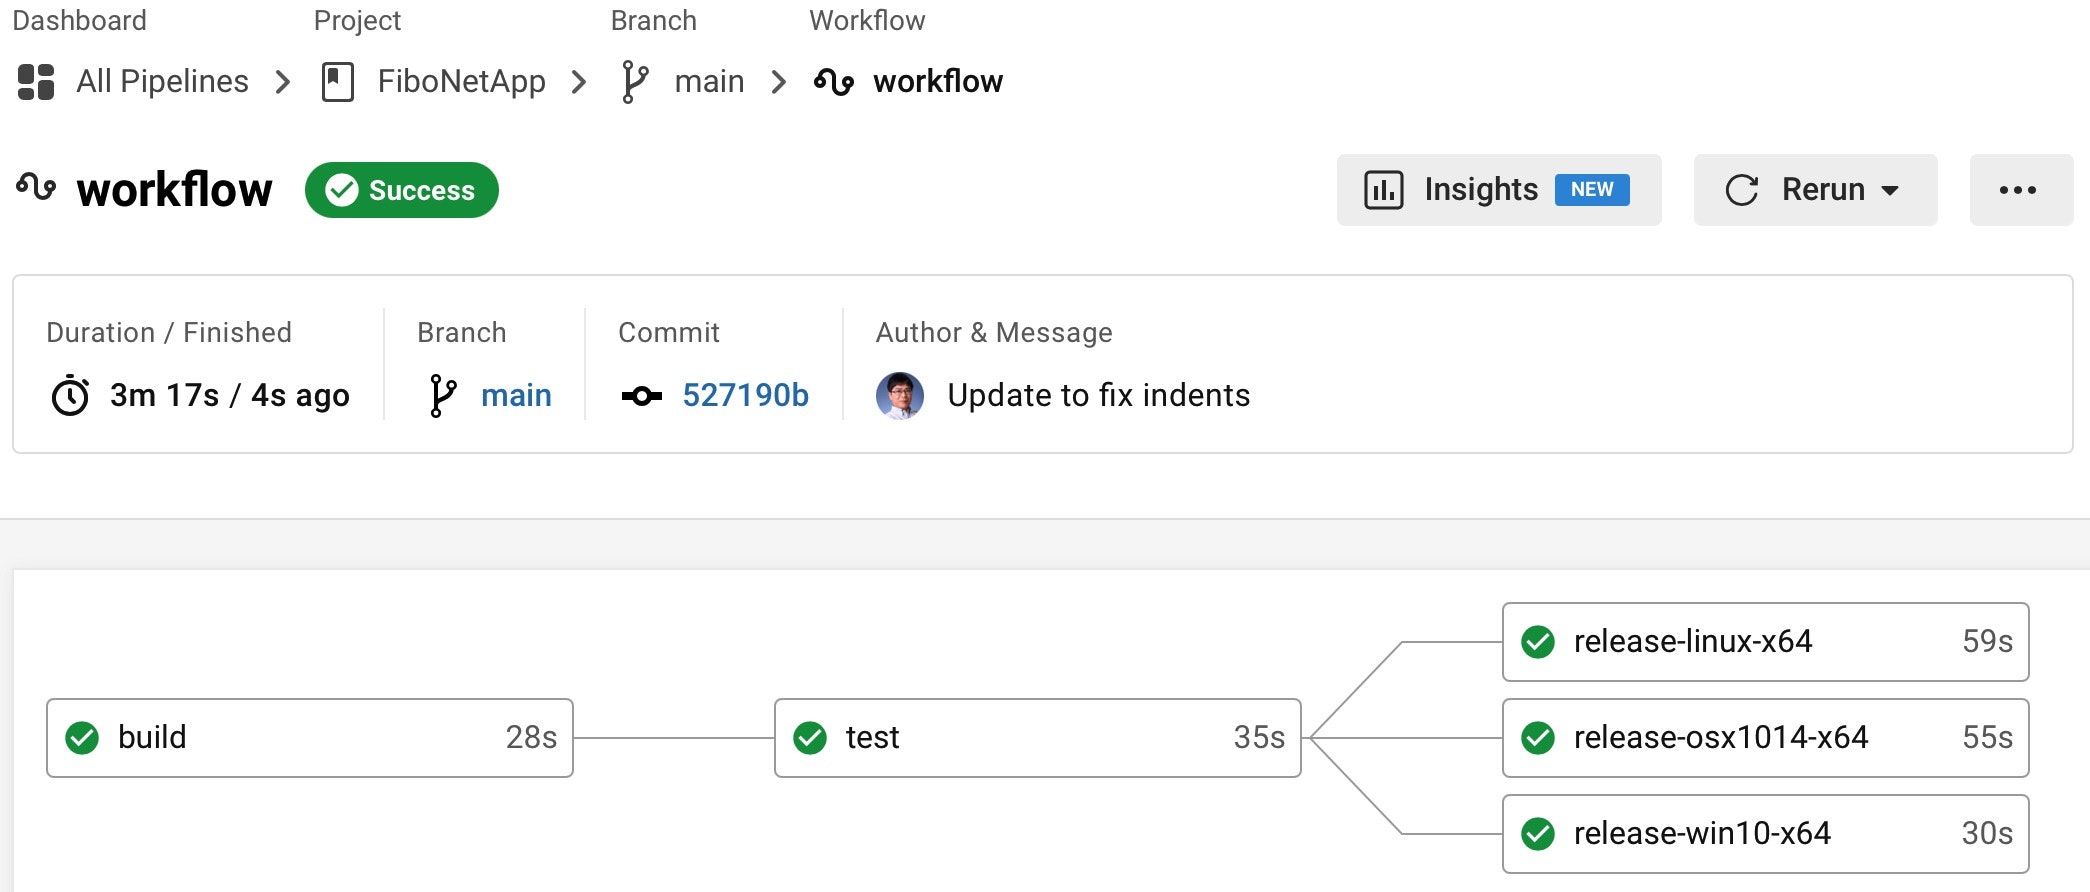
次に、ビルド(build)、テスト(test)、およびリリース(Windows向けはrelease-win10-x64、Linux向けはrelease-linux-x64、Mac向けはrelease-osx1014-x64)の合計3種類、5つのジョブを定義しています。
ビルド
まずは、ビルドです。今回は(テストで使っているxUnit以外に)パッケージは使っていないのですが、パッケージを定義した *.csproj のチェックサムをキーに nugetのキャッシュをCircleCI側でキャッシュするようにしています。
jobs:
  build:
    executor: win/default
    steps:
      - checkout
      - restore_cache:
          keys:
            - dotnet-packages-v3-{{ checksum "FiboLibraryTest/FiboLibraryTest.csproj" }}
      - run:
          command: dotnet build
          shell: cmd.exe
      - save_cache:
          paths:
            - C:¥Users¥circleci¥.nuget¥packages
          key: dotnet-packages-v3-{{ checksum "FiboLibraryTest/FiboLibraryTest.csproj" }}
テスト
次にテストです。
  test:
    executor: win/default
    steps:
      - checkout
      - restore_cache:
          keys:
            - dotnet-packages-v3-{{ checksum "FiboLibraryTest/FiboLibraryTest.csproj" }}
      - run:
          command: dotnet test
          shell: cmd.exe
リリース
最後にリリースです。3プラットフォーム間でリリースに関わる記述(dotnet publishの実行、およびfibo実行ファイルの保存)は「ほとんど同じ」なので、releaseコマンドとして切り出しておきます。引数にtargetにプラットフォーム(win10-x64, linux-x64, osx.10.14-x64)を渡して呼び出せば、渡した引数をパラメタ(parameters.target)として、作成されたfiboコマンド(fiboやfibo.exe)がアーティファクト中に保存されます。
commands:
  release:
    parameters:
      target:
        type: enum
        enum: ['win10-x64', 'linux-x64', 'osx.10.14-x64']
    steps:
      - checkout
      - restore_cache:
          keys:
            - dotnet-packages-v3-{{ checksum "FiboLibraryTest/FiboLibraryTest.csproj" }}
      - run:
          command: dotnet publish -c Release -r << parameters.target >>
          shell: cmd.exe
      - store_artifacts:
          path: fibo/bin/Release/netcoreapp3.1/<< parameters.target >>/publish
その上で、ターゲットプラットフォームごとのリリースジョブを、先ほど定義したreleaseコマンドのパラメタにプラットフォーム名を渡して呼び出すことで、再利用性が高い形で実装します(今回はやっていませんが、プラットフォームだけでなく.NETのバージョン違いに対応したリリースを複数用意することも簡単ですし、それに合わせてテストも.NETのバージョン違い、プラットフォームの違い、Debug/Releaseビルドの違いに合わせた形で「簡潔」に定義することができます)。
  release-win10-x64:
    executor: win/default
    steps:
      - release:
          target: win10-x64
  release-linux-x64:
    executor: win/default
    steps:
      - release:
          target: linux-x64
  release-osx1014-x64:
    executor: win/default
    steps:
      - release:
          target: osx.10.14-x64
ワークフロー
ここまでに定義してきたジョブ(ビルド、テスト、リリース)を使って、ワークフローを定義します。
workflows:
  version: 2
  workflow:
    jobs:
      - build
      - test:
          requires:
            - build
      - release-win10-x64:
          requires:
            - test
      - release-linux-x64:
          requires:
            - test
      - release-osx1014-x64:
          requires:
            - test
ポイントはrequiresを使って、テスト(test)実行の前提にはビルド(build)が成功していなければならず、各プラットフォーム向けのリリース(release-win10-x64, release-linux-x64, release-osx1014-x64)実行の前提にはテスト(test)が成功していなければならない反面、これら3つのリリース間には相互依存関係はありません(順番に実行しなくても、並行して実行すればよい)。
ですから、このワークフローを実行しているときのCircleCIの画面上はこのようにリリース作業が並列に実行されている、つまり3倍速で進んでいることがわかるかと思います。
各プラットフォームで実行
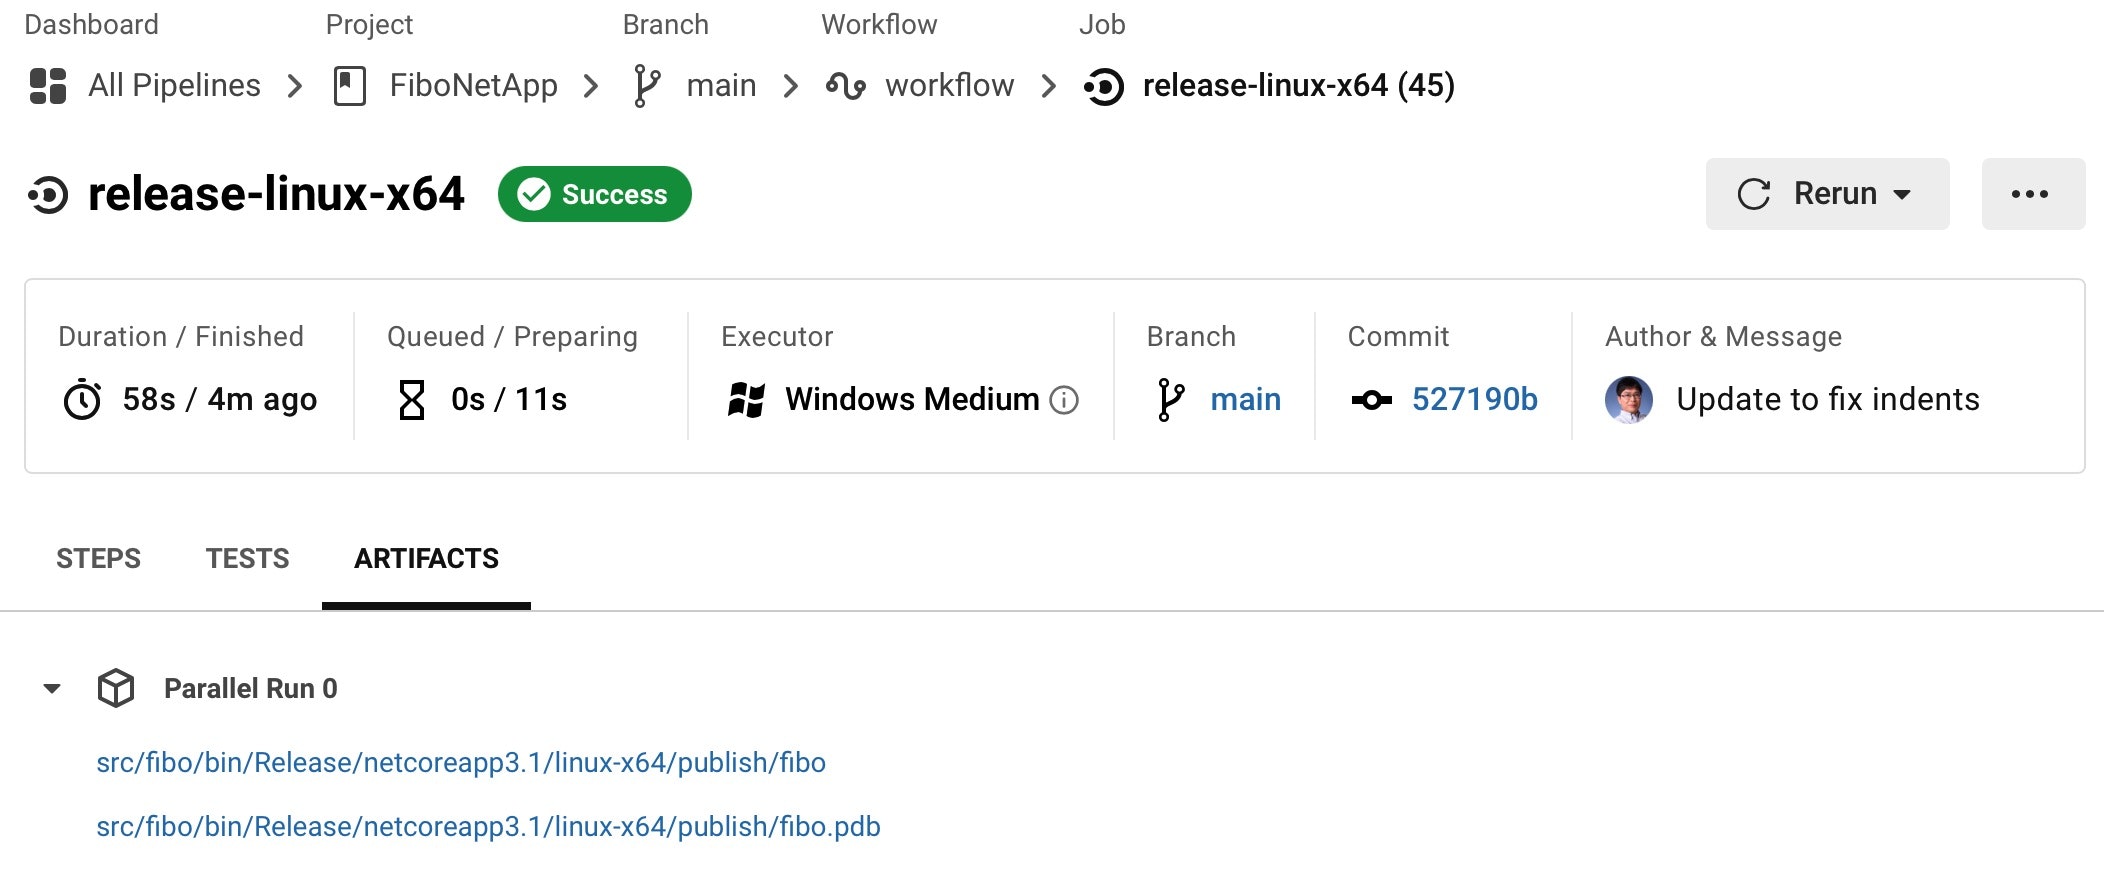
Windows, Linux, および macOS向けの実行ファイルは、前述の画面のrelease-linux-x64などと書かれた箱をクリックしていただき、ARTIFACTSタブをクリックしていただくと、ダウンロード可能です。
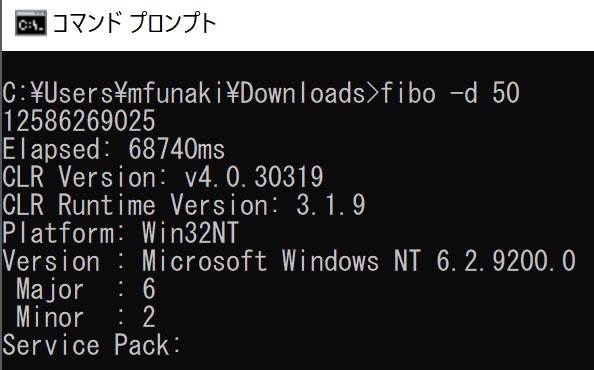
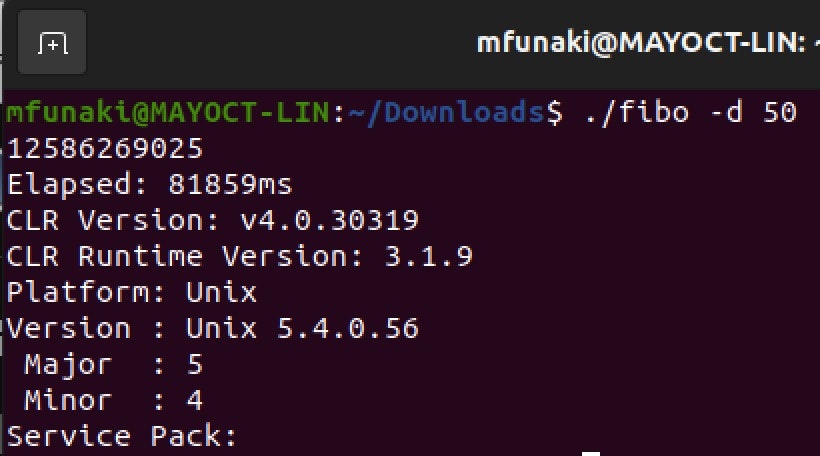
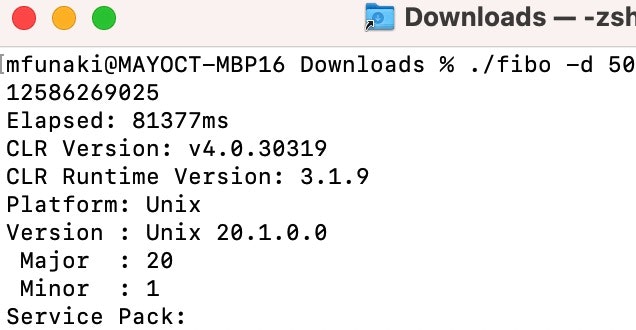
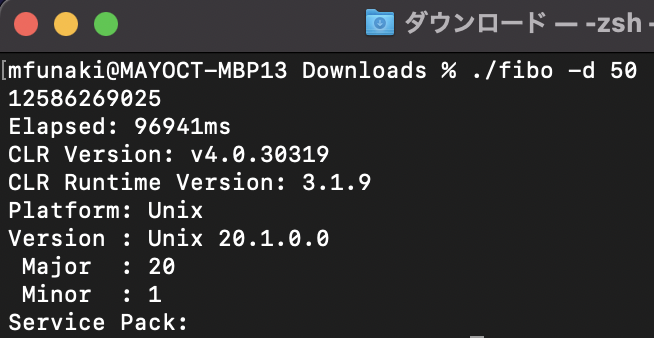
なお、実行結果はこんな感じです。
| win10-x64 | linux-x64 | osx1014-x64 | osx1014-x64 on M1 |
|---|---|---|---|
 |
 |
 |
 |
終わりに
仕事の効率を上げるようなちょっとしたコマンドラインのツールを作るには、C#も悪くないな、というのが今回の感想です。GUIが必要であれば、Electronなど、一度の開発でより幅広い人たちに使っていただくには、プラットフォームの選択と、ビルド〜テスト〜リリース(配布)の自動化が重要です。
CIがみなさまの開発をより楽しく、速く、そして品質を支えることを願っています!(「やってみた」報告をぜひ、Twitterでもハッシュタグ #CircleCIJp をつけてつぶやいてくださいませ)
