はじめに
ParticleSystemForceFieldで3Dテクスチャを使うことにより、事前計算したベクトル場でParticleを動かすことができます。
今回はParticleをCurlNoiseで動かしてみました。
ParticleSystemForceFieldは Unity2018.3以降のバージョンで利用することができます。
ParticleSystemForceFieldについて
https://docs.unity3d.com/ja/current/Manual/class-ParticleSystemForceField.html
実装したものはGithubに置いてあります。
結果
こんな感じ

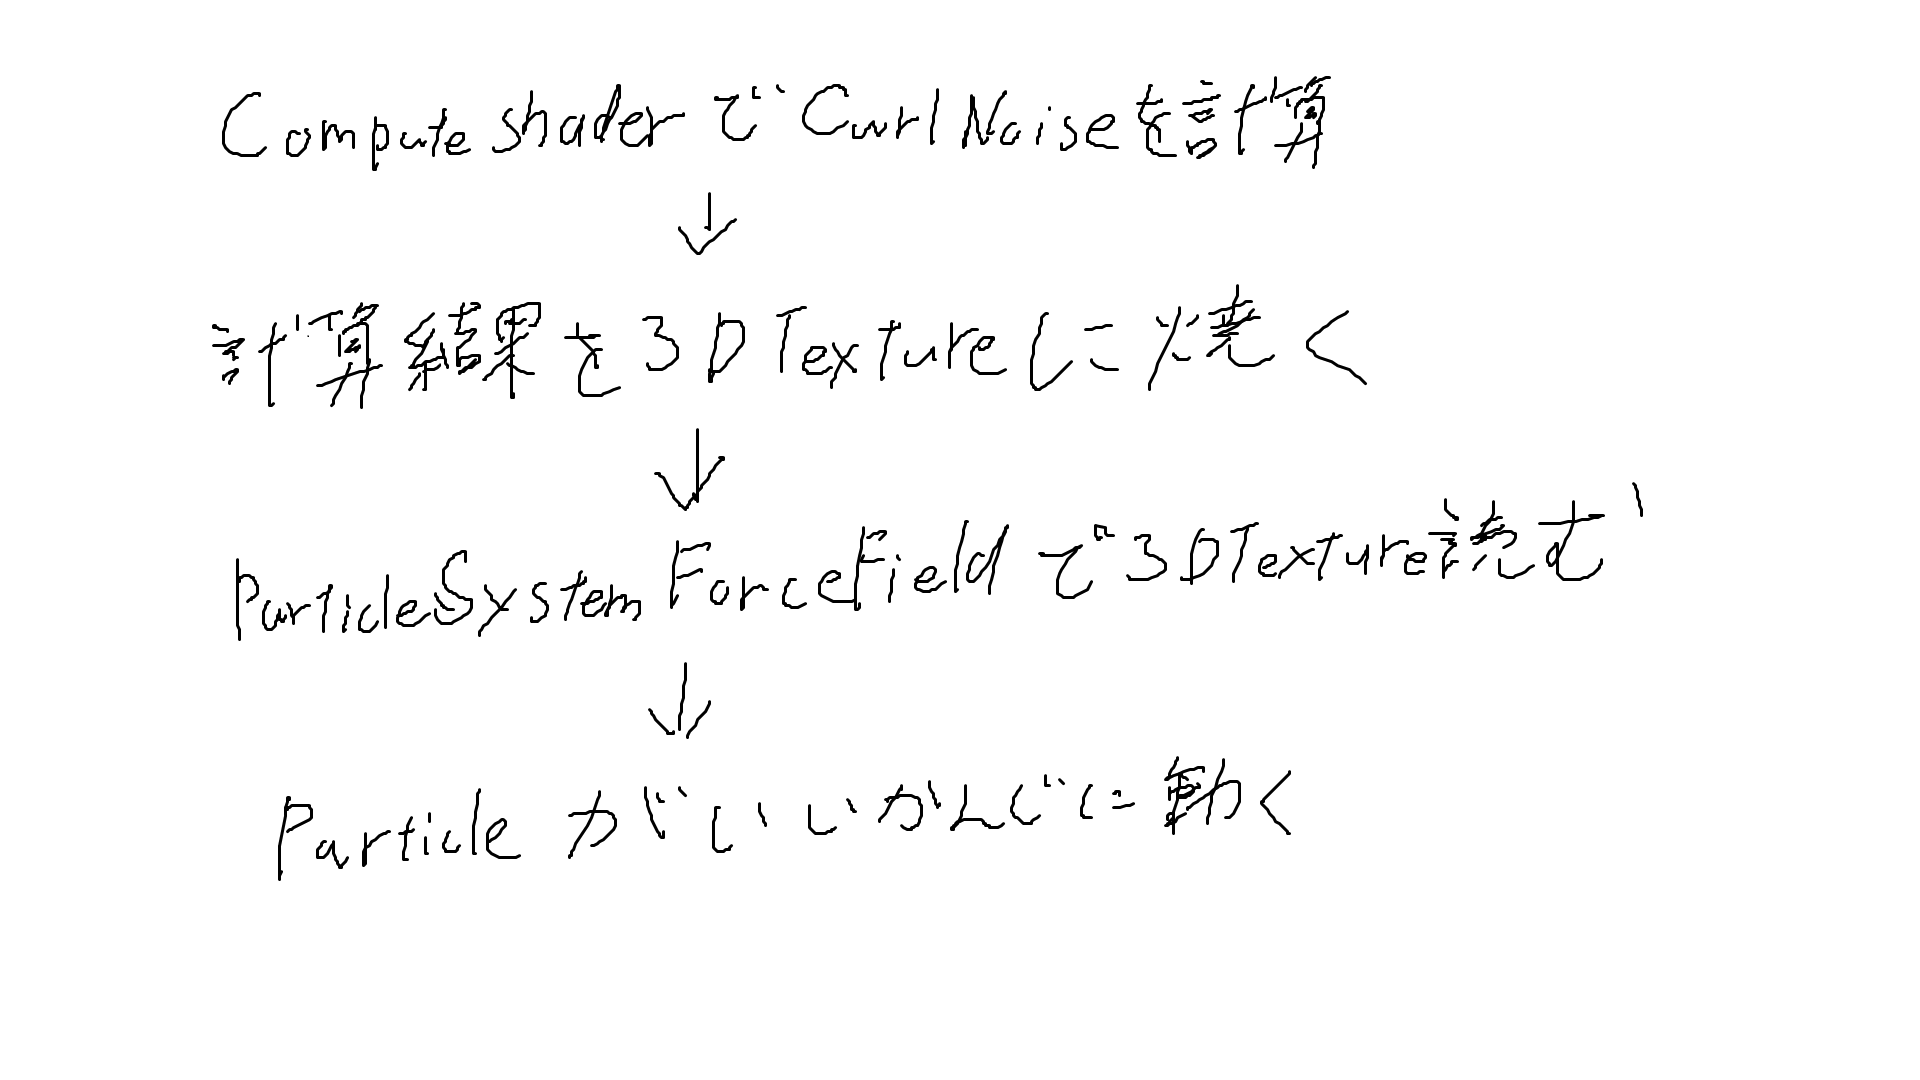
処理の流れ
こんな感じ
実装
C#部分
using System.Collections;
using System.Collections.Generic;
using UnityEngine;
# if UNITY_EDITOR
using UnityEditor;

/// <summary>
/// 3Dテクスチャを作成する
/// </summary>
public class Create3DTexture : MonoBehaviour
{
    [SerializeField] int size = 64; //立方体3Dテクスチャの1辺のサイズ
    [SerializeField] Vector3 offset = new Vector3(0f,0f,0f);//ノイズの位相のずれ
    [SerializeField] float density = 3f;//ノイズの密度
    [SerializeField] ComputeShader computeshader = null; //計算に使うComputeShader
    [SerializeField] string savePath = "Assets/CurlNoiseParticleSystem/Textures/";//3Dテクスチャ保存パス
    [SerializeField] string fileName = "CurlNoise3DTexture";//3Dテクスチャ名
    private TextureFormat format = TextureFormat.RGBAHalf;//テクスチャの色のフォーマット
    const int threadCount = 8;//compute shader 1方向のスレッド数

    /// <summary>
    /// ContextMenuから3Dテクスチャを生成する
    /// </summary>
    [ContextMenu ("Gen 3dtexture")]
    void GenCurlNoise3DTex()
    {
        // Texture3D 初期化
        Texture3D texture3d = new Texture3D(size, size, size, format, false);

        // 色情報を保存する3次元の配列を初期化する
        Color[] colors3d = new Color[size * size * size];

        // float4 配列の compute buffer
        ComputeBuffer colorBuffer = new ComputeBuffer(size * size * size, sizeof(float) * 4);

        // ComputeShaderに値とバッファ渡して計算する
        computeshader.SetFloat("size", (float)size);
        computeshader.SetFloat("density", density);
        computeshader.SetVector("offset", offset);
        computeshader.SetBuffer(0,"velocityBuffer",colorBuffer);
        computeshader.Dispatch(0, size/threadCount, size/threadCount, size/threadCount);

        // 結果を貰う
        colorBuffer.GetData(colors3d);

        // 配列のデータを3D texture にうつす
        texture3d.SetPixels(colors3d);
        texture3d.Apply();

        // アセットファイルとして3DTextureを保存
        AssetDatabase.CreateAsset(texture3d, savePath+fileName+".asset");

        // メモリ開放
        colorBuffer.Release();
    }
}
# endif
C#部分ではComputeShaderにパラメータとコンピュートバッファを渡して計算結果を受け取り、3Dテクスチャを作成しアセットとして保存しています。
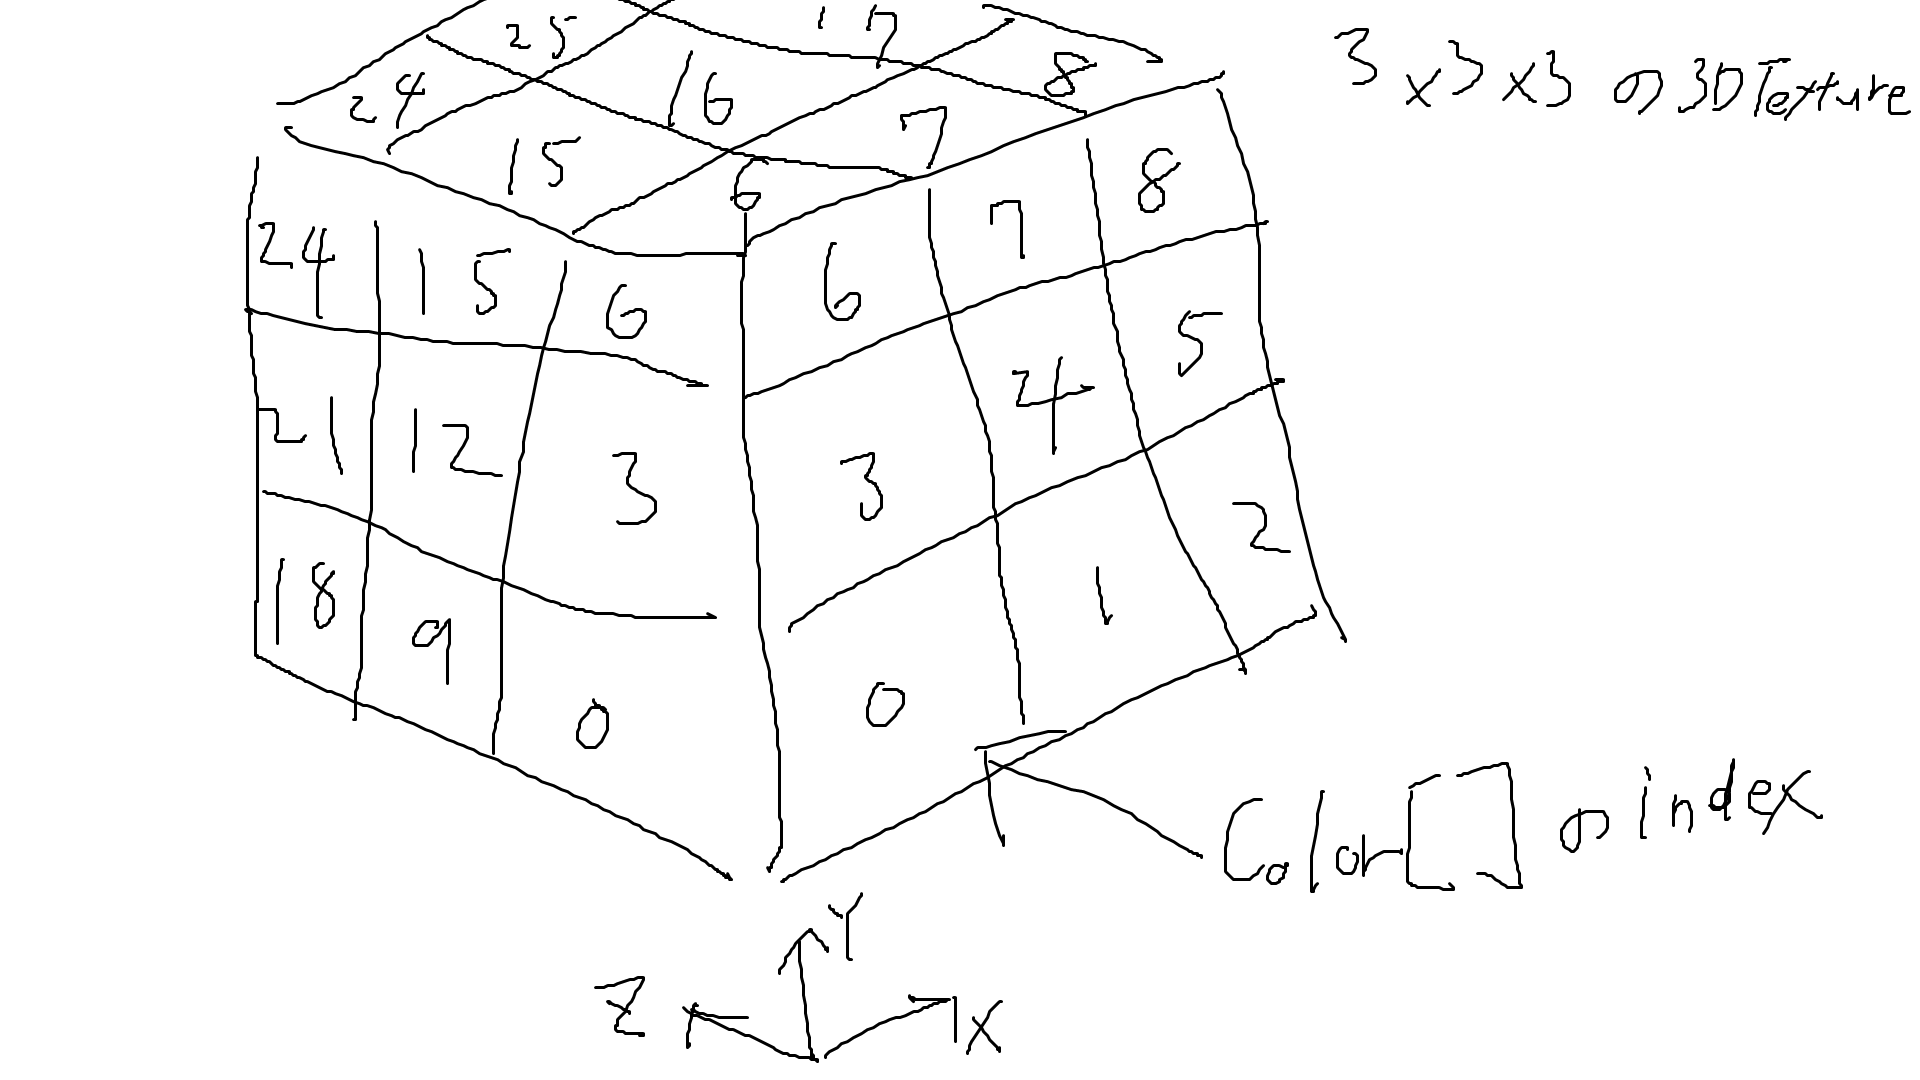
Texture3Dにデータを格納するために、Texture3DのSetPixels関数を利用します。SetPixelsは1次元のColor配列を引数として受け取り、3Dテクスチャの各ピクセルに格納します。
Color配列のindexとTexture3Dの座標の対応は index = x + size * y + size * size * z となっています。
図にするとこんな感じ
// Texture3D 初期化
Texture3D texture3d = new Texture3D(size, size, size, format, false);

// 色情報を保存する3次元の配列を初期化する
Color[] colors3d = new Color[size * size * size];

// float4 配列の compute buffer
ComputeBuffer colorBuffer = new ComputeBuffer(size * size * size, sizeof(float) * 4);

// ComputeShaderに値とバッファ渡して計算する
computeshader.SetFloat("size", (float)size);
computeshader.SetFloat("density", density);
computeshader.SetVector("offset", offset);
computeshader.SetBuffer(0,"velocityBuffer",colorBuffer);
computeshader.Dispatch(0, size/threadCount, size/threadCount, size/threadCount);

// 結果を貰う
colorBuffer.GetData(colors3d);
Texture3Dの初期化でformatをRGBAHalfにしているため、負の値とかちょっとでかい値とかでも格納できるようにしています。
ComputeBufferはC#側ではColor配列として、ComputeShader側としてはfloat4配列として扱いたいため、float4個分のデータ*3Dテクスチャのピクセル分で宣言します。
あとはパラメータ等適当に渡してDispatchします。
ComputeShader部分
# pragma kernel CSMain
# include "CurlNoise.cginc"

float  size;    //立方体3Dテクスチャの1辺のサイズ
float  density; //ノイズの密度
float3 offset;  //ノイズの位相のずれ
RWStructuredBuffer<float4> velocityBuffer;

[numthreads(8,8,8)]
void CSMain (uint3 id : SV_DispatchThreadID)
{
    // get voxel pos
    float3 pos = float3((float)id.x,(float)id.y,(float)id.z)/size*density;
    // get curl noise
    float3 noise = curlNoise(pos + offset);
    // set result
    velocityBuffer[id.x + id.y * size + id.z * size * size] = float4(noise.x,noise.y,noise.z,1.0);
}
DispatchThreadIDをsizeで割って0~1の範囲に収めて適当な数をかけて作った数字でCurlNoiseを計算しています。
CurlNoiseの実装部分をcgincに分けています。実装を見たい方はGithubを探ってみてください。
CurlNoiseの実装はこちらを参考に実装しました。
CurlNoise実装のためにSimplexNoiseを利用しています。SimplexNoiseはwebgl-noise様からお借りしました。
計算結果を保存
// 結果を貰う
colorBuffer.GetData(colors3d);

// 配列のデータを3D texture にうつす
texture3d.SetPixels(colors3d);
texture3d.Apply();

// アセットファイルとして3DTextureを保存
AssetDatabase.CreateAsset(texture3d, savePath+fileName+".asset");

// メモリ開放
colorBuffer.Release();
計算結果をTexture3DにうつしてTexture3Dをアセットファイルとして保存します。ComputeBufferも忘れずに解放します。
ParticleSystem側
設定はこんな感じ ExternalForcesを必ず有効にしましょう。
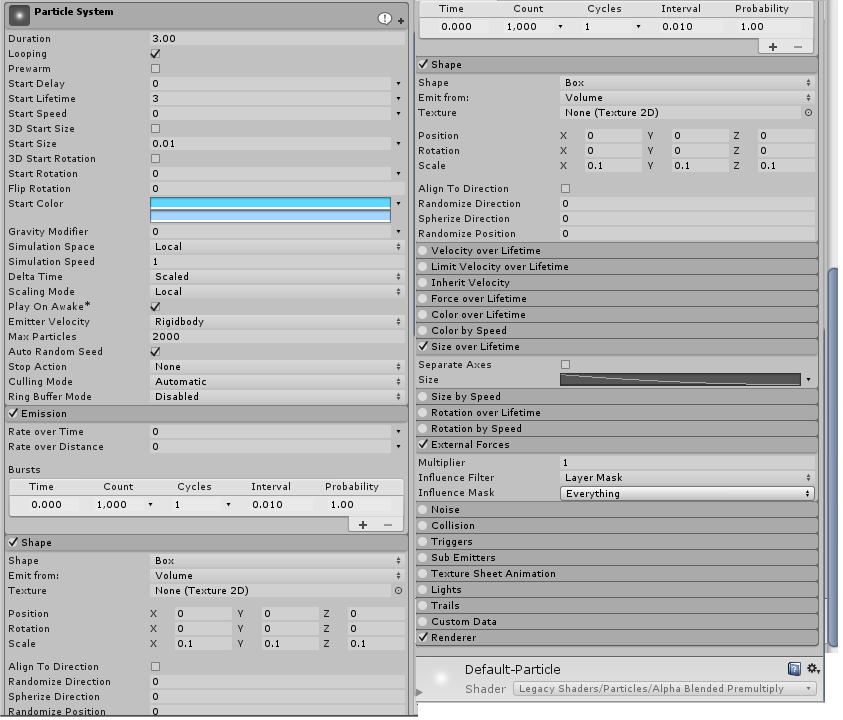
ExternalForcesを必ず有効にしましょう。
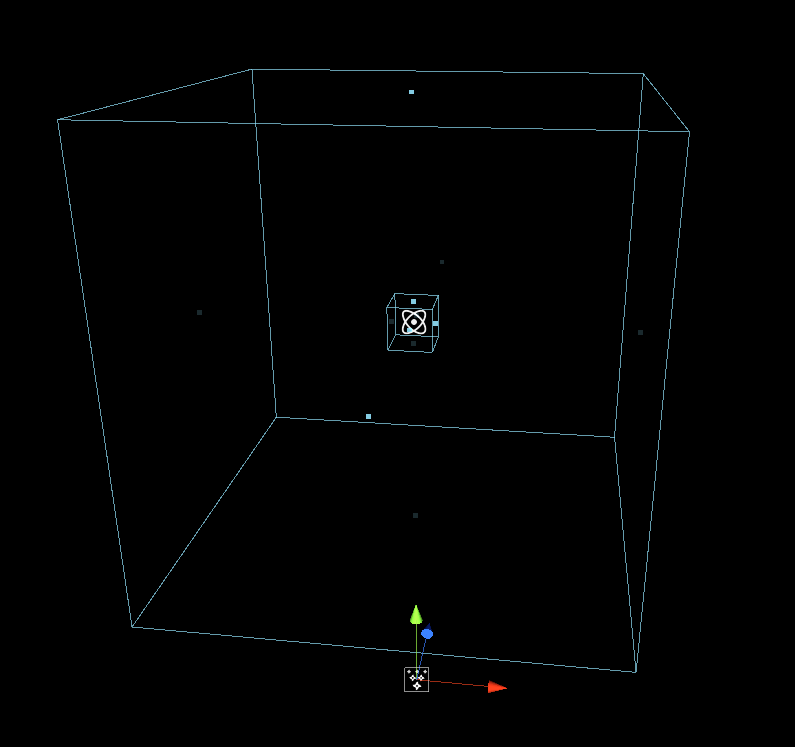
ParticleSystemForceFieldの設定はこんな感じ
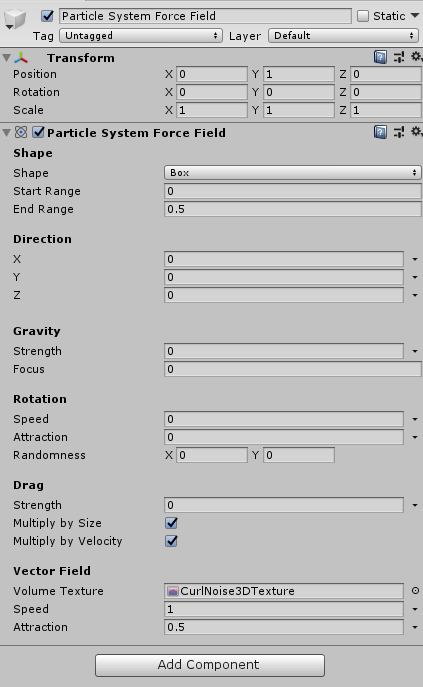
こんな感じで置いたら完成!
おわりに
3Dテクスチャのサイズを128128128とかにしちゃうとメモリをたくさん食べちゃうので気を付けないといけないですね。