本記事は学生団体P&DのAdventCalendar2017 16日目です。
導入
最近ですが、私の周りでは「スーパーマリオ・◯デッセイ」が流行ってます。
みんな楽しそうにやってます。
ですが、残念ながら私は「◯intend ◯witch」を持っていません。
悔しいです...。
というわけで...
今回の私の記事では、ArduinoとNode.jsを使ってブラウザで動く躍動感溢れる(予定の)マリオを作りました。効果音はArduinoに圧電型のブザーを取り付けてそこから流しています。
いつか自分だけの据え置き型ゲーム機を夢見て、Arduinoで頑張ります。
1.準備したもの
今回はMacBookにて環境構築をしました。因みにですが、私のmacOSは「High Sierra 10.13.1」です。
- MacBookにて用意したもの
- Node.js
- npm
- Arduinoにて用意したもの
- Arduino本体
- 圧電ブザー
ファイル構成
プロジェクトの構成は以下となっています。
mario/
├ mario/mario.ino (Arduino言語のファイル)
├ socket/
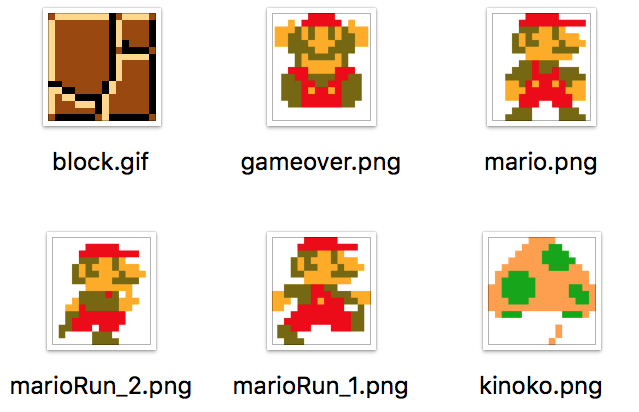
├ img/ (mario.htmlで使用するマリオ画像)
└ mario.html
1.1.wsとserialportのインストール
Nodejsとnpmはすでにインストールされているという前提でお話しさせて頂きます。
まずは上記のsocketフォルダ内にてwsとserialportをインストール!
$ npm install ws
$ npm install serialport
1.2.ws.jsの作成
同様にsocketフォルダ内にws.jsを作成します。
const WebSocket = require('ws');
const wss = new WebSocket.Server({ port: 3333 });
const arduinoPort = "/dev/tty.usbmodem1421"; //自分の使用するポートに合わせる

console.log("ws start!");

wss.on('connection', function connection(ws) {
  //シリアル通信の開始
  const SerialPort = require('serialport');
  const port = new SerialPort(arduinoPort, {
    baudRate: 9600
  });

  port.on('open', function () {
    console.log("serialport opened");
  });

  port.on('data', function (data) {
    console.log('Data from serialport: ' + data);
  });

  ws.on('message', function incoming(message) {
    console.log('received message: %s', message);
    if(message === "1UP") port.write(new Buffer("1UP\n"), function(err, res){
      console.log(err);
    });
  });

  ws.on('close', function(){
    port.close(function (err) {
      console.log('port closed', err);
    });
  });
});
これがサーバ側のWebSocketとなります。
クライアント側からコネクション要求が来ると'connection'イベントが発生します。また、そのタイミングでnew SerialPortによりArduinoに対してシリアル通信を開始します。
内容としては、クライアント側から'1UP'という文字が送信されて来るとsocketサーバからArduinoにシリアル通信を使って'1UP'を送信するようにしています。
1.3.mario.htmlの作成
次はクライアント側であるhtmlファイルとsocketクライアント、そしてマリオを作ります。
mario.htmlの内容はこんな感じに。
<!DOCTYPE html>
<html lang="ja">
<head>
<meta charset="UTF-8">
<meta name="viewport" content="width=device-width initial-scale=1.0">
<script
  src="https://code.jquery.com/jquery-3.2.1.min.js"
  integrity="sha256-hwg4gsxgFZhOsEEamdOYGBf13FyQuiTwlAQgxVSNgt4="
  crossorigin="anonymous">
</script>
<style>
body {
  margin: 0;
}

.gameBox {
  position: relative;
  margin-left: 33.3%;
  margin-top: 22%;
}

.blocks {
  margin-top: -5px;
}

.blocks > img {
  width: 37px;
  height: 37px;
}

.button_area {
/* 特になし */
}

# mario {
  width: 37px;
  height: 40px;
}

# kinoko {
  position: absolute;
  /* 343pxは床の幅 ( 37px * 10個 ) - 27px(キノコの幅) = 343px となっています */
  /*left: 343px;*/
  /*top: 13px;*/
  width: 27px;
  height: 27px;
}
</style>
</head>
<body>
  <div class="gameBox">
    <img id="mario" src="img/mario.png"><img id="kinoko" src="img/kinoko.png">
    <div class="blocks"></div>
    <div class="button_area"><button id="restartBtn" disabled=''>Restart!</button></div>
  </div>
</body>
<script>

$(function(){

  //床ブロックの画像のパス, エラーの際のゲームオーバーの画像パス
  const img_blockPath = 'img/block.gif', img_gameoverPath = 'img/gameover.png';

  const blocksCount = 11;
  if(blocksCount <= 0) return; //一応
  //blocksCount個の床ブロックを.blocks要素に追加 (書くのがめんどくさいので...
  let fragment = document.createDocumentFragment();
  let $blocks = $('.blocks');
  for (let i = 0 ; i < blocksCount ; i++) {
    let elem = document.createElement('img');
    elem.src = img_blockPath;
    fragment.appendChild(elem);
  }
  $blocks[0].appendChild(fragment);

  //#kinoko要素を初期位置に移動
  let $kinoko = $('#kinoko');
  $kinoko.css('left', $blocks.find('img:first').width() * blocksCount - $kinoko.width());
  $kinoko.css('top', $('#mario').height() - $kinoko.height());


  // WebSocketのhostとの接続先, socketの作成
  const host = 'ws://localhost:3333', socket = new WebSocket(host);
  if(socket){
    //hostと接続した際に呼び出される処理
    socket.onopen = () => {
      console.log('Connected!!');

      //リスタートボタンにクリックイベントを付与
      $('#restartBtn').click(function(){
        $('#kinoko').show();
        $(this).attr('disabled', '');
        mario_run(socket);
      });

      mario_run(socket);
    };

    //hostからメッセージを取得した際に呼び出されるの処理
    socket.onmessage = (message) => {
      console.log(message);
    };

    //hostとの接続が切断された際に呼び出される処理
    socket.onclose = () => {
      $('#mario').attr('src', img_gameoverPath);
      $('#restartBtn').attr('disabled', '');
      alert('Connection closed.');
    };
  }else{
    //hostとの接続が確立できなかった際の処理 -> 基本的には接続できなくてもsocketに関する情報は定数内部に入っているのでここは呼ばれることはない(はず)
    $('#mario').attr('src', img_gameoverPath);
    alert('Socket Error...');
  }
});


const mario_run = (socket) => {
  setTimeout(() => {
    //事前に要素を取得
    let $mario = $('#mario'), $kinoko = $('#kinoko');
    const imgs = ['img/marioRun_1.png', 'img/marioRun_2.png'], defaultImg = $mario.attr('src'), defaultPoint = $kinoko.position().left;
    let imgIndex = 0, count = defaultPoint;

    let IntervalId = setInterval(() =>{
      // 0 1 の反転
      imgIndex = 1 - imgIndex;
      // 7(px)ずつ減少させる
      count -= 7;

      $mario.attr('src', imgs[imgIndex]);
      $kinoko.css('left', count);

      //キノコの位置が左から37pxになると処理をする->マリオと接触判定
      if(count <= 37){
        //キノコを初期位置に戻す
        $kinoko.hide().css('left', defaultPoint);
        //マリオのimgを初期に戻す
        $mario.attr('src', defaultImg);
        clearInterval(IntervalId);
        //hostにキノコ取得を通知する
        socket.send('1UP');

        $('#restartBtn').removeAttr('disabled');
      }
    }, 40);
  }, 1000);
};
</script>
</html>
ws://localhost:3333にてサーバ側のsocketを指定します。
またコネクションが確立されたタイミングでmario_run関数を実行しています。mario_runはマリオの動作に関する処理です。
1.4.mario.inoの作成
「Arduino IDE」を使ってNode.jsとのシリアル通信および効果音を出力する処理を書きます。
mario.inoの内容は以下のようになりました。
int SpeakerPin = 8;

String str = "1UP";

void setup(){
pinMode(SpeakerPin, OUTPUT);
Serial.begin(9600);
}

void mario_1up(){
int i;
for (i=0; i<97; i++){
digitalWrite(SpeakerPin,HIGH);
delayMicroseconds(379);
digitalWrite(SpeakerPin,LOW);
delayMicroseconds(379);
}
for (i=0; i<235; i++){
digitalWrite(SpeakerPin,HIGH);
delayMicroseconds(319);
digitalWrite(SpeakerPin,LOW);
delayMicroseconds(319);
}
for (i=0; i<396; i++){
digitalWrite(SpeakerPin,HIGH);
delayMicroseconds(189);
digitalWrite(SpeakerPin,LOW);
delayMicroseconds(189);
}
for (i=0; i<315; i++){
digitalWrite(SpeakerPin,HIGH);
delayMicroseconds(238);
digitalWrite(SpeakerPin,LOW);
delayMicroseconds(238);
}
for (i=0; i<353; i++){
digitalWrite(SpeakerPin,HIGH);
delayMicroseconds(212);
digitalWrite(SpeakerPin,LOW);
delayMicroseconds(212);
}
for (i=0; i<471; i++){
digitalWrite(SpeakerPin,HIGH);
delayMicroseconds(159);
digitalWrite(SpeakerPin,LOW);
delayMicroseconds(159);
}
}


void loop(){
  if (Serial.available() > 0) {
    String strBuf = Serial.readStringUntil('\n');
    if(str.compareTo(strBuf) == 0){
      mario_1up();
      delay(500);
    }
  }
  delay(100);
}
mario_1up()はマリオの1upした時のプログラムです。こちらは「Arduino@東北芸工大」を参考にさせていただきました!
loop()関数にてnodejsからシリアル通信によりデータが転送され、if(Serial.available() > 0)がtrueとなります。そして転送されてきた文字列との文字比較処理を行います。受け取った文字列が'1UP'なら圧電ブザーから効果音を発生させます。
蛇足ですが、接続するポートはあとでws.jsでも使用するので覚えておいたほうが楽チンです。
1.5.マリオの画像を用意する
用意する。気合いで。
2.実際にやってみる
以上で用意するものは揃ったので実際に実行してみます。やったぜ。
2.1.Arduino起動
まずはArduinoとmacbookを接続するために「Arduino IDE」を起動します。
起動後、書き込みをするボードとシリアルポートを設定しmario.inoをArduinoに書き込み。
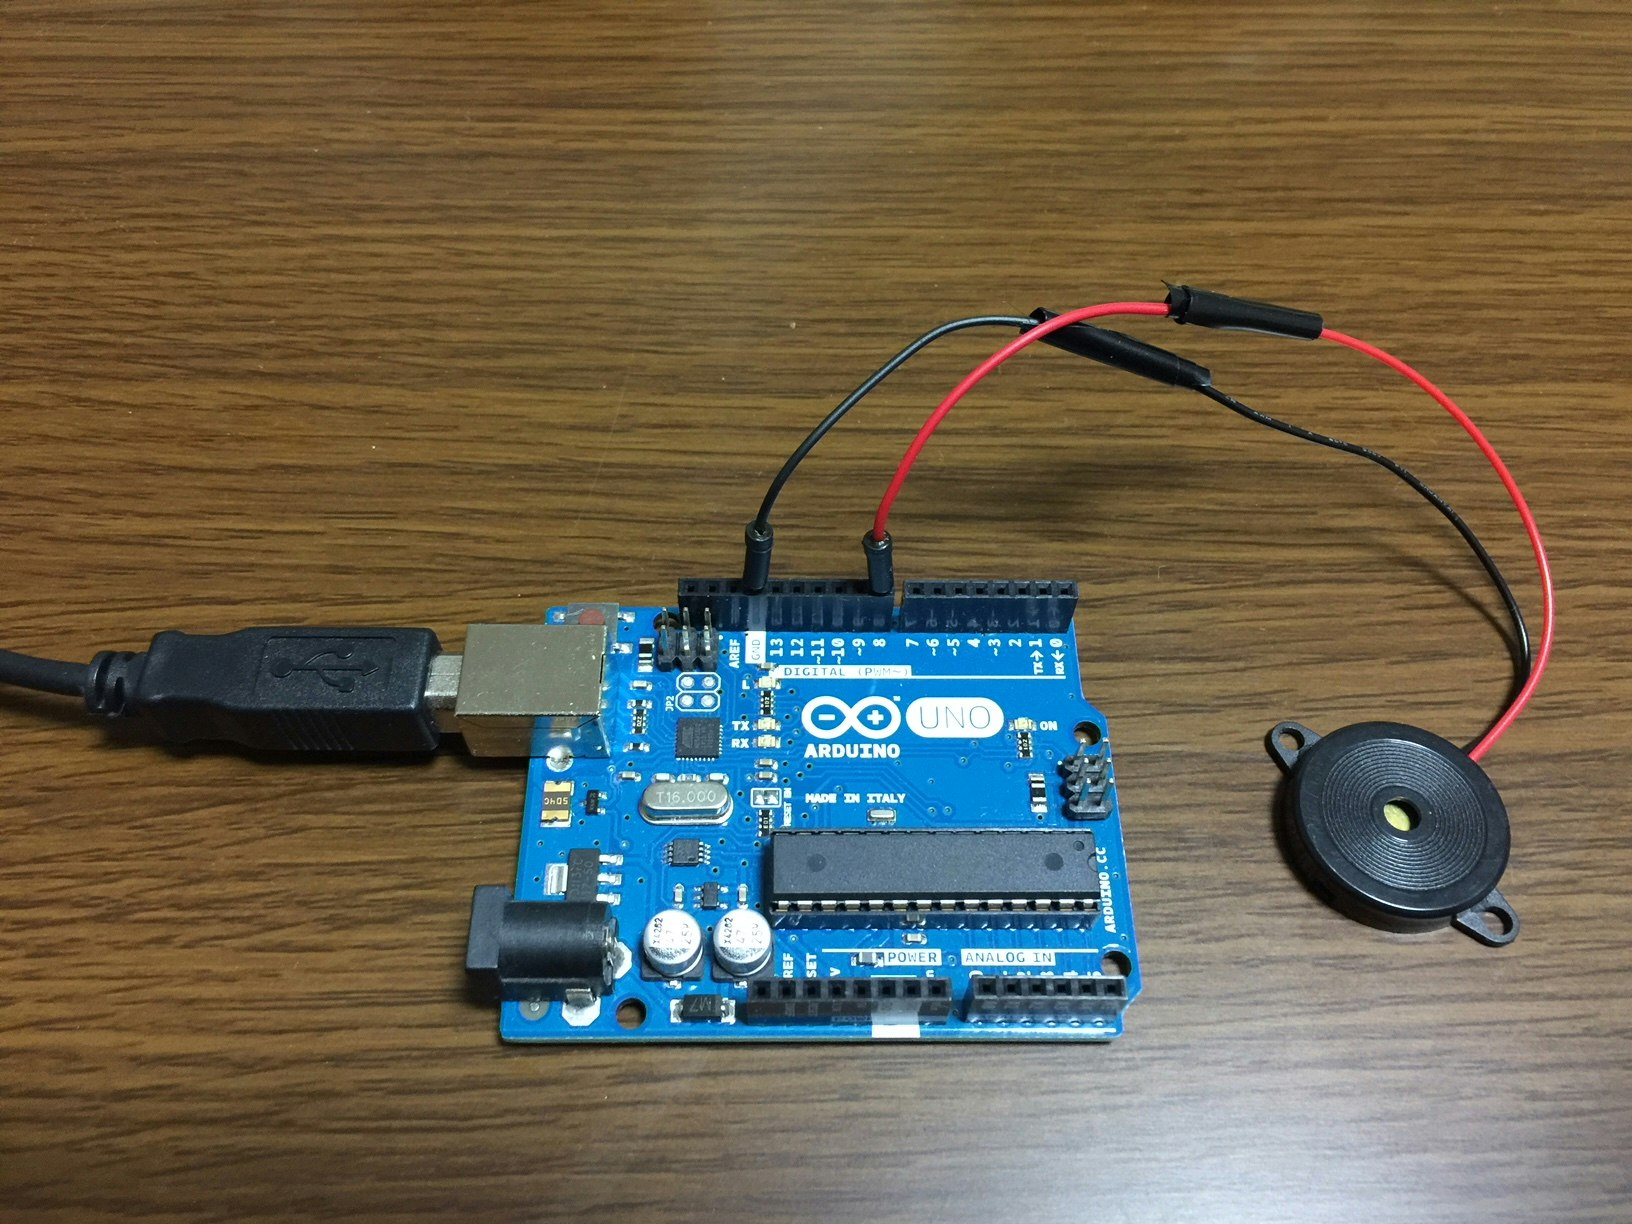
そして、圧電ブザーはデジタルピンの8番とGNDに差し込みます。
接続は以下のような感じに。
2.2.ws.jsの実行
まずはArduinoと接続されているポートを確認します。
ターミナルにて以下のコマンドからArduinoとusb接続で使用しているポートを探します。
$ ls /dev
macだとtty.usbmodem1421というようにtty.usbmodemと名のつくポートがあるのでそれをws.jsにて指定します。
また、「1.4.章」にて覚え書きをしたポートとここで使用するポートは全く同じになっているのでそれをコピペするのが楽かもです。
ws.jsの変更が終わり次第、早速ws.jsを起動します。
$ node socket/ws.js
ws start!
2.3.mario.htmlにアクセス!
ここまで完了するとあとは、mario.htmlにブラウザでアクセスしマリオの動作を確認するだけです。
mario.htmlをクリックし、実際に確認!
3.結果
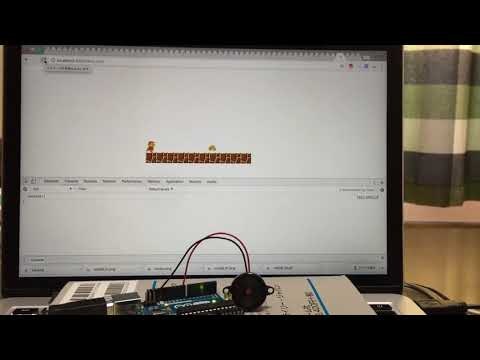
こうなった。
走ったやん...
効果音も、鳴ってるやん...
蛇足ですが、nodejsとのコネクションが切れちゃうと

↓

一応、マリオもゲームオーバー...
という訳で次、結論です。
4.結論
◯デッセイ、最高にすごいよ。
5.感想
自分だけの据え置きゲームはどうやらまだまだのようです。
まだジャンプもできないんだ。
ジャンプ、させたいよね...
完。
mario github
参考までに今回のprojectです。自分だけの据え置きゲーム機、どうでしょうか。
ArduinoMario - github.com
※画像は個人利用で御願い致します。
参考にさせて頂いたもの
https://www.nintendo.co.jp/switch/aaaca/
http://arduino-tuad.blogspot.jp/2009/06/blog-post_782.html
https://www.arduino.cc/en/main/software
https://qiita.com/tnarihi/items/762b6ba4ac0a160eef5b


