Loopについて・・・
Loopというのは、簡単に説明すればループするという意味ですww
まあ、さきに例文を書いてみましょう。
loop all players:
これですべてのプレイヤーをLoopします。
とはいえ、これにはイベントがないので動きません。
on join:
    loop all players:
        send "&e%player%さんがサーバーに来ちゃった・・・w" to loop-player
はい。
これで動きます。

以前書いたのはplayerに送信でしたが、今回はloop-playerです。
loop-playerは、loop all players:を書いたときに使います。
先ほどのコードならbroadcastと同じ働きをすることになりますので、いちいち書くのは馬鹿らしいですよね・・・
正しい使い方?じゃないというのが事実です。
on join:
    loop all players:
        loop-player do not have permission "skript.admin"
        send "&e%player% さんがサーバーに来たぞ!!" to loop-player
これでそのパーミッションを持っていない人がきたらメッセージを送信、持っていたらなにも起きなくなります。
カスタムコマンドについて・・・
command /任意のコマンド:
    description:
    usage:
    permission:
    permission message:
    executable by:
    aliases:
    trigger:
まず、/testというコマンドが作りたいなら、
1行目はcommand /test:としてください。
2行目のdescription:はMinecraftに元からある/helpコマンド実行時に表示される説明を書きます。
3行目のusage:はコマンドの使い方である/testを書きます。
4行目のpermission:はそのコマンドを使うために必要な権限(パーミッション)を書きます。
5行目のpermission message:はその権限を持っていないプレイヤーが使った場合に返すメッセージです。
6行目のexecutable by:はコマンドを実行できる環境を書きます。例えば、コンソールとプレイヤーのチャットから実行できるようにするにはexecutable by: player and consoleと書くことになります。
7行目のaliases:はコマンドの省略形式を書きます。/tsなど
そしてもっとも重要な8行目のtrigger:ですが・・・・
ここまで説明したが、
command /test:
    trigger:
で、構いません。
あ、これだと一般のプレイヤーも使えるのでpermissionだけでも書いてるほうがいいかもしれませんね・・・
※permissionを設定していてもOP権限を持っていると関係なしに使える場合があるので注意
command /test:
    trigger:
        send "test" to player
これでコマンドを実行すると「test」と表示されます。
では鯖に実用的なコマンドを作ってみましょう。
command /close:
    permission: skript.admin
    trigger:
        execute console command "/whitelist on"
        loop all players:
            loop-player is not an op
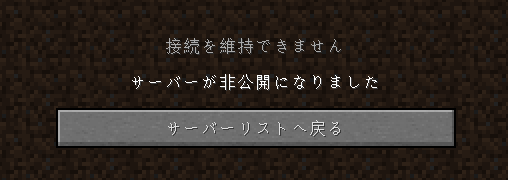
            kick the loop-player due to "サーバーが非公開になりました"
        send "サーバーを非公開にしました" to player
また、新しいものがいくつか出てきましたね。
まず、1~3行目は記述済みなので4行目から解説していきます。
4行目のexecute console command "/whitelist on"ですが、これはコンソールで指定したコマンドを実行するというものです。
これでサーバーのホワリスがオンになります。
5行目でこのページの1番最初に書いたLoopが出てきましたね。
6行目のif loop-player is not an op:はloop-playerがOPじゃなかったらという条件になります。
7行目のkick the loop-player due to "サーバーが非公開になりました"でloop-playerをキックできます。また、キックの理由も指定できます。

8行目は・・・わかるねw
中には気づいた方もいるかもですが、OP権限者=permission所持者は成立しても、permission所持者=OP権限者は成立しないのです。
ということは、これだと実行者がキックされてもおかしくありませんね。
ではその対策を書きましょう。
command /close:
    permission: skript.admin
    trigger:
        execute console command "/whitelist on"
        loop all players:
            loop-player is not an op
            loop-player is not player
            kick the loop-player due to "サーバーが非公開になりました"
        send "サーバーを非公開にしました" to player
loop-playerの条件にif loop-player is not player:を付けたしただけです。
loop-playerはplayerとは違いまっせてね。
最後の対策ははっきり言っていりませんw
次はコチラ
前はコチラ