はじめに
こちらの教材を参考に環境構築したDjangoアプリをVSCodeでデバッグ実行できるように設定しました。
環境
windows10
VSCode 1.79.2
venv(仮想環境)
ディレクトリ構成(一部)
navi (プロジェクト名)
├── config
│     ├── __init__.py
│     ├── asgi.py
│     ├── settings.py
│     ├── urls.py
│     ├── wsgi.py
│     └── __pychache__
├── venv
└── 各アプリケーション
やったこと
こちらの記事のVS Code側で仮想環境を使う以降を参考に下記を実施しました。
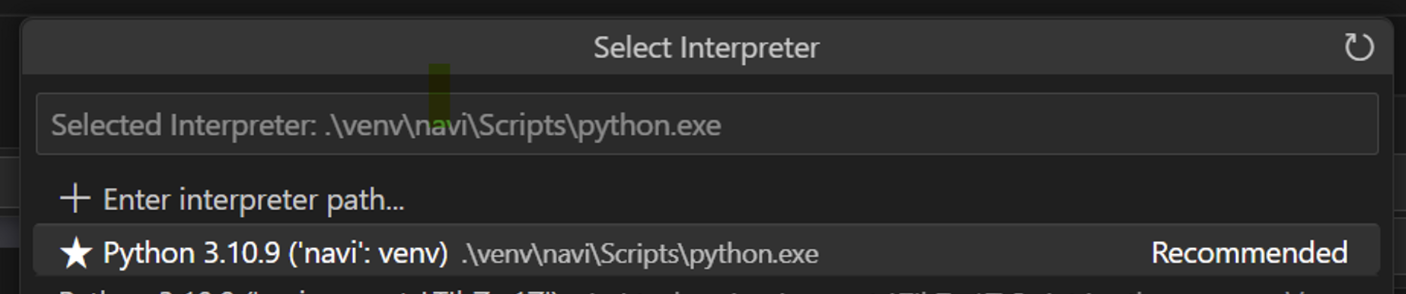
PythonのInterpreterを追加&選択
VSCodeのSelect Interpreterにて+ Enter interpreter path...をクリックして下記ファイルを選択しました。
navi/navi/Scripts/python.exe
選択後はこのような状態になります。
launch.jsonファイルの作成
VSCodeのデバッグ画面からcreate a launch.json fileのリンクをクリックし、Python→Djangoを選択すると、.vscodeフォルダ配下に下記launch.jsonが自動作成されます。
launch.json
{
    // Use IntelliSense to learn about possible attributes.
    // Hover to view descriptions of existing attributes.
    // For more information, visit: https://go.microsoft.com/fwlink/?linkid=830387
    "version": "0.2.0",
    "configurations": [
        {
            "name": "Python: Django",
            "type": "python",
            "request": "launch",
            "program": "${workspaceFolder}\\manage.py",
            "args": [
                "runserver"
            ],
            "django": true,
            "justMyCode": true
        }
    ]
}
デバッグ実行
デバッグ画面にて実行ボタン(緑の三角)を押すとデバッグ実行されます。

参考サイト
環境構築
Djangoでブログアプリを開発しよう!
VSCodeでのデバッグ実行
DjangoをVSCode+Anacondaで開発(Windows)