はじめに
以前、RockyLinux 9 へ Redmine 5.0.7 をインストールする記事を作成しましたが、RockyLinux10 がリリースされていたので、そちらにRedmineをインストールしてみました。
手順は大筋同じでしたが変更点をいくつか確認しましたので備忘として投稿します。
変更点
・passenger-install-apache2-module 実行時に CPU コアとメモリが少ないと使用率が上昇してコマンドが進まなくなかったのですが、RockyLinux10 を用いると CPU 1コア・メモリ2GB程度のスペックでインストールできました。
詳細は不明ですが、RockyLinux10 から対応するCPU命令セットの最低要件が引き上げられ、x86-64-v3 以上が必須となったため、要求される CPU の条件が緩和されているかもしれないです。
そのため、上記の事例に関する記述や一時的にスペックを変更する部分の文章を変更しております。
・OSインストール直後にロケールが LANG=ja_JP.utf8 を使用するようになっており、ロケールの変更が必須ではなくなったので設定変更部分を記述を変更しました。
・gem をインストールする際に、--without のオプションが廃止されていたためコマンドを変更しました。
・誤字脱字など気になった個所を変更しました。
事前準備
インストール環境
    CPU: 1コア
    MEM: 2GB
    HDD: 16GB
    OS : RockyLinux10
OSインストール、SELinux無効化、Firewalld停止/無効化、dnf update の箇所は端折りますので各自で実施をお願いします。
パッケージインストール
必要なパッケージをインストールします。
# dnf groupinstall "Development Tools"
# dnf install openssl-devel readline-devel zlib-devel curl-devel libffi-devel postgresql-server postgresql-devel httpd httpd-devel wget subversion git ruby ruby-devel
# dnf install --enablerepo=crb libyaml-devel
# dnf install epel-release
# dnf install ImageMagick ImageMagick-devel
# dnf install glibc-langpack-ja
日本語ロケール(ja_JP.utf8)確認
現状確認
System Locale: LANG=C.UTF-8 であれば変更不要
# localectl
# localectl
System Locale: LANG=C.UTF-8
    VC Keymap: jp
   X11 Layout: jp
#
ロケール変更
# localectl set-locale LANG=ja_JP.utf8
# localectl set-locale LANG=ja_JP.utf8
#
フォントインストール
# wget https://launchpad.net/takao-fonts/trunk/15.03/+download/TakaoFonts_00303.01.zip
# unzip TakaoFonts_00303.01.zip
# mkdir -vp /usr/share/fonts/TakaoFonts
# mv TakaoFonts_00303.01/Takao* /usr/share/fonts/TakaoFonts/
# ls -l /usr/share/fonts/TakaoFonts
PostgreSQL 初期セットアップ・サービス起動
PostgreSQL 初期セットアップ
# postgresql-setup initdb
# postgresql-setup initdb
WARNING: using obsoleted argument syntax, try --help
WARNING: arguments transformed to: postgresql-setup --initdb --unit postgresql
 * Initializing database in '/var/lib/pgsql/data'
 * Initialized, logs are in /var/lib/pgsql/initdb_postgresql.log
#
設定ファイルバックアップ
# ls -l /var/lib/pgsql/data/pg_hba.conf*
# cp -ip /var/lib/pgsql/data/pg_hba.conf /var/lib/pgsql/data/pg_hba.conf.bak
# ls -l /var/lib/pgsql/data/pg_hba.conf*
接続設定(127.0.0.1からの接続を許可)
# vi /var/lib/pgsql/data/pg_hba.conf
local all all peer の下に下記の行を記載
host redmine redmine 127.0.0.1/32 md5
# diff -c -1 /var/lib/pgsql/data/pg_hba.conf /var/lib/pgsql/data/pg_hba.conf.bak
# diff -c -1 /var/lib/pgsql/data/pg_hba.conf /var/lib/pgsql/data/pg_hba.conf.bak
*** /var/lib/pgsql/data/pg_hba.conf     2025-04-19 15:17:57.073014896 +0900
--- /var/lib/pgsql/data/pg_hba.conf.bak 2025-04-19 01:53:01.797672128 +0900
***************
*** 84,86 ****
  local   all             all                                     peer
- host    redmine         redmine         127.0.0.1/32            md5
  # IPv4 local connections:
--- 84,85 ----
#
PostgreSQL 起動・自動起動有効化・起動確認
# systemctl start postgresql
# systemctl enable postgresql
# systemctl status postgresql
ロール作成
# sudo -i -u postgres createuser -P redmine
上記コマンド実行後、パスワード入力を求められるので入力したパスワードは忘れないようにしてください。
# sudo -i -u postgres createuser -P redmine
Enter password for new role:
Enter it again:
#
DB作成
# sudo -i -u postgres createdb -E UTF-8 -l ja_JP.UTF-8 -O redmine -T template0 redmine
# sudo -i -u postgres createdb -E UTF-8 -l ja_JP.UTF-8 -O redmine -T template0 redmine
#
Redmine インストール
インストール用ディレクトリ作成
# mkdir -vp /var/lib/redmine
オーナー変更
# cd /var/lib/
# ls -ld redmine
# chown apache redmine
# ls -ld redmine
Redmine インストール
# cd redmine
# sudo -u apache svn co https://svn.redmine.org/redmine/branches/6.1-stable /var/lib/redmine
# sudo -u apache svn co https://svn.redmine.org/redmine/branches/6.1-stable /var/lib/redmine
A    .github/actions
A    .github/actions/setup-redmine
A    .github/workflows
A    app
A    app/assets
A    app/assets/fonts
A    app/assets/images
A    app/assets/images/bullet_go.png

中略

A    vendor/javascript/turndown.js
A    themes/README
A    yarn.lock
A    tmp/thumbnails/empty
 U   .
リビジョン 24574 をチェックアウトしました。
#
DB接続設定
# vi /var/lib/redmine/config/database.yml
password: "パスワード"の部分はロール作成時に入力したパスワードに置換をお願いします。
production:
   adapter: postgresql
   databse: redmine
   host: 127.0.0.1
   username: redmine
   password: "パスワード"
   encording: utf8
メール送信設定
# vi /var/lib/redmine/config/configuration.yml
production:
   email_delivery:
      delivery_method: smtp
      smtp_settings:
         address: "localhost"
         port: 25
         domain: "example.com"

   rmagick_font_path: /usr/share/fonts/TakaoFonts/TakaoGothic.ttf
Bundler インストール
Bundler インストール
# gem install bundler
# gem install bundler
Fetching bundler-4.0.10.gem
Successfully installed bundler-4.0.10
Parsing documentation for bundler-4.0.10
Installing ri documentation for bundler-4.0.10
Done installing documentation for bundler after 0 seconds
1 gem installed

A new release of RubyGems is available: 3.5.22 → 4.0.10!
Run `gem update --system 4.0.10` to update your installation.
#
gem インストール
インストール除外対象登録
# bundle config set without 'development test'
# bundle config set without 'development test''
#
インストール
# bundle install
# bundle install
Don't run Bundler as root. Installing your bundle as root will break this application for all non-root users on
this machine.
[DEPRECATED] Platform :mingw, :x64_mingw, :mswin will be removed in the future. Please use platform :windows instead.
Fetching gem metadata from https://rubygems.org/.........
Resolving dependencies...
Fetching rake 13.3.1
Installing rake 13.3.1
Fetching base64 0.3.0

中略

to avoid an unexpected breakage when 3.0 is released (e.g. ~> 2.3.0).
See https://github.com/rubyzip/rubyzip for details. The Changelog also
lists other enhancements and bugfixes that have been implemented since
version 2.3.0.
2 installed gems you directly depend on are looking for funding.
  Run `bundle fund` for details
#
セッションストア秘密鍵の生成
# bundle exec rake generate_secret_token
# bundle exec rake generate_secret_token
#
テーブル作成
# RAILS_ENV=production bundle exec rake db:migrate
# RAILS_ENV=production bundle exec rake db:migrate
== 1 Setup: migrating =========================================================
-- create_table("attachments", {:force=>true, :id=>:integer})
   -> 0.0419s
-- create_table("auth_sources", {:force=>true, :id=>:integer})

中略

== 20250611092227 EnablePkce: migrating =======================================
-- add_column(:oauth_access_grants, :code_challenge, :string, {:null=>true})
   -> 0.0008s
-- add_column(:oauth_access_grants, :code_challenge_method, :string, {:null=>true})
   -> 0.0004s
== 20250611092227 EnablePkce: migrated (0.0017s) ==============================

#
Passenger インストール
Passenger インストール
# gem install passenger -N
# gem install passenger -N
Fetching passenger-6.1.2.gem
Building native extensions. This could take a while...
Successfully installed passenger-6.1.2
1 gem installed
#
Apache モジュールインストール
下記コマンドの実行に伴い CPU とメモリの使用率がインストール処理に専有されるため、処理が途中で進まなくなった場合はCPU 4コア・メモリ4GBにするを増やすなどスペックを見直していただくようお願いします。
# passenger-install-apache2-module --auto --languages ruby
# passenger-install-apache2-module --auto --languages ruby
Welcome to the Phusion Passenger Apache 2 module installer, v6.1.2.

This installer will guide you through the entire installation process. It
shouldn't take more than 3 minutes in total.

Here's what you can expect from the installation process:

中略

To learn how to deploy a web app on Passenger, please follow the deployment
guide:

  https://www.phusionpassenger.com/library/deploy/apache/deploy/

Enjoy Phusion Passenger, a product of Phusion® (www.phusion.nl) :-)
https://www.phusionpassenger.com

Passenger® is a registered trademark of Asynchronous B.V.
#
CPU とメモリを一時的に変更した場合は、ここまで実行完了したら戻していただいて大丈夫です。
Apache 設定確認
# passenger-install-apache2-module --snippet
# passenger-install-apache2-module --snippet
LoadModule passenger_module /usr/local/share/gems/gems/passenger-6.1.2/buildout/apache2/mod_passenger.so
<IfModule mod_passenger.c>
  PassengerRoot /usr/local/share/gems/gems/passenger-6.1.2
  PassengerDefaultRuby /usr/bin/ruby
</IfModule>
#
上記の実行結果は httpd.conf に記載するため控えておいてください。
Apache 設定
カレントディレクトリ移動
# cd /etc/httpd/conf.d
Redmine 用設定ファイル作成
Apache設定に置換 の部分は passenger-install-apache2-module --snippet の実行結果に置換をお願いします。
# vi redmine.conf
<Directory "/var/lib/redmine/public">
   Require all granted
</Directory>

Apache設定に置換

PassengerMaxPoolSize 20
PassengerMaxInstancesPerApp 4
PassengerPoolIdleTime 864000
PassengerStatThrottleRate 10

<Directory /var/lib/redmine/public>
   Allow from all
   Options -MultiViews
   Require all granted
</Directory>

Alias /redmine /var/lib/redmine/public
<Location /redmine>
  PassengerBaseURI /redmine
  PassengerAppRoot /var/lib/redmine
</Location>
設定ファイル構文チェック
# httpd -t
# httpd -t
AH00558: httpd: Could not reliably determine the server's fully qualified domain name, using xxx.xxx.xxx.xxx. Set the 'ServerName' directive globally to suppress this message
Syntax OK
#
エラーについては個別にご確認をお願いします。
httpd 起動
# systemctl start httpd
# systemctl enable httpd
# systemctl status httpd
起動確認
http://IPアドレス/redmine へアクセス
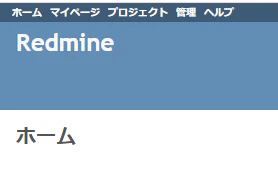
上記の画面が表示されていれば Redmine を利用できる形になっていると思います。お疲れさまでした。
所感
RockyLinux10 へのインストールは、もう少しこけても良いのではと思うぐらい割とすんなりインストールできましたので他にもなんか記事作りたい気持ちです。