はじめに
前回で環境構築が完了しました。今回は AI(Cursor)が Figma デザインを直接読み取れるようにセットアップします。
前回はこちら。
| 日程 | テーマ | 内容 |
|---|---|---|
| Day 1 | 環境構築 | Next.js + TypeScript セットアップ |
| ☆ Day 2 | Cursor × Figma MCP 連携設定 | Cursor で Figma デザインを読み込めるようにする |
| Day 3 | デザイン分析・精査 | AI がトークン/コンポーネント提案 → 人間が精査 |
| Day 4 | Tokens Studio登録 | AI の提案をトークンとして登録 |
| Day 5 | シンプルなコンポーネント実装 | Button, Input, Card など基本部品を実装 |
| Day 6 | ダッシュボード完成 | 全コンポーネント統合・完成 |
| Day 7 | 完結・まとめ | 6日間の体験総括 |
Figma MCP とは
Figma MCP とは、Figma の MCP(AI(この場合 Cursor) が外部サービス(この場合 Figma)にアクセスするための通信プロトコル)です。
Cursor ←→ Figma MCP ←→ Figma
     (通信)           (デザインデータ読み込み)
これにより Cursor は Figma のコンポーネント、色、サイズなどを直接参照できるようになります。
セットアップ手順
1. Figma APIトークンの取得
Figma を開き、画面左上にある Figma アイコンから「Help and account」→「Account Settings」→「Security」の順に開きます。
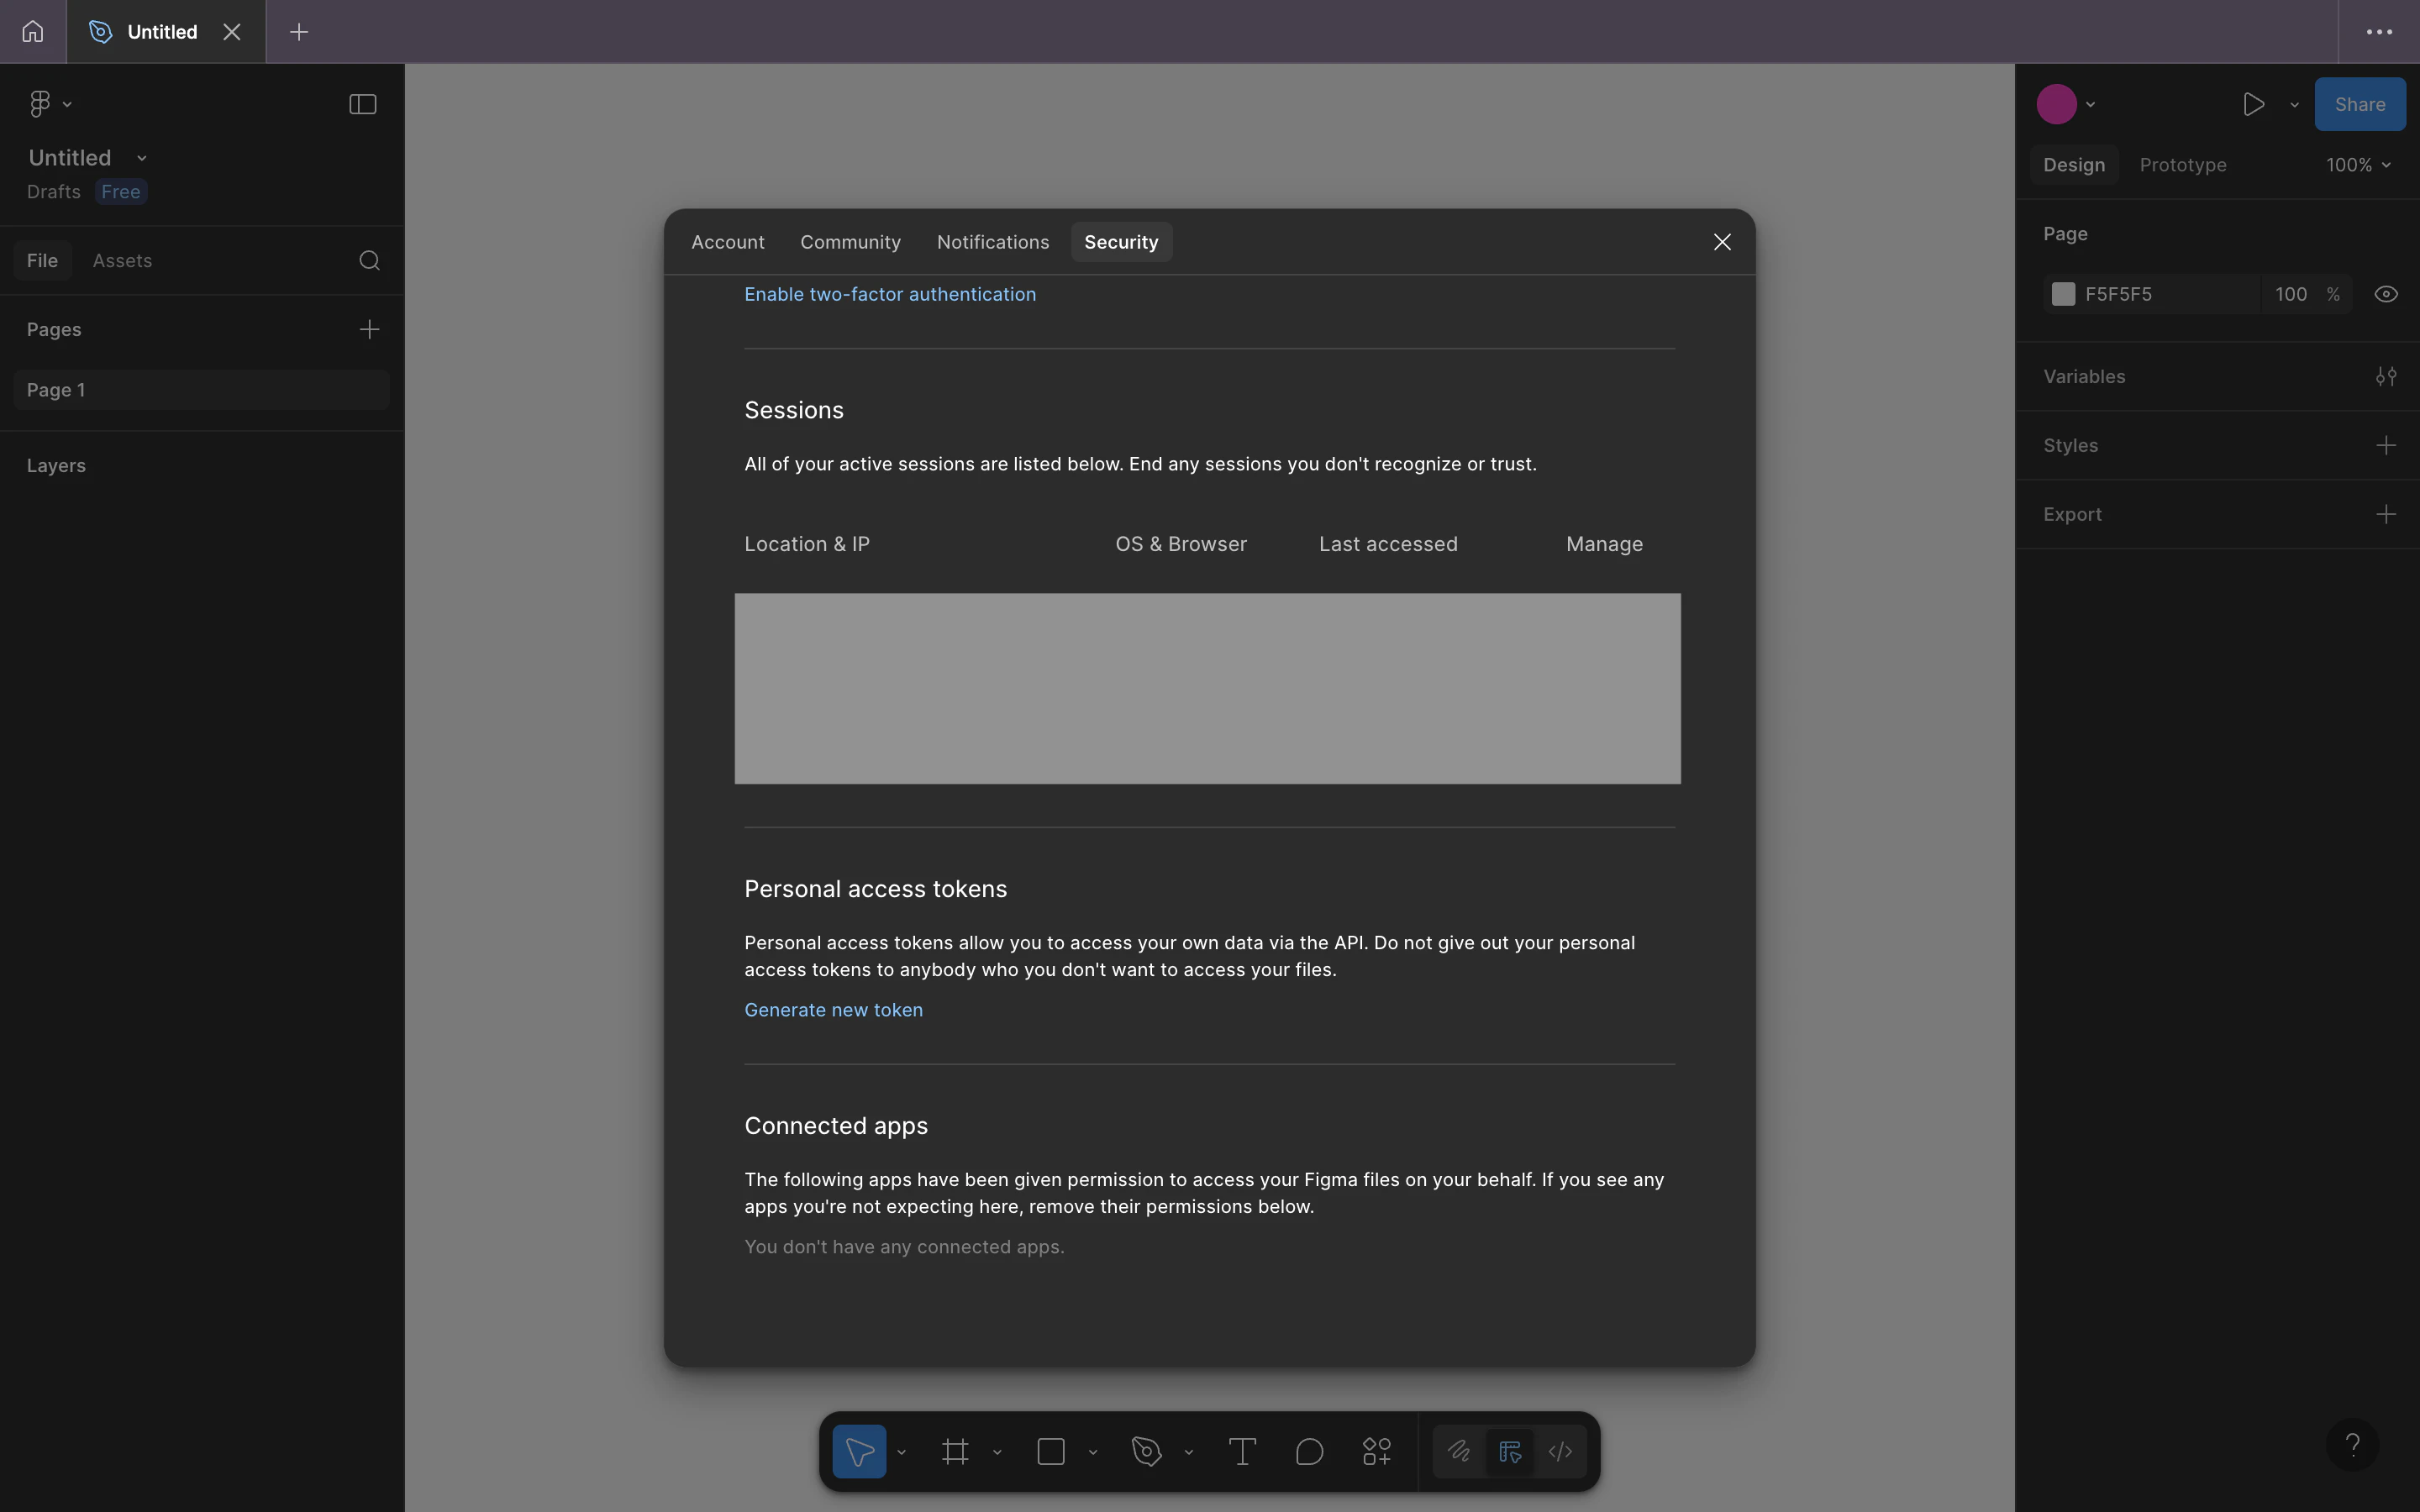
「Personal access tokens」にある「Generate new token」をクリックします。どういう権限をつけるかが表示されるので、以下の2つを設定します。
- file_content:read
- file_dev_resources:read

2. MCP サーバーを有効化
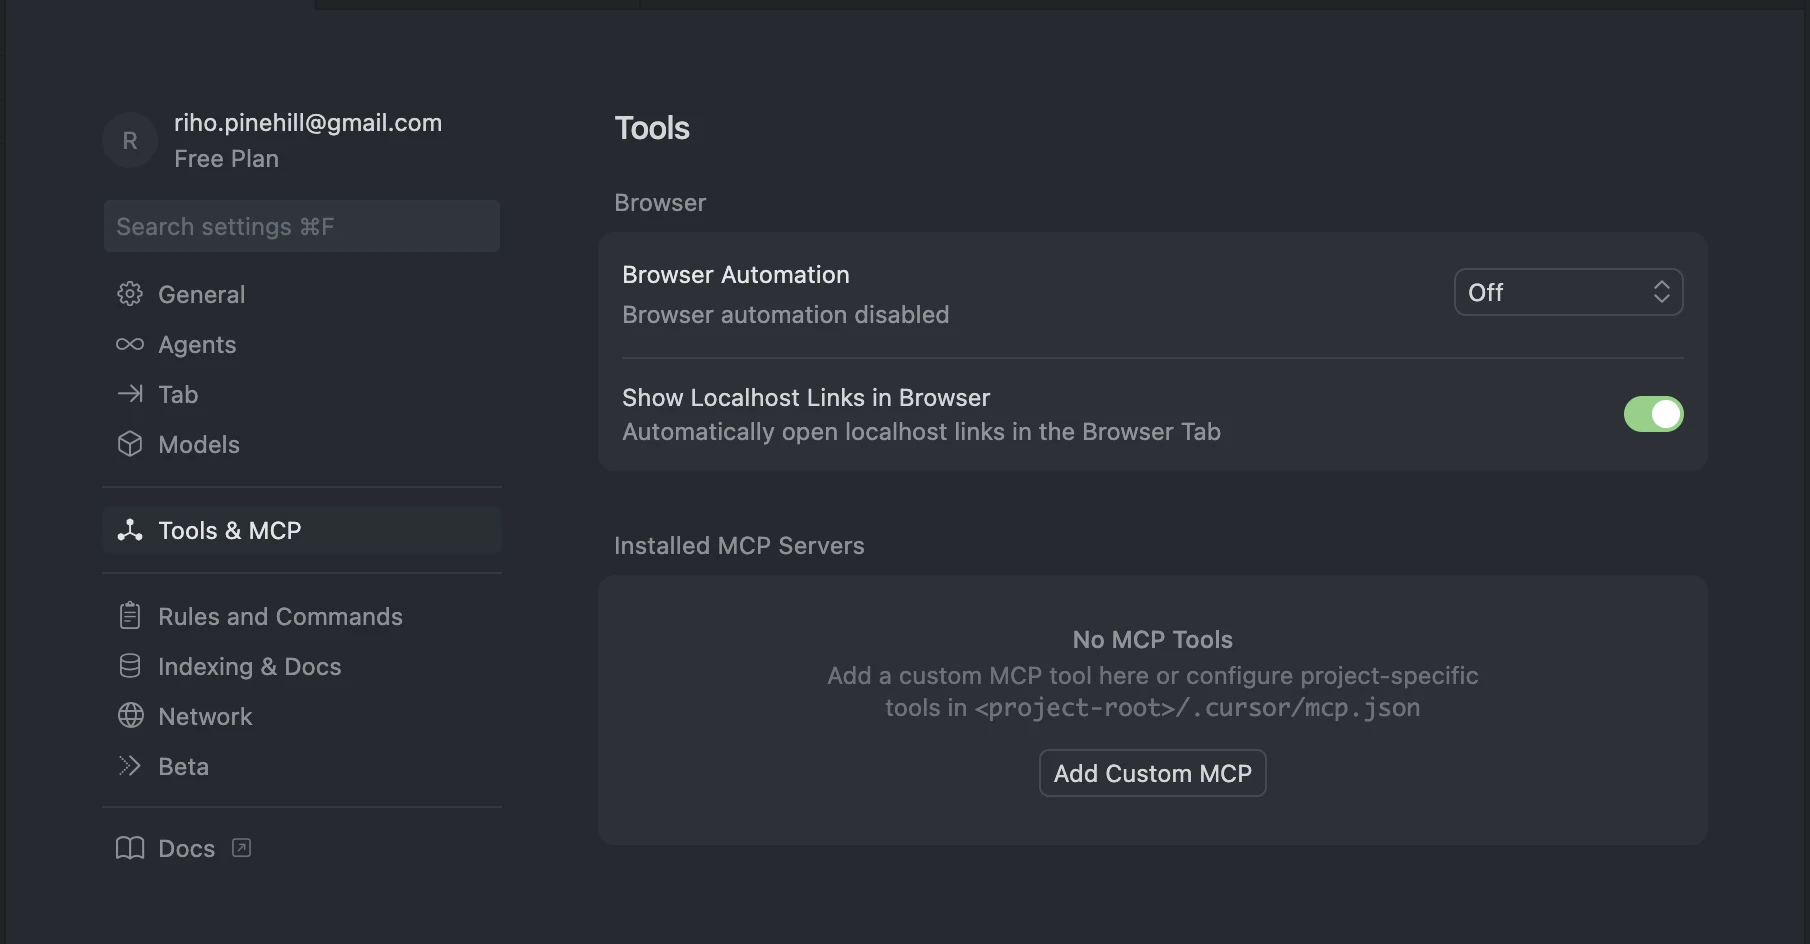
Cursor の右上にある歯車マークを押し、設定画面を開きます。
「Tools & MCP」を選択し、「Installed MCP Servers」から MCP サーバーを追加します。
開かれた mcp.json に以下を設定します。
{
  "mcpServers": {
    "Figma MCP": {
      "command": "npx",
      "args": ["-y", "figma-developer-mcp", "--figma-api-key=APIトークン", "--stdio"]
    }
  }
}
3. 動作確認
設定が完了すると Figma MCP と接続されるようになります。

最後に
次回は画面デザインから AI によるトークン/コンポーネント提案をしてみます。