◆開発環境
- Rails 6.0.3.4
- Ruby 2.6.5
- MySQL 5.6.47
◆目次
1)cocoon導入方法
2)動的にフォームを追加 ←
前置き
1. モデル作成
2. コントローラー(アクション)
3. コントローラー(ストロングパラメーター)
4. ビュー
5. ビュー(動的に追加したい部分)
3)追加するフォームにidやdata属性を付与する
★GIF画像(こんな感じになります)
*注意* 「にんじん」を選択するとピンクのボックスの後ろに「本」出力されるのはcocoonとは全く関係ないので悪しからず。cocoonは追加ボタンをクリックするとフォームの一部が追加されていくgemです。
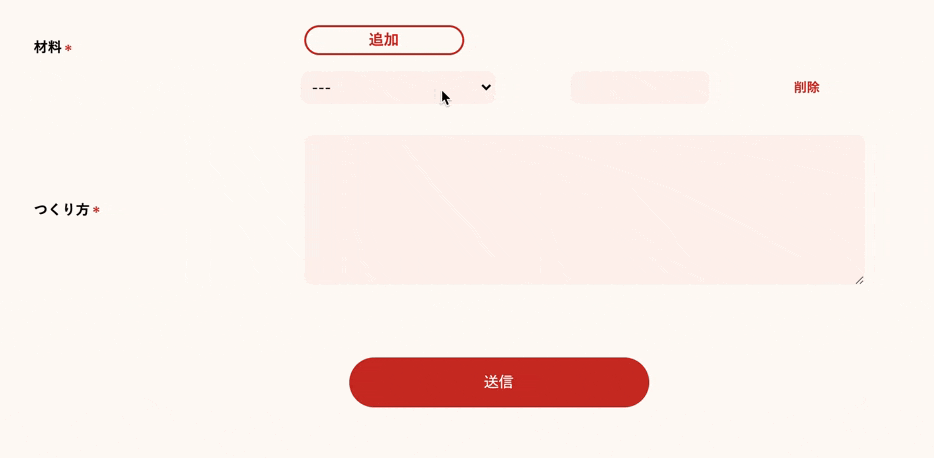
**【親】recipe 【子】ingredient (材料の増えていってるところ)
2)動的にフォームを追加
1. モデル作成
(親)model/recipe.rb
class Recipe < ApplicationRecord
  # cocoonで子フォームを親と一緒に保存するための記述。accepts_nested_attributes_forというメソッドを使っています。
  has_many      :ingredients, dependent: :destroy
  accepts_nested_attributes_for :ingredients, allow_destroy: true
end
(子)model/ingredient.rb
class Recipe < ApplicationRecord
  belongs_to :recipe
end
2. コントローラー(アクション)
(親)controller/recipe_controller.rb
  def new
    @recipe = Recipe.new
    @ingredient = @recipe.ingredients.build
    # ↑この記述が大事
    # paramsでこのように運ばれるため(カラム等だいぶ省略してます)
    # recipe{"title"=>"ポテトサラダ","ingredients_attributes"=> {"thing_name"=>"1", "amount"=>"1" }}
  end

  def create
    @recipe = Recipe.new(recipe_params)
    if @recipe.save
       # @recipe.saveでrecipeもingredientも同時に保存しています
      redirect_to my_recipe_user_path(id: current_user)
    else
      render :new
    end
  end
3. コントローラー(ストロングパラメーター)
**書き方とっても大事です!ここでだいぶ詰まりました...
(親)controller/recipe_controller.rb
 private
  def recipe_params
    params.require(:recipe).permit(
      {images: []},:title,:feature,:eat,:category_id,:cold_date,:frozen_date,:time,:text,
      ingredients_attributes:[:id, :recipe_id, :thing_id, :amount, :_destroy])
      .merge(user_id: current_user.id)
  end
一番大事な記述↓↓↓
ingredients_attributes:[:id, :recipe_id, :thing_id, :amount, :_destroy]
- ingredients・・・複数形、単数形はmodelと合わせてください。(多分複数形になると思いますが)
- attributes・・・ここはmodel等は関係なく、複数形でOKです。
- :id・・・理由はわかりませんが、:idの記述も必要なようです。
- _:destroy・・・cocoonの削除ボタンと関係あるのかなと思ってます。(詳しい方ぜひ教えてください)
4. ビュー
GIF動画のcocoonで作成している材料の箇所以外省略しました。
view/recipe/new.html.erb
<%= form_with(model: @recipe, class:"recipes-post-main", local: true) do |f| %>
  <!-- 省略 -->
  <div class="parent">
    <div class="form-box">
      <div class="forms-item">
        材料
      </div>
      <!-- 1)追加ボタンの記述 -->
      <div class="add-botton-box">
        <%= link_to_add_association "追加ボタン", f, :ingredients,
        class: 'add_fields',
        id: 'add-btn',
        data: {
          association_insertion_node: '#detail-association-insertion-point',
          association_insertion_method: 'after'
          }
        %>
      </div>
    </div>

    <!-- 動的に追加するフォームを挿入する箇所(なくてもいい*詳細は1)で説明します) -->
    <div id="detail-association-insertion-point"></div>

    <!-- 2)動的に追加するフォーム(renderで飛ばしている先が追加される) -->
    <%= f.fields_for :ingredients do |form| %>
      <%= render "ingredient_fields", f: form %>
    <% end %>
  </div>
  <!-- 省略 -->
<% end %>
順を追って説明
1) 追加ボタンの記述
<!-- これだけあれば動く。あとはオプション -->
<%= link_to_add_association "追加ボタン", f, :ingredients%>
**補足: ここの「f」はform_withのブロック変数
**補足2: 必須箇所以外については__公式サイト__のREADMEに詳しく書いてあるので、簡単に説明。
-
association_insertion_node: 追加フォームを挿入する位置を指定できる。上記の例の場合は
<div id="detail-association-insertion-point"></div>の位置に挿入される。 - association_insertion_method: 追加するフォームをどこに増やすか。上なのか下なのか...(before, after, append, prepend)Default: before。以外と難しいので色々試してみてください。
2) 動的に追加するフォーム(renderで飛ばしている先が追加される)
追加フォームの部分
<%= f.fields_for :ingredients do |form| %>
  <%= render "ingredient_fields", f: form %>
<% end %>
- :ingredients 複数形・単数形はmodelの記述に合わせる
- ingredient_fields ファイル名:「_ingredient_fields.html.erb」は親のディレクトリに置く。(今回の場合はrecipe)。
5. ビュー(動的に追加したい部分)
_ingredient_fields.html.erb
<!-- class="nested-fields" ←ここ絶対に必要です -->
<div class="nested-fields">
  <table>
    <tr>
      <td class="td-fixed-select">

        <!-- 選択ボックス(プルダウン)の箇所 -->
        <% thing_options = Thing.order(:id).map { |c| [c.thing_name, c.id, data: { unit: c.unit, spoon:c.spoon }] } %>
        <%= f.select(:thing_id, thing_options, { prompt: "---"}, {class:"select", data:{select:0}, id:"thing-select" }) %>

      </td>
      <td class="td-fixed-spoon">
        <span class="box-spoon" id='spoon-auto' data-spoon='0'></span>
      </td>
      <td class="td-fixed-amount">
        <%= f.number_field :amount, class:"ingredients-amount",id:"ingredient-amount", min:"0",step:"0.1"%>
      </td>
      <td class="td-fixed-unit">
        <span class="box-unit" id='unit-auto' data-unit='0'></span>
      </td>
      <td class="td-fixed-delete">

        <!-- 削除ボタン -->
        <%= link_to_remove_association "削除", f %>

      </td>
    </tr>
  </table>
</div>
**補足: 今回は動的に追加するフォームをtableで書いていますが、自由に書いて大丈夫です。
- _ingredient_fields.html.erb ファイル名のルールを守る。「ingredient」は好きな名前にしてください *注意*「ingredient」の部分はmodel名と合わせる必要があるため、複数形にしない。
- class="nested-fields" 追加したいフォーム内容を囲む。
- link_to_remove_association "削除", f 削除ボタンの記述を忘れない。
参考文献
おすすめ順
Qiita_【Rails】cocoonを用いて親子孫関係のテーブルに複数のデータを同時保存する方法
Qiita_【Rails】cocoon 親子孫の複数テーブル&複数データを同時保存
Qiita_Rails6でのcocoon
ブログ_Rails 6 で Cocoon を使ってネストしたフォームを作る方法
以上です。
抜け漏れなどご指摘あればコメントいただけると嬉しいです!