はじめに
本記事は expect,it等の説明は記載しません。(記事が溢れてるから)
caseに対するテストコードの書き方を順次備忘録として追記していきます。
前提情報
fixture = TestBed.createComponent(コンポーネントクラス名);
TestBed.createComponentとは、
ComponentFixtureオブジェクトを返すメソッドらしいです。
ComponentFixtureを使用することで、
コンポーネントクラス名のインスタンス自体(要はTS)にアクセスでき、
またコンポーネントのHTML要素(DOM要素)へアクセスできるそうです。
なので、
テスト中にコンポーネントのproperty値を検証したり、
HTML要素の値を検証したりすることが可能になる。
前提
- 各componentでテストを実行する場合、
RouterTestingModuleは必ずimportsしてください。 - 同componentで使用するModuleは全てimportsしてください。
⇒errorになります。
(ngModelを使用しているが、FormsModuleをimportsしていないケース等) - toBeやtoContainといった
expect().〇〇(); の〇〇の部分をMatcherと呼ぶそう。どんな種類があるかを事前に把握する。
CASE
HTMLタグの表示確認
<p>h10s works!</p>
  it('表示確認',()=>{
    const pTag = fixture.debugElement.query(By.css('p'));
    expect(pTag.nativeElement.textContent).toBe('h10s works!');
  })
プロパティ値確認
public temperature:Number = 16;
  it(('property default value check'), fakeAsync(()=>{
    //対象プロパティ値 取得
    let temperature = component.temperature;
    //プロパティ値が16であること確認
    expect(temperature).toEqual(16);
  }))
ユーザ操作(onclick)でメソッドが正しく呼ばれるか確認
注意:変数定義箇所は記載していません。
<span class="mod" [class.bk-color]="isChanged">背景色が変わる</span>

<button class="buttond" (click)="onChange()">
    ボタン
</button>
  public onChange(){
    if(this.isChanged){
      return this.isChanged = false;
    }else {
      return this.isChanged = true;
    }
  }
  it(('HTML button click class add'), fakeAsync(()=>{

    //spanタグ 取得
    let spanTag = fixture.debugElement.query(By.css('.mod')).nativeElement;
    //buttonタグ 取得
    let buttonTag = fixture.debugElement.query(By.css('.buttond'));

    buttonTag.triggerEventHandler('click',null);

    fixture.detectChanges();
    tick();

    //spanタグにclassが付与されてること確認
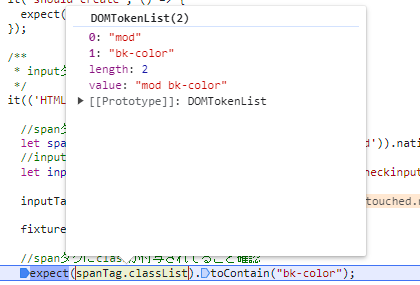
    expect(spanTag.classList).toContain("bk-color");

  }))
inputタグ ngModel プロパティ値更新されてるか確認
※isChangedプロパティは定義済みです。

<span class="mod" [class.bk-color]="isChanged">背景色が変わる</span>
<input class="checkinput" type="checkbox" [(ngModel)]="isChanged">
  it(('HTML input click class add'), fakeAsync(()=>{

    //spanタグ 取得
    let spanTag = fixture.debugElement.query(By.css('.mod')).nativeElement;
    //inputタグ 取得
    let inputTag = fixture.debugElement.query(By.css('.checkinput')).nativeElement;

    inputTag.click();

    fixture.detectChanges();

    //spanタグにclassが付与されてること確認
    expect(spanTag.classList).toContain("bk-color");

  }))
メソッドの返り値確認
spyOnはmethodをモック化します。
つまり、methodの本来のTS実装を置き換えて、テスト用のダミー動作をさせること。
  public add(a:number,b:number){
    return a+b;
  }

  public multiply(a:number,b:number){
    return a*b;
  }

  public calculate(a:number,b:number){
    return this.add(a,b)+this.multiply(a,b);
  }
  it('mock化',()=>{
    //add methodの返り値をモック化。
    spyOn(component,'add').and.returnValue(20);
    //multiply methodは本来の実装処理を行う。
    spyOn(component,'multiply').and.callThrough();
    //calculate methodの引数をセット。
    var result = component.calculate(2,3);

  //add methodが呼ばれたこと確認テスト
    expect(component.add).toHaveBeenCalled();
    //multiply methodが呼ばれたこと確認テスト
    expect(component.multiply).toHaveBeenCalled();
    //呼び出した際の引数確認テスト
    expect(component.multiply).toHaveBeenCalledWith(2,3);
    //calculateの返り値が正しいか確認 falseになる。
    //result:26になるため。
    expect(result).toBe(11);
  })
メソッド処理でプロパティ値が正しく変更更新されてるか確認
  ngOnInit(){
    this.methodTest(false);
  }

  public methodTest(val:boolean){
    if(val){
      this.add = 10;
    }else {
      this.add = 3;
    }
  }
  it(('method add 3 or 10 check'), fakeAsync(()=>{
    const add:Number = component.add;

    spyOn(component,'methodTest');
    component.ngOnInit();

    expect(add).toEqual(3);
  }))
追加
methodTestメソッドをonChangeメソッドから呼ぶようにします。
onChangeメソッドはHTML側のが定義されています。
  public methodTest(val:boolean){
    if(val){
      this.add = 10;
    }else {
      this.add = 3;
    }
  }

  public onChange(){
    if(this.isChanged){
      this.methodTest(false);
      return this.isChanged = false;
    }else {
      this.methodTest(true);
      return this.isChanged = true;
    }
  }
  it(('userIF click methodTest check'), (()=>{

    let inputTag = fixture.debugElement.query(By.css('.buttond'));

    inputTag.triggerEventHandler('click',null);
    const spy = spyOn(component,'methodTest');

      expect(spy).toHaveBeenCalled();
      expect(component.add).toEqual(10);

  }))
画面Xから画面Yへ正しく遷移できてるか確認
  ngOnInit(){
    console.log("Acomponent");

    setTimeout(()=>{
      this.router.navigateByUrl('/routerComponent');
    },3000)
  }
  let component: AComponent;
  let fixture: ComponentFixture<AComponent>;
  let router: Router;

  beforeEach(() => {
    TestBed.configureTestingModule({
      declarations: [AComponent],
      imports:[
        RouterTestingModule,
        RouterModule
      ]
    });
    fixture = TestBed.createComponent(AComponent);
    component = fixture.componentInstance;
    router = TestBed.inject(Router);★
    fixture.detectChanges();

  });

  it('遷移確認', ()=>{
    const spy = spyOn(router, 'navigateByUrl');

    component.ngOnInit();
    tick(3000);
    expect(spy).toHaveBeenCalledWith('/routerComponent');
  })
TestBed.inject(ライブラリ);について
※正しい認識とは少しずれるかもしれませんが、ニュアンスはあってると思います。
TestBed.injectで特定のサービス(Router,HttpClient等)のインスタンスを取得(テスト環境用の)して、
テスト環境でサービスが動作するようにします。
そして、it()の中で、 spyして使用することでモック化(ダミー化)された挙動となる。
子コンポーネントへ渡した値が正しく処理されてるか確認
■Parent側
<app-child
    [headerText]="temp"
></app-child>
public temp:number = 0;
■Child側
<div class="header">
    {{ headerText }}
</div>
@Input() headerText:Number | undefined;
~~~~~~省略~~~~~~
  let component: ParentComponent;
  let fixture: ComponentFixture<ParentComponent>;
  let componentChild: ChildComponent;

~~~~~~省略~~~~~~
  beforeEach(() => {
    TestBed.configureTestingModule({
      declarations: [
        ParentComponent,
        ChildComponent
      ],
      imports:[
        RouterTestingModule,
        FormsModule,
        HttpClientModule
      ]
    });
    fixture = TestBed.createComponent(ParentComponent);
    component = fixture.componentInstance;
    fixture.detectChanges();

    const childDebugElement =
    fixture.debugElement.query(By.directive(ChildComponent));
    componentChild = childDebugElement.componentInstance;

  });

  it(('parent child component vind check'), fakeAsync(()=>{

    // component.temp = 55;
    let temp = component.temp;
    fixture.detectChanges();

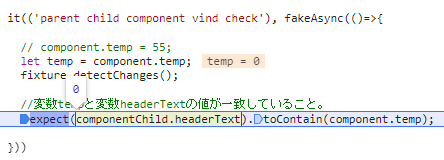
    //変数tempと変数headerTextの値が一致していること。
    expect(componentChild.headerText).toContain(component.temp);

  }))
~~~~~~省略~~~~~~


