はじめに
画面左から現れるSideMenu,とてもかっこいいですよね!
そんな挙動を簡単に実現できるライブラリがありましたので、紹介します。
色々実装記事があったのですが、エラーが出てしまい、また、自分の知識では解決できなかったので、出来るだけシンプルに、コードも少しで実装できたので、今回はその方法を記載していきます。
また、ライブラリのインストールについては、他の優秀な記事がたくさん出ていますので、今回は割愛させていただきます。
1.まずは動かしてみよう!!
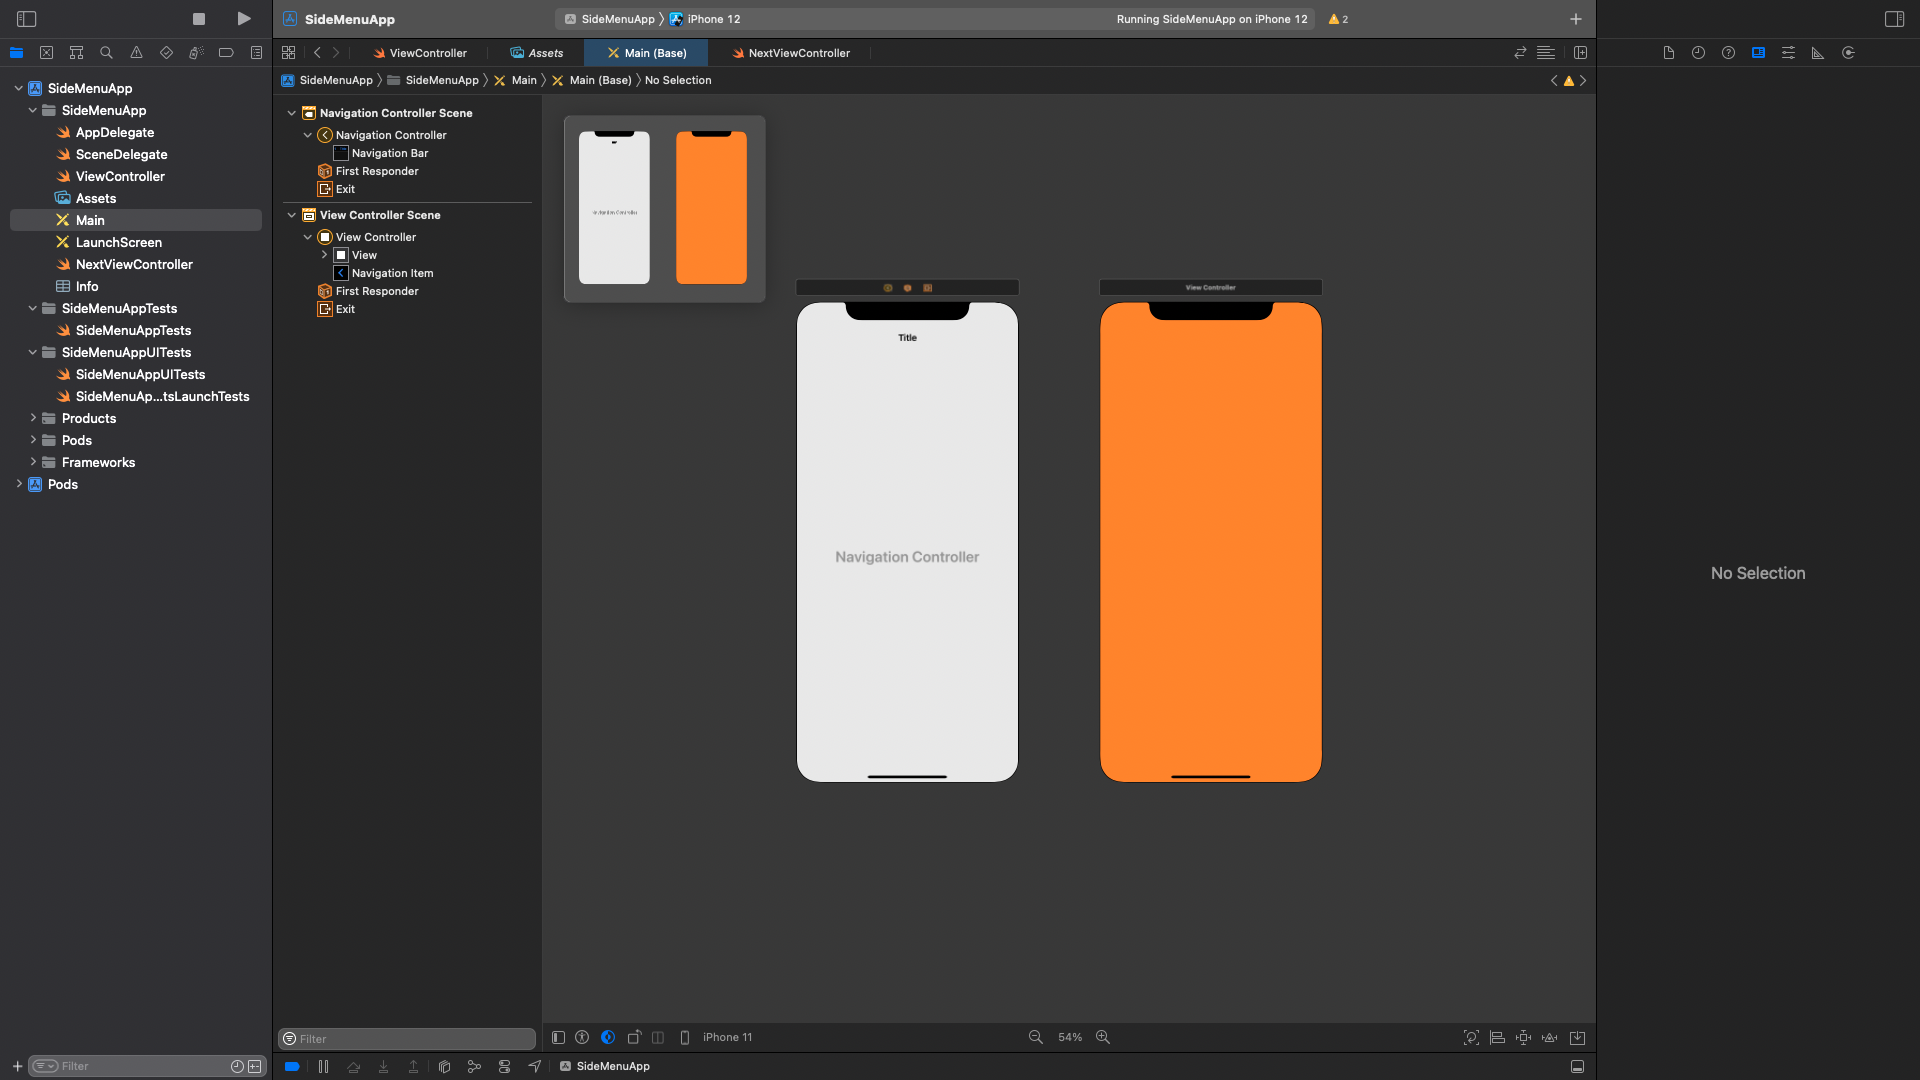
ViewControllerは画面遷移が分かりやすいように色をつけています。
そしてNavigationControllerを配置します。
次にNavigationControllerのCustomClassを選択します。
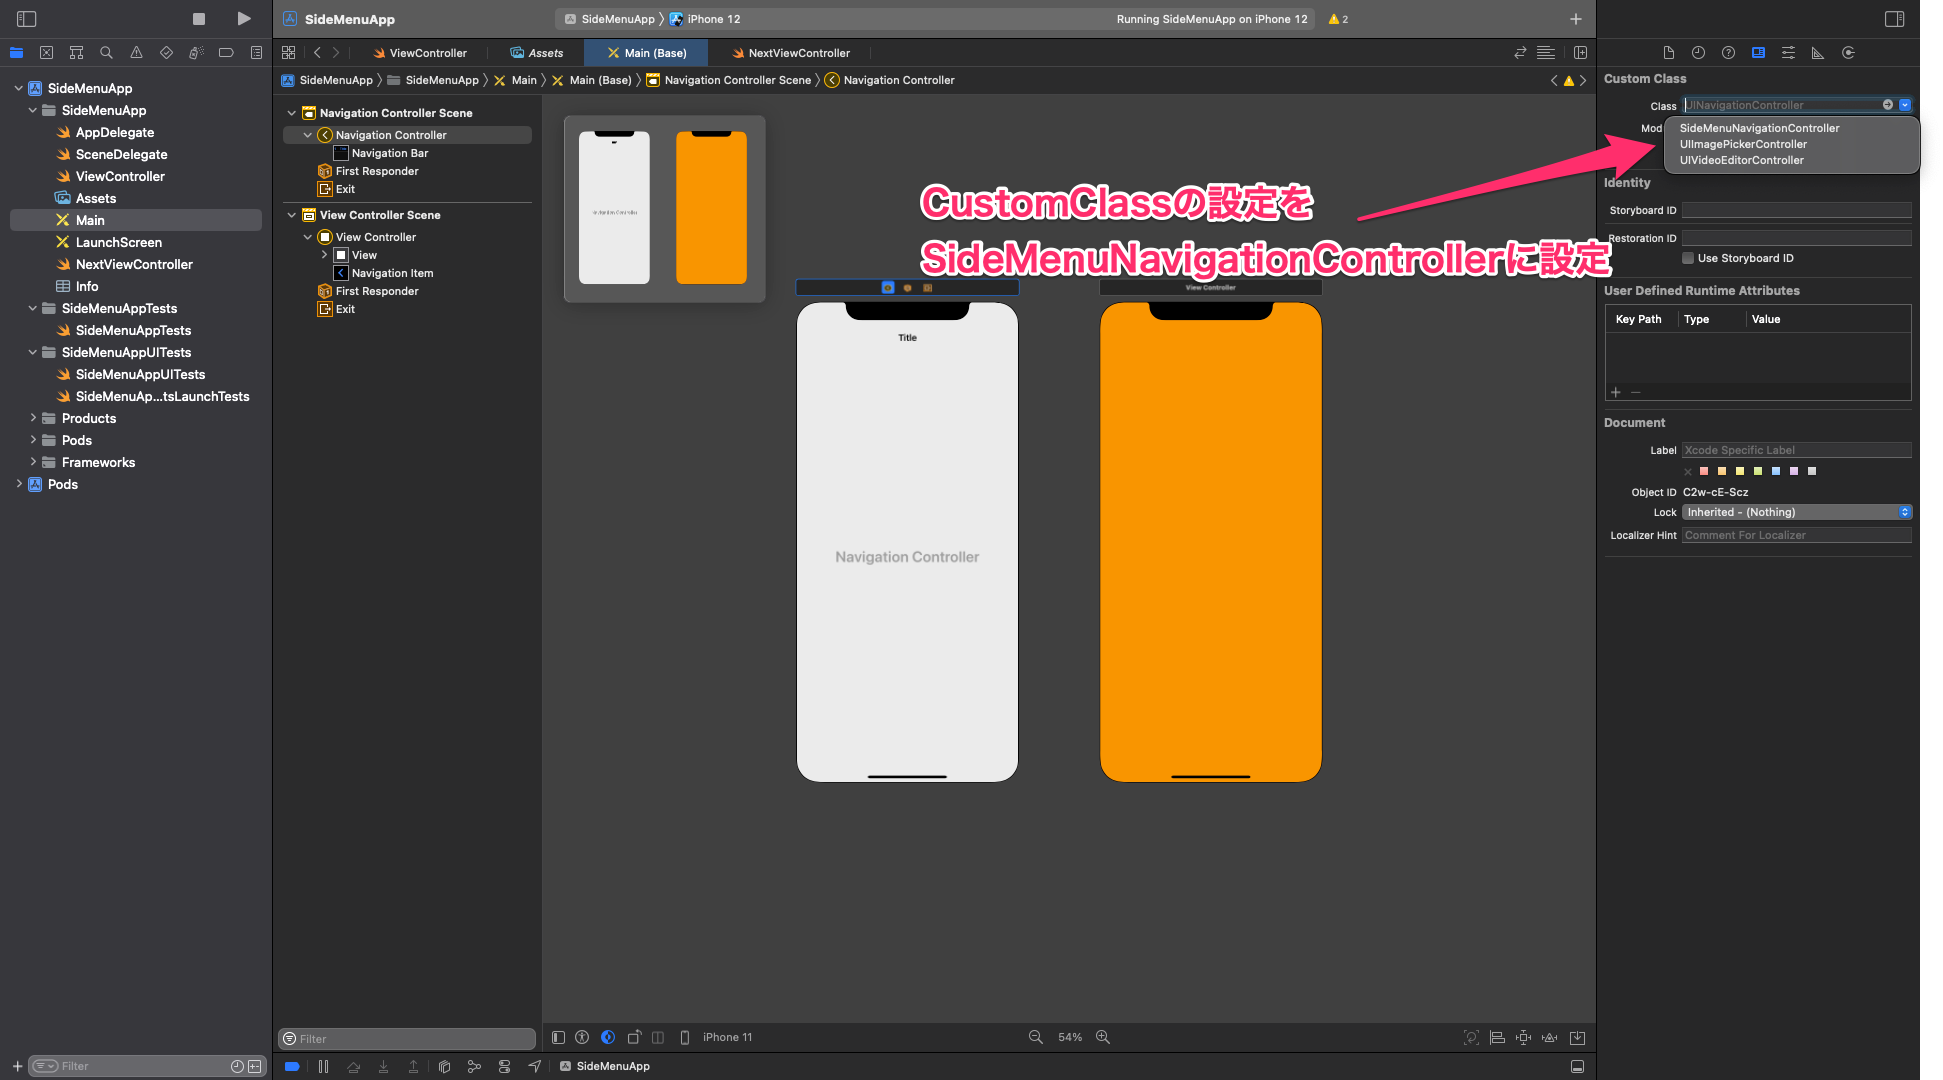
するとNavigationControllerがSideMenuNavigationControllerに変わります。
次にSideMenuNavigationControllerからキーボードのContlol + ドラッグ&ドロップ でrootviewcontroller接続します。
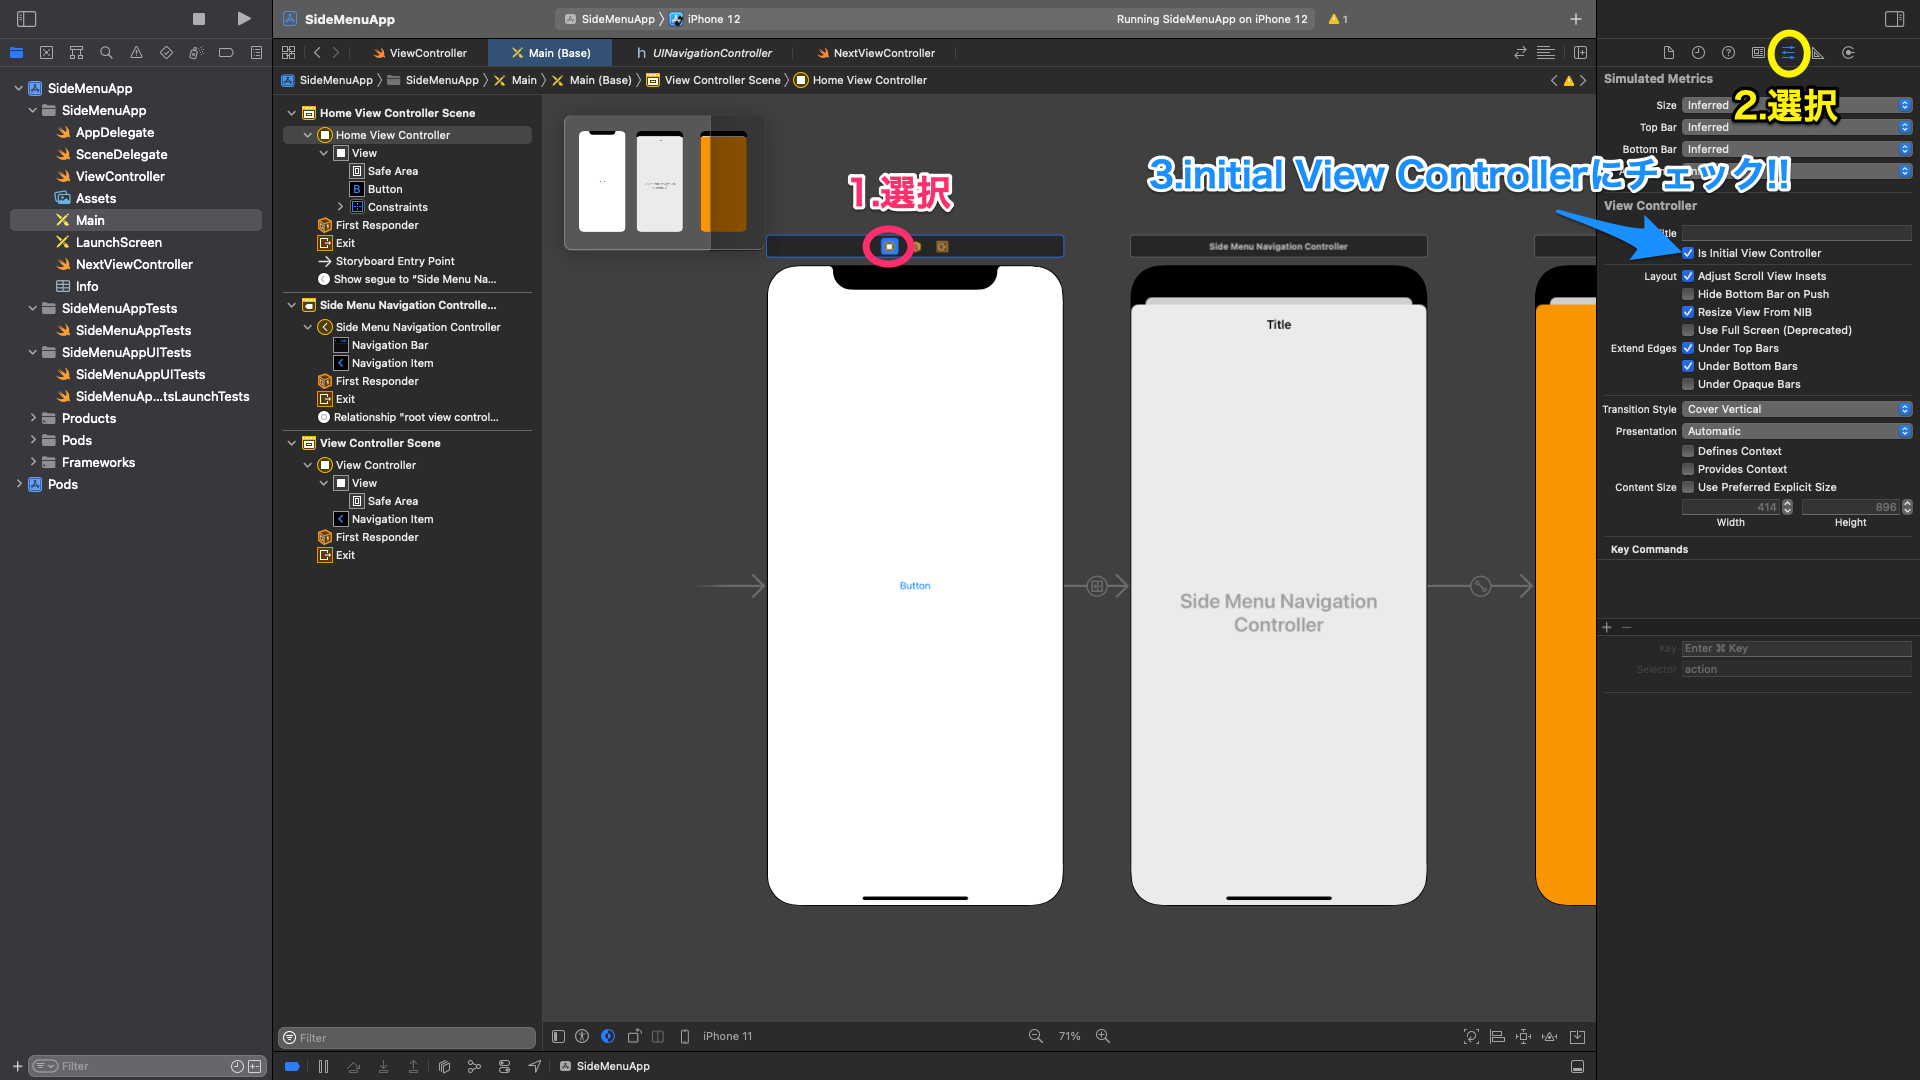
新しいViewControllerを配置、名称をHomeViewControllerにし、UIButtonを配置、SegueでSideMenuNavigationControllerに接続します。
最後にHomeViewControllerをinitialViewControllerにして下さい。
最後の最後にSideMenuNavigationControllerの設定を変えます。
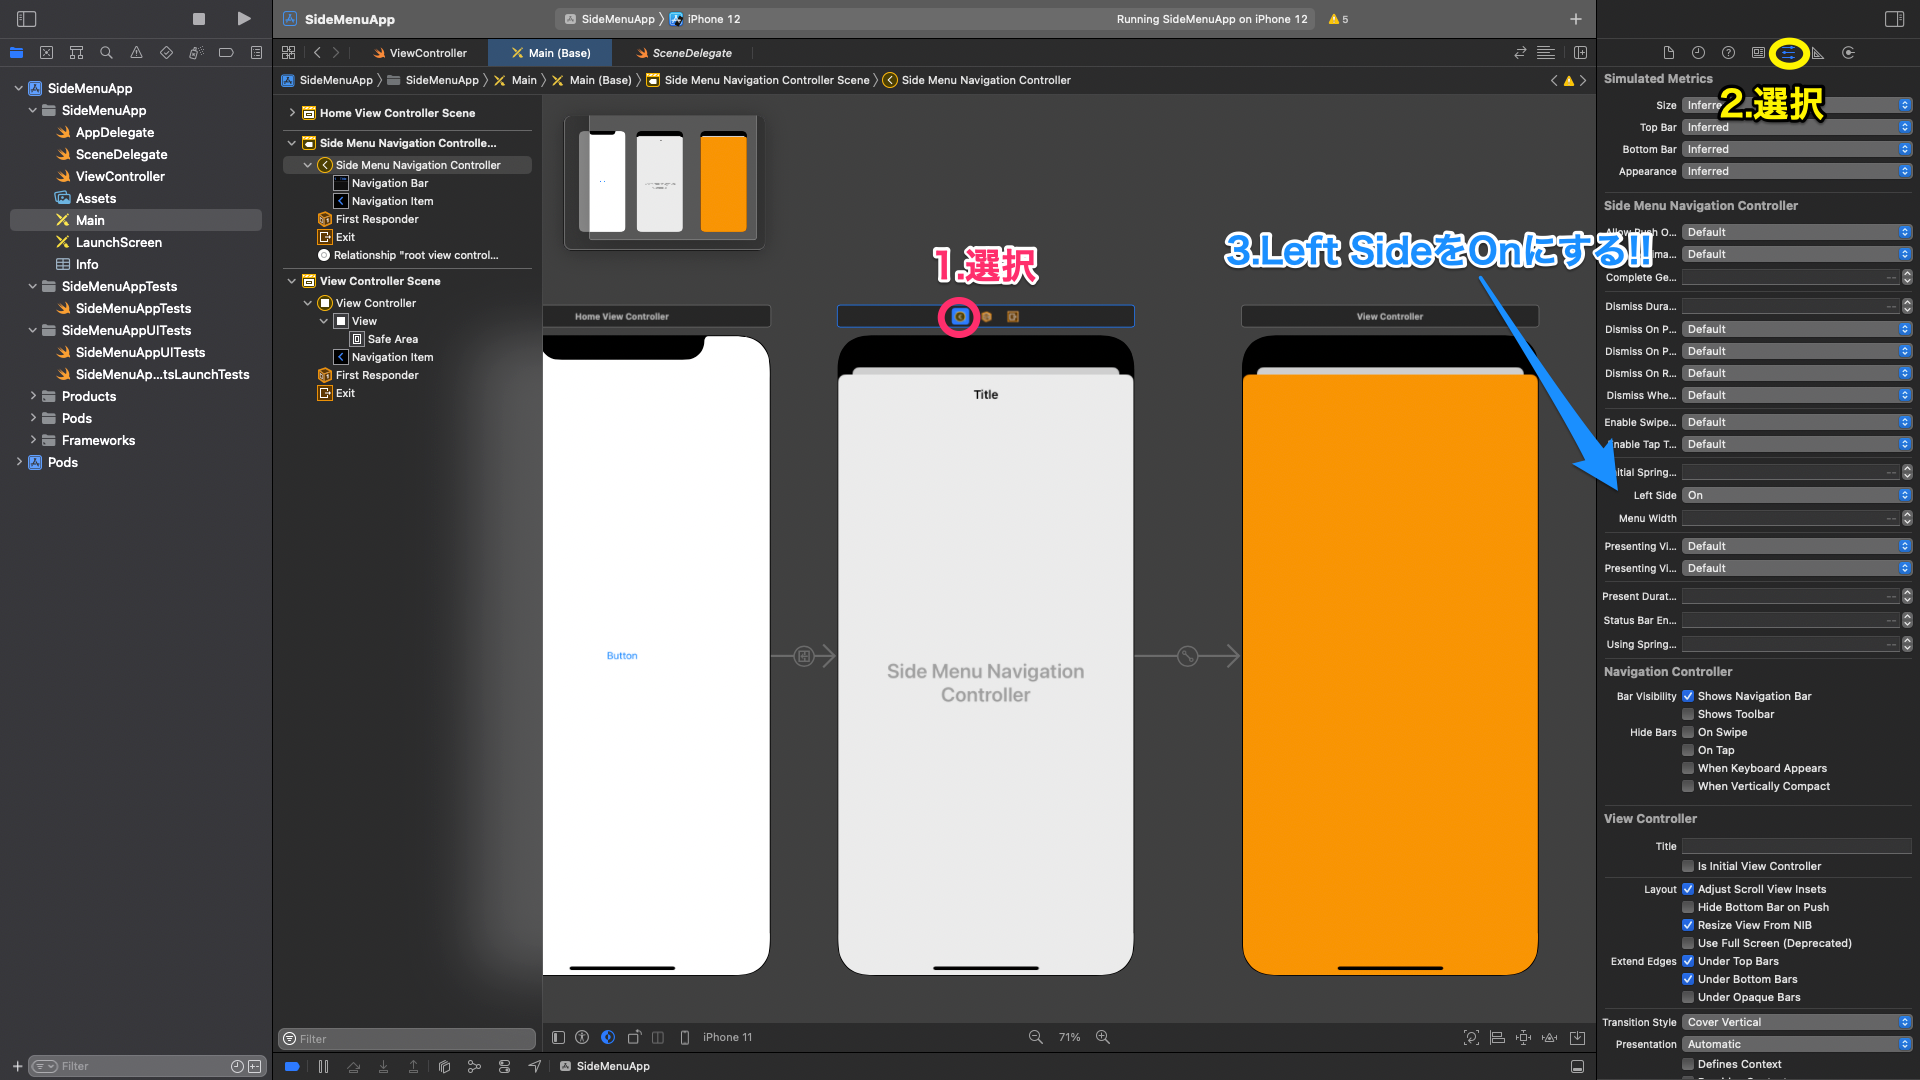

こんな感じで左からViewControllerが出てきてくれました!!
2.より実践的に使う!!
具体的にSideMenuっぽく表現していきたいと思います!!
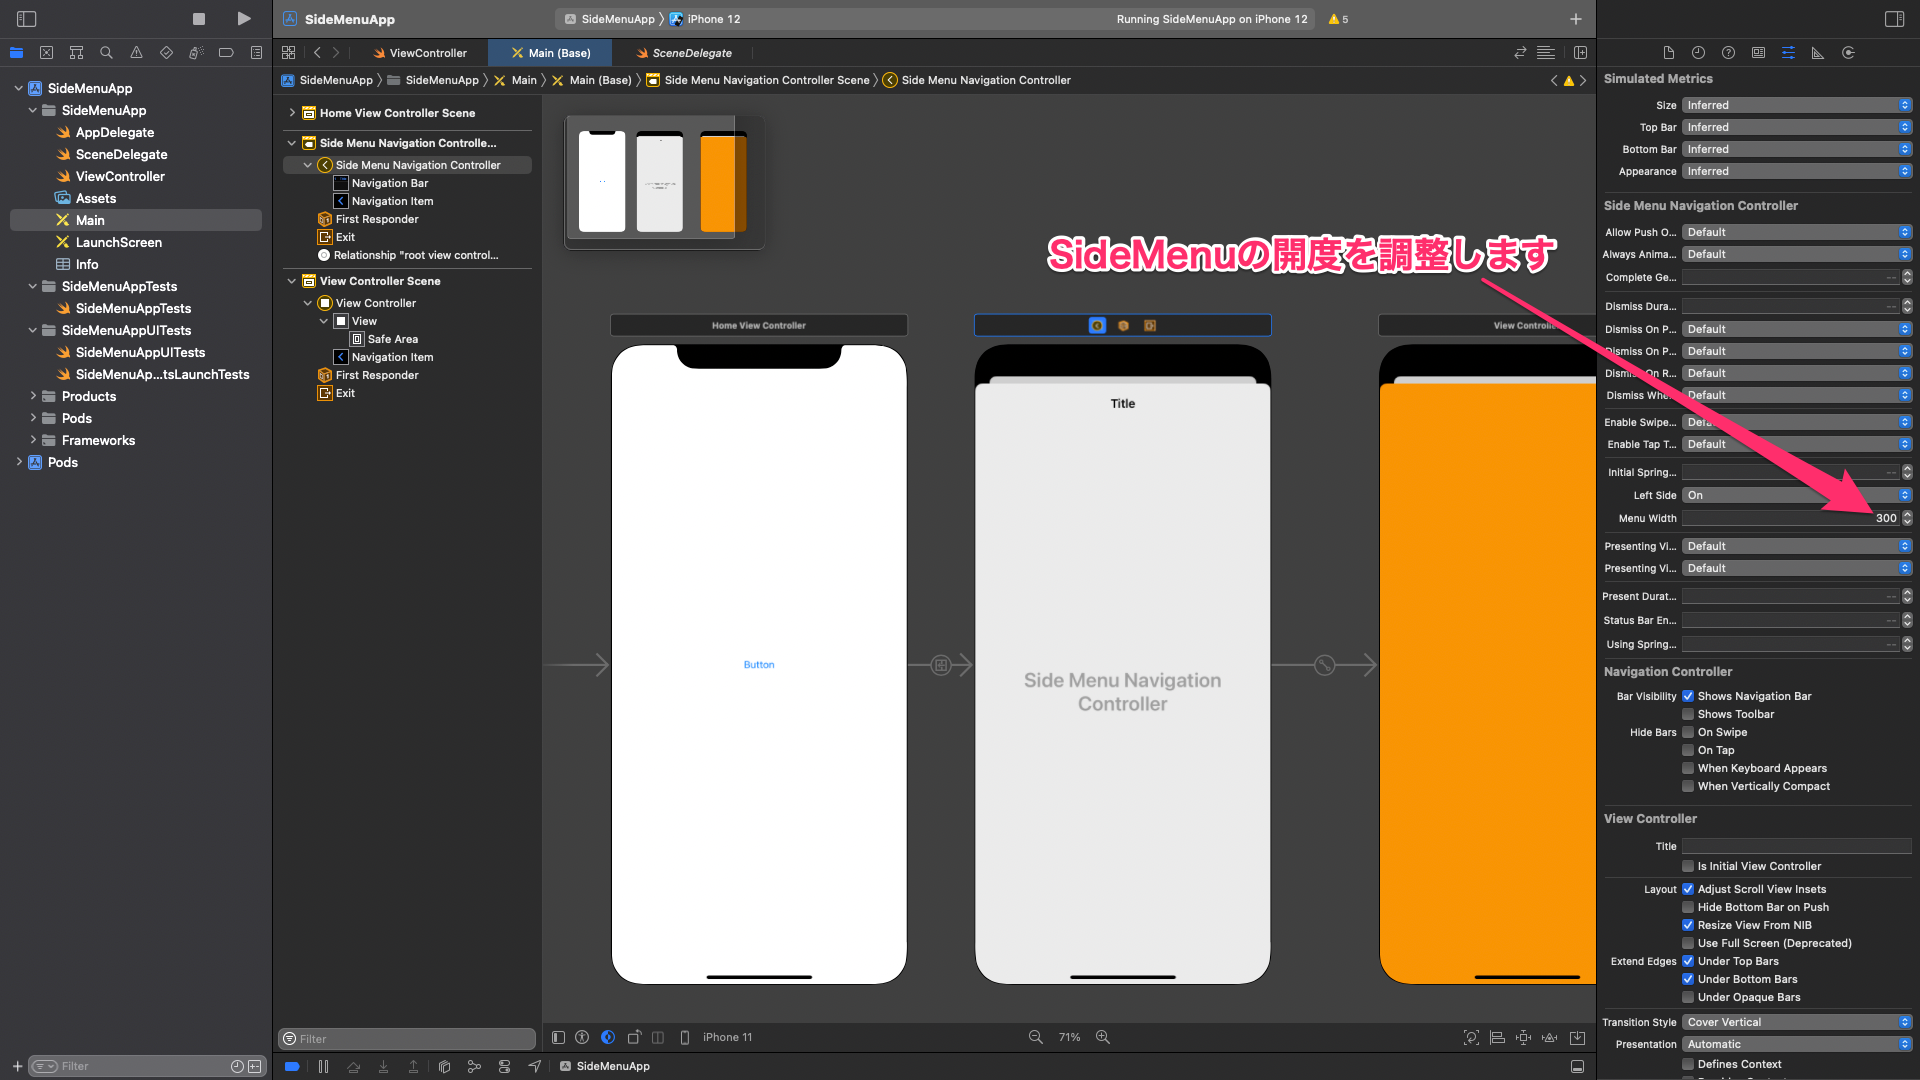
1.SideMenuの開度調整
2.それぞれのViewControllerのコード記載する!
全文載せておきます。
尚、TableViewの使い方は
https://qiita.com/masasumi0327/items/f525f799fa7aa6fbe248
を参考にして下さい。
Storyboardの設定はそれぞれ行なって下さい。
import UIKit
import SideMenu

class HomeViewController: UIViewController {

    private let coverView: UIView = {
        let mainBoundSize: CGSize = UIScreen.main.bounds.size
        let mainFrame = CGRect(x: 0, y: 0, width: mainBoundSize.width, height: mainBoundSize.height)

        let view = UIView()
        view.frame = mainFrame
        view.backgroundColor = UIColor(white: 0, alpha: 0.1)
        return view
    }()
    override func viewDidLoad() {
        super.viewDidLoad()
        //スワイプで画面遷移が出来ます
        SideMenuManager.default.addPanGestureToPresent(toView: view)
    }
}
extension HomeViewController: SideMenuNavigationControllerDelegate {
    //サイドメニューが開くときにcoverViewを出す
    func sideMenuWillAppear(menu: SideMenuNavigationController, animated: Bool) {
        view.addSubview(coverView)
    }
    //サイドメニューが完全に閉じたらcovorViewを消す
    func sideMenuDidDisappear(menu: SideMenuNavigationController, animated: Bool) {
        coverView.removeFromSuperview()
    }
}
import UIKit

class ViewController: UIViewController {
    //セクションのタイトルを定義
    let sectionTitle: NSArray = ["フルーツ", "野菜"]
    let fruits = ["バナナ","メロン","キウイ"]
    let vegetable = ["玉ねぎ","大根","ニンジン"]

    @IBOutlet weak var tableView: UITableView!
    override func viewDidLoad() {
        super.viewDidLoad()
        tableView.delegate = self
        tableView.dataSource = self
    }
}
extension ViewController: UITableViewDelegate, UITableViewDataSource {
    //セクション数の指定
    func numberOfSections(in tableView: UITableView) -> Int {
        2
    }
    //セクションタイトルを指定
    func tableView(_ tableView: UITableView, titleForHeaderInSection section: Int) -> String? {
        return sectionTitle[section] as? String
    }
    //それぞれのセルの表示数を指定
    func tableView(_ tableView: UITableView, numberOfRowsInSection section: Int) -> Int {
        if section == 0 {
            return fruits.count
        }
        else if section == 1 {
            return vegetable.count
        }
        else {
            return 0
    }
}
    //それぞれのセルに表示される内容を指定
    func tableView(_ tableView: UITableView, cellForRowAt indexPath: IndexPath) -> UITableViewCell {
        let cell = UITableViewCell(style: .default, reuseIdentifier: "cell")
        cell.textLabel?.text = fruits[indexPath.row]
        if indexPath.section == 0 {
            cell.textLabel?.text = fruits[indexPath.row]
            //セルの色を指定
            cell.textLabel?.textColor = UIColor.red
            //セルのフォントを指定
            cell.textLabel?.font = UIFont.boldSystemFont(ofSize: 30)
        }
        else if indexPath.section == 1 {
            cell.textLabel?.text = vegetable[indexPath.row]
            cell.textLabel?.textColor = UIColor.blue
            cell.textLabel?.font = UIFont.boldSystemFont(ofSize: 30)
        }
        return cell
    }
}
ビルドします!!

さいごに
画面遷移時背景を暗くするやり方は
https://qiita.com/tewi_r/items/f1ecbde1976b496c2a5d
を参考にさせて頂きました!!
ありがとうございます。
まだまだ使い方がわからないですが、とりあえず最低限の挙動は出来たので、参考にして頂けると幸いです!!