やること
StableDiffusionControlNetPipelineを用いて、色違いのポケモン画像を生成します。
実際のポケモン画像を入力とし、エッジ検出により線画化した後、その線画で条件付けた画像生成を行います。
なお、以下のコードはGoogle Colaboratory上(ランタイムのタイプ:T4 GPU)での実行を想定しています。
ライブラリのインストール、インポート
!pip install -q diffusers==0.14.0 transformers xformers git+https://github.com/huggingface/accelerate.git
!pip install -q opencv-contrib-python
!pip install -q controlnet_aux
import cv2
from PIL import Image
import numpy as np
import torch
from diffusers import StableDiffusionControlNetPipeline, ControlNetModel
from diffusers import UniPCMultistepScheduler
from diffusers import StableDiffusionControlNetPipeline
from diffusers.utils import load_image
from google.colab import files
パイプラインの作成
エッジ画像で条件づけられるControlNetを用います。
# モデルのロード
controlnet = ControlNetModel.from_pretrained("lllyasviel/sd-controlnet-canny", torch_dtype=torch.float16)

pipe = StableDiffusionControlNetPipeline.from_pretrained(
    "lambdalabs/sd-pokemon-diffusers", controlnet=controlnet, torch_dtype=torch.float16
)

pipe.scheduler = UniPCMultistepScheduler.from_config(pipe.scheduler.config)

device = torch.device("cuda:0" if torch.cuda.is_available() else "cpu")
pipe = pipe.to(device)

pipe.enable_xformers_memory_efficient_attention()

# NSFWチェッカーの無効化
def null_safety(images, **kwargs):
    return images, [False for _ in range(images.shape[0])]
pipe.safety_checker = null_safety
なお、今回はポケモン風の絵柄にするためにポケモン画像でファインチューンされたモデルを使わせていただきましたが、通常のSD1.5("runwayml/stable-diffusion-v1-5")でも構いません。
ファイルのアップロード
ローカルから画像ファイルを選択します。余白の少ない画像であることが望ましいです。
# ファイルのアップロード
uploaded_file = files.upload()
uploaded_file = next(iter(uploaded_file))
image = load_image(uploaded_file)
image
このセルを繰り返し実行する際、ブラウザがSafariだとエラーが出るようなので、Google Chromeの使用を推奨します。
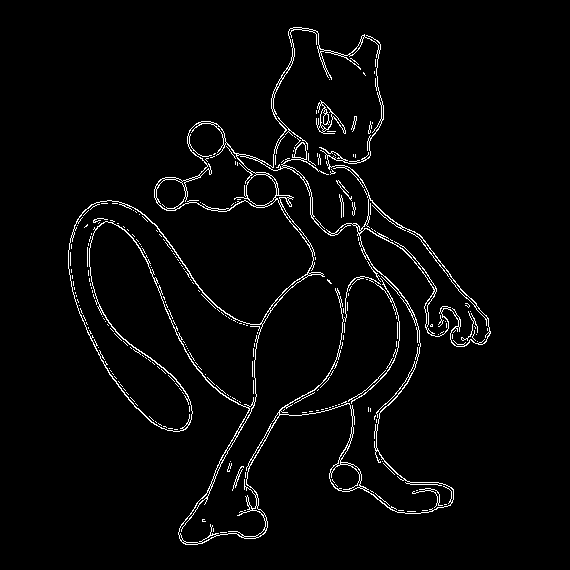
エッジ検出
cv2.Cannyを用いて画像からエッジ検出をします。
image = np.array(image)

# エッジ検出の閾値
threshold1 = 200
threshold2 = 300

canny_image = cv2.Canny(image, threshold1, threshold2)
canny_image = canny_image[:, :, None]
canny_image = np.concatenate([canny_image, canny_image, canny_image], axis=2)
canny_image = Image.fromarray(canny_image)
canny_image
二つのthresholdはどちらもエッジかどうかの判断の閾値を表していて、値が大きいほどエッジが検出されにくく、小さいほどエッジが検出されやすくなります。主にthreshold2(エッジかどうかの判断の閾値そのもの)を調整し、適切なエッジ検出画像を作りましょう。
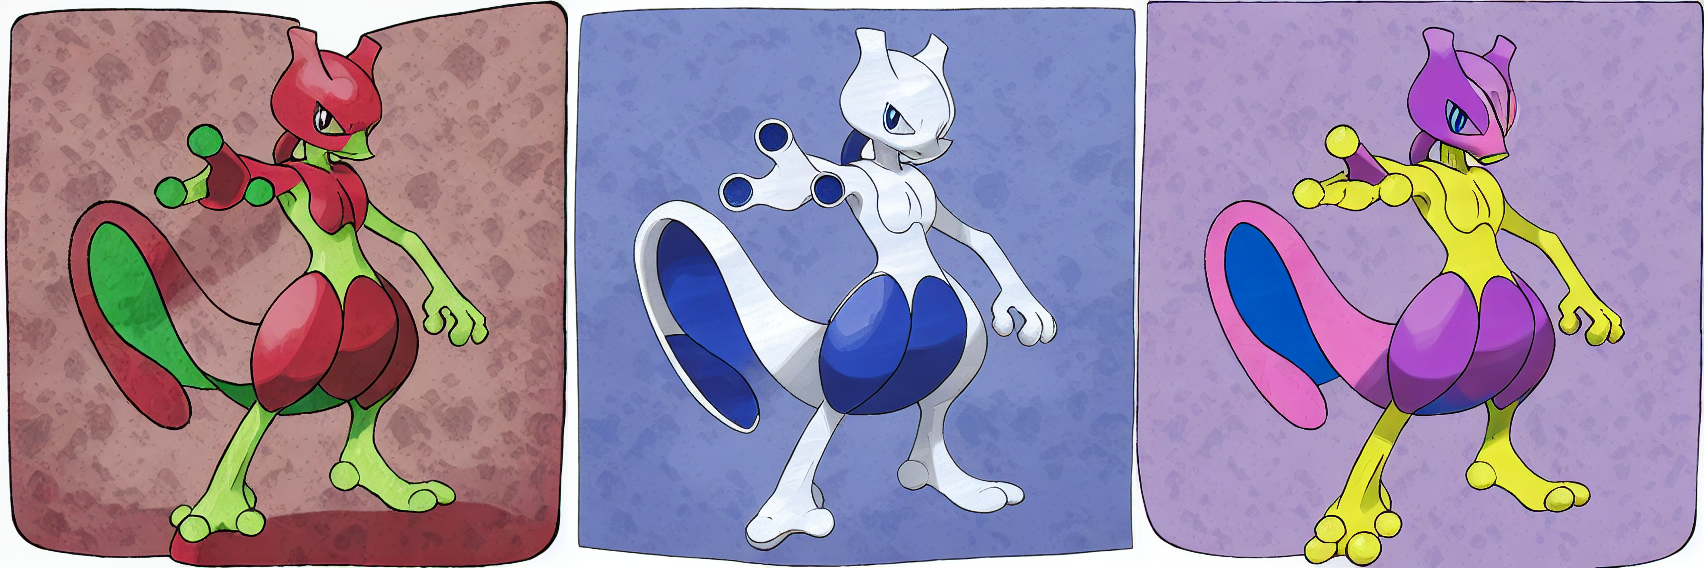
画像生成
配列colorsの各テキストにより、生成するモンスターの色を指定します。下の例では、同時に三通りの色パターンを生成しています。
追加プロンプトやネガティブプロンプトにはまだ試行錯誤の余地があります。
# 生成するモンスターの色
colors = ["red and green",
          "blue and white",
          "colorful"]

# 推論ステップ数
num_inference_steps = 50
# 追加プロンプト
additional_prompt =  "flat white background, solo, masterpiece, best quality"
# ネガティブプロンプト
negative_prompt = "lowres, worst quality, low quality, mutiple"

prompt = [color + " body, " + additional_prompt for color in colors]

generator = [torch.Generator(device=device).manual_seed(0) for i in range(len(prompt))]

# 推論
output = pipe(
    prompt,
    canny_image,
    negative_prompt=[negative_prompt for _ in range(len(prompt))],
    generator=generator,
    num_inference_steps=num_inference_steps,
)

# 結果の表示
w, h = output.images[0].size
grid = Image.new("RGB", size=(len(prompt)*w, h))
for i, img in enumerate(output.images):
  grid.paste(img, box=(i*w, 0))
grid
結果
例1
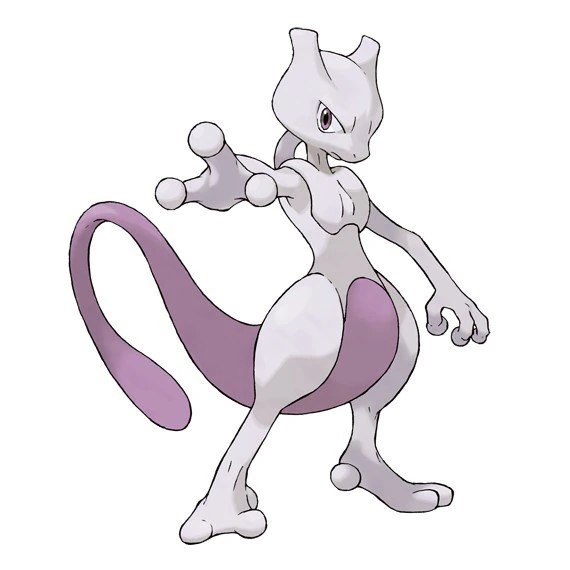
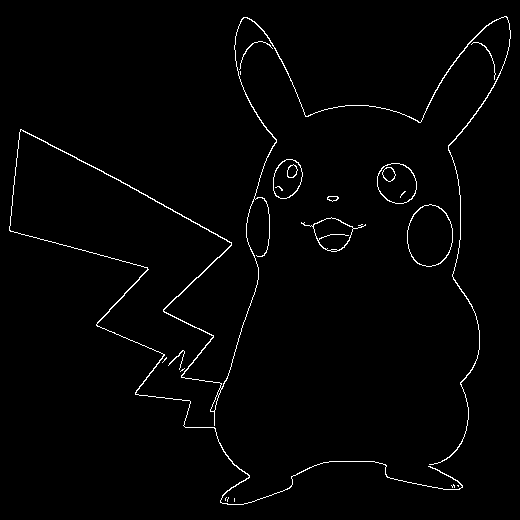
元画像
エッジ抽出画像
プロンプトと生成画像
colors = ["red and green",
          "blue and white",
          "colorful"]
例2
元画像
エッジ抽出画像
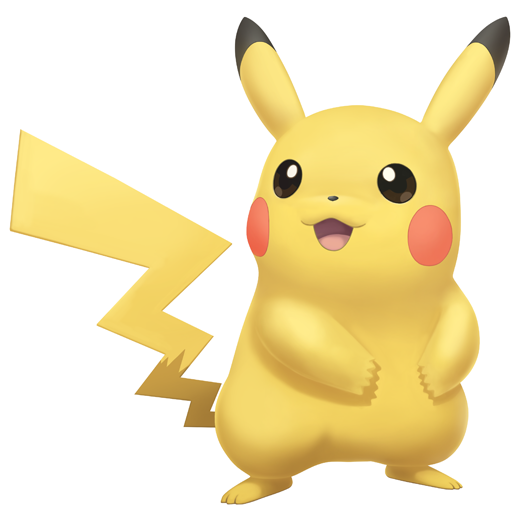
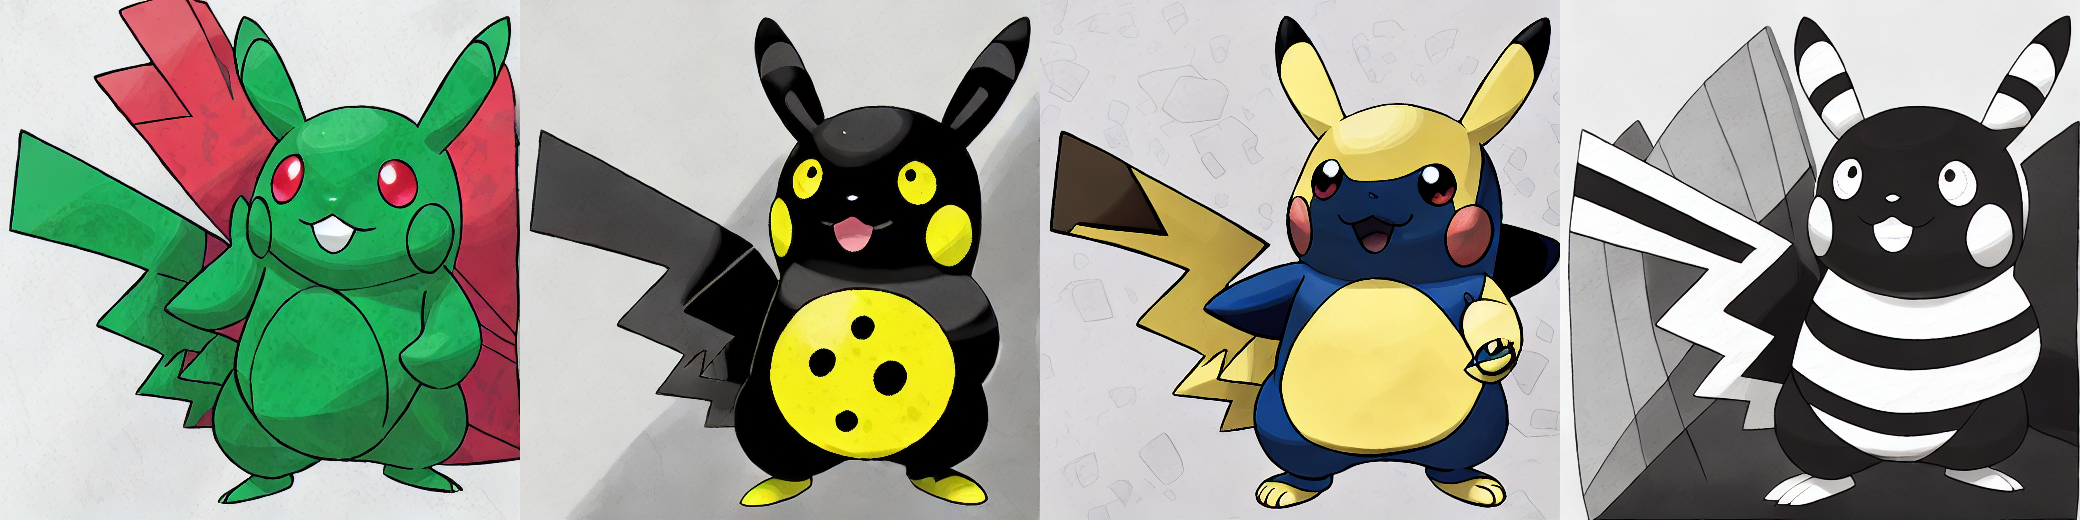
プロンプトと生成画像
colors = ["red/green/blue",
          "black spots, yellow",
          "pikachu",
          "black and white stripe"]
例3
元画像

エッジ抽出画像

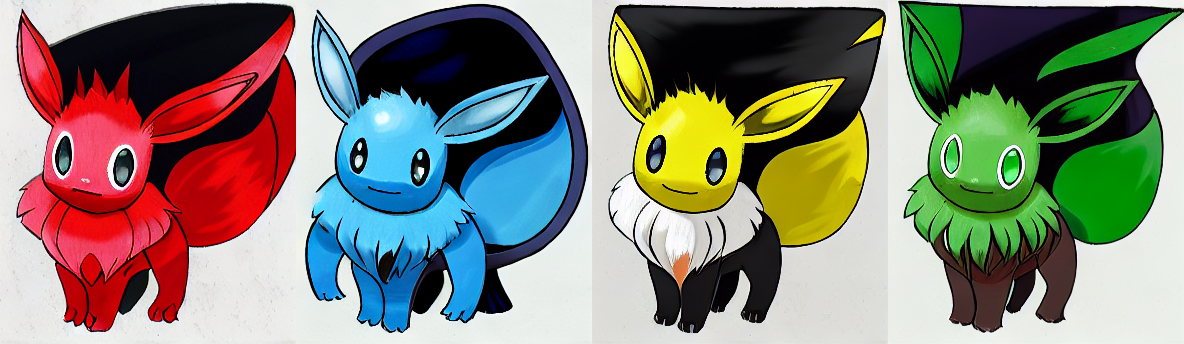
プロンプトと生成画像
colors = ["red fire",
          "blue water",
          "yellow electricity",
          "green leaf"]
おわりに
- 背景色を真っ白にすることが難しかった。プロンプトの影響を受けがちで、余計なものが出てくることが多い。
- 色以外のプロンプトにおいて、模様(斑点、縞)は精度良く指定できたが、より高次の概念(季節、タイプ)はうまく反映されなかった。
参考サイト
cv2.Canny(): Canny法によるエッジ検出の調整をいい感じにする
Stable Diffusion 呪文・プロンプトまとめ
【ControlNet】Colaboratory上でコントローラブルな画像生成AIを5分で構築するレシピ