やりたいこと
IBM Cloud Kubernetes Service (IKS) の Kubernetes クラスター上に Node-RED を稼働させ、ノードの構成情報を永続化します。
作成する環境
- IBM Cloud Kubernetes Service (IKS) の Kubernetes クラスター上に Node-RED の環境を構築
- Node-RED は公式のイメージ を使用します。
- Node-RED の doc (以下に引用) によると、
/data以下に構成データが保存されるとあるので、Node-RED の pod が永続ボリュームをマウントするよう構成します。 - 永続ボリュームには IBM Cloud 上で利用できるストレージサービスのうち、IBM Cloud Object Storage を利用します。
Node-RED uses the /data directory inside the container to store user configuration data.
今回はやらないこと
- アプリケーションの公開方法については特に考えません。この記事では http プロトコルでアクセスできることまでを考えます。
- Node-RED 自体も管理者以外がアクセスできないよう、パスワード等で環境を保護するべきですが、その部分も扱いません。
- 高可用性などの非機能要件も特別には考えません。
- Node−RED アプリを IKS クラスター内でどの namespace に配置するかも考えません。
Defaultを使用しました。
用意する必要があるもの
- IBM Cloud のリソース
- IBM Cloud Kubernetes Service の Kubernetes Cluster (Classic/VPC どちらでも可)
- IBM Cloud Object Storage
- IBM Cloud Kubernetes Service で利用できるアドオン
- IBM Cloud Object Storage plug-in
リソース準備時の考慮点
- IBM Cloud Kubernetes Service
- 特になし
- IBM Cloud Object Storage
-
サービス資格情報を作成します。今回はHMAC認証を使用したいので、HMAC認証を使用するように構成します。
-
構成手順
IKS クラスターの構築
- カタログから 「Kubernetes Service」を選択する (https://cloud.ibm.com/kubernetes/catalog/create)
- 必要な環境を指定し、クラスターを作成します。すでにお持ちのクラスターを利用する場合には作成不要です。私の環境では国内にデータが保持されるよう大阪リージョンを使って構成しました。
以下は私の環境で使用した設定値です。記載がない項目はデフォルト値のままとしました。- インフラストラクチャー: クラシック (適宜変更ください)
- リージョン: アジア太平洋
- 可用性: マルチゾーン
- メトロ: 大阪
- ワーカーゾーンとVLAN: 大阪22と大阪23を選択。(VLANはそれぞれのゾーンでデフォルトのものとした。お客様のアカウントの状態によってはVLANの選択もしくは作成が必要となる)
- バージョン: 1.28.3
- ワーカーノード: 「b3c.4x16 | 仮想 - 共有 | x86-64 | Ubuntu 20」とし、ゾーンあたり1台を指定
- クラスター名: mfcluster12
ICOS インスタンスの作成
インスタンスを作成します。ここでは指定しませんが、国内にデータが保持されるように大阪リージョンのリージョナルのバケットを利用するようにします。
- カタログから 「Object Storage」を選択してインスタンスの作成画面にアクセスします。
(https://cloud.ibm.com/objectstorage/create) - 必要な環境を指定してインスタンスを作成します。
- 以下は私の環境で使用した設定値です。
- インフラストラクチャーの選択: IBM Cloud
- 料金プランの選択: Standard
- サービス名: Cloud Object Storage-mfcos12
- リソースグループの選択: Default
- 作成されたインスタンスに資格情報を設定します。
ICOS 資格情報の IKSクラスターへの登録
-
IBM Cloudのコンソール画面からICOSのインスタンスにアクセスします。(https://cloud.ibm.com/objectstorage でリストされるインスタンスから対象のインスタンスを選択)
-
資格情報の作成を行います。
-
ここからは IKSクラスター側の作業を始めます。
-
コマンドラインでIBM Cloudにログイン (ibmcloud login) して構成ファイルをダウンロード (ibmcloud ks cluster config --cluster )します。
-
シークレットを作成します。access-keyとsecret-keyには先ほどひかえた
access_key_idとsecret_access_keyを使用します。以下のコマンド実行例のkeyはそれっぽい値ですが、すでに使用できない値です。
$ kubectl create secret generic cos-write-access --type=ibm/ibmc-s3fs --from-literal=access-key="13f94d936f5b485289d2650cc4444444" --from-literal=secret-key="b7151990cc12bd99ba329650494a9f239a3d011111111111"
secret/cos-write-access created
- シークレットが作成できているか確認します。cos-write-access のエントリーがあればOKです。
$ kubectl get secret
NAME                                                TYPE                             DATA   AGE
all-icr-io                                          kubernetes.io/dockerconfigjson   1      16h
cos-write-access                                    ibm/ibmc-s3fs                    2      14s
mfcluster12-c82dcc5867b41450588f49284670f9a8-0000   kubernetes.io/tls                2      16h
ICOS plugin の導入
- 続いてKubernetesクラスター上にCloud Object Storageプラグインを導入します。
HELMをつかって導入します。 - 最初にノードのKubernetesバージョンを確認します。更新版があるというようなアイコン、メッセージが表示されないのでこのまま進めます。
$ ibmcloud ks worker ls --cluster mfcluster12
OK
ID                                                       Public IP       Private IP   Flavor              State    Status   Zone    Version
kube-clkklb8o0484faqs0h70-mfcluster12-default-000001ee   163.73.64.235   10.10.5.54   u3c.2x4.encrypted   normal   Ready    osa23   1.28.3_1535
kube-clkklb8o0484faqs0h70-mfcluster12-default-00000226   163.69.66.194   10.9.20.76   u3c.2x4.encrypted   normal   Ready    osa22   1.28.3_1535
- 利用できるhelmの環境が3系列であることを確認して、ibm-helmレポジトリを追加します。
$ helm version
version.BuildInfo{Version:"v3.12.3", GitCommit:"3a31588ad33fe3b89af5a2a54ee1d25bfe6eaa5e", GitTreeState:"clean", GoVersion:"go1.20.7"}
$ helm repo add ibm-helm https://raw.githubusercontent.com/IBM/charts/master/repo/ibm-helm
"ibm-helm" has been added to your repositories
- レポジトリをアップデートします。
$ helm repo update
Hang tight while we grab the latest from your chart repositories...
...Successfully got an update from the "ibm-helm" chart repository
Update Complete. ⎈Happy Helming!⎈
- プラグインを環境にインストールします。
$ helm plugin install ./ibm-object-storage-plugin/helm-ibmc
Installed plugin: ibmc
- インストール終了後に以下のコマンドを実行してエラーとなることがあります。
$ helm ibmc --help
Error: fork/exec <PATH>/.local/share/helm/plugins/helm-ibmc/ibmc.sh: permission denied
- エラーとなった場合には以下のコマンドでパーミッションを変更して改めて実行します。
$ chmod 755 <PATH>/.local/share/helm/plugins/helm-ibmc/ibmc.sh
$ helm ibmc --help
Helm version: v3.12.3+g3a31588
Install or upgrade Helm charts in IBM K8S Service(IKS)
Usage:
  helm ibmc [command]
Available Commands:
  install           Install a Helm chart
  upgrade           Upgrade the release to a new version of the Helm chart
Available Flags:
  -h, --help        (Optional) This text.
  -u, --update      (Optional) Update this plugin to the latest version
Example Usage:
    Install: helm ibmc install ibm-object-storage-plugin ibm-helm/ibm-object-storage-plugin
    Upgrade: helm ibmc upgrade [RELEASE] ibm-helm/ibm-object-storage-plugin
Note:
    1. It is always recommended to install latest version of ibm-object-storage-plugin chart.
    2. It is always recommended to have 'kubectl' client up-to-date.
- プラグインをクラスター上にインストールします。
$ helm ibmc install ibm-object-storage-plugin ibm-helm/ibm-object-storage-plugin --set license=true --set quotaLimit=false --set bucketAccessPolicy=false --set allowCrossNsSecret=false
Helm version: v3.12.3+g3a31588
Checking cluster type
Installing the Helm chart...
PROVIDER: IBMC
WORKER_OS: debian
PLATFORM: k8s
KUBE_DRIVER_PATH: /usr/libexec/kubernetes
CONFIG_BUCKET_ACCESS_POLICY: false
CONFIG_QUOTA_LIMIT: false
ALLOW_CROSS_NS_SECRET: false
DC: osa22
Region: jp-osa
Chart: ibm-helm/ibm-object-storage-plugin
namespace/ibm-object-s3fs created
NAME: ibm-object-storage-plugin
LAST DEPLOYED:
NAMESPACE: ibm-object-s3fs
STATUS: deployed
REVISION: 1
NOTES:
Thank you for installing: ibm-object-storage-plugin.   Your release is named: ibm-object-storage-plugin

1. Verify that the storage classes are created successfully:

   $ kubectl get storageclass | grep 'ibmc-s3fs'

2. Verify that plugin pods are in "Running" state:

   $ kubectl get pods -n ibm-object-s3fs -o wide | grep object

   The installation is successful when you see one `ibmcloud-object-storage-plugin` pod and one or more `ibmcloud-object-storage-driver` pods.
   The number of `ibmcloud-object-storage-driver` pods equals the number of worker nodes in your cluster. All pods must be in a `Running` state
   for the plug-in to function properly. If the pods fail, run `kubectl describe pod -n ibm-object-s3fs <pod_name>`
   to find the root cause for the failure.
######################################################
Additional steps for IBM Kubernetes Service(IKS) only:
######################################################

  1. If the plugin pods show an "ErrImagePull" or "ImagePullBackOff" error, copy the image pull secret 'all-icr-io' from "default" namespace to ibm-object-s3fs namespace of your cluster. The image pull secret 'all-icr-io' provides access to IBM Cloud Container Registry.

     a. Check the secret exists in "default" namespace

     $ kubectl get secrets -n default | grep icr-io

     Example output:
     ------------------------------------------------------------------
     all-icr-io         kubernetes.io/dockerconfigjson        1      2d
     ------------------------------------------------------------------

     b. Copy secret to ibm-object-s3fs  namespace

     $ kubectl get secret -n default all-icr-io -o yaml | sed 's/default/<namespace>/g' | kubectl -n <namespace> create -f -

     c. Verify that the image pull secret is available in the ibm-object-s3fs  namespace.

     $ kubectl get secrets -n ibm-object-s3fs | grep icr-io

  2. Verify that the state of the plugin pods changes to "Running".

     $ kubectl get pods -n ibm-object-s3fs | grep object
- 実行後数十秒で以下のようにpodが起動します。ワーカーノードの数+1つのpodができると考えられます。
$ kubectl get pod --all-namespaces -o wide | grep object
ibm-object-s3fs   ibmcloud-object-storage-driver-cbcw8                   1/1     Running   0          92s   10.10.5.54      10.10.5.54   <none>           <none>
ibm-object-s3fs   ibmcloud-object-storage-driver-cdw7r                   1/1     Running   0          92s   10.9.20.76      10.9.20.76   <none>           <none>
ibm-object-s3fs   ibmcloud-object-storage-plugin-69dcbb5747-8hz99        1/1     Running   0          92s   172.30.22.210   10.9.20.76   <none>           <none>
- その後ストレージクラスが作成されていることも確認します。
$ kubectl get storageclass | grep s3
ibmc-s3fs-cold-cross-region            ibm.io/ibmc-s3fs    Delete          Immediate           false                  108s
ibmc-s3fs-cold-regional                ibm.io/ibmc-s3fs    Delete          Immediate           false                  108s
ibmc-s3fs-smart-cross-region           ibm.io/ibmc-s3fs    Delete          Immediate           false                  108s
ibmc-s3fs-smart-perf-cross-region      ibm.io/ibmc-s3fs    Delete          Immediate           false                  108s
ibmc-s3fs-smart-perf-regional          ibm.io/ibmc-s3fs    Delete          Immediate           false                  108s
ibmc-s3fs-smart-regional               ibm.io/ibmc-s3fs    Delete          Immediate           false                  108s
ibmc-s3fs-standard-cross-region        ibm.io/ibmc-s3fs    Delete          Immediate           false                  108s
ibmc-s3fs-standard-perf-cross-region   ibm.io/ibmc-s3fs    Delete          Immediate           false                  108s
ibmc-s3fs-standard-perf-regional       ibm.io/ibmc-s3fs    Delete          Immediate           false                  108s
ibmc-s3fs-standard-regional            ibm.io/ibmc-s3fs    Delete          Immediate           false                  108s
ibmc-s3fs-vault-cross-region           ibm.io/ibmc-s3fs    Delete          Immediate           false                  108s
ibmc-s3fs-vault-regional               ibm.io/ibmc-s3fs    Delete          Immediate           false                  108s
- PVCを作成するためのマニフェストファイルを作成します。
- バケットを自動生成し、アプリ削除時に自動削除する設定としています。容量は1GB, ストレージクラスは「ibmc-s3fs-smart-regional」つまりRegionalのSmart Tierのバケットとしています。
kind: PersistentVolumeClaim
apiVersion: v1
metadata:
  name: pvcmf12
  namespace: default
  annotations:
    ibm.io/auto-create-bucket: "true"
    ibm.io/auto-delete-bucket: "true"
    ibm.io/bucket: ""
    ibm.io/quota-limit: "false"
    ibm.io/tls-cipher-suite: "default"
    ibm.io/secret-name: "cos-write-access"
spec:
  accessModes:
    - ReadWriteOnce
  resources:
    requests:
      storage: 1Gi
  storageClassName: ibmc-s3fs-smart-regional
- 作成したファイルを引数にして PVC を作成します。
$ kubectl apply -f pvcmf12.yaml
persistentvolumeclaim/pvcmf12 created
- PVCの作成状況を確認します。最下部
EventsにProvisioningSucceededが現れれば成功です。これが5分以上立っても表示されないときには、ここまでの構成に問題があるケースがほとんどです。
$ kubectl describe pvc pvcmf12
Name:          pvcmf12
Namespace:     default
StorageClass:  ibmc-s3fs-smart-regional
Status:        Bound
Volume:        pvc-d5963154-f70b-4f23-bcaa-0a01c1f80dfd
Labels:        <none>
Annotations:   ibm.io/auto-create-bucket: true
               ibm.io/auto-delete-bucket: true
               ibm.io/bucket:
               ibm.io/quota-limit: false
               ibm.io/secret-name: cos-write-access
               ibm.io/tls-cipher-suite: default
               pv.kubernetes.io/bind-completed: yes
               pv.kubernetes.io/bound-by-controller: yes
               volume.beta.kubernetes.io/storage-provisioner: ibm.io/ibmc-s3fs
               volume.kubernetes.io/storage-provisioner: ibm.io/ibmc-s3fs
Finalizers:    [kubernetes.io/pvc-protection]
Capacity:      1Gi
Access Modes:  RWO
VolumeMode:    Filesystem
Used By:       <none>
Events:
  Type    Reason                 Age                    From                                                                                                   Message
  ----    ------                 ----                   ----                                                                                                   -------
  Normal  ExternalProvisioning   2m48s (x2 over 2m48s)  persistentvolume-controller                                                                            Waiting for a volume to be created either by the external provisioner 'ibm.io/ibmc-s3fs' or manually by the system administrator. If volume creation is delayed, please verify that the provisioner is running and correctly registered.
  Normal  Provisioning           2m48s                  ibm.io/ibmc-s3fs_ibmcloud-object-storage-plugin-69dcbb5747-8hz99_ed768111-26f1-43af-ae57-0c264221bd1c  External provisioner is provisioning volume for claim "default/pvcmf12"
  Normal  ProvisioningSucceeded  2m44s                  ibm.io/ibmc-s3fs_ibmcloud-object-storage-plugin-69dcbb5747-8hz99_ed768111-26f1-43af-ae57-0c264221bd1c  Successfully provisioned volume pvc-d5963154-f70b-4f23-bcaa-0a01c1f80dfd
Node-RED の導入
- マニフェスト・ファイルの作成
- Service と Deployment を作成します。
- IKS のクラシックインフラストラクチャ上での稼働のケースを想定して、NLB 1.0 を単一のゾーン(任意)に作成し、公開します。(「今回はやらないこと」節にも記載した通り、セキュアなアクセス方法や高可用性は考慮していませんが、考慮する場合にはこのマニフェスト・ファイルの定義を変更します。)
- 使用するコンテナイメージは Node-RED 公式イメージの latest タグがついたものです。
- Podが
/dataに PV をマウントする構成としています。 - セキュリティコンテキストとして非ルートユーザーとして稼働させます。IBM Cloud Docs (以下に引用) に記載されている注意事項に合わせて runAsUser と fsGroup を同一の値としています。
IBM Cloud Object Storage のファイルに非 root ユーザーとしてアクセスするには、デプロイメント内の runAsUser および fsGroup の各値を同じ値に設定する必要があります。
apiVersion: v1
kind: Service
metadata:
  name: node-red
  labels:
    app: node-red
spec:
  type: LoadBalancer
  ports:
  - port: 1880
  selector:
    app: node-red
---
apiVersion: apps/v1
kind: Deployment
metadata:
  name: node-red
spec:
  replicas: 1
  selector:
    matchLabels:
      app: node-red
  template:
    metadata:
      labels:
        app: node-red
    spec:
      containers:
      - name: node-red
        image: nodered/node-red:latest
        ports:
        - containerPort: 1880
        volumeMounts:
        - name: data
          mountPath: /data
      securityContext:
        runAsNonRoot: true
        runAsUser: 2000
        fsGroup: 2000
      volumes:
      - name: data
        persistentVolumeClaim:
          claimName: pvcmf12
- 作成したマニフェスト・ファイルを使用してアプリをデプロイします。
$ kubectl apply -f noderedmanifest.yaml
service/node-red created
deployment.apps/node-red created
- 作成したサービスを確認します
$ kubectl get service
NAME         TYPE           CLUSTER-IP       EXTERNAL-IP    PORT(S)          AGE
kubernetes   ClusterIP      172.21.0.1       <none>         443/TCP          18h
node-red     LoadBalancer   172.21.160.238   163.73.69.50   1880:32675/TCP   2m39s
node-red というサービスが作成できています。EXTERNAL-IP と PORT を使うとアクセスできますね。
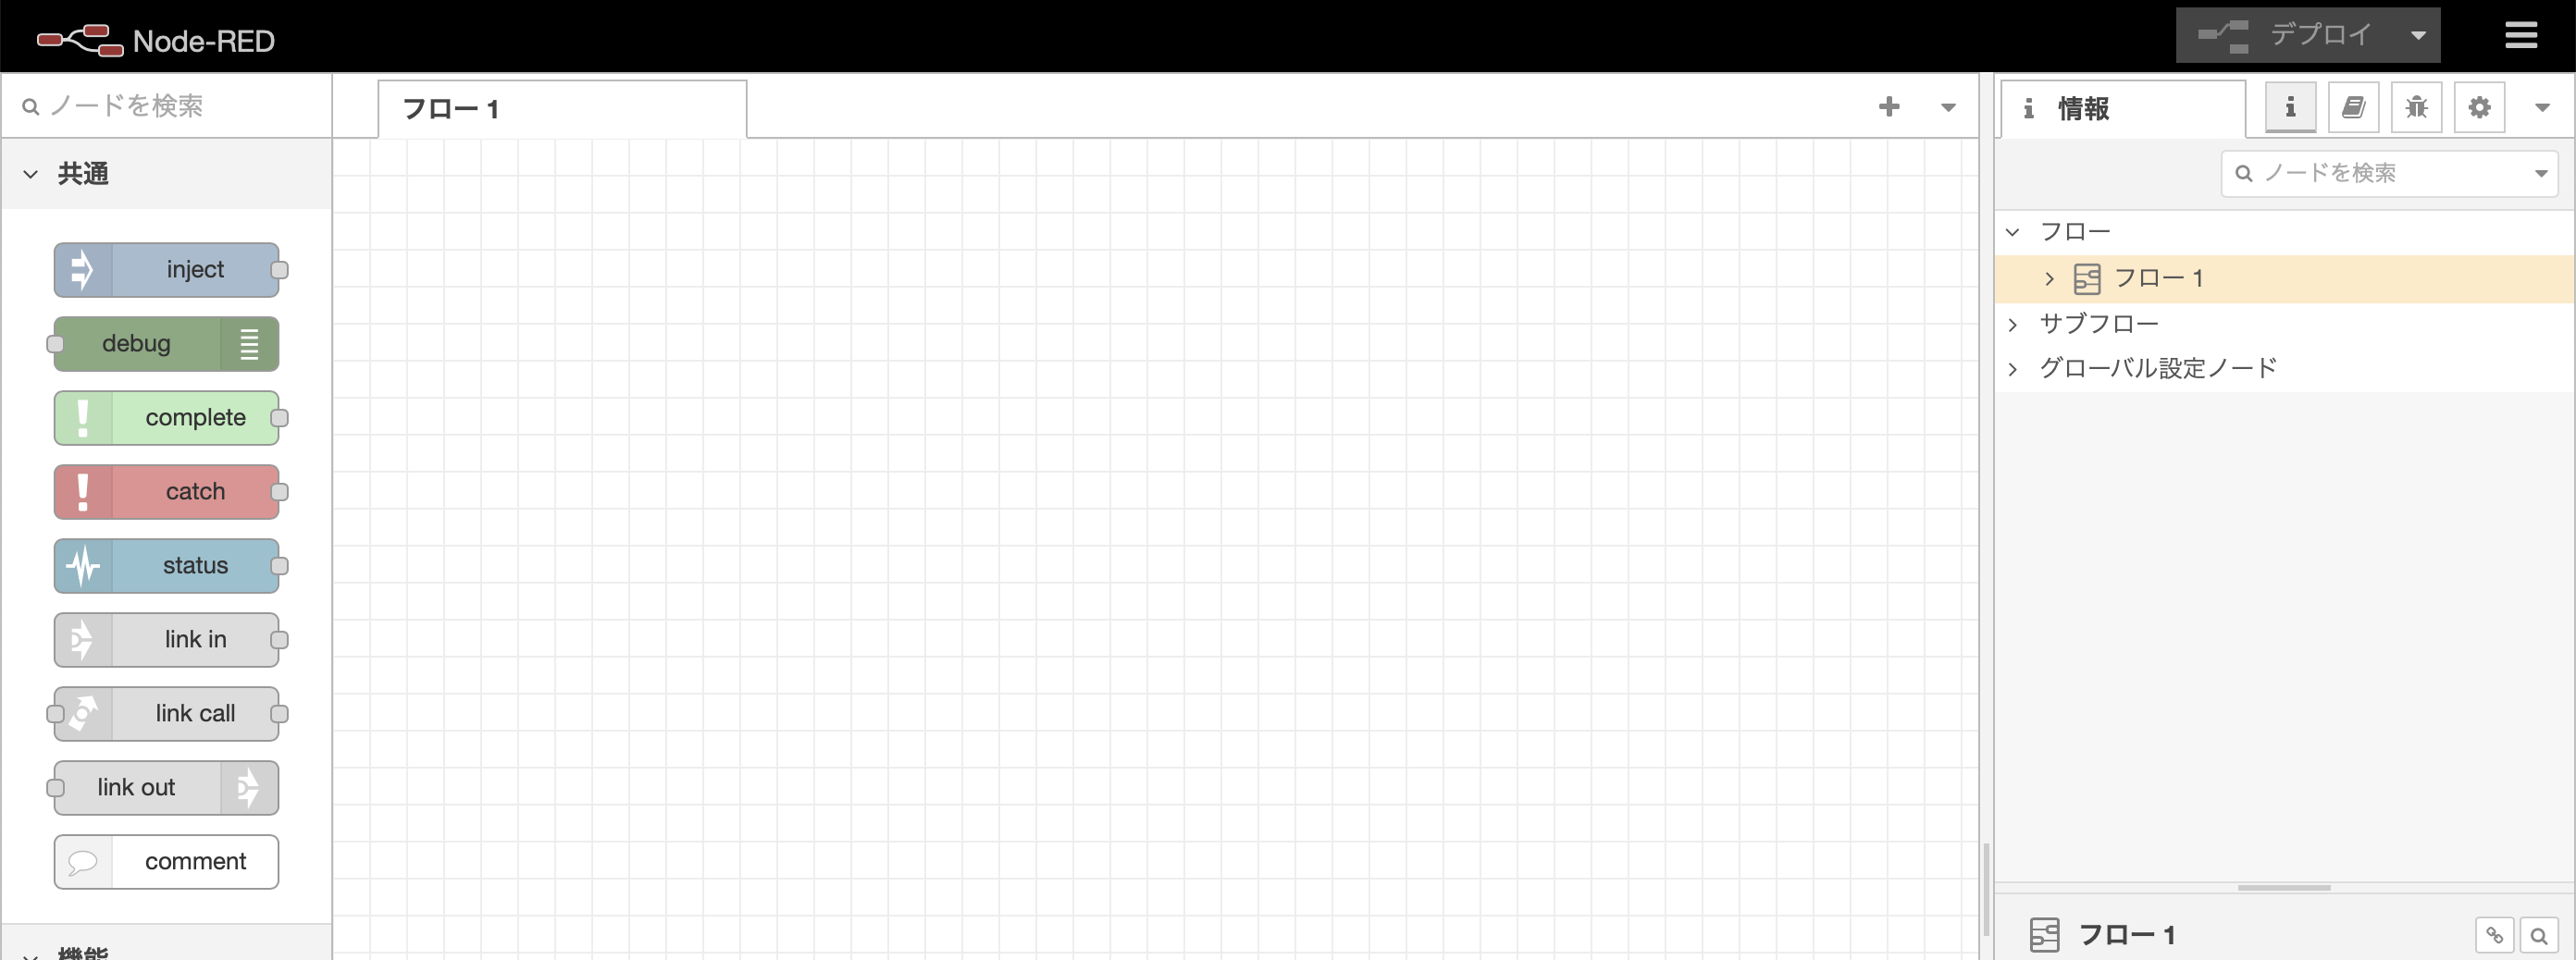
実際にhttp://163.73.69.50:1880 にアクセスすると、、、

このように Node-RED にアクセスできました。
Node情報を保持できるか確認してみる
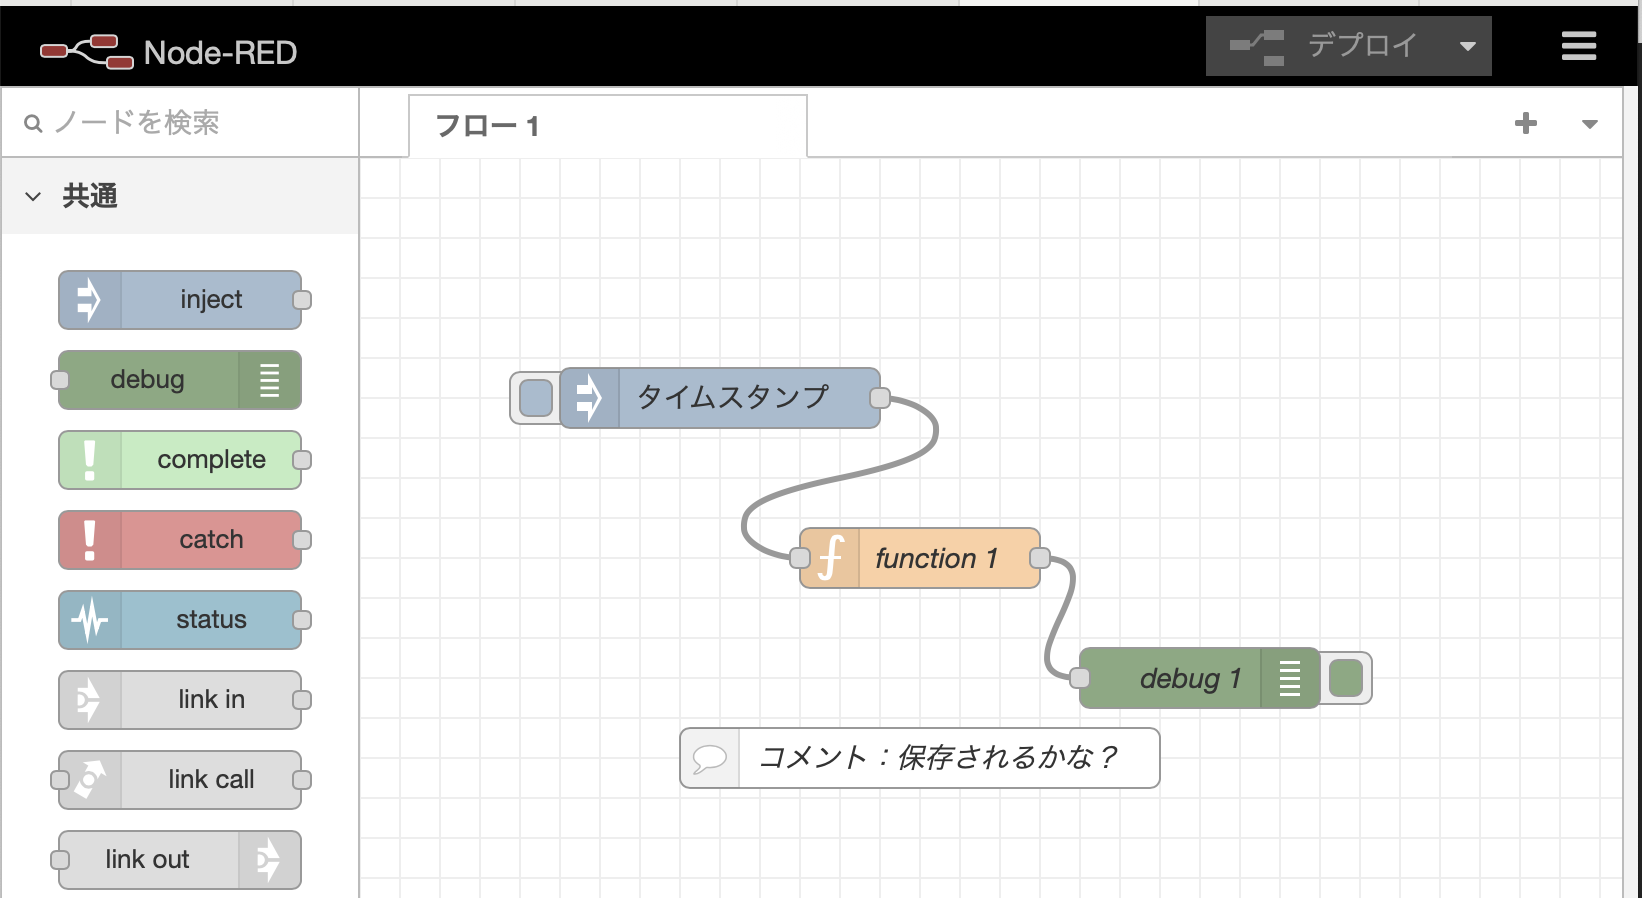
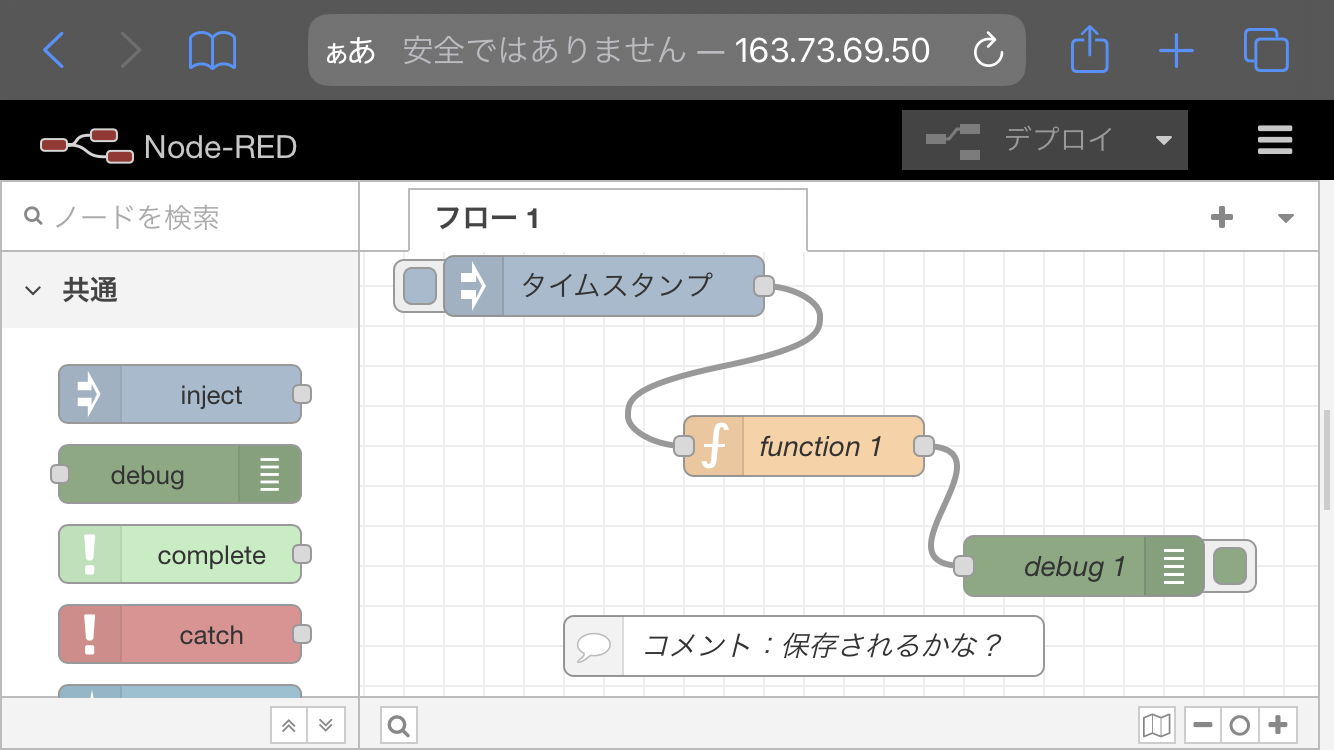
- Nodeを追加して、デプロイ(保存)した後に、別のブラウザーからNode-REDにアクセスしてみましょう。
Node-RED チュートリアルの Your First Flowのようなフローをつくってデプロイしてみます。

Node-RED のPodを削除してみる
- Node-REDのPodを削除してみます。
Deployentに定義したreplicas : 1を満たすように別のPodが起動されるはずです。このときボリュームが永続化されていなければノードの設定情報は消失するはずですが、永続化できていれば新しいアプリに引き継がれるはずです。
$ kubectl get pod
NAME                        READY   STATUS    RESTARTS   AGE
node-red-5dd9f958f6-5pvb9   1/1     Running   0          14m

$ kubectl delete pod/node-red-5dd9f958f6-5pvb9
pod "node-red-5dd9f958f6-5pvb9" deleted

$ kubectl get pod
NAME                        READY   STATUS    RESTARTS   AGE
node-red-5dd9f958f6-xsmfn   1/1     Running   0          6s
- 再び Node-RED にアクセスしてみます。念のため別の端末からアクセスしてみましたが、フローは保存され、永続化されていました。

Object Storageのバケットをみてみる
保存されているデータがどのように見えるのか最後に確認しましょう。
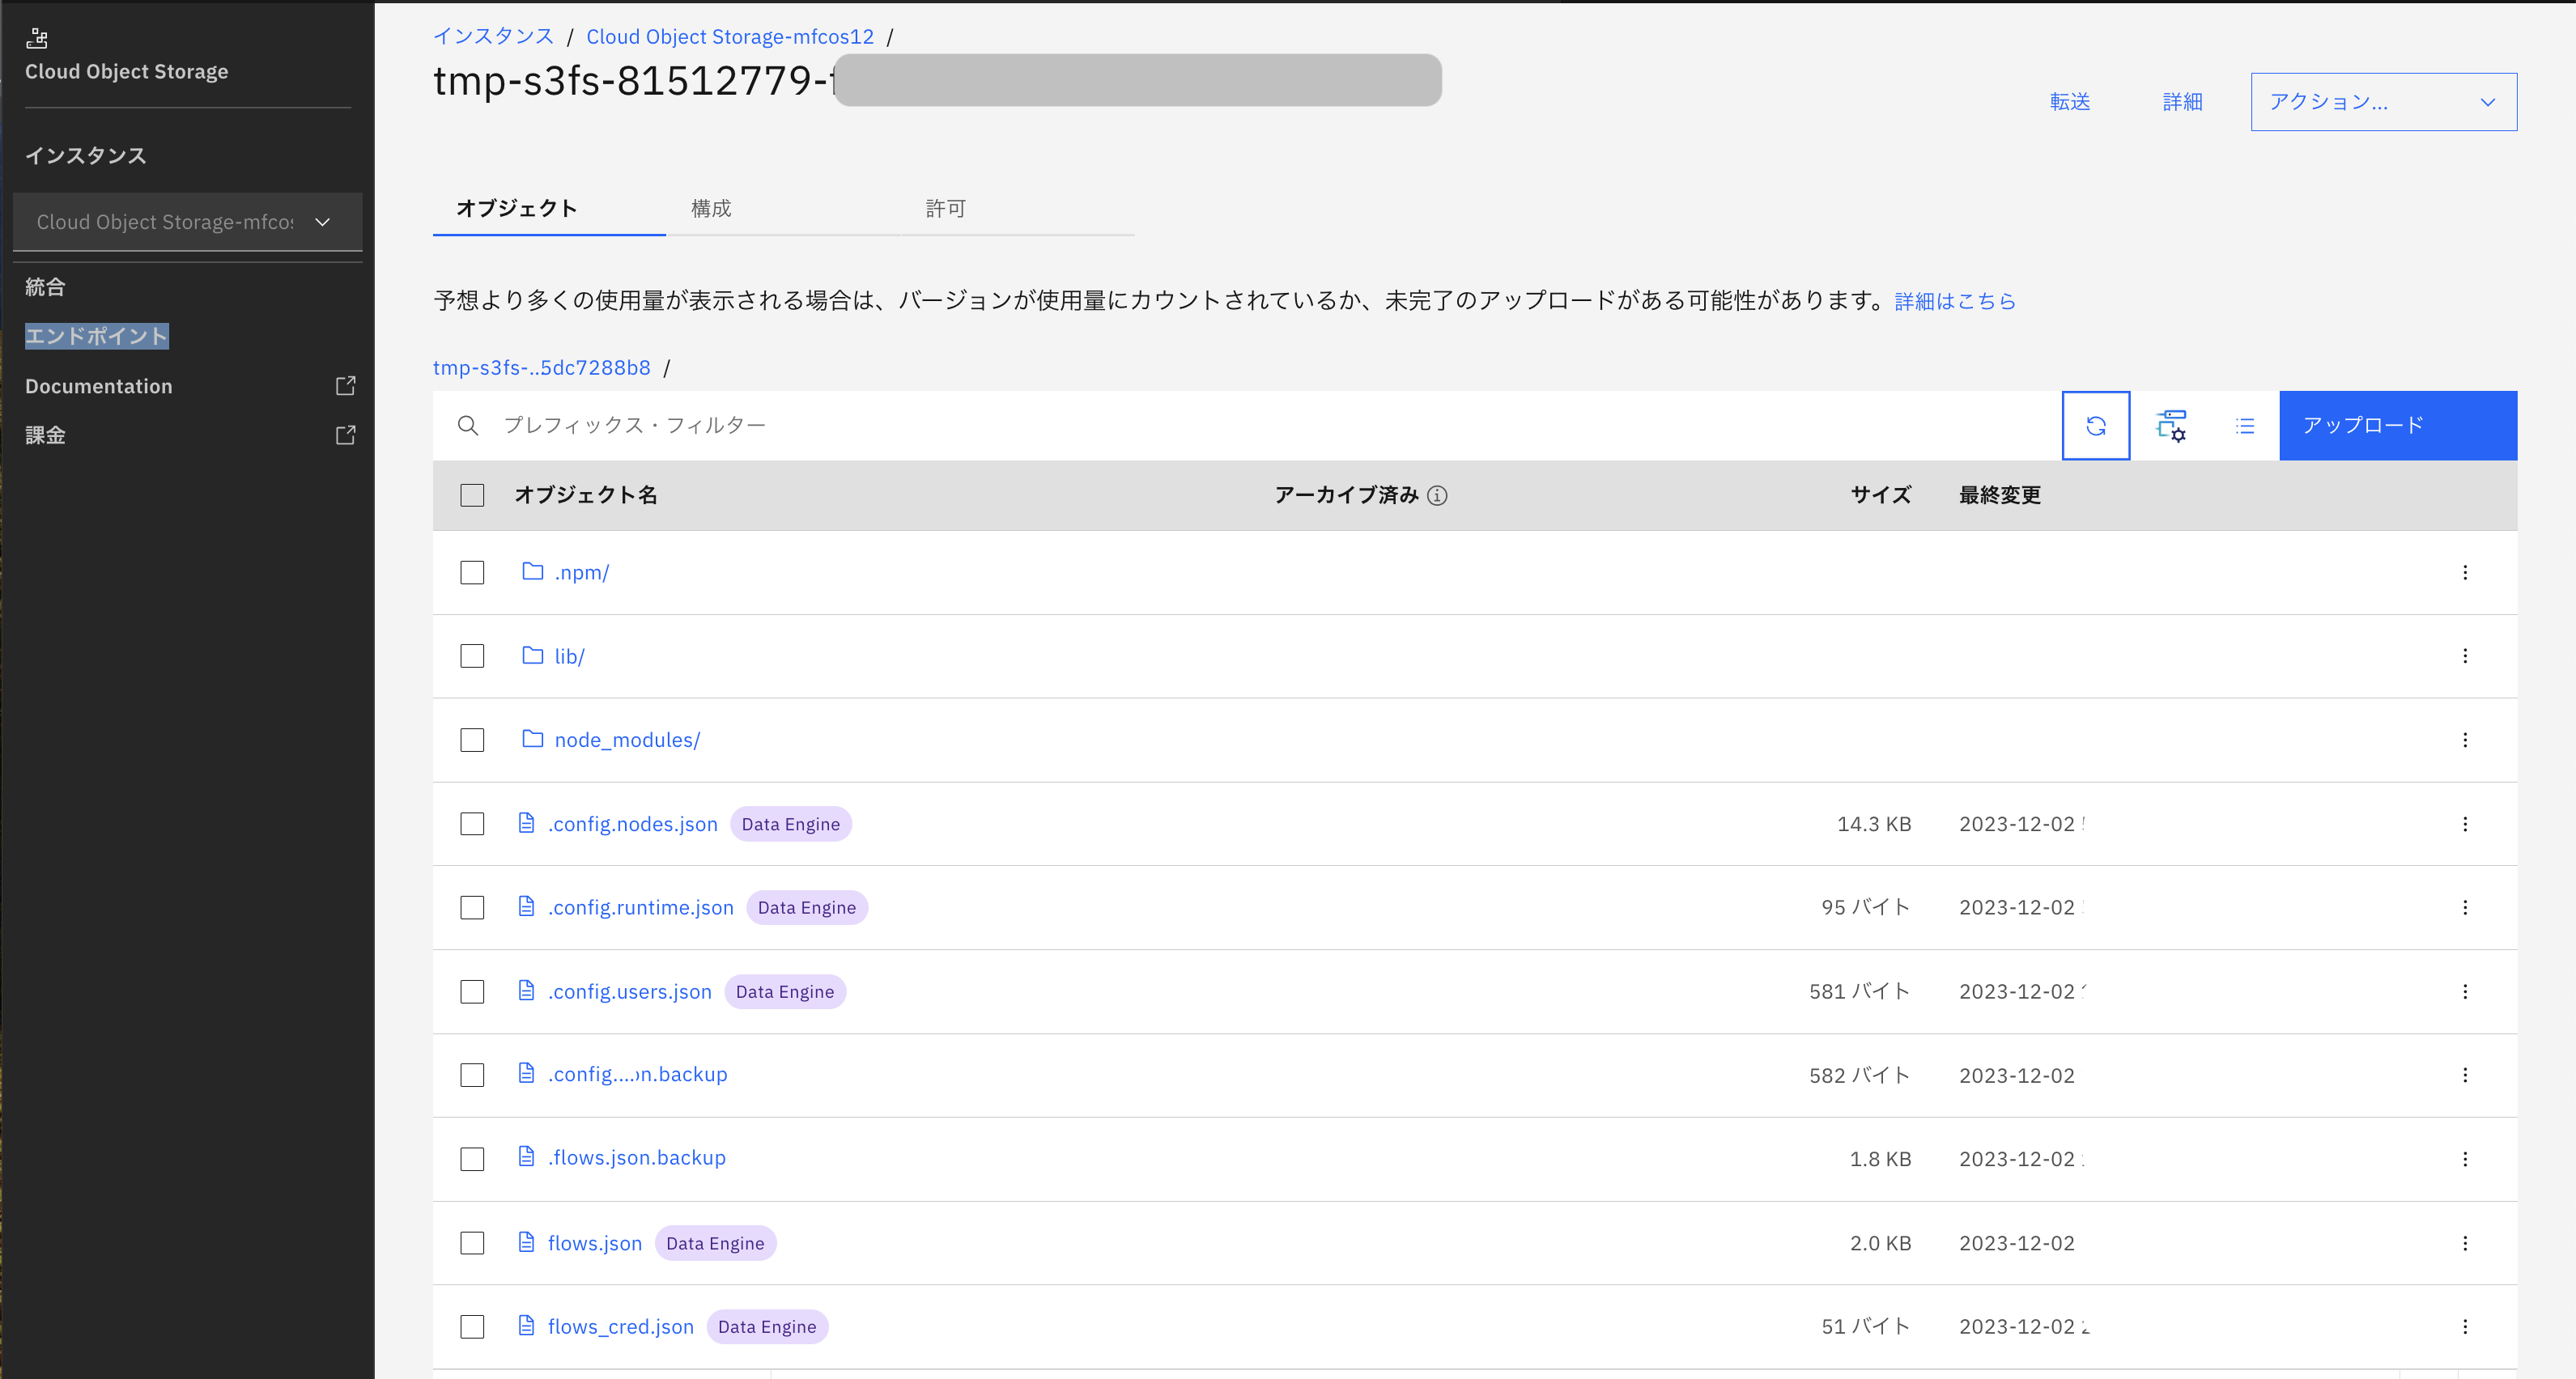
IBM Cloudコンソールからバケットにアクセスします。

ICOSインスタンス内に作成されたバケットにアクセスするといくつかのオブジェクトが保存されています。flow.jsonをダウンロードしてエディタで開いてみると、先ほどのフローの要素が表示され保存できていることが確認できると思います。フローの情報がICOS内のバケットにオブジェクトとして保存できていました。
まとめ
Node-REDをIKS上にデプロイし、ICOS上にノード情報を保存してみました。ICOSプラグインを使うと手軽に実現できますね。ICOSは並行した読み書きが少し苦手だと言われていますが、Node-REDの編集の頻度を考えると、そういった特性の影響はほとんど受けないと考えられます。Block Storage/File Storageを使うような方法ももちろんありますが、個人的にはICOSを利用するのが一番手軽かなと思いました。
今回紹介した環境ではNode-RED上でそのままアプリを開発することができます。一方でこの構成ではNode-REDアプリがインターネット上に公開され、誰でもアクセスできてしまうので、システムの要件を勘案した対策が求められます。その部分は追ってまたの機会に説明したいと思います。


