スマートコントラクトでhellow world
前回ubuntsに構築したけど、ローカルの方が取り回しいいのでmacにインストール。
前準備
# Geth
brew tap ethereum/ethereum
brew install ethereum

mkdir eth_private
vim eth_private/genesis.json
======
{
"nonce": "0x0000000000000042",
"mixhash": "0x0000000000000000000000000000000000000000000000000000000000000000",
"difficulty": "0x400",
"alloc": {},
"coinbase": "0x3333333333333333333333333333333333333333",
"timestamp": "0x0",
"parentHash": "0x0000000000000000000000000000000000000000000000000000000000000000",
"extraData": "0x",
"gasLimit": "0x8000000",
"config": {}
}
======

geth --datadir /Users/hoge/eth_private/ init /Users/hoge/eth_private/genesis.json
geth --networkid "10" --nodiscover --datadir "/Users/hoge/eth_private" console 2>> /Users/hoge/eth_private/geth_err.log

personal.newAccount()
miner.start()
miner.stop()
exit
rpc接続して色々やってみる
スマートコントラクト
開発環境
これがいいらしい
https://github.com/ethereum/browser-solidity
git clone https://github.com/ethereum/browser-solidity.git
cd browser-solidity
npm install
-bash: npm: command not found
npmなかったので入れる
参考:
https://qiita.com/taketakekaho/items/dd08cf01b4fe86b2e218
入れたのでやりなおし
npm install
npm start
ブラウザ開く
http://localhost:8080/
Run → Enviromentをweb3に
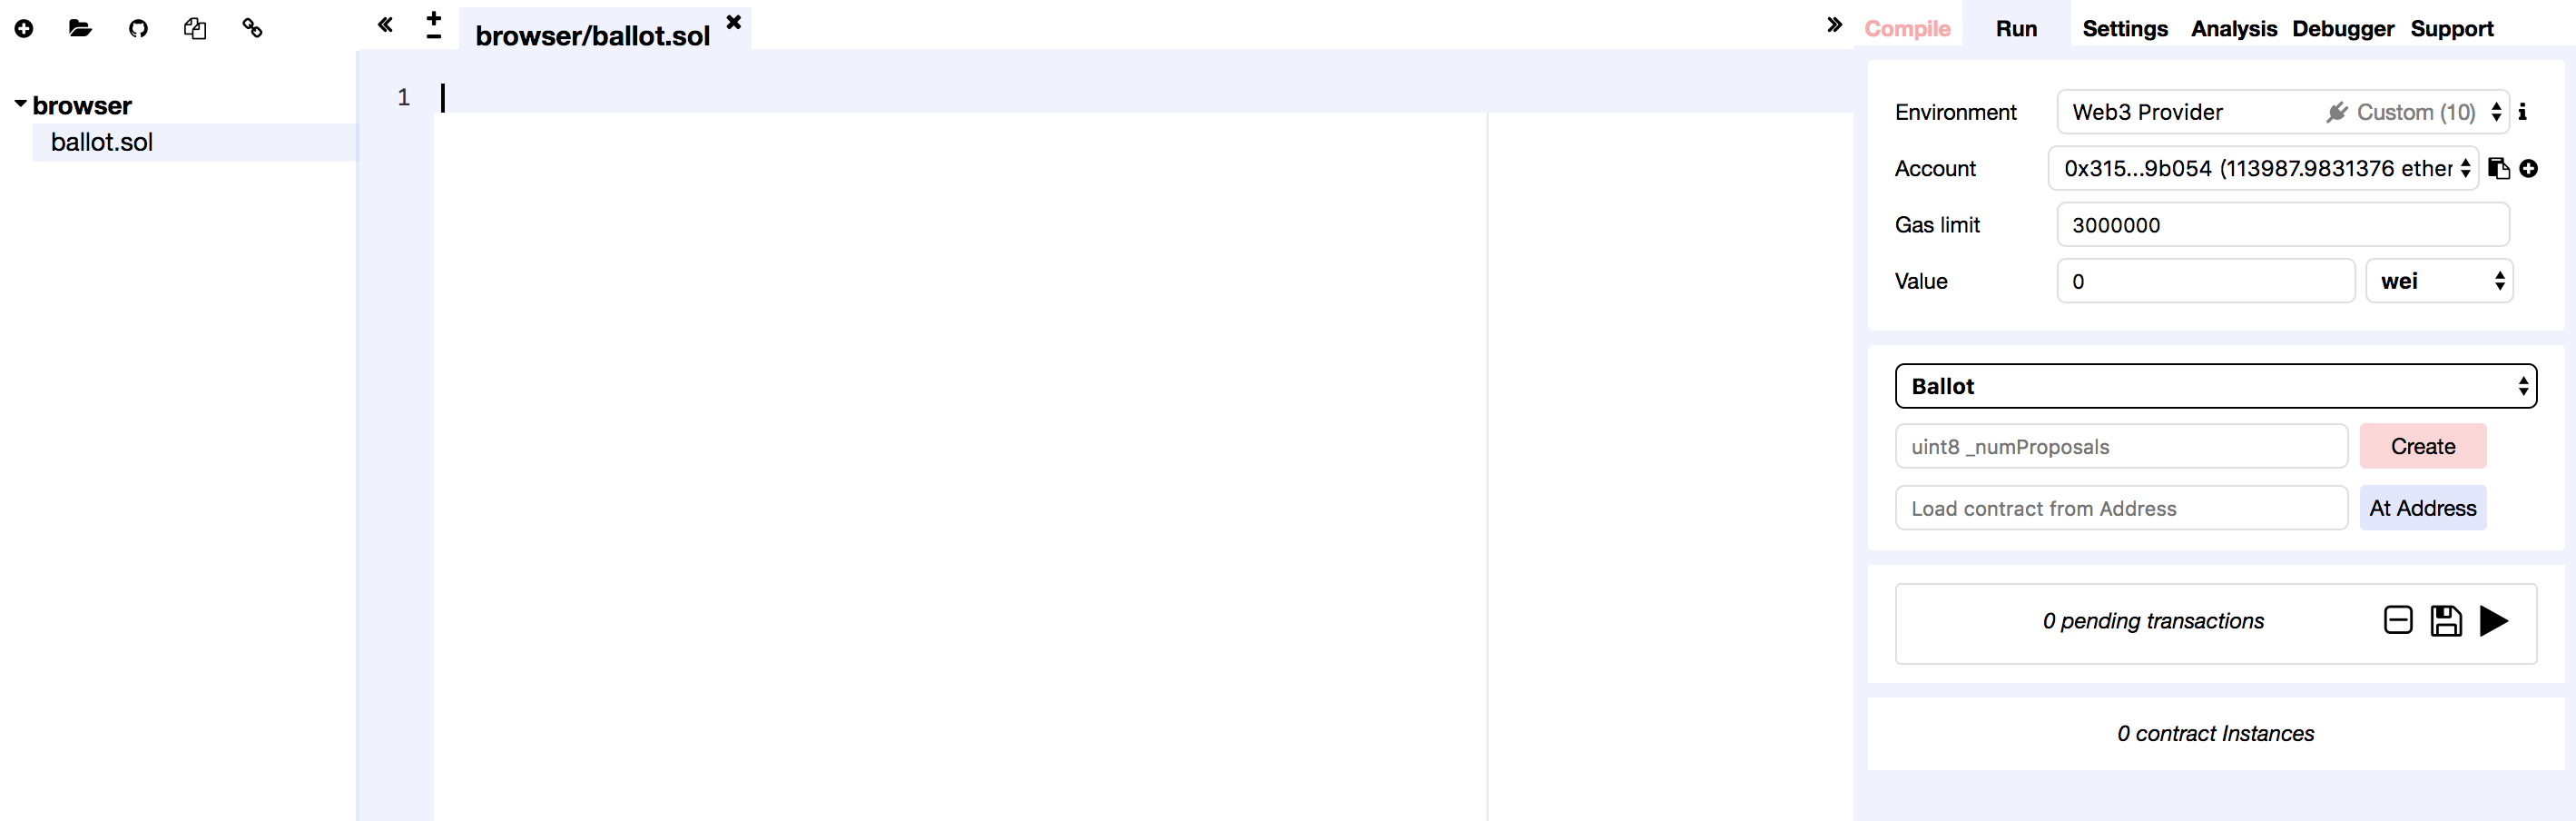
そして出て来る入力box
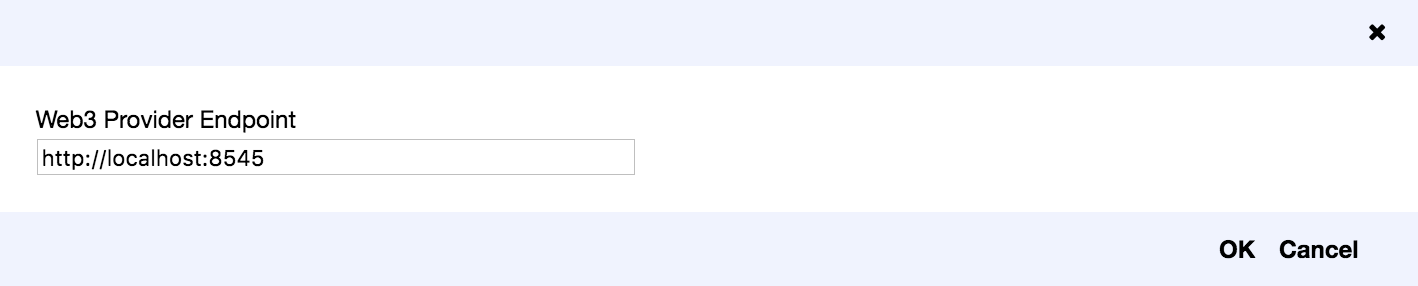
ethereumに入り口作ってやらないと接続できないようだ。
private_netをrpcポート開けて起動
geth --networkid "10" --nodiscover --unlock "0" --datadir "eth_private" --rpc --rpcaddr "ホスト名" --rpcport "8545" --rpccorsdomain "*" --rpcapi "eth,net,web3,personal,accounts" console 2>> eth_private/geth_err.log
の起動オプションの中の
rpcaddr "ホスト名" --rpcport "8545"
を入力

で、繋がった。
--rpcを指定して起動すると何ができるか
外部からcurlやjsでいじれるようになってるぽい。
jsonrpcでバージョン確認
curl -H "Content-type: application/json" -H "Accept: application/json" -X POST http://xxx.xxx.xxx.xxx:8545  --data '{"jsonrpc":"2.0","method":"web3_clientVersion","params":[],"id":1}'
{"jsonrpc":"2.0","id":1,"result":"Geth/v1.7.3-stable/darwin-amd64/go1.9.2"}
coinbase確認
curl -X POST -H "Content-type: application/json" -H "Accept: application/json" -X POST http://192.168.200.121:8545 --data '{"jsonrpc":"2.0","method":"eth_coinbase","params":[],"id":64}'
コマンド一覧はこちら
https://github.com/ethereum/wiki/wiki/JSON-RPC
スマートコントラクト開発
[ ] gethインストール
[ ] 初期設定
[ ] browser-solidity(IDE)インストール
[ ] rpc接続
[ ] 動作確認
で準備ができたので、開発してみる。
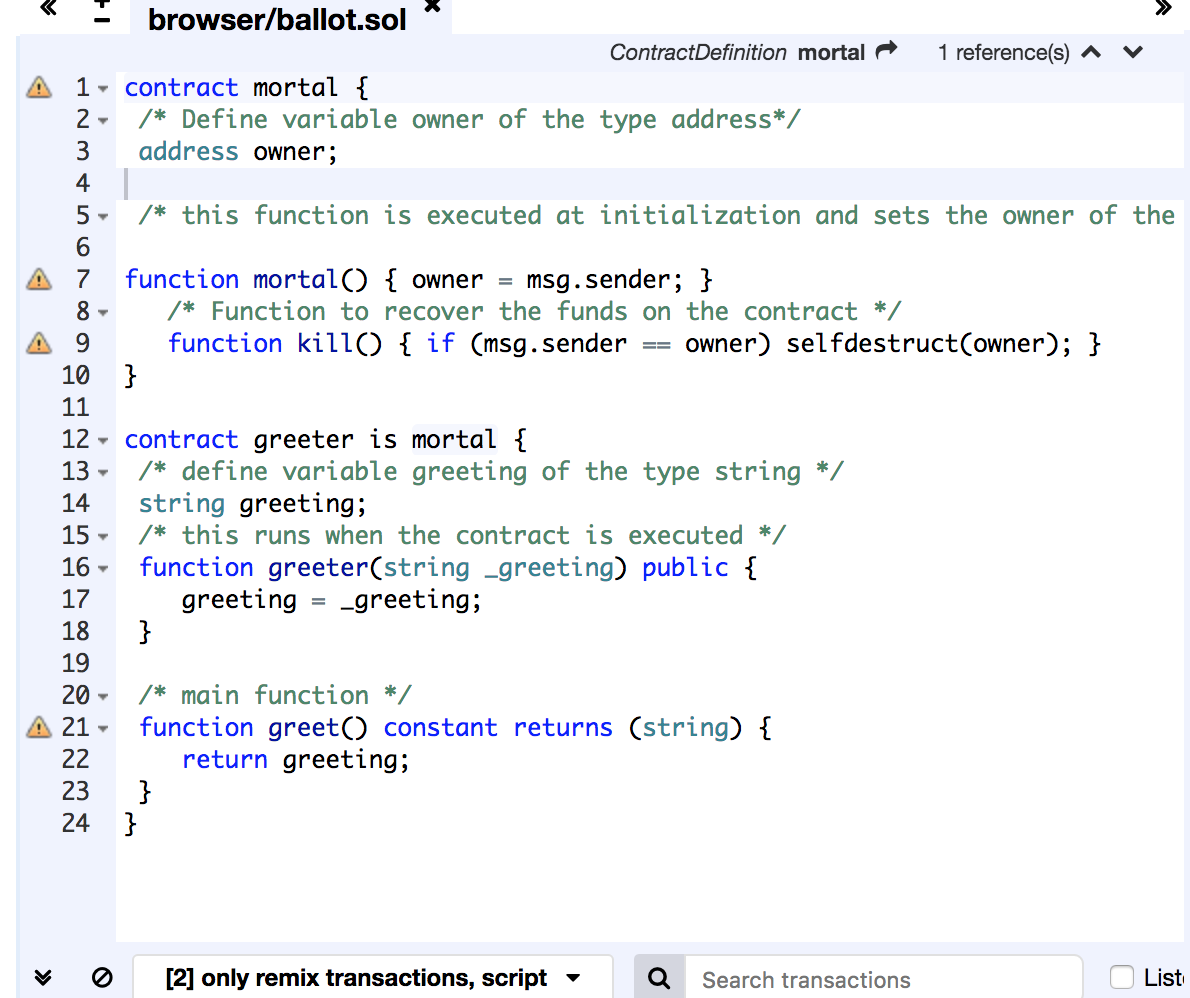
↓あたり参考にhellow world
contract mortal {
 /* Define variable owner of the type address*/
 address owner;

 /* this function is executed at initialization and sets the owner of the contract */

function mortal() { owner = msg.sender; }
   /* Function to recover the funds on the contract */
   function kill() { if (msg.sender == owner) selfdestruct(owner); }
}

contract greeter is mortal {
 /* define variable greeting of the type string */
 string greeting;
 /* this runs when the contract is executed */
 function greeter(string _greeting) public {
    greeting = _greeting;
 }

 /* main function */
 function greet() constant returns (string) {
    return greeting;
 }
}
このコードをデプロイしてトランザクションに編み込めば良いらしい。
まずこんな感じにコード貼り付ける。
- motal
- greeter
の2つをデプロイ
右上のタブでCompile→detailを選択
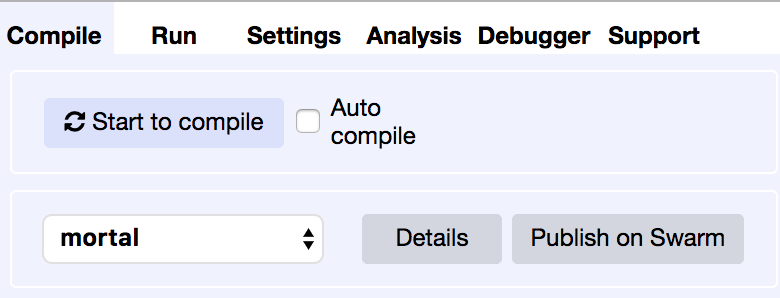
色々出てくるうちの、WEB3DEPLOYをコピー(書類アイコン)
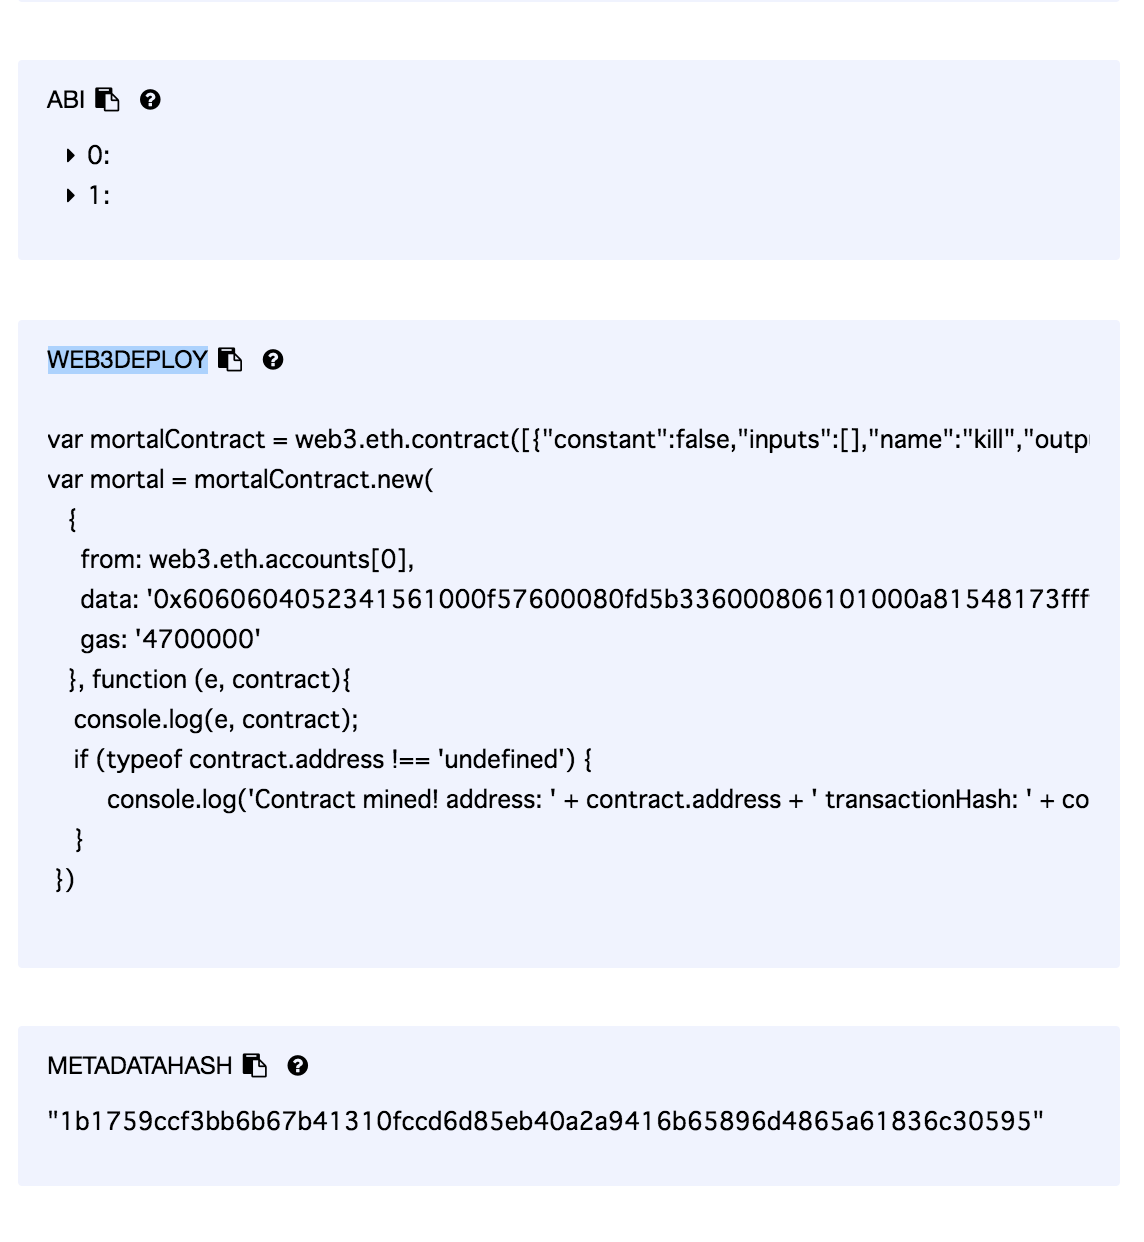
- コピーしたものをprivate_netのコンソールに貼り付け。
greetingの方は
var _greeting = /* var of type string here */ ;
のところを任意の文字列に変更してから貼り付ける。
motalとgreetingを貼り付けたら、採掘してトランザクションに編み込む
> miner.start()
null
> null [object Object]
Contract mined! address: 0x29169ff0ca1d857392b3c003670cce055e335858 transactionHash: 0x42c3c7f7bbb45c1e41d195284af93fca895f61b8a103cf49f8ebf218076047a2
null [object Object]
Contract mined! address: 0xd021f7510bc0fe0b3129e4f3de24686608a360e1 transactionHash: 0xcaa1a0fc9221d9a82215e505895391ad1560f2adf889f3c1dea975f82c05b98c
> miner.stop()
true
叩いてみる
> greeter.address
"0xd021f7510bc0fe0b3129e4f3de24686608a360e1"
> greeter.greet()
"hellow world"
できた。
他人が使う時
- 前提条件
- ⇑の準備が終わっている
- ABIがある
- アドレスがある
他人が使う場合はABIとアドレスをテキストベースで渡してあげる
var greeterContract = web3.eth.contract([{"constant":false,"inputs":[],"name":"kill","outputs":[],"payable":false,"stateMutability":"nonpayable","type":"function"},{"constant":true,"inputs":[],"name":"greet","outputs":[{"name":"","type":"string"}],"payable":false,"stateMutability":"view","type":"function"},{"inputs":[{"name":"_greeting","type":"string"}],"payable":false,"stateMutability":"nonpayable","type":"constructor"}]);
greeterContract.at("0xd021f7510bc0fe0b3129e4f3de24686608a360e1")
ABIってなんぞ
# これ
var greeterContract2 = web3.eth.contract([{"constant":false,"inputs":[],"name":"kill","outputs":[],"payable":false,"stateMutability":"nonpayable","type":"function"},{"constant":true,"inputs":[],"name":"greet","outputs":zzty":"view","type":"function"},{"inputs":[{"name":"_greeting","type":"string"}],"payable":false,"stateMutability":"nonpayable","type":"constructor"}]);```
アドレスってなんぞ
> greeter.address
"0xd021f7510bc0fe0b3129e4f3de24686608a360e1"
次回何しようかな