概要
研究室で行っている研究に今まではplaidmlやgoogle colabを使っていたのだがgcpやawsに環境を移すことでtensorflowをバックエンドで使用してgpuを使用する。また、google colabと違ってgitでの管理も楽になるのでこの度環境を移行したためその手順をメモ代わりに書く。
流れ
GCPのインスタンスの作成
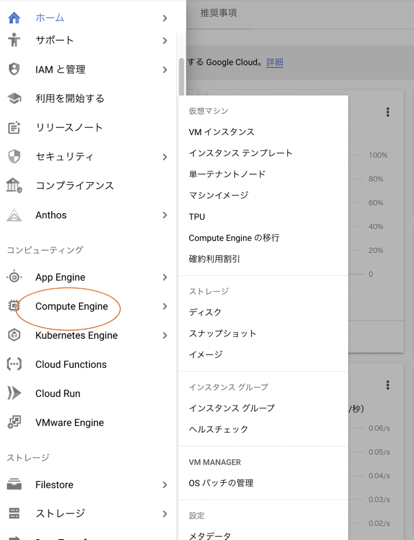
GCPで新しいプロジェクトを作成し、Ccompute Engineの項目を選択する。
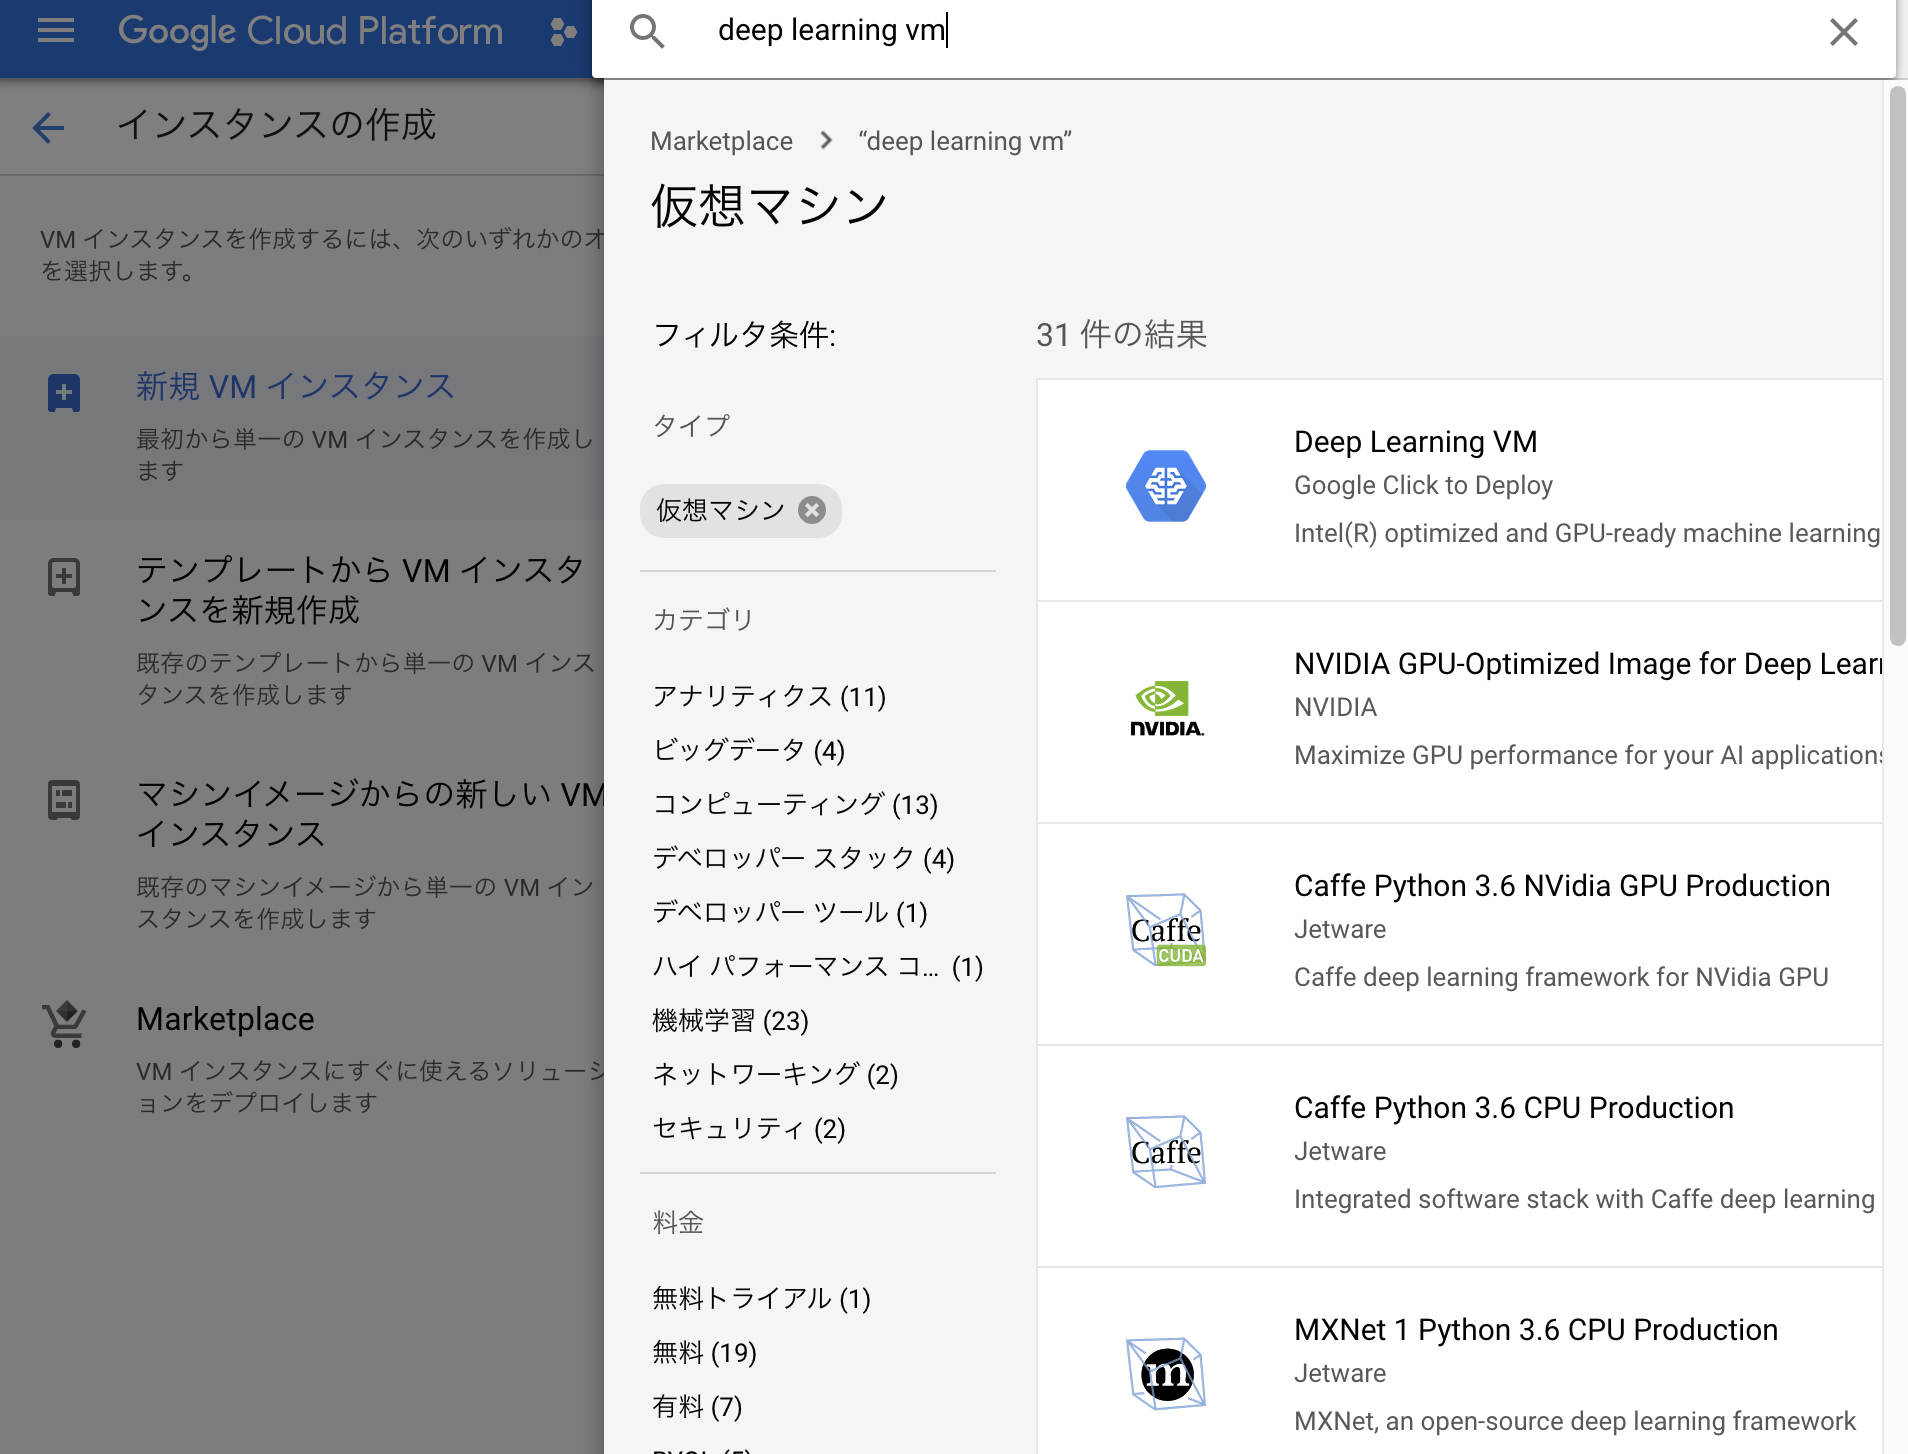
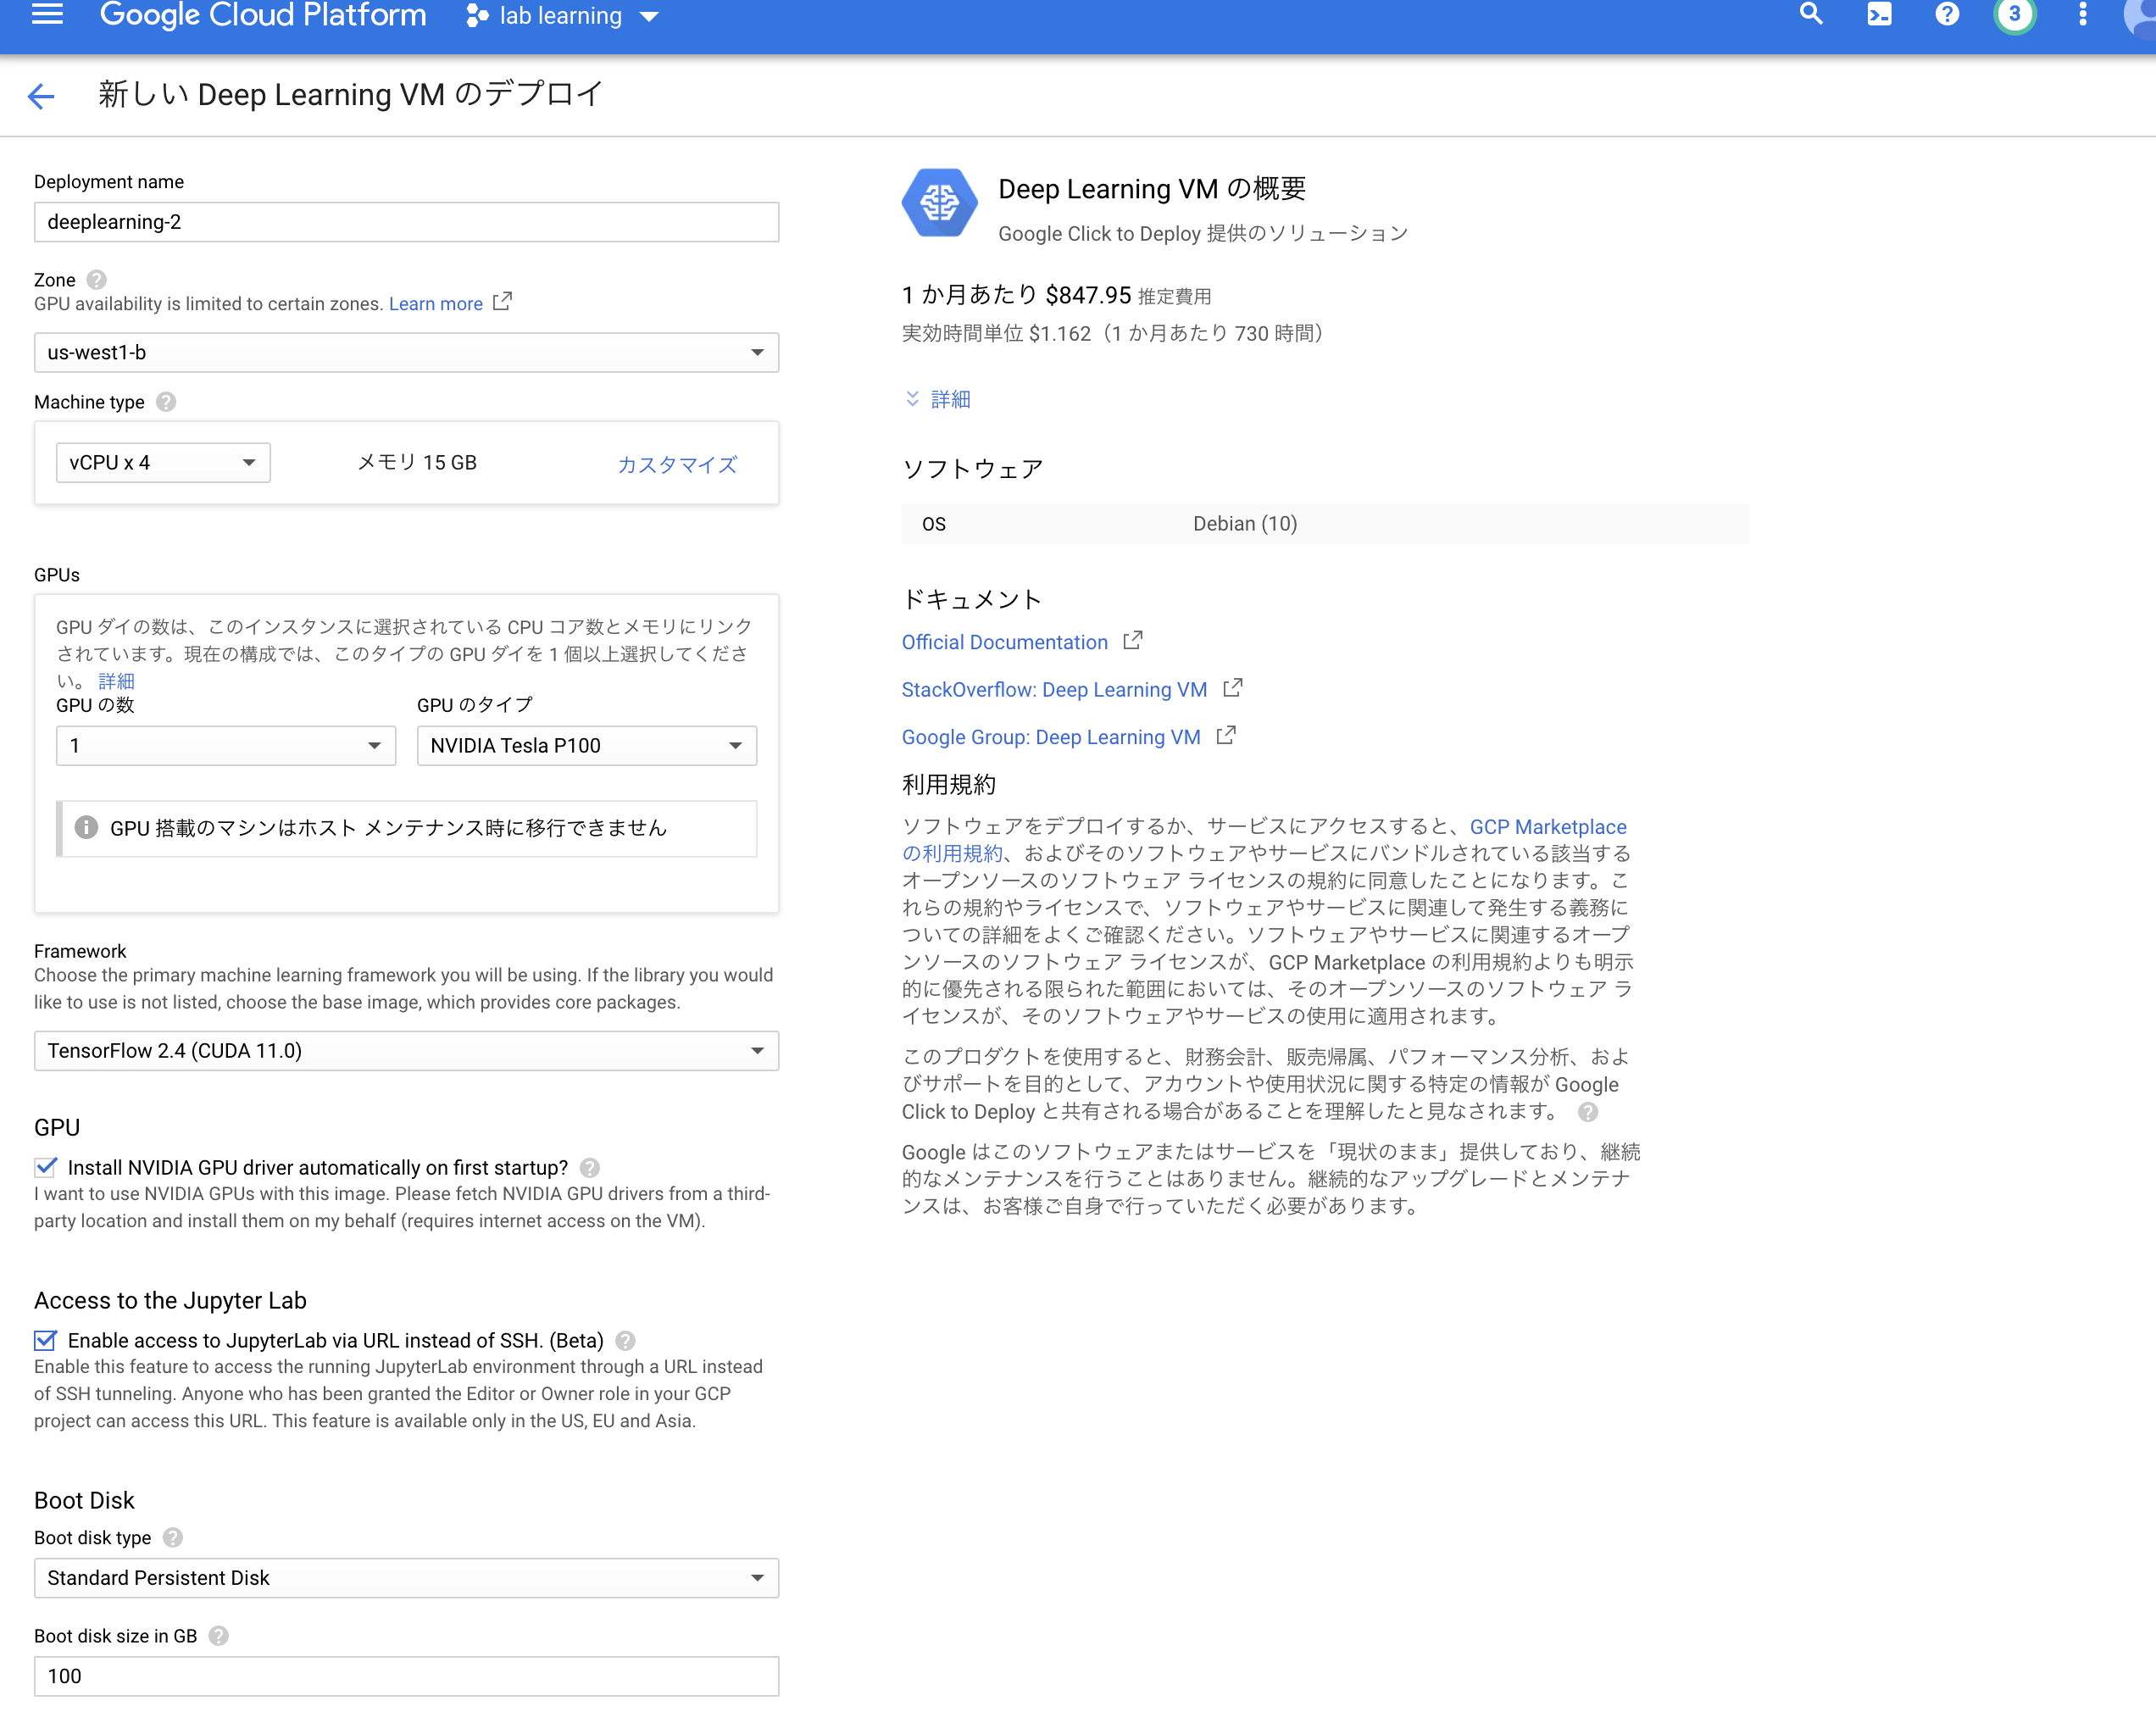
インスタンスの作成を押しMarketplaceを選択し以下のようにDeep learning VMを選択する。
この段階でインスタンスをデプロイ使用としてもGPUが割り当てられていないためこのままだとインスタンスを作成できない。
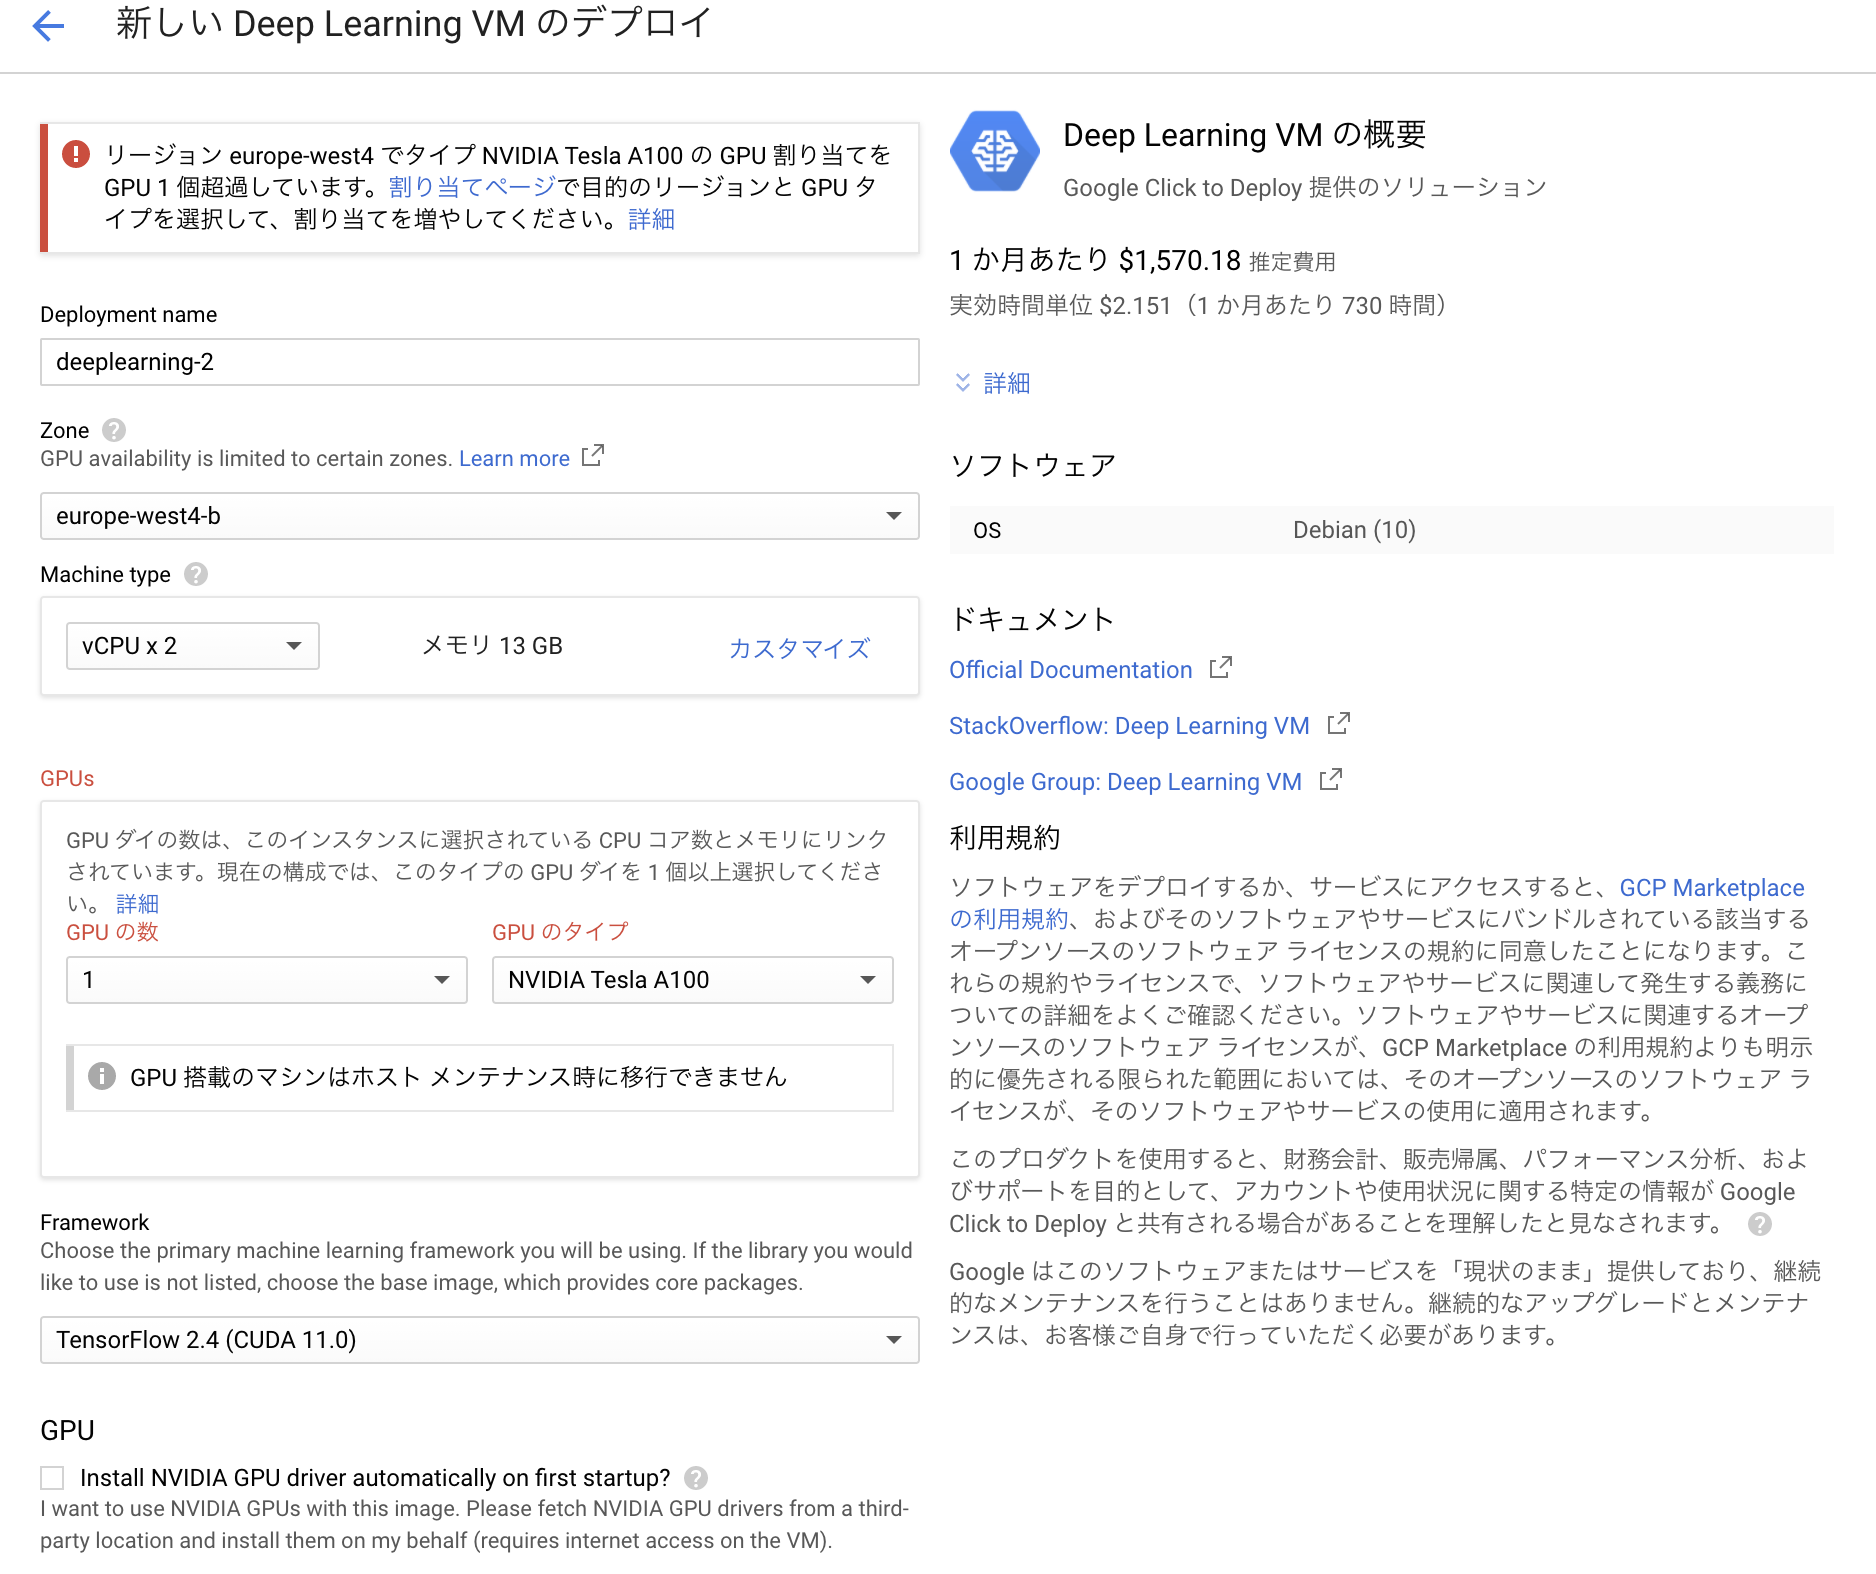
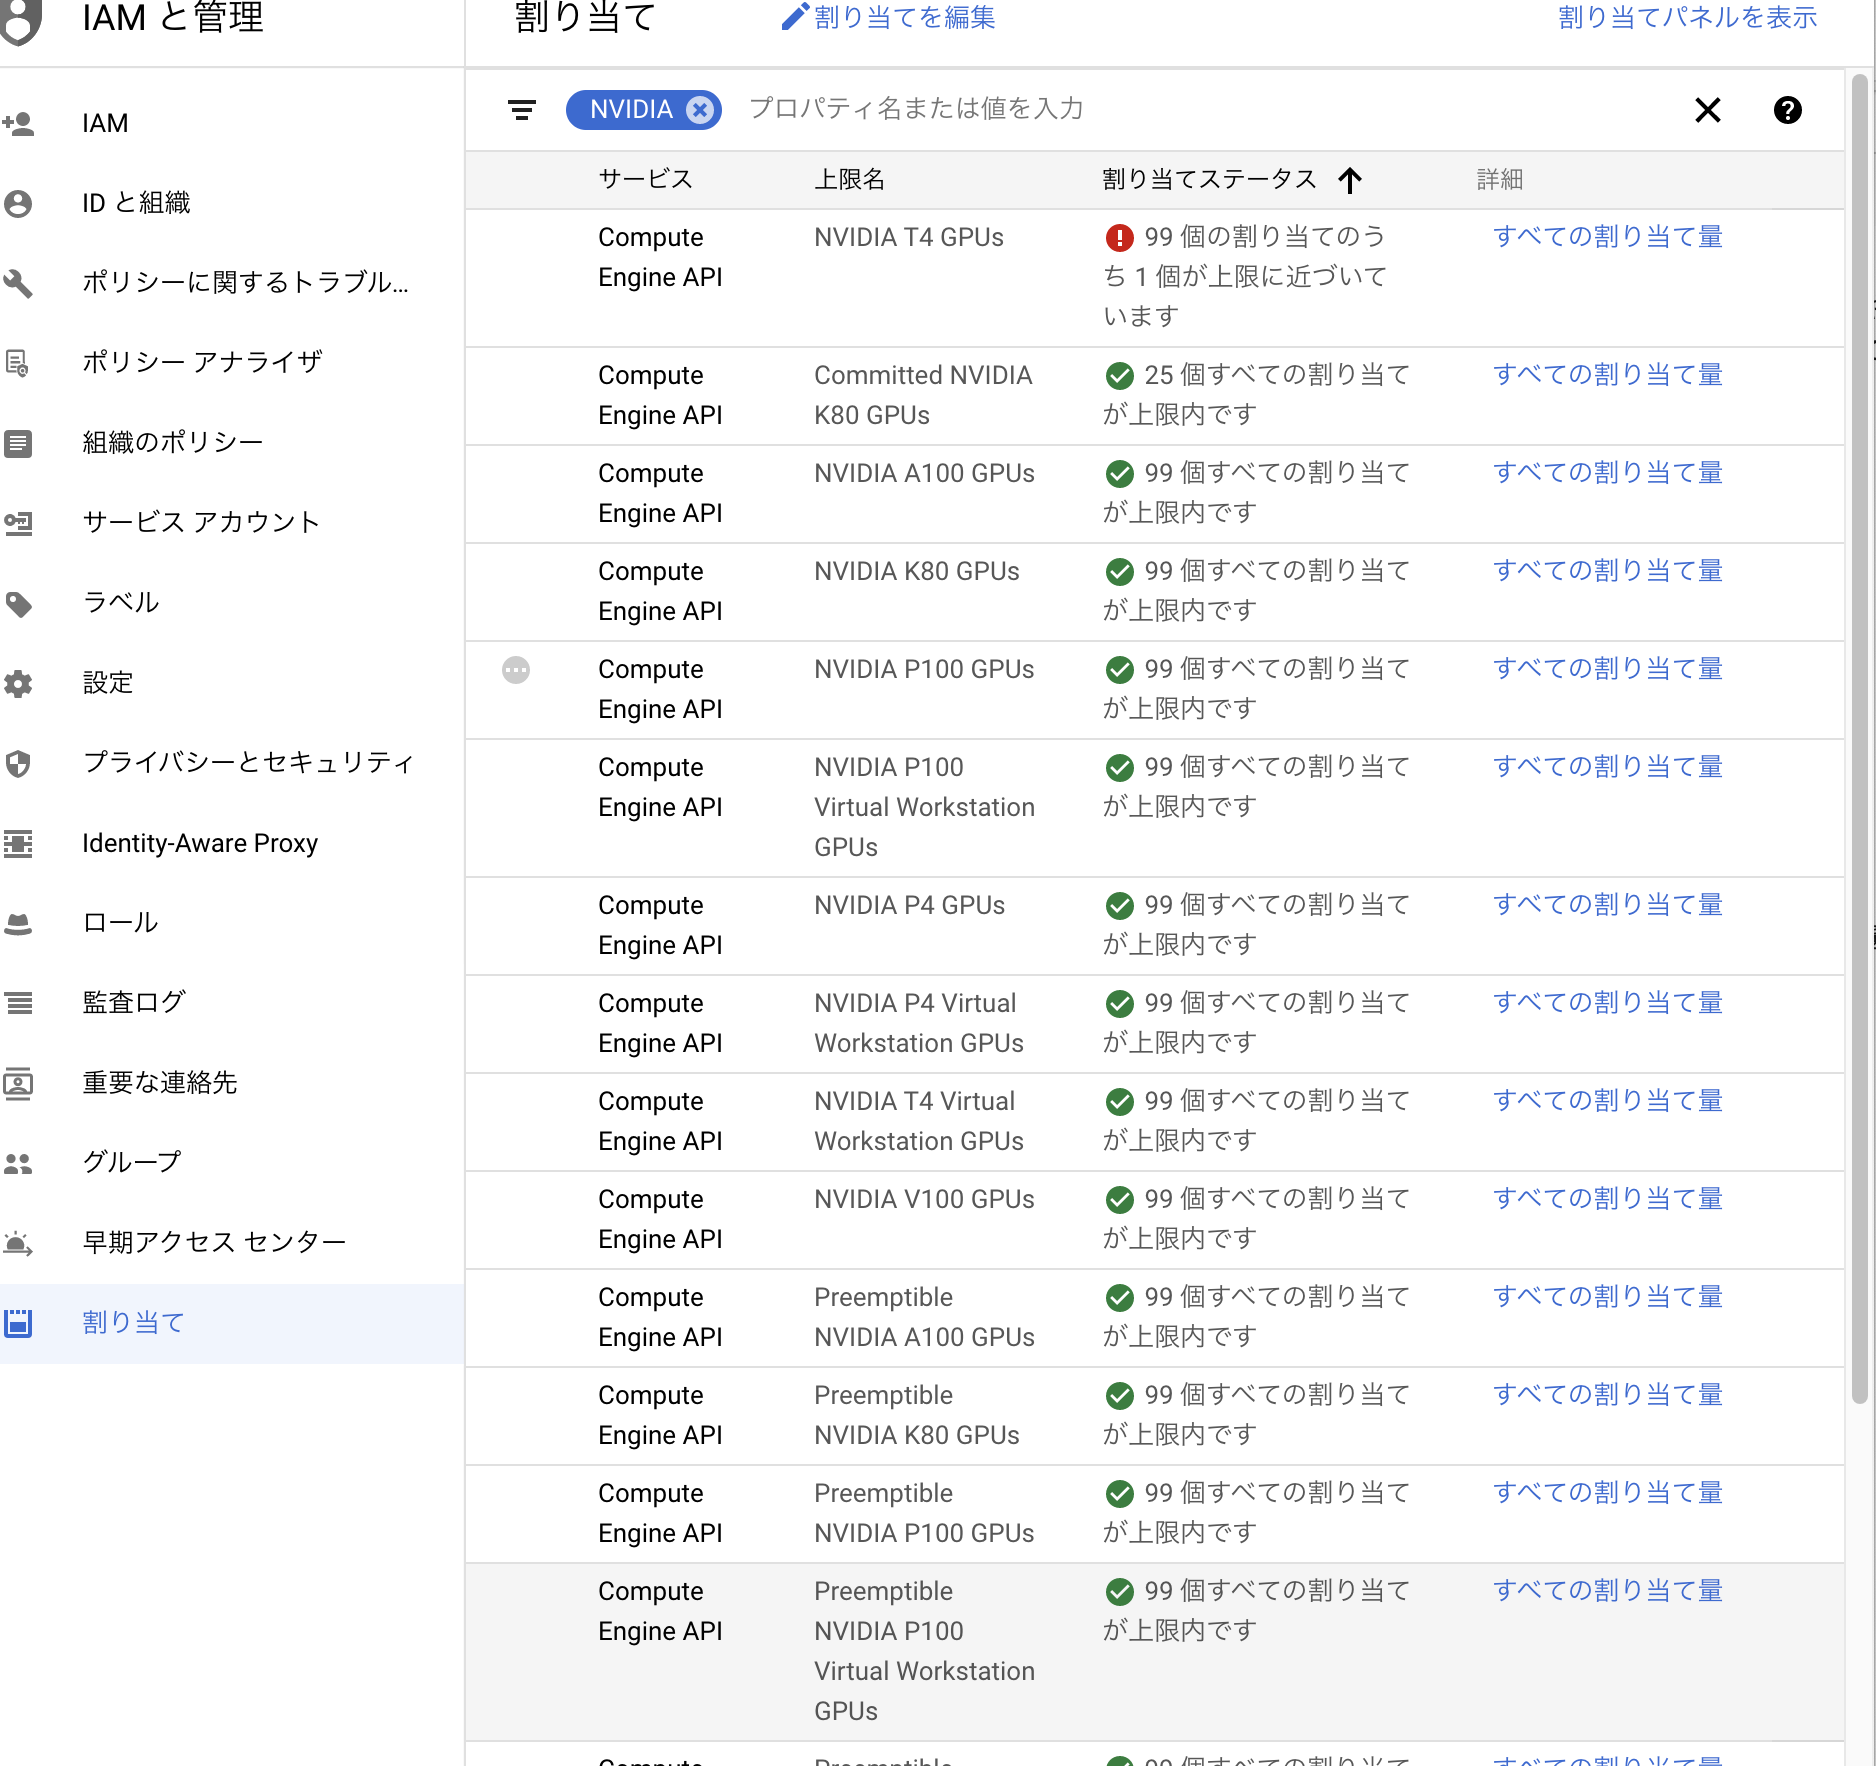
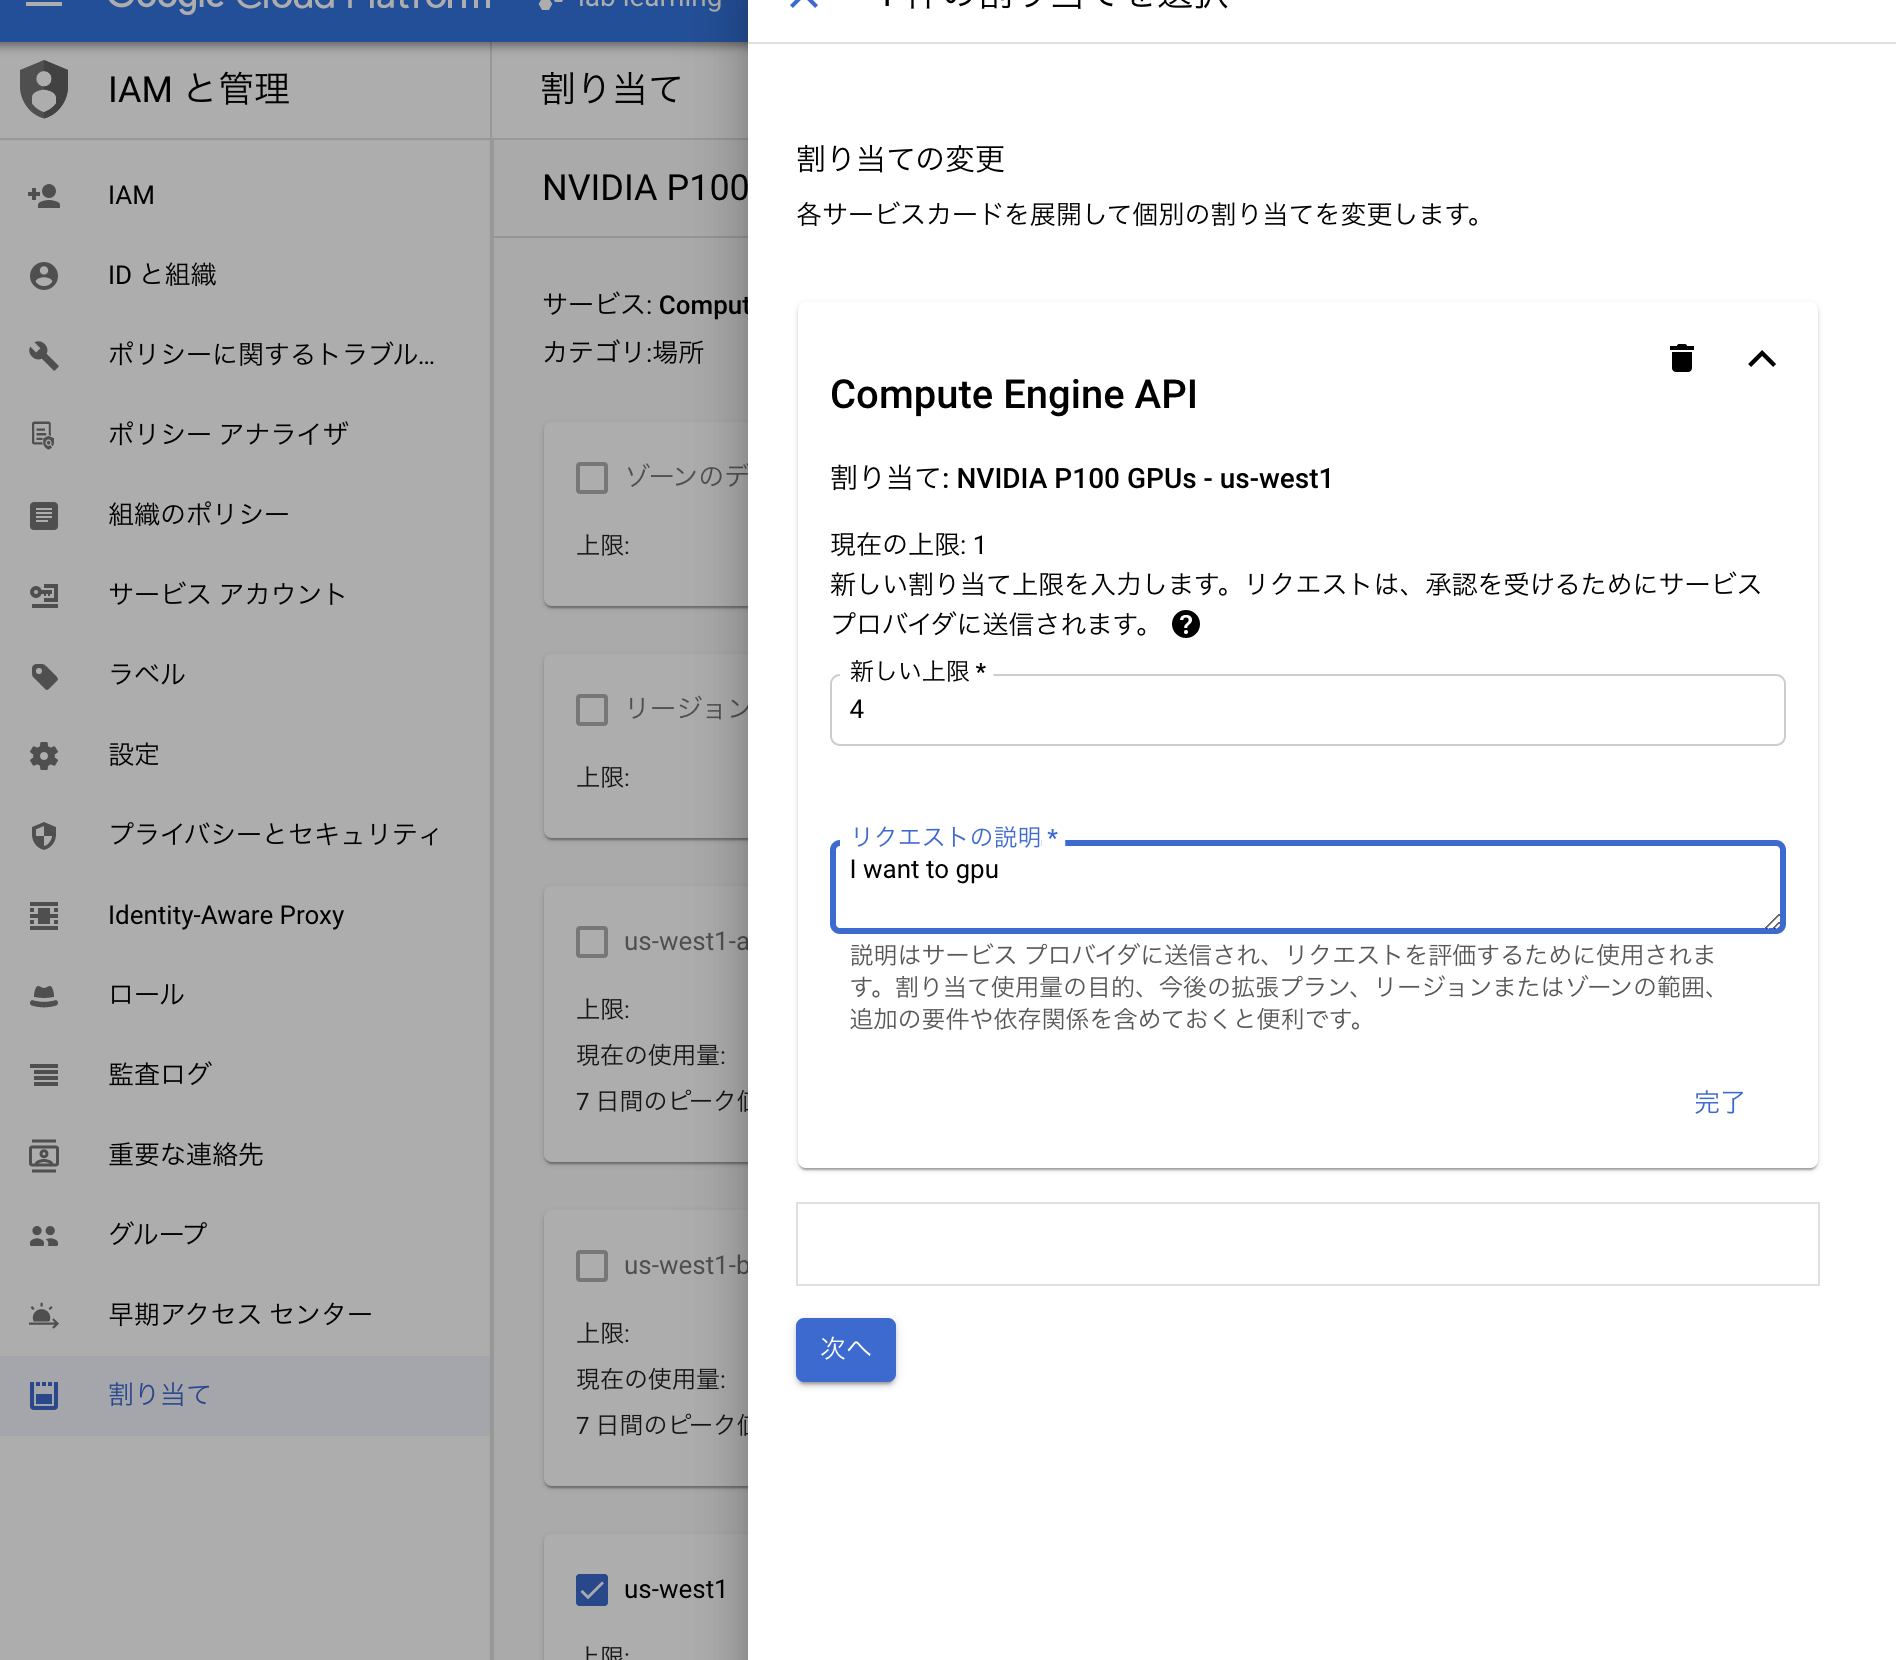
そこで以下のように IAMと管理→割当て の順で選択し、NVIDIAと選択し、使用したいGPUを選択し、自分で使いたいリージョンを選択してGPUの割当を行う。上限に関してはバカでかい数でなければ適当に選択して良い。今回は4とした。

注意点
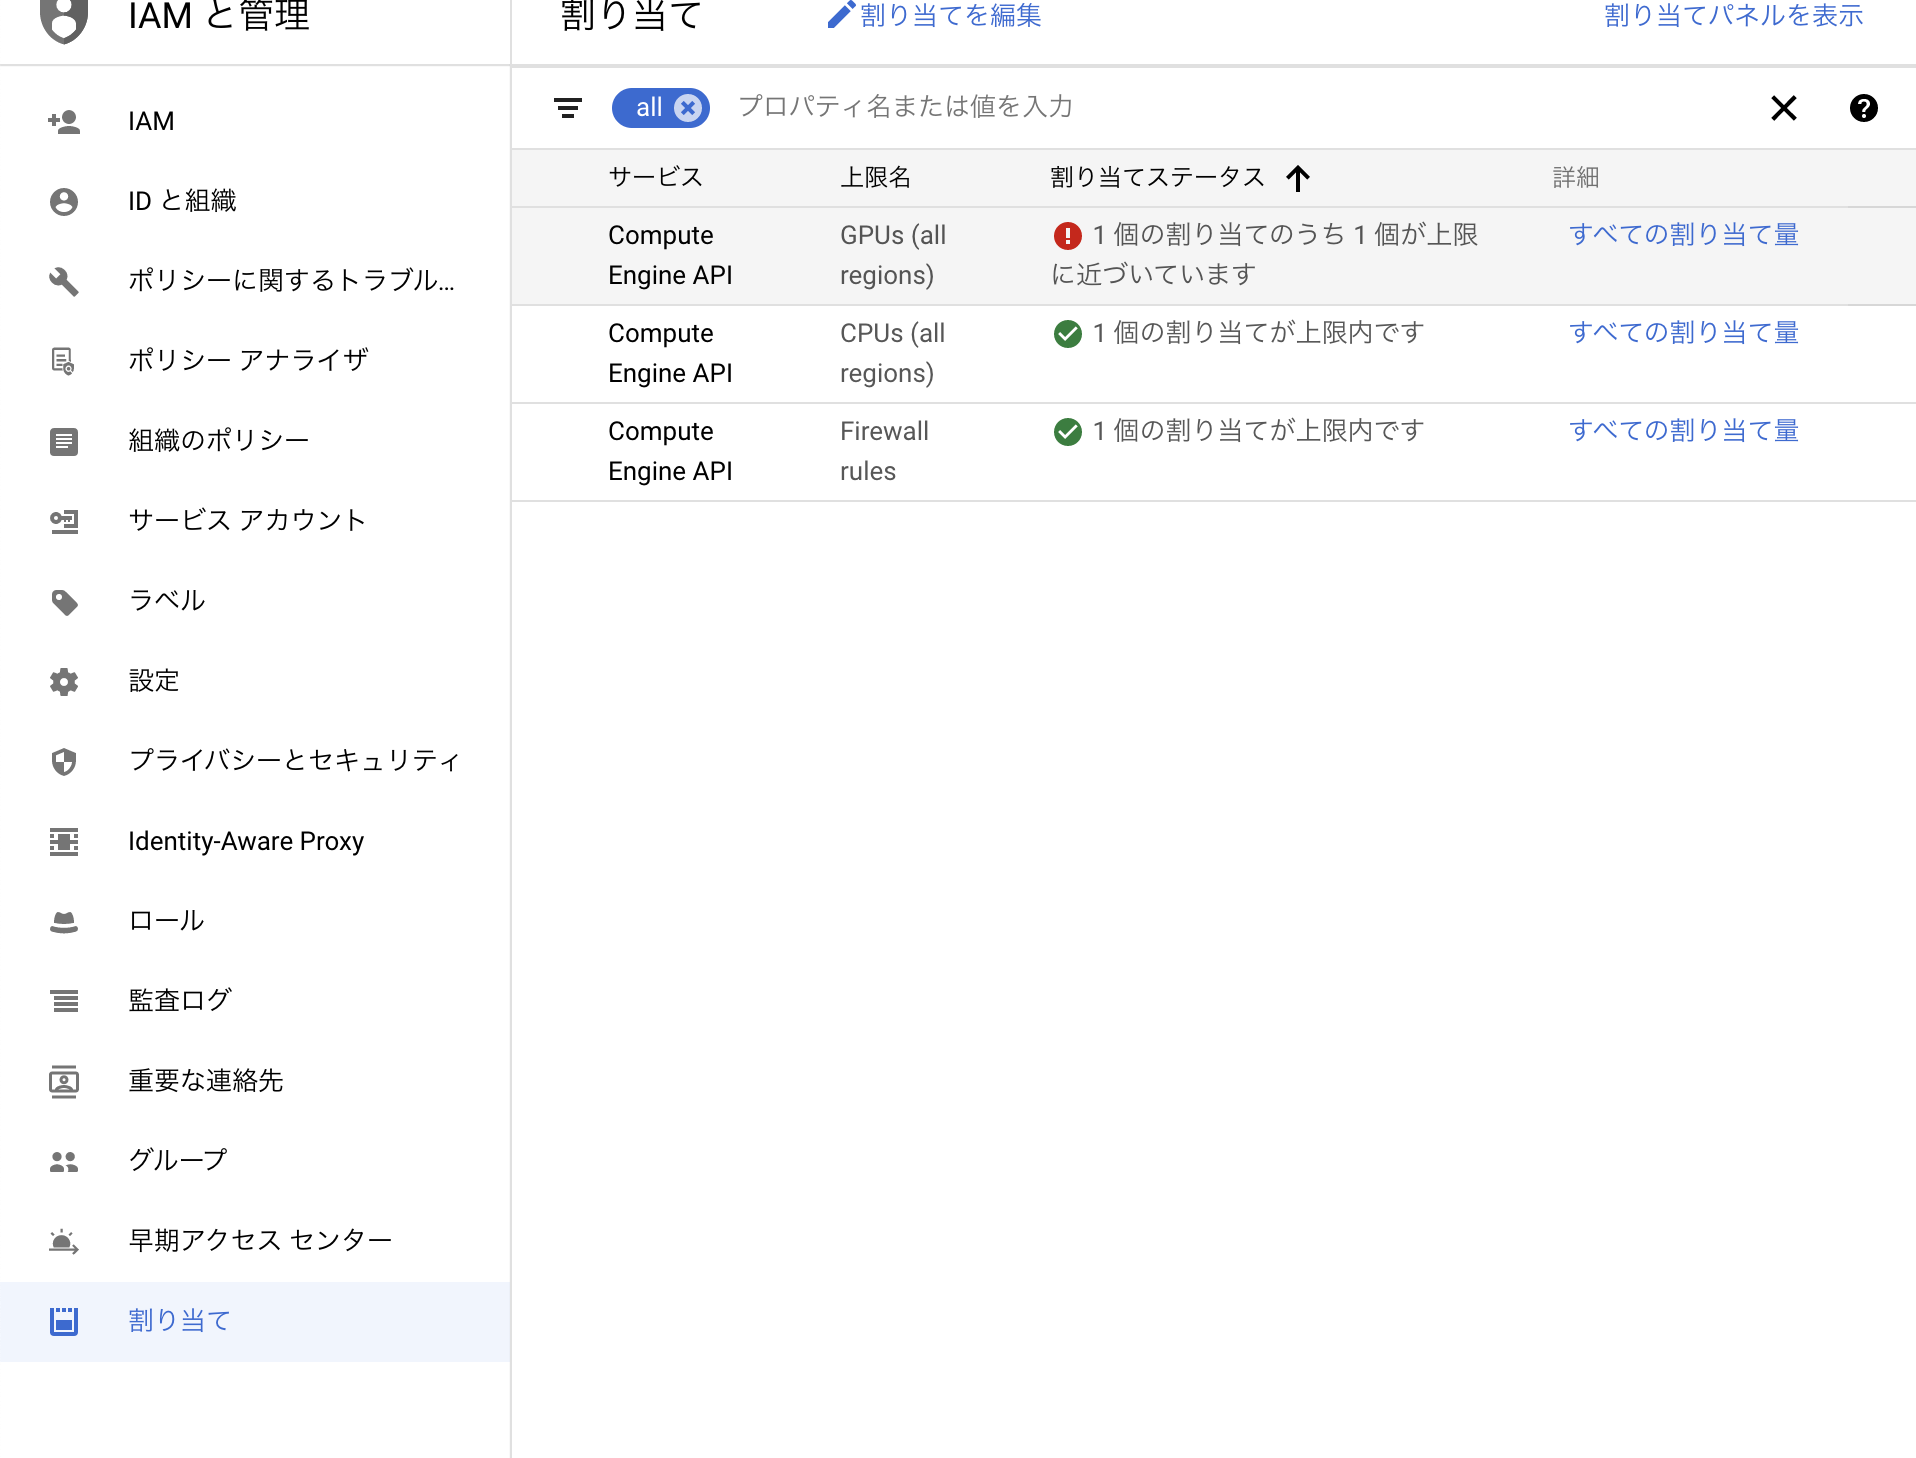
ここで一つ注意するのは自分の使用するリージョンだけでなく、以下のようにall regionという選択をしてそこにも選択する必要がある。
両方の割当が修了したらインスタンスを作成できるようになっているので以下のように使用したいGPUを割り当ててインスタンスを作成していく。
ここで右上の料金表は1ヶ月ぶっ続けでGPUを稼働させたときにかかる料金なのでこれを見て自分の懐と相談してどのGPUを割り当てるか決めると良い。
以下の点に注意する必要がある。
・GPUがチェックになっている
・Access to the Jupyter Lab
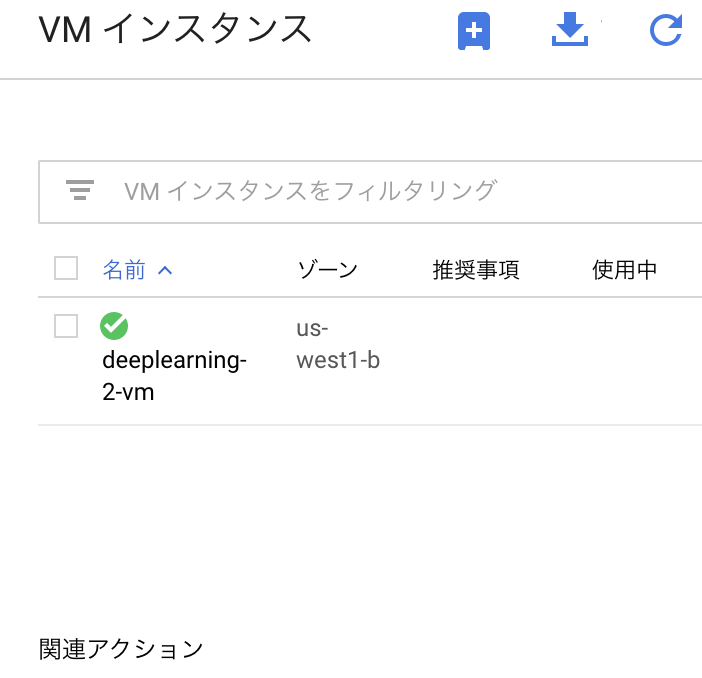
インスタンスが立ち上がっているのを確認する。
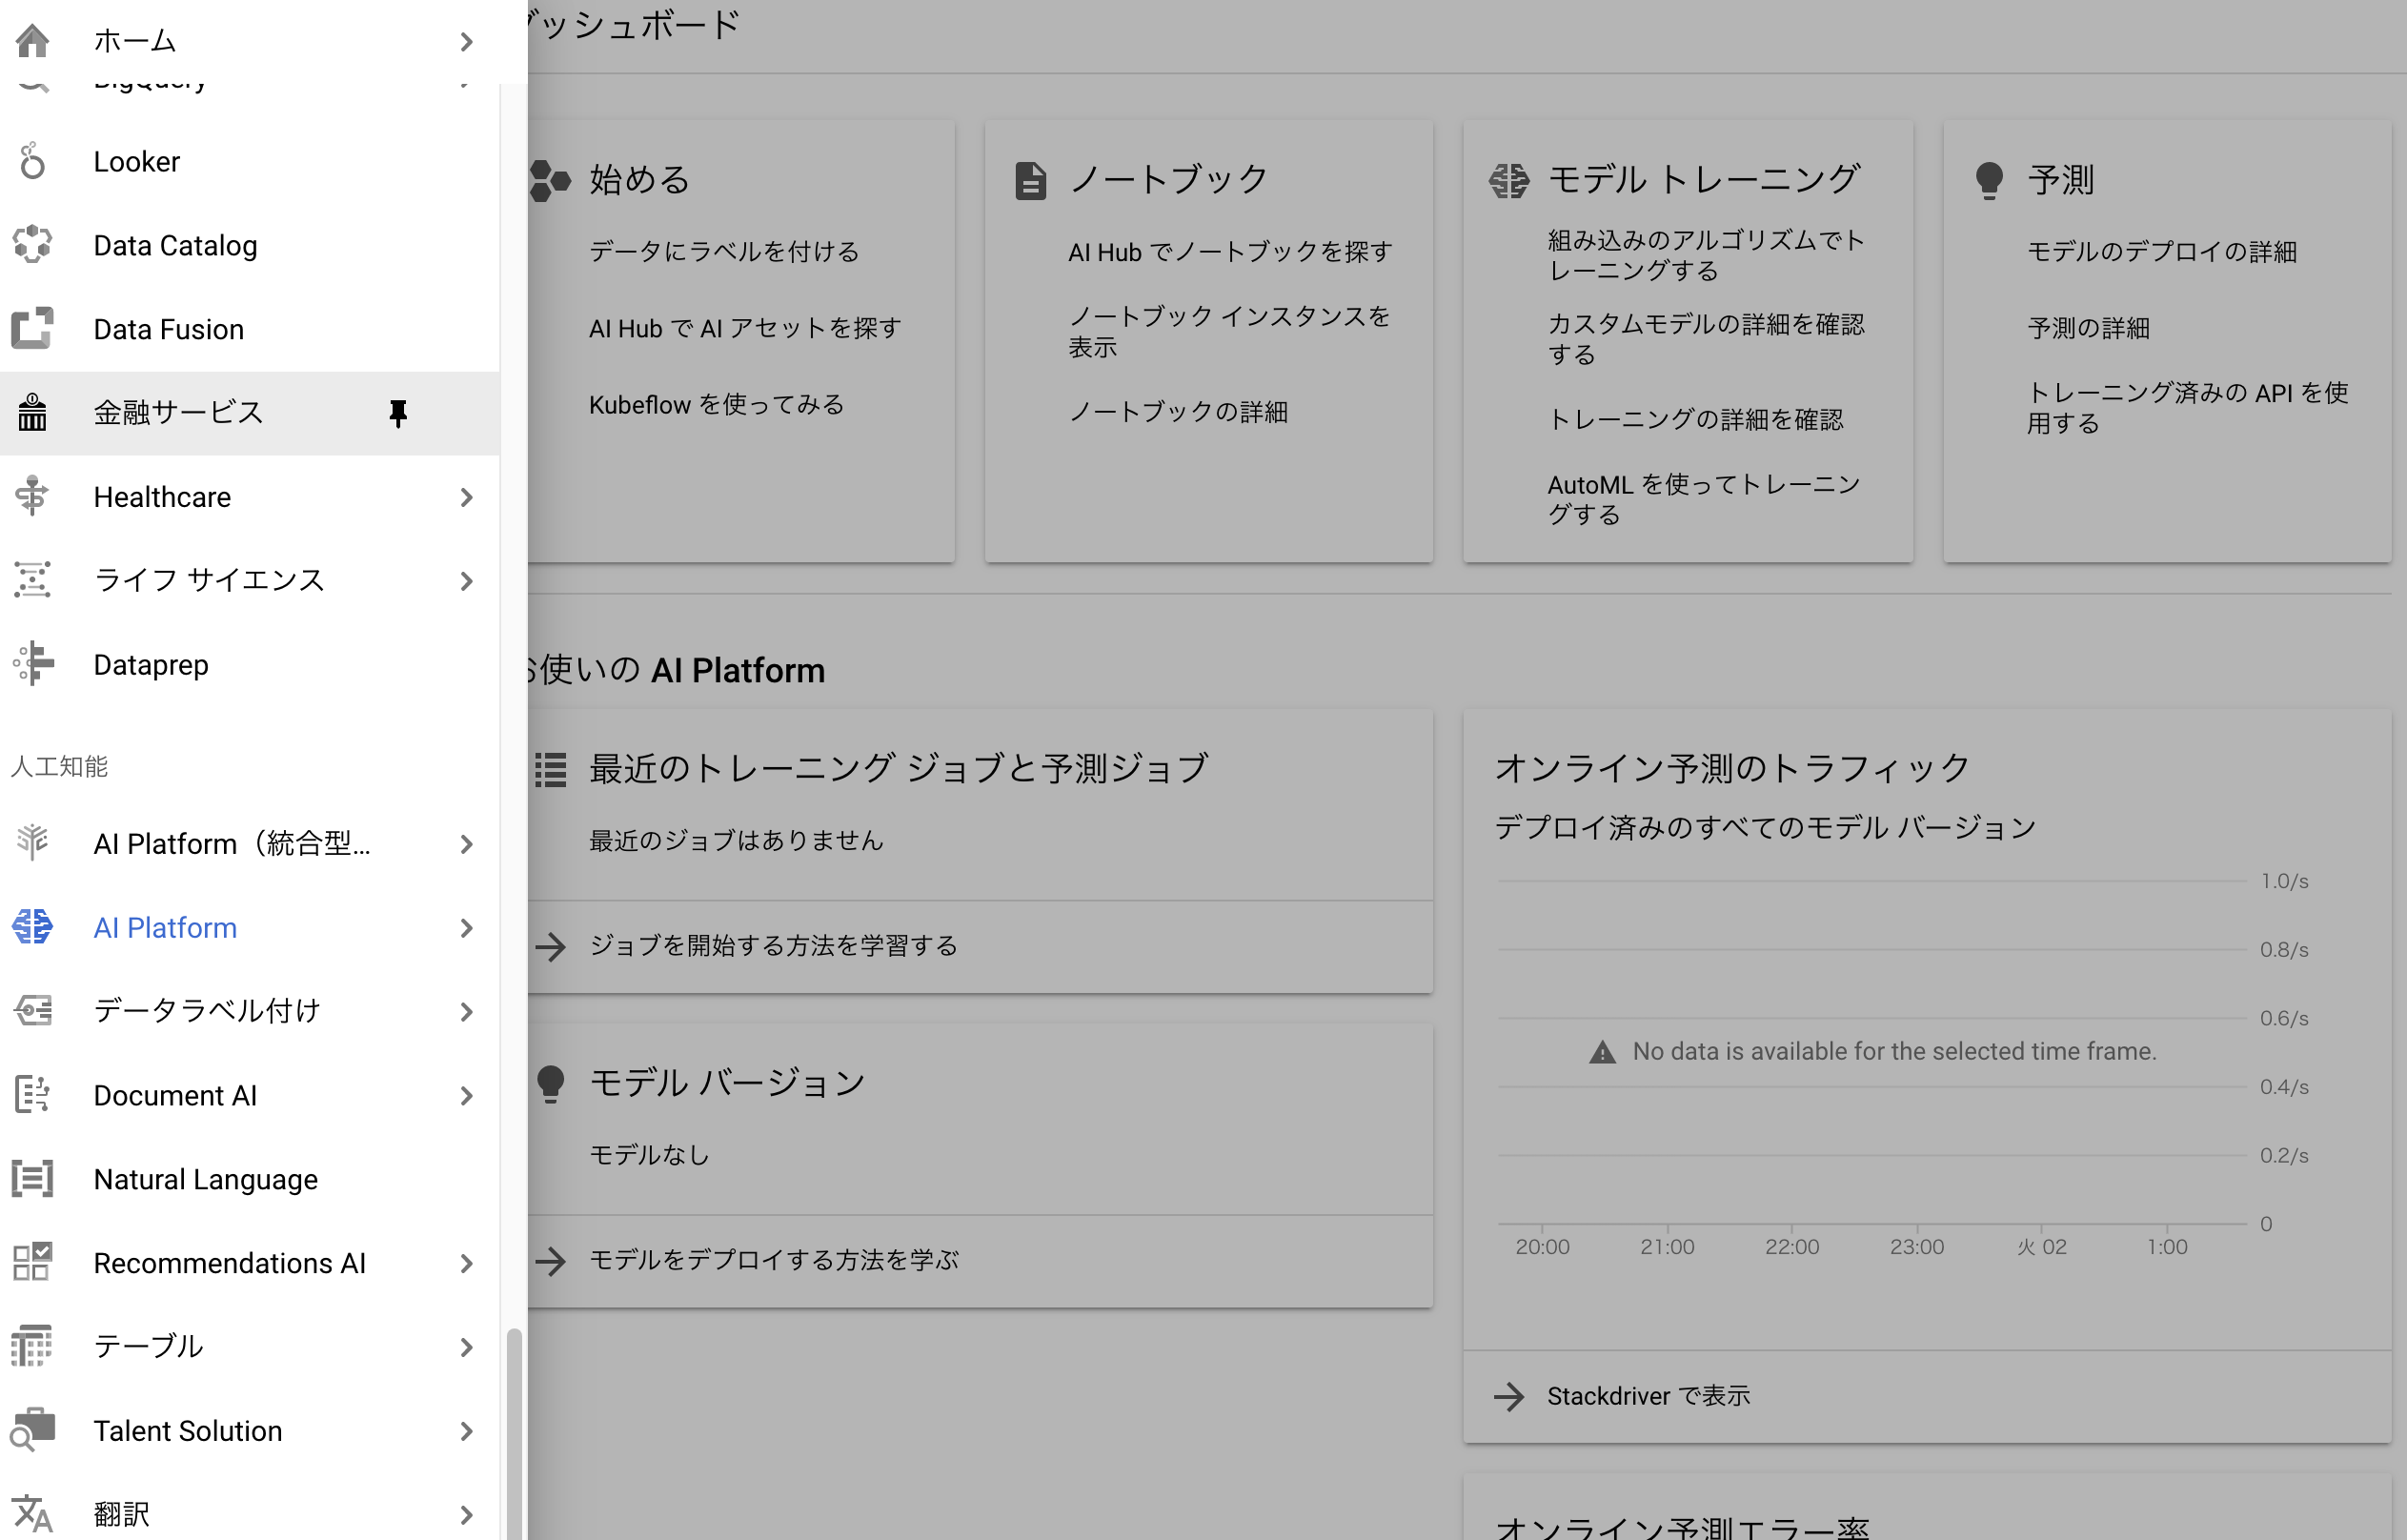
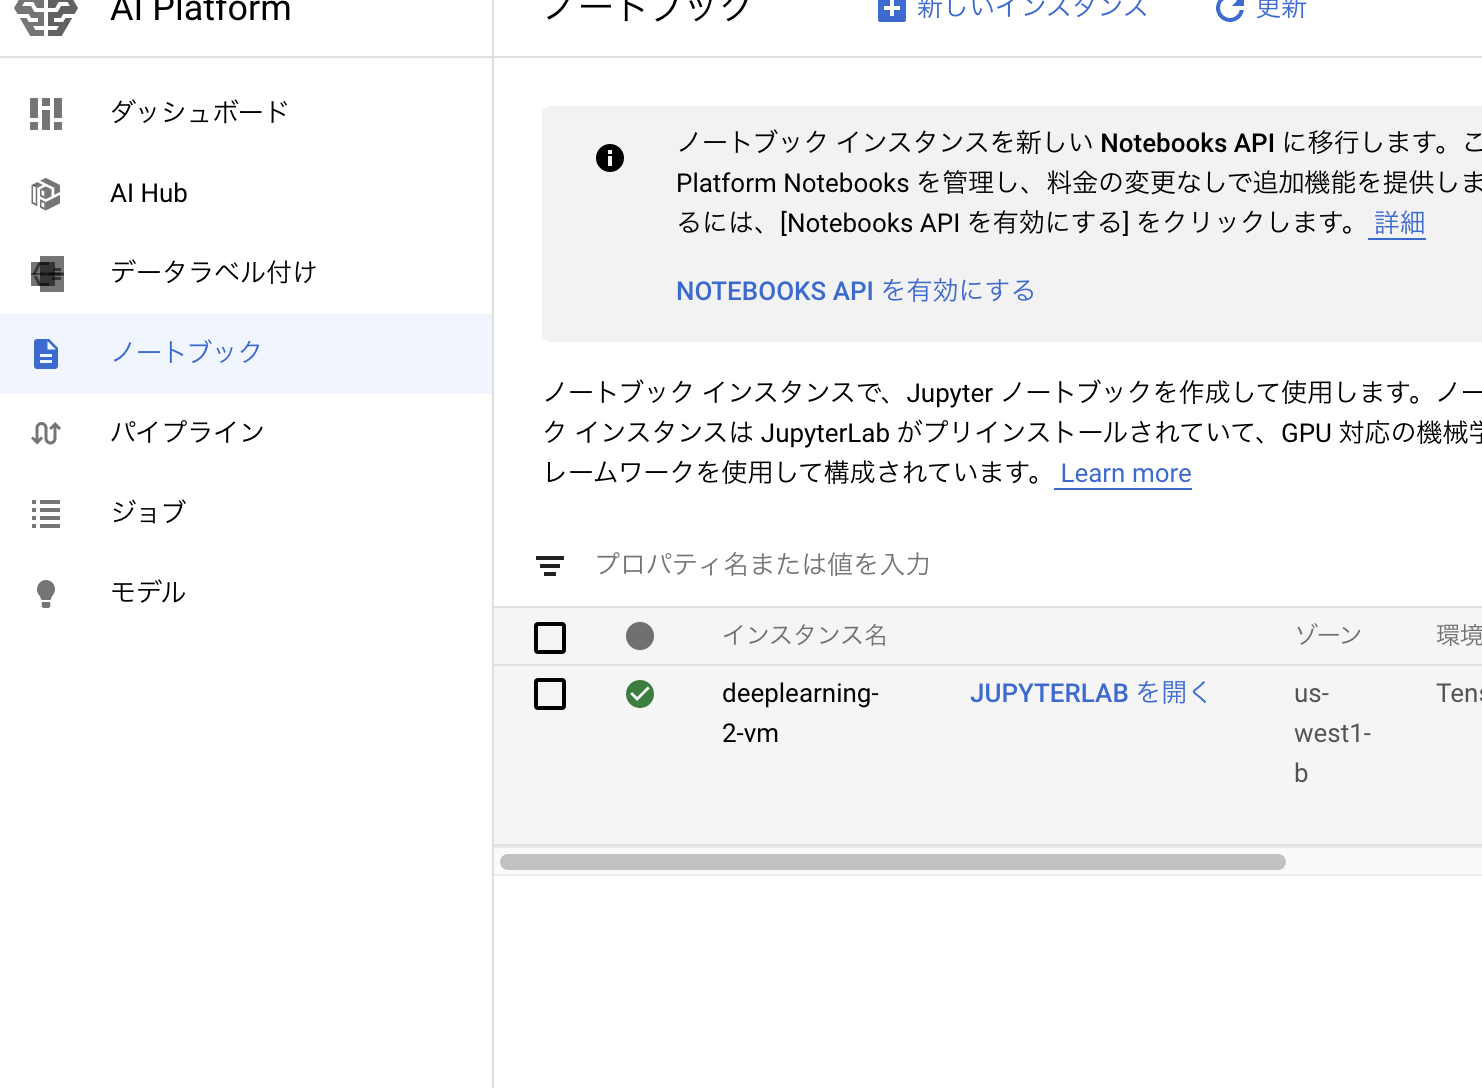
次に AIインスタンス→ノートブック を選択する。
以下のようにJupyer Labをひらくを選択するとjupyter labを立ち上げることができる。
GPUを使用した機械学習の確認
実際にGPUを使って機械学習ができているか確かめる。
Jupyter labで新しいnotebookを開き以下のコードを打ち込み実際にGPUが立ち上がっているか確認する。
from tensorflow.python.client import device_lib
device_lib.list_local_devices()
以下のようにGPUデバイスを確認することができればGPUが使用されていることになる。
[name: "/device:CPU:0"
 device_type: "CPU"
 memory_limit: 268435456
 locality {
 }
 incarnation: 17584941202425452170,
 name: "/device:GPU:0"
 device_type: "GPU"
 memory_limit: 15703311680
 locality {
   bus_id: 1
   links {
   }
 }
 incarnation: 5167920673850346787
 physical_device_desc: "device: 0, name: Tesla P100-PCIE-16GB, pci bus id: 0000:00:04.0, compute capability: 6.0"]
実際にmnistで学習ができるかたしかめてみる。
(train_images, train_labels), (test_images, test_labels) = datasets.mnist.load_data()

train_images = train_images.reshape((60000, 28, 28, 1))
test_images = test_images.reshape((10000, 28, 28, 1))

# ピクセルの値を 0~1 の間に正規化
train_images, test_images = train_images / 255.0, test_images / 255.0

model = models.Sequential()
model.add(layers.Conv2D(32, (3, 3), activation='relu', input_shape=(28, 28, 1)))
model.add(layers.MaxPooling2D((2, 2)))
model.add(layers.Conv2D(64, (3, 3), activation='relu'))
model.add(layers.MaxPooling2D((2, 2)))
model.add(layers.Conv2D(64, (3, 3), activation='relu'))
model.add(layers.Flatten())
model.add(layers.Dense(64, activation='relu'))
model.add(layers.Dense(10, activation='softmax'))

model.compile(optimizer='adam',
              loss='sparse_categorical_crossentropy',
              metrics=['accuracy'])
model.summary()
Downloading data from https://storage.googleapis.com/tensorflow/tf-keras-datasets/mnist.npz
11493376/11490434 [==============================] - 0s 0us/step
Model: "sequential"
_________________________________________________________________
Layer (type)                 Output Shape              Param #
=================================================================
conv2d (Conv2D)              (None, 26, 26, 32)        320
_________________________________________________________________
max_pooling2d (MaxPooling2D) (None, 13, 13, 32)        0
_________________________________________________________________
conv2d_1 (Conv2D)            (None, 11, 11, 64)        18496
_________________________________________________________________
max_pooling2d_1 (MaxPooling2 (None, 5, 5, 64)          0
_________________________________________________________________
conv2d_2 (Conv2D)            (None, 3, 3, 64)          36928
_________________________________________________________________
flatten (Flatten)            (None, 576)               0
_________________________________________________________________
dense (Dense)                (None, 64)                36928
_________________________________________________________________
dense_1 (Dense)              (None, 10)                650
=================================================================
Total params: 93,322
Trainable params: 93,322
Non-trainable params: 0
_________________________________________________________________
そうしたらgitにpushして管理できるようになる。
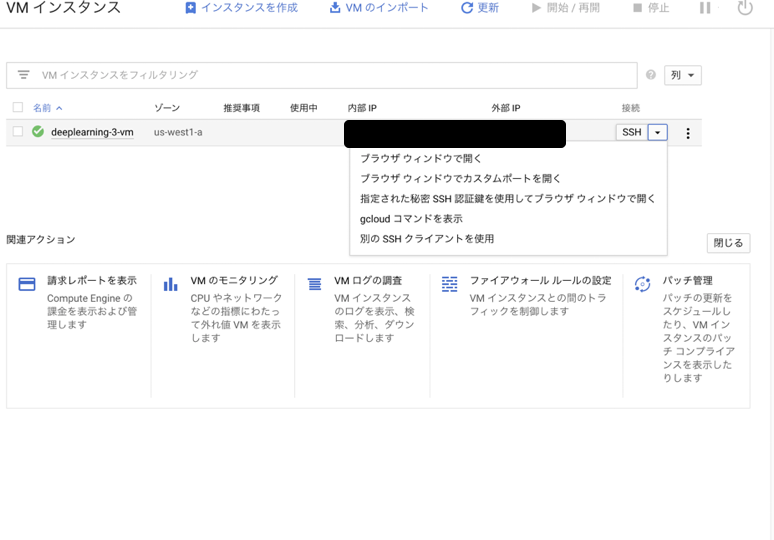
# 外部からsshログインする
まずは以下の記事を参考にgcloudコマンドのインストールと設定を行う。
GCPのgcloudコマンドのインストールと最初の認証までを初心者向けに細かく解説
そのあと、以下の選択肢からgcloudコマンドを表示を選択して出てきたコマンドをローカルpcのターミナルで打ち込む。
gcloud beta compute ssh --zone $ZONE $INSTANCE_NAME --project $PROJECT_NAME
いかに実際に起きたErrorの事例を2つあげる。
ERROR: (gcloud.compute.ssh) Could not fetch resource: - Insufficient Permission
以下の stack overflow で解決できる。
ERROR: (gcloud.compute.ssh) Could not fetch resource: - Insufficient Permission