概要
Fivetran から Microsoft Fabric にデータを同期する手順を紹介します。
本記事は下記記事の一部です。

出所:フルマネージドなデータ連携:データ統合の自動化を実現する Fivetran の全貌 #fivetran - Qiita
アンダースコアに関する制限がある旨の記述があるため、下記の条件に該当するスキーマ、あるいは、テーブルを同期する際には注意してください。
- The table and schema names must not start or end with an underscore, and must not contain multiple consecutive underscores ( __ ).

出所:Fivetran for OneLake Implementation | Configuration and documentation
ただし、2025年4月22日日時点では想定通りに同期されました。

手順
Register application and add service principal
Azure Portal にてMicrosoft Entra ID -> アプリの登録 -> + 新規登録を選択します。
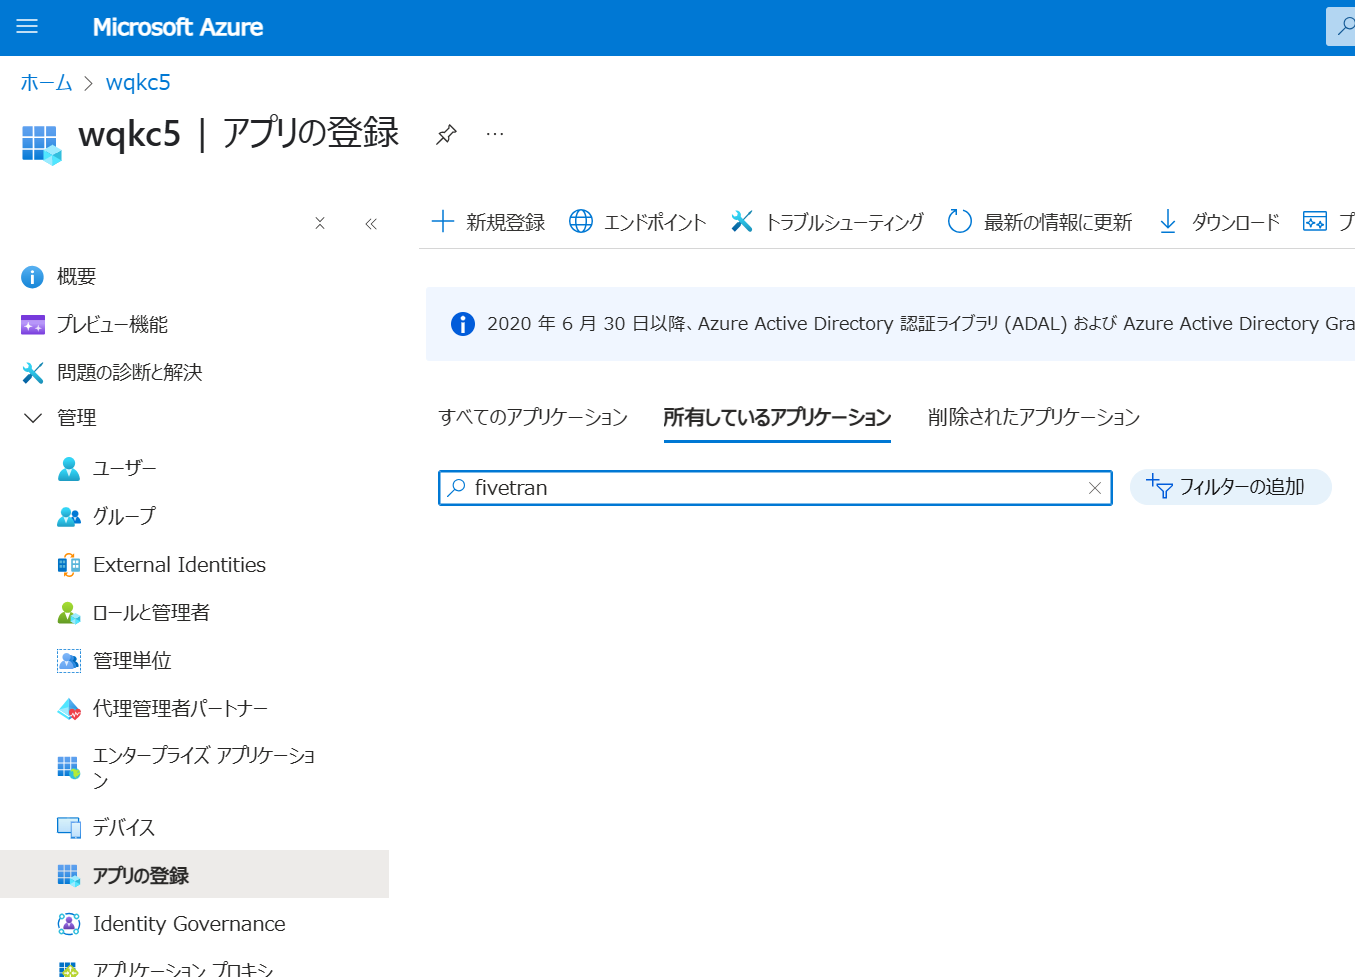
任意の名前(例:fivetran-service-principal)を入力し、登録を選択します。

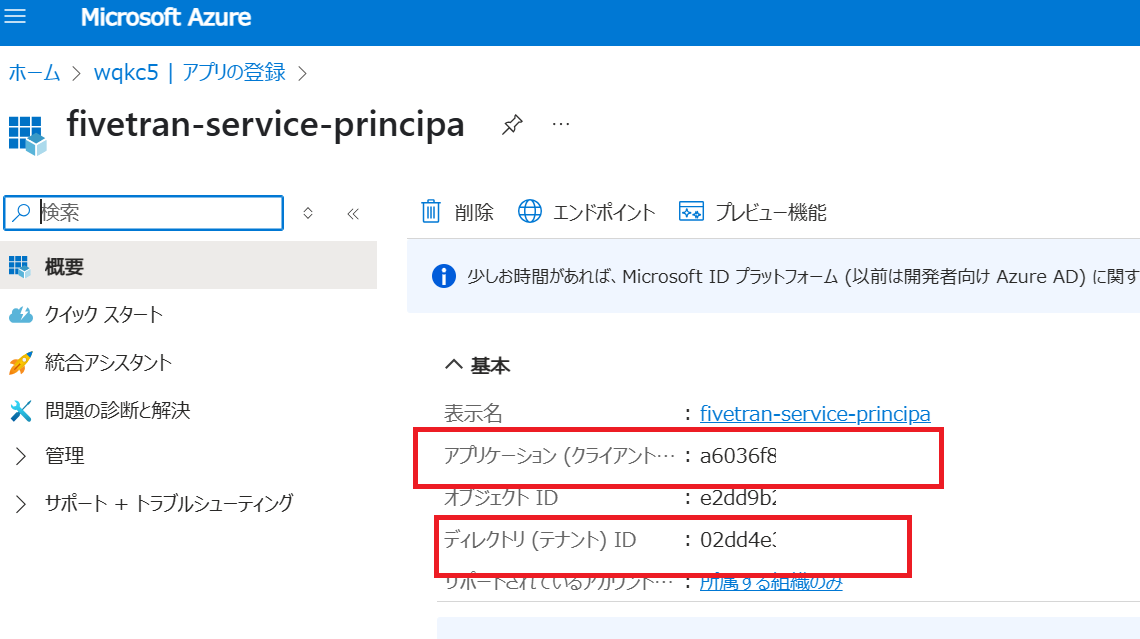
アプリケーション (クライアント) IDの値とディレクトリ (テナント) ID の値をひかえます。
Create client secret
作成したアプリの画面にて、証明書とシークレット -> クライアントシークレット -> + 新しいクライアントシークレットを選択します。
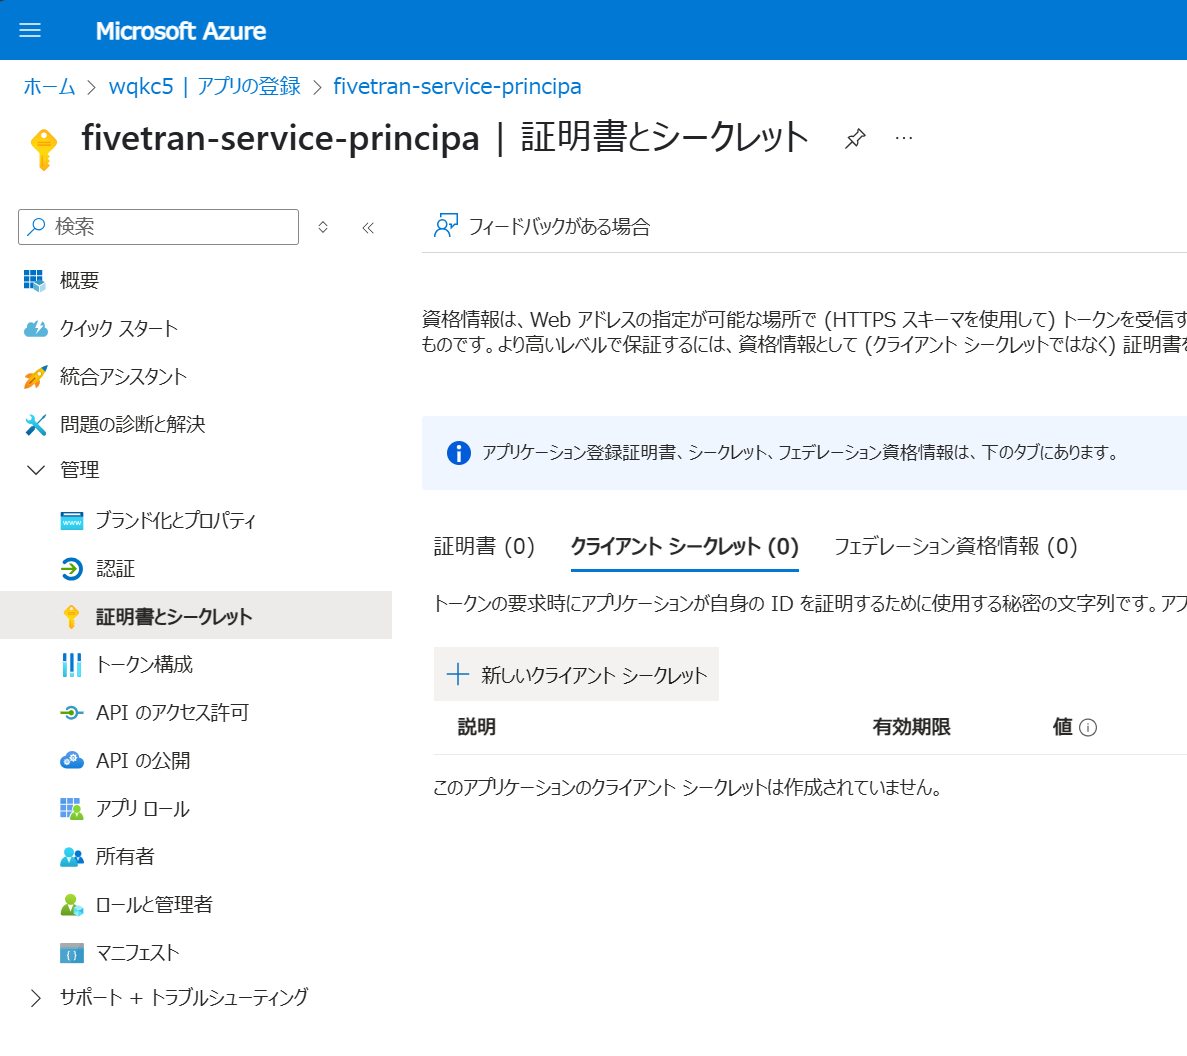
説明に任意の値を入力し、追加を選択します。

値に表示されている値を控えます。

Create workspace
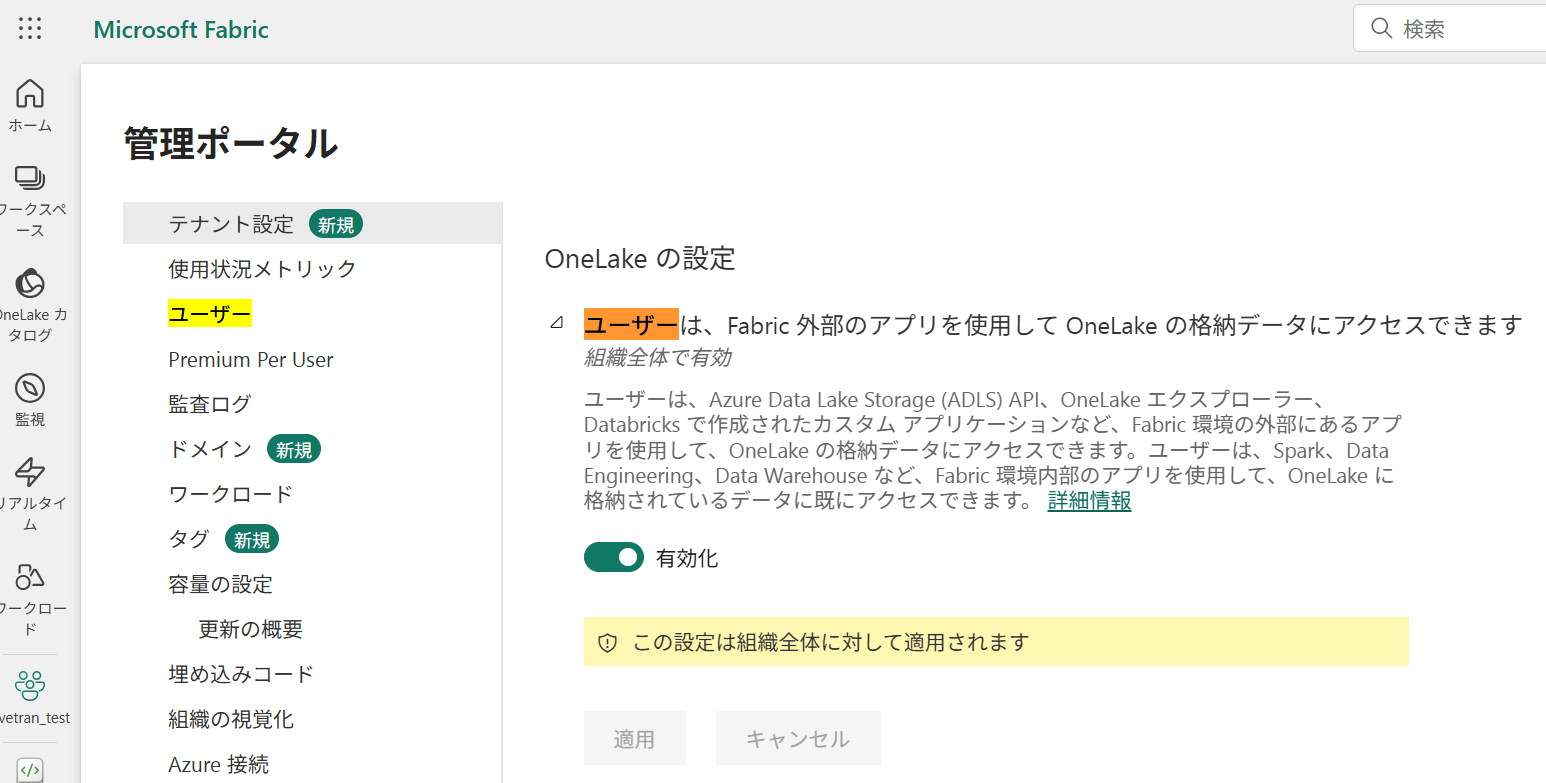
Microsoft Fabric にログインし、右上の歯車ボタン -> 管理ポータルを選択します。

サービス プリンシパルは Fabric API を使用できますの設定を有効化します。

ユーザーは、Fabric 外部のアプリを使用して OneLake の格納データにアクセスできますの設定を有効化します。
左側のワークスペース -> + 新しいワークスペースを選択します。

任意の名前(例:Onlake_Fivetran)を入力し、適用を選択します。

Add service principal to workspace
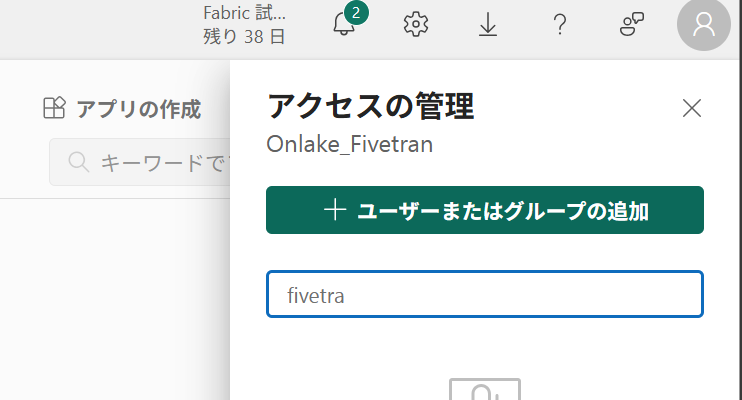
作成したワークスペースの画面にて、右上にあるアクセスの管理を選択します。

+ ユーザーまたはグループの追加を選択します。
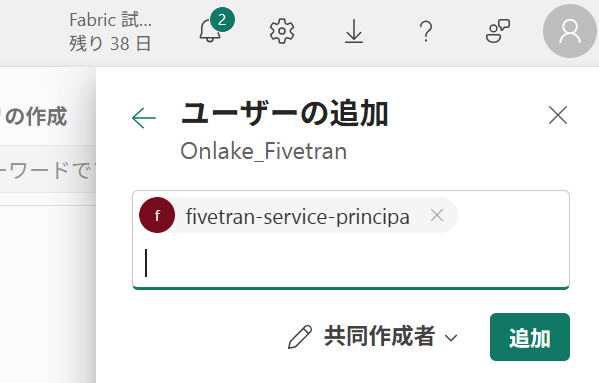
作成したサービスプリンシパルを追加し、共同作成者に変更した上で追加を選択します。
Create lakehouse
作成したワークスペースにて、+ 新しい項目を選択します。

レイクタウンを選択します。

任意の名前(例:Lakehouse_Fivetran)を入力し、作成を選択します。

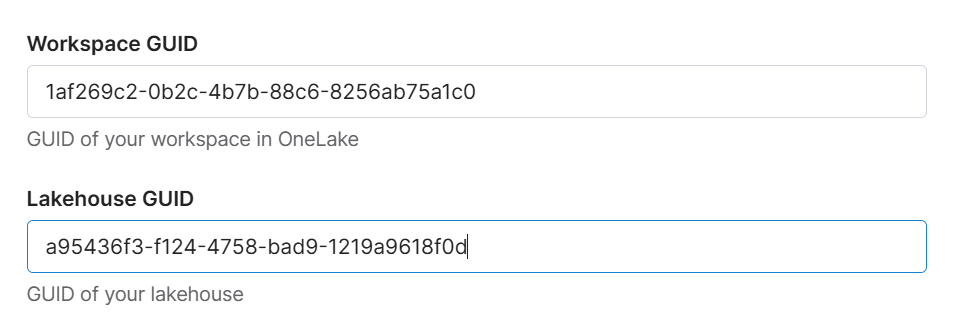
ワークスペースの URL から Workspace GUID と Lakehouse GUID を控えます。URL の groups の後の値が Workspace GUID であり、lakehouses の後の値が Lakehouse GUID です。

Complete Fivetran configuration
Fivetran にてDestinations -> Add Destinationを選択します。

OneLakeのSelectを選択します。

任意の名前(例:onelake_01)を入力し、Addを選択します。

Destination のセットアップ画面が表示されることを確認します。

Workspace GUID と Lakehouse GUID を入力します。
サービスプリンシパルに関する情報を入力します。

Save & Testを選択します。

Setup test
検証が正常終了することを確認します。

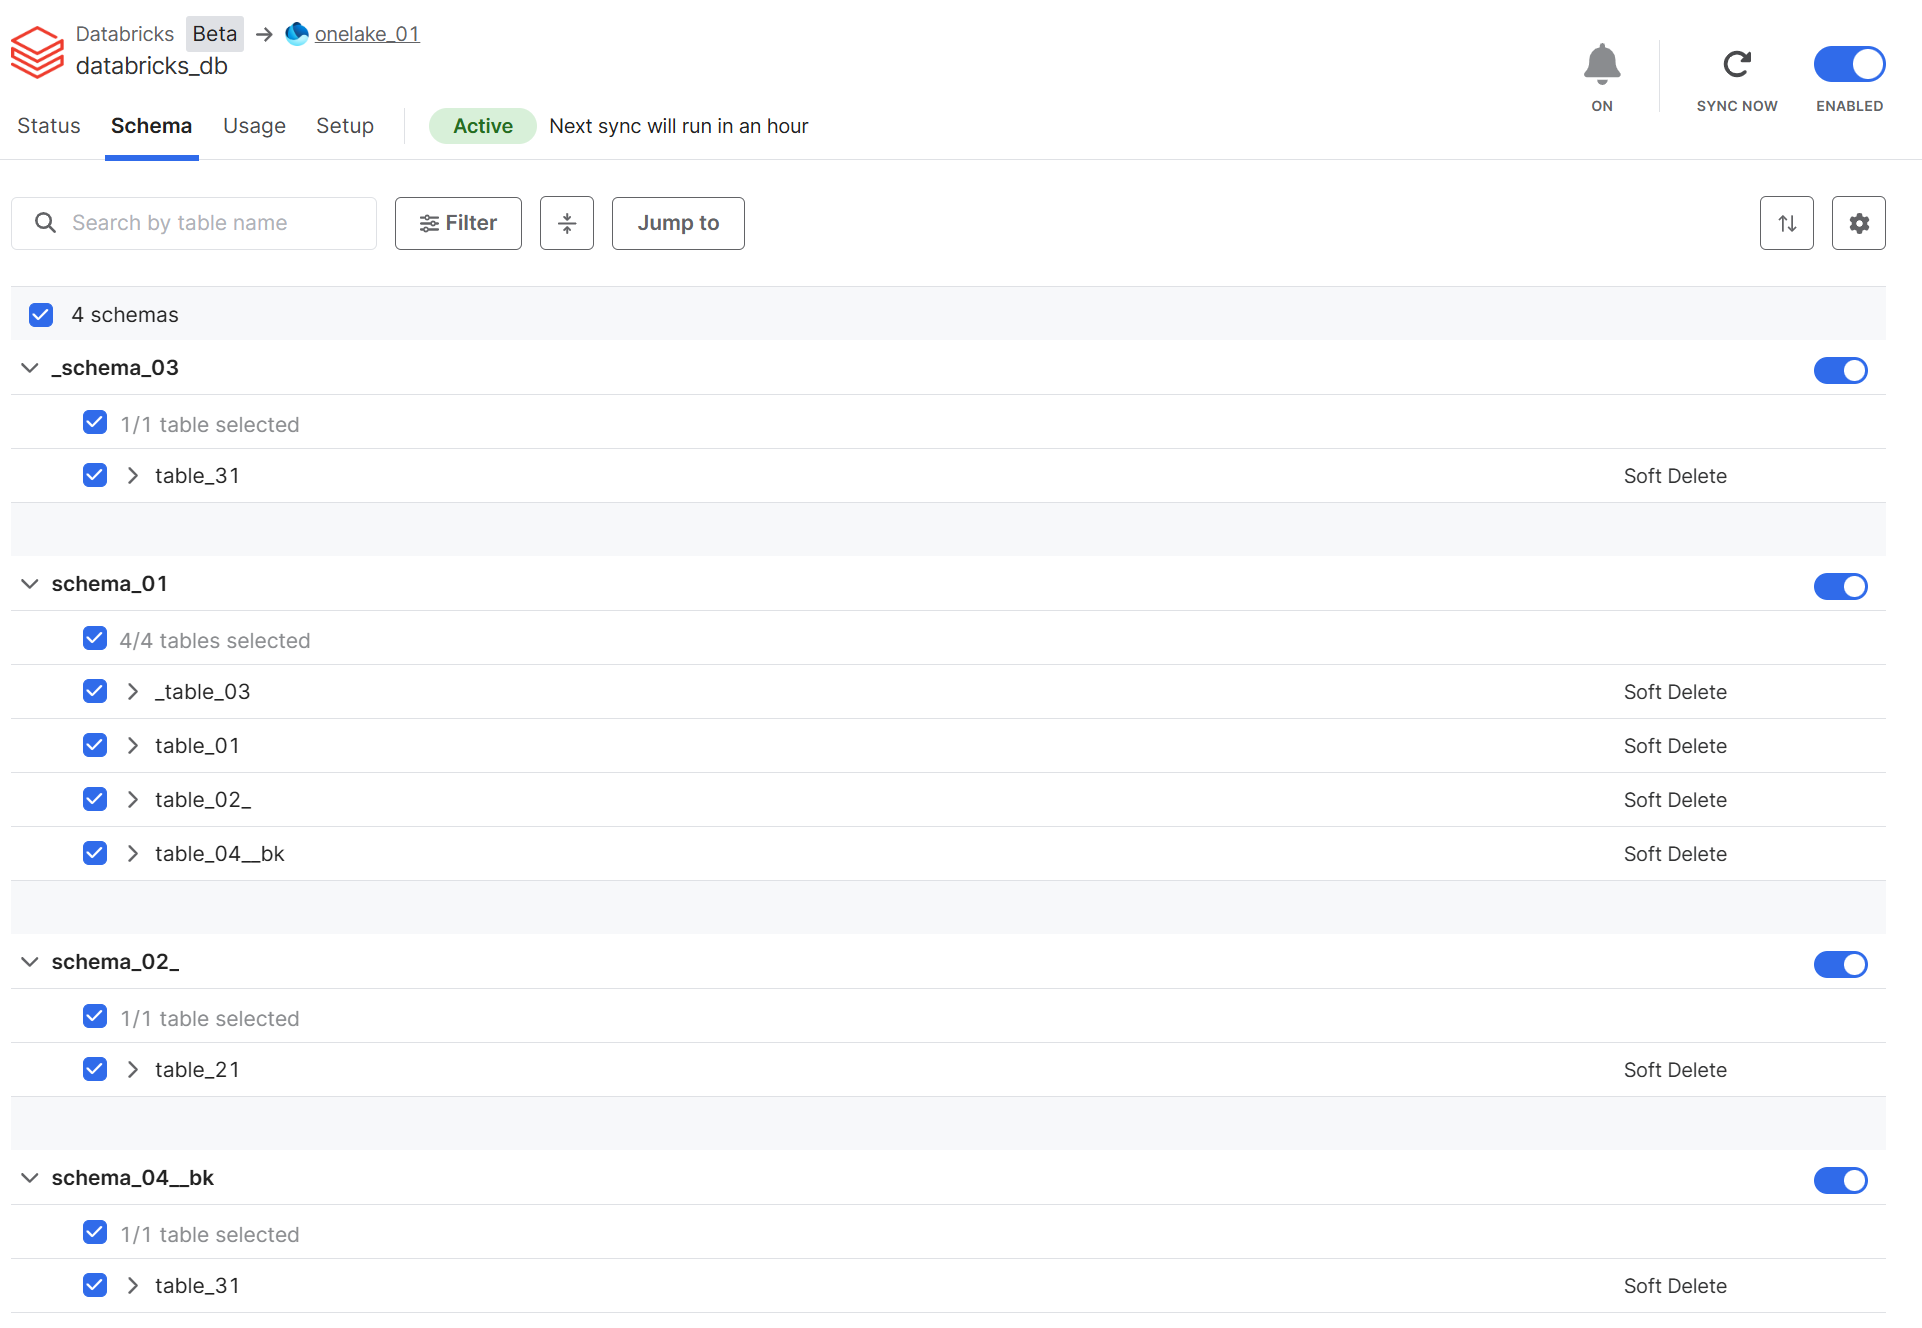
データの同期
Fivetran にてデータ同期の実施
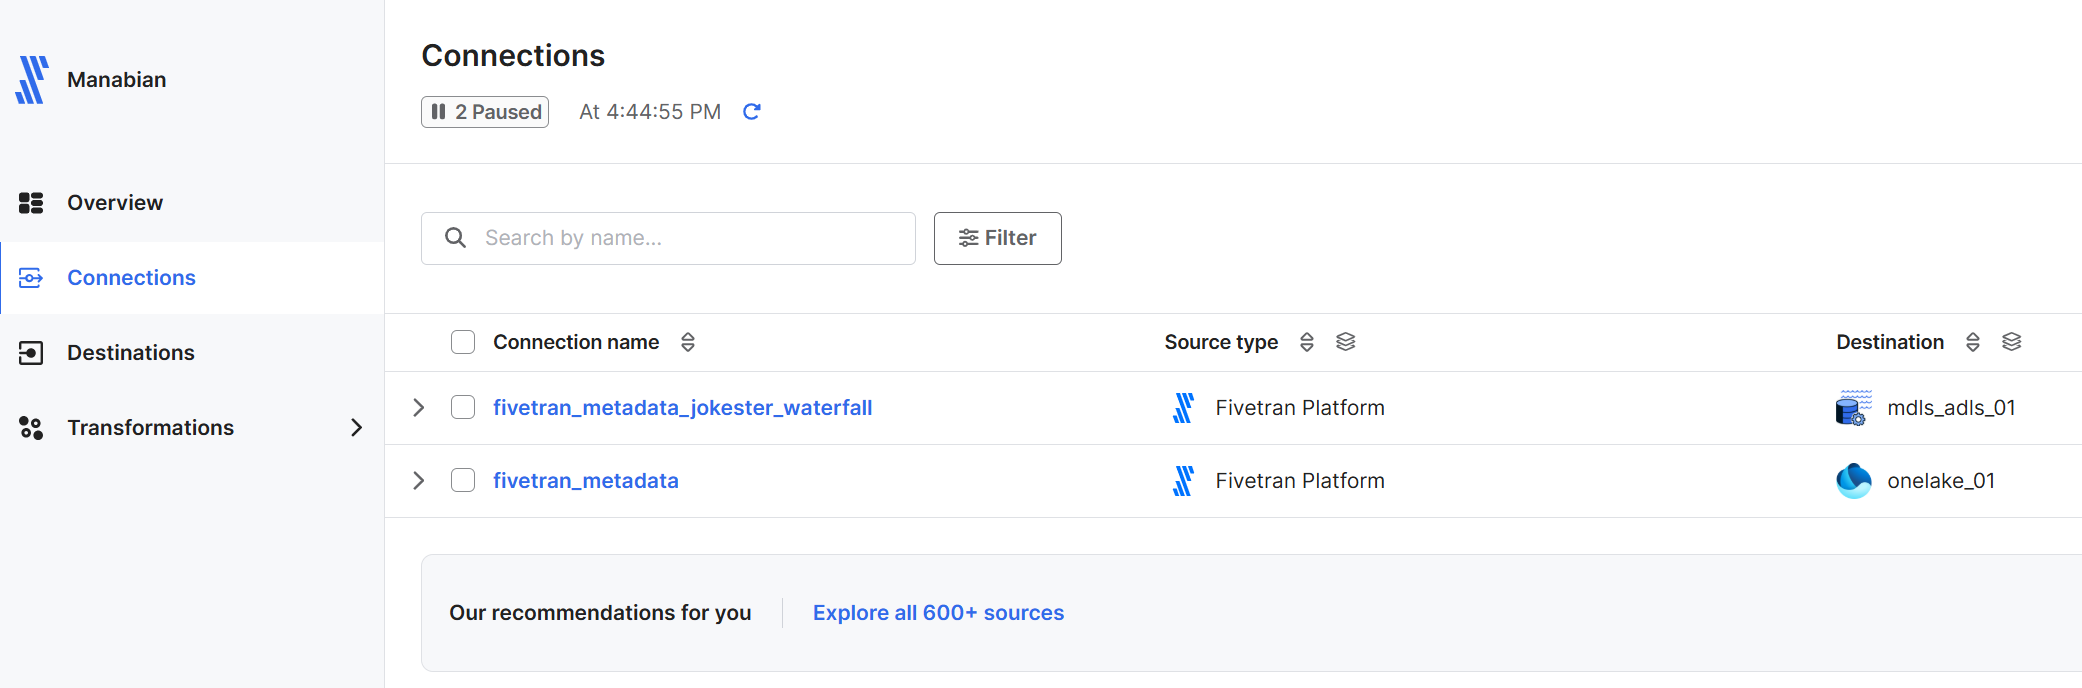
Connection -> 作成した Destinon が利用されているコネクションを選択します。
Start Initial Syncを選択します。

同期が完了することを確認します。

Microsoft Fabric にてデータを確認
データが同期されていることを確認します。
