0
1

Delete article

Deleted articles cannot be recovered.

Draft of this article would be also deleted.

Are you sure you want to delete this article?

Cloudflare R2 におけるバケット作成と認証情報取得の基本的な手順

0
Posted at

概要

本稿では、Cloudflare R2 でバケットを作成し、作成したバケットを操作可能な認証情報(アクセス キー ID / シークレット アクセス キー / エンドポイント URL)を取得するまでの手順を整理します。前提として、Cloudflare のアカウント作成および支払い情報の登録が完了しているものとします。

手順

バケットの作成

Cloudflare のダッシュボードで対象アカウントを選択したうえで、ストレージとデータベース -> R2 オブジェクト ストレージ -> 概要 を選択します。
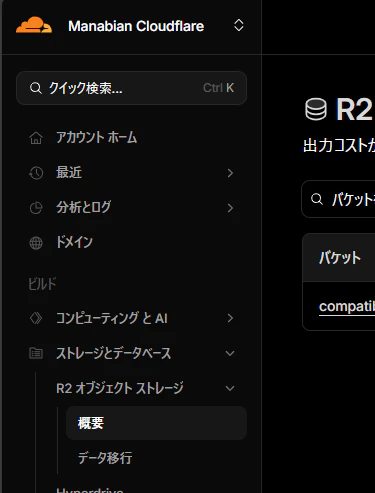
image.png

画面右上の + バケット作成 を選択します。

image.png

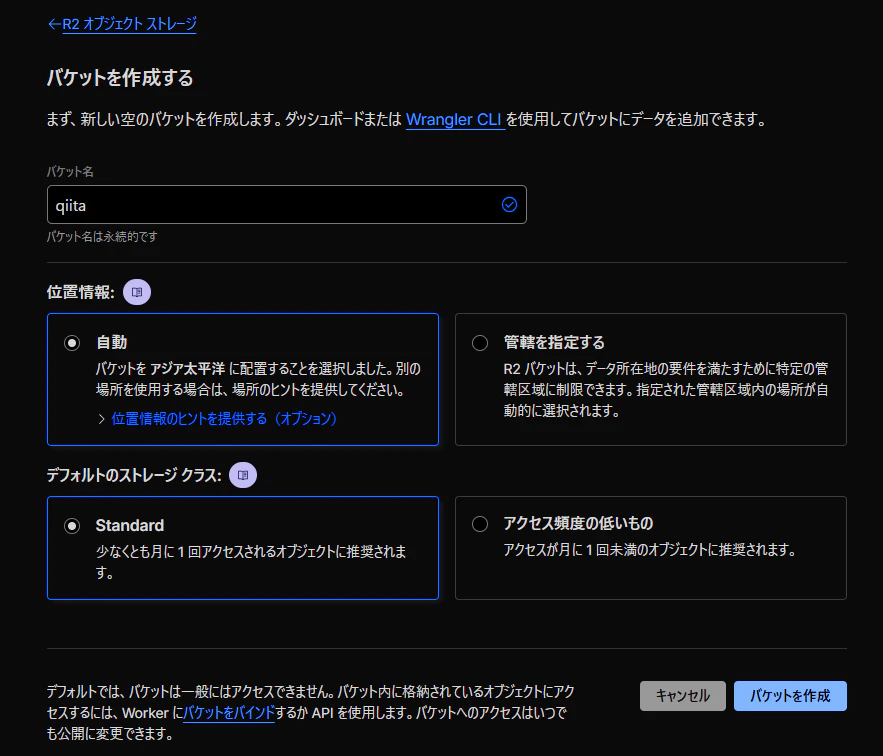
バケット名 などの必要事項を入力し、バケットを作成 を選択します。

image.png

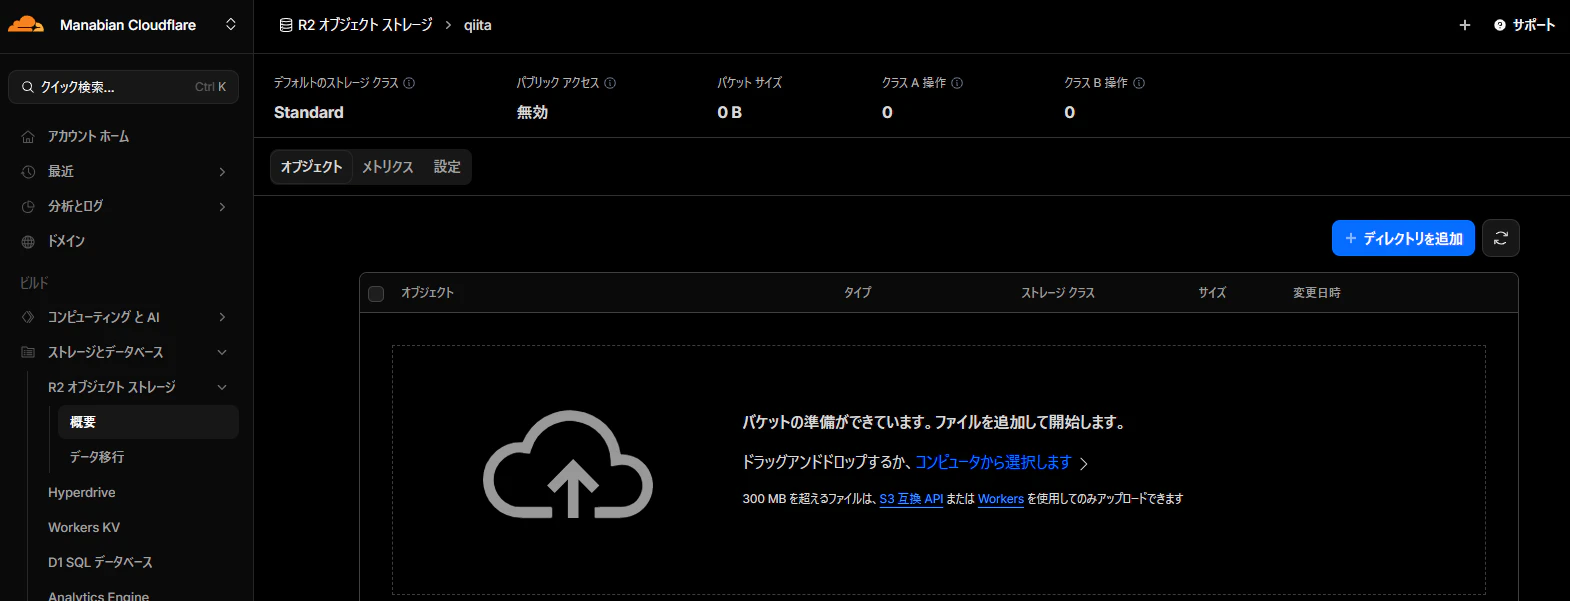
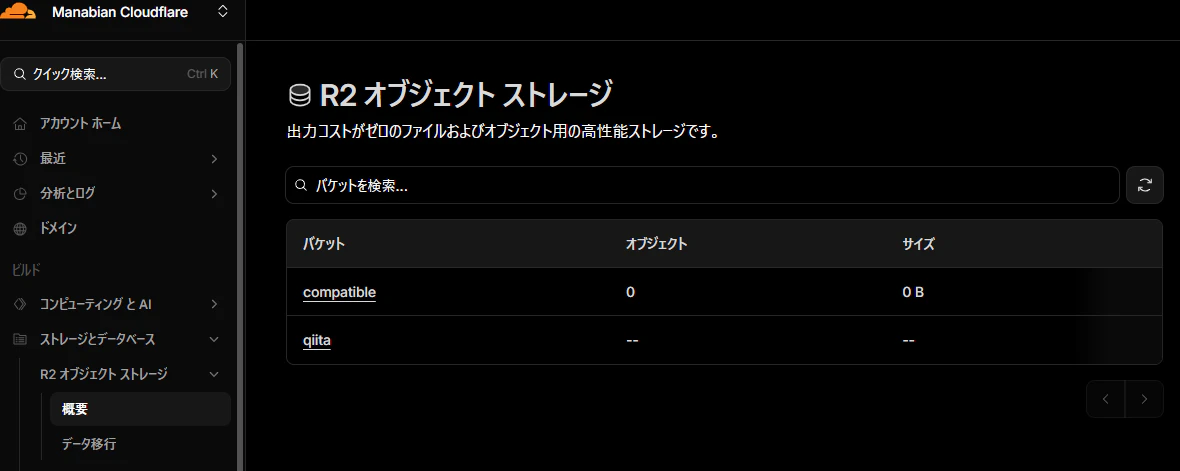
作成したバケットが一覧に表示されることを確認します。

image.png

image.png

認証情報の取得

Cloudflare のダッシュボードで対象アカウントを選択したうえで、ストレージとデータベース -> R2 オブジェクト ストレージ -> 概要 を選択します。続いて、画面中央右側にある Manage を選択します。

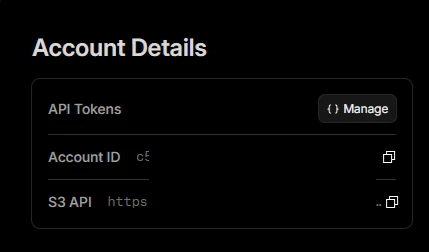
image.png

image.png

Account API トークンを作成する を選択します。

image.png

トークン名などの必要事項を設定し、Account API トークンを作成する を選択します。
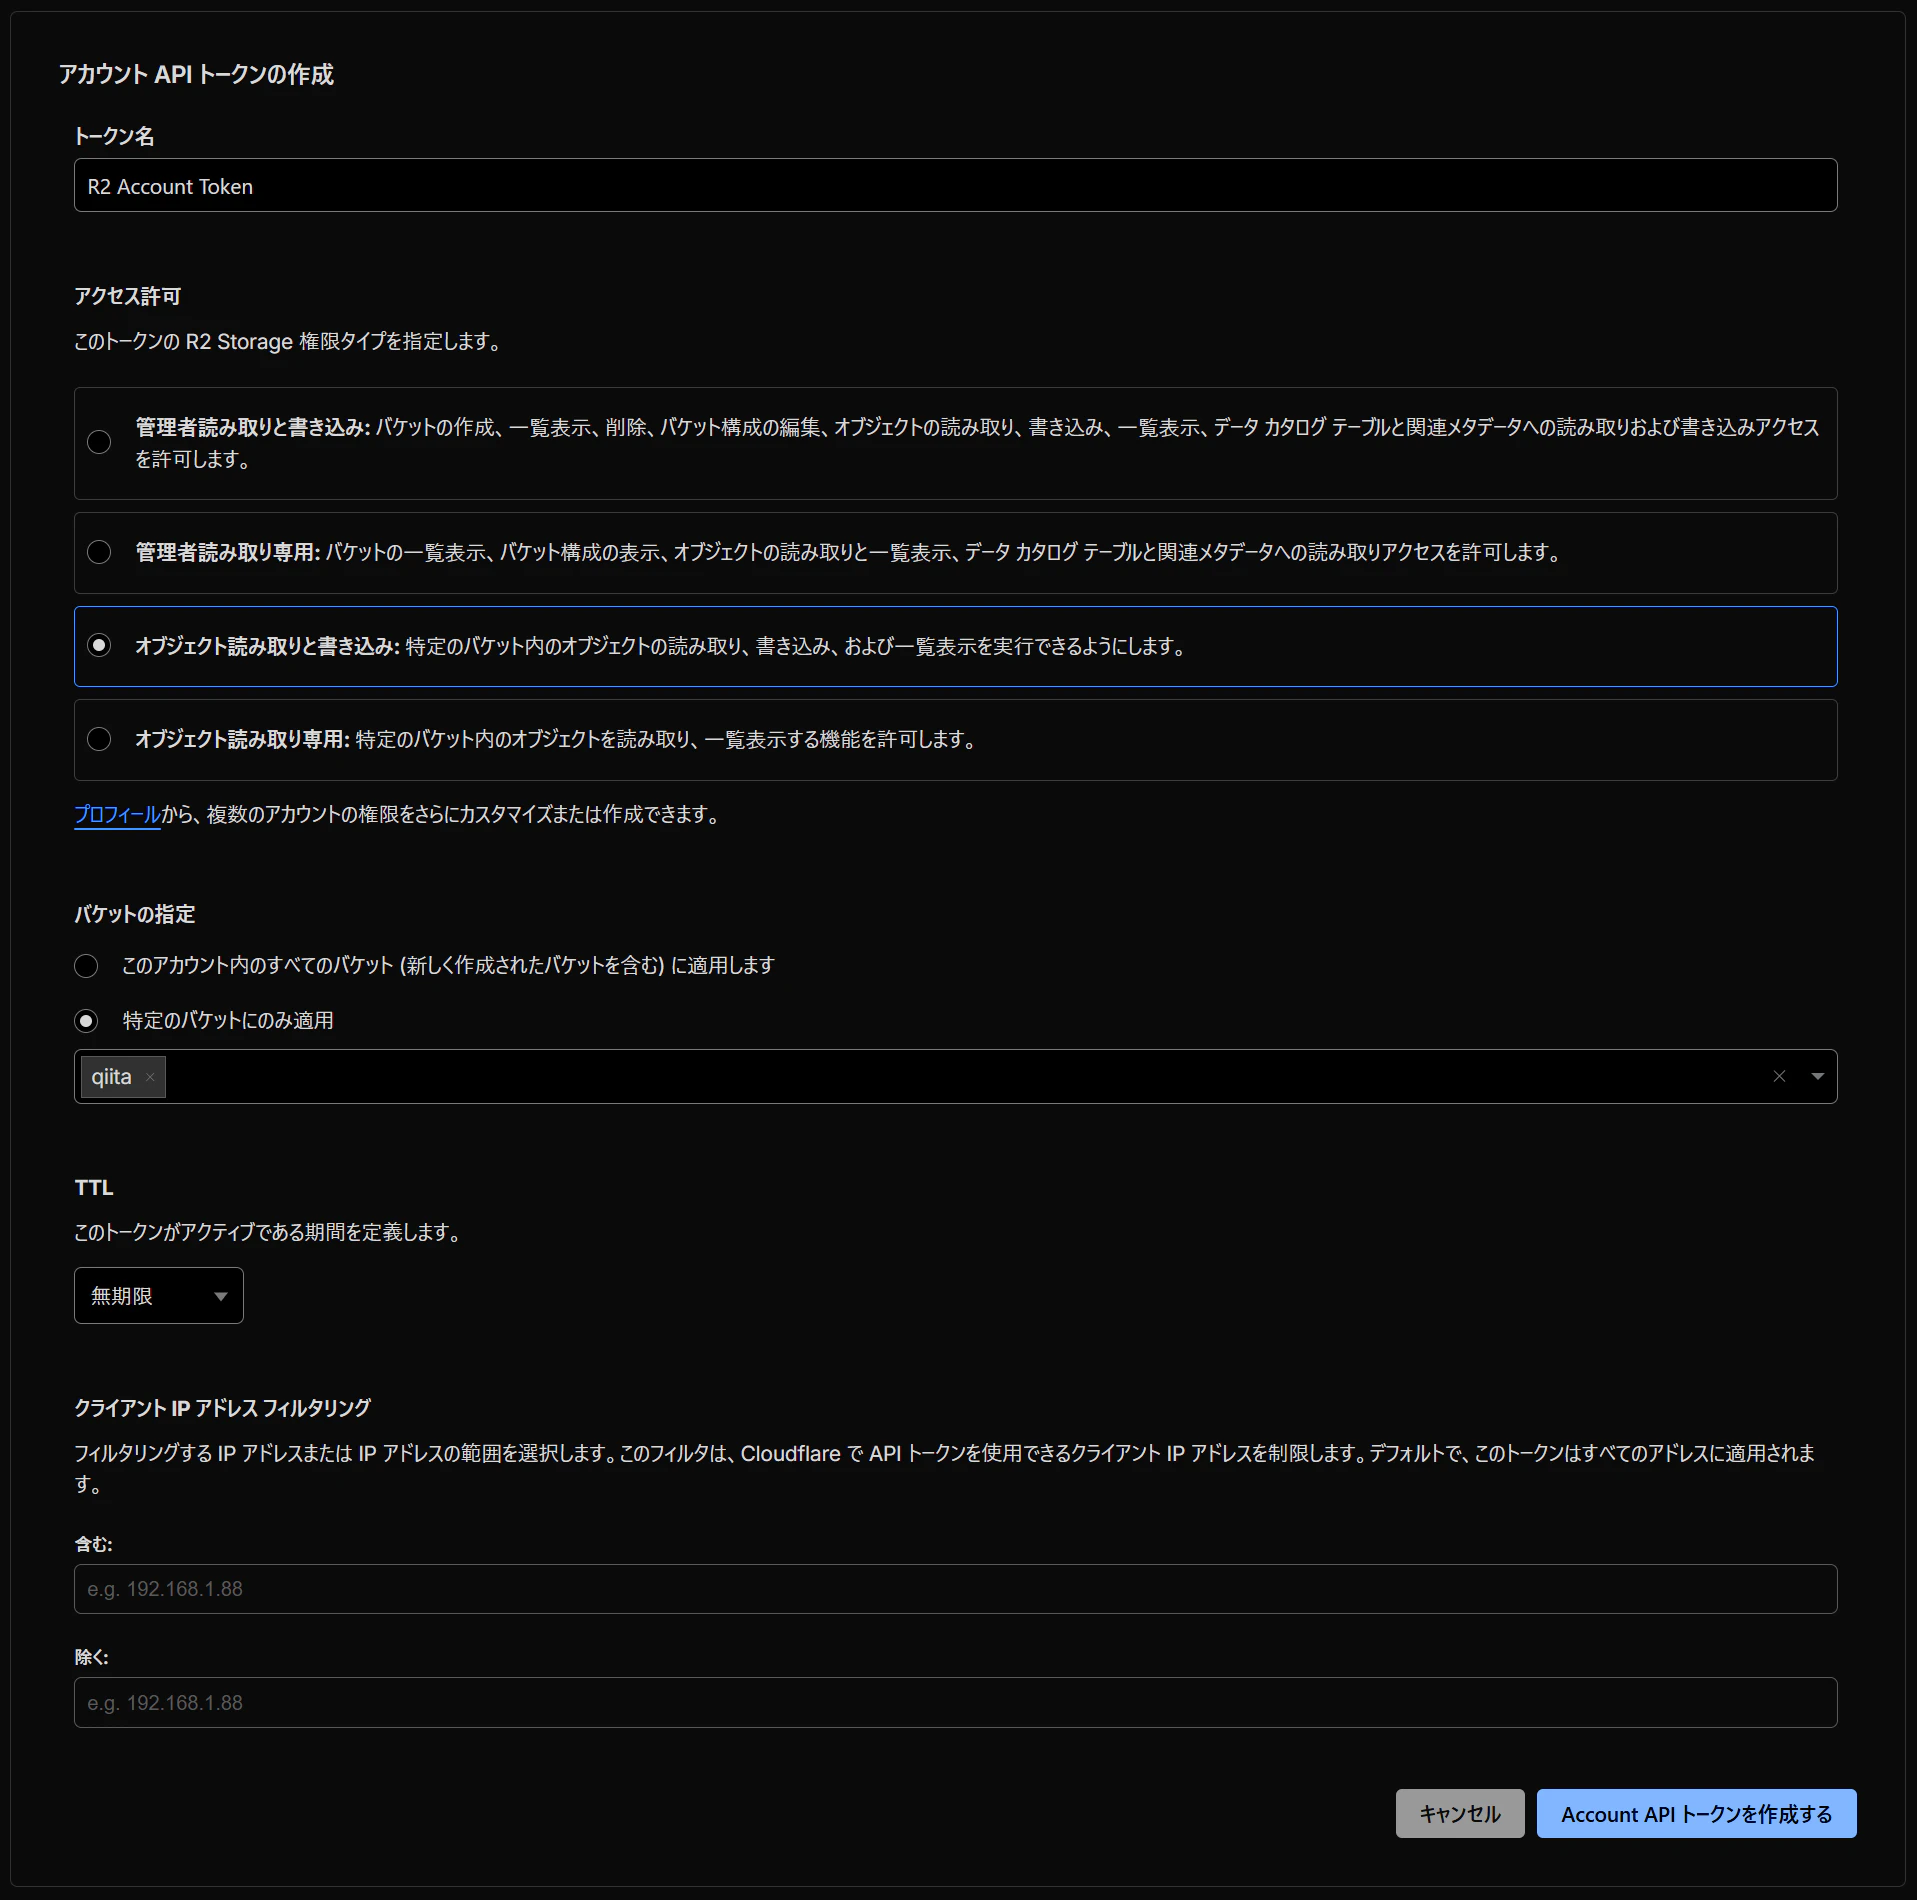
image.png

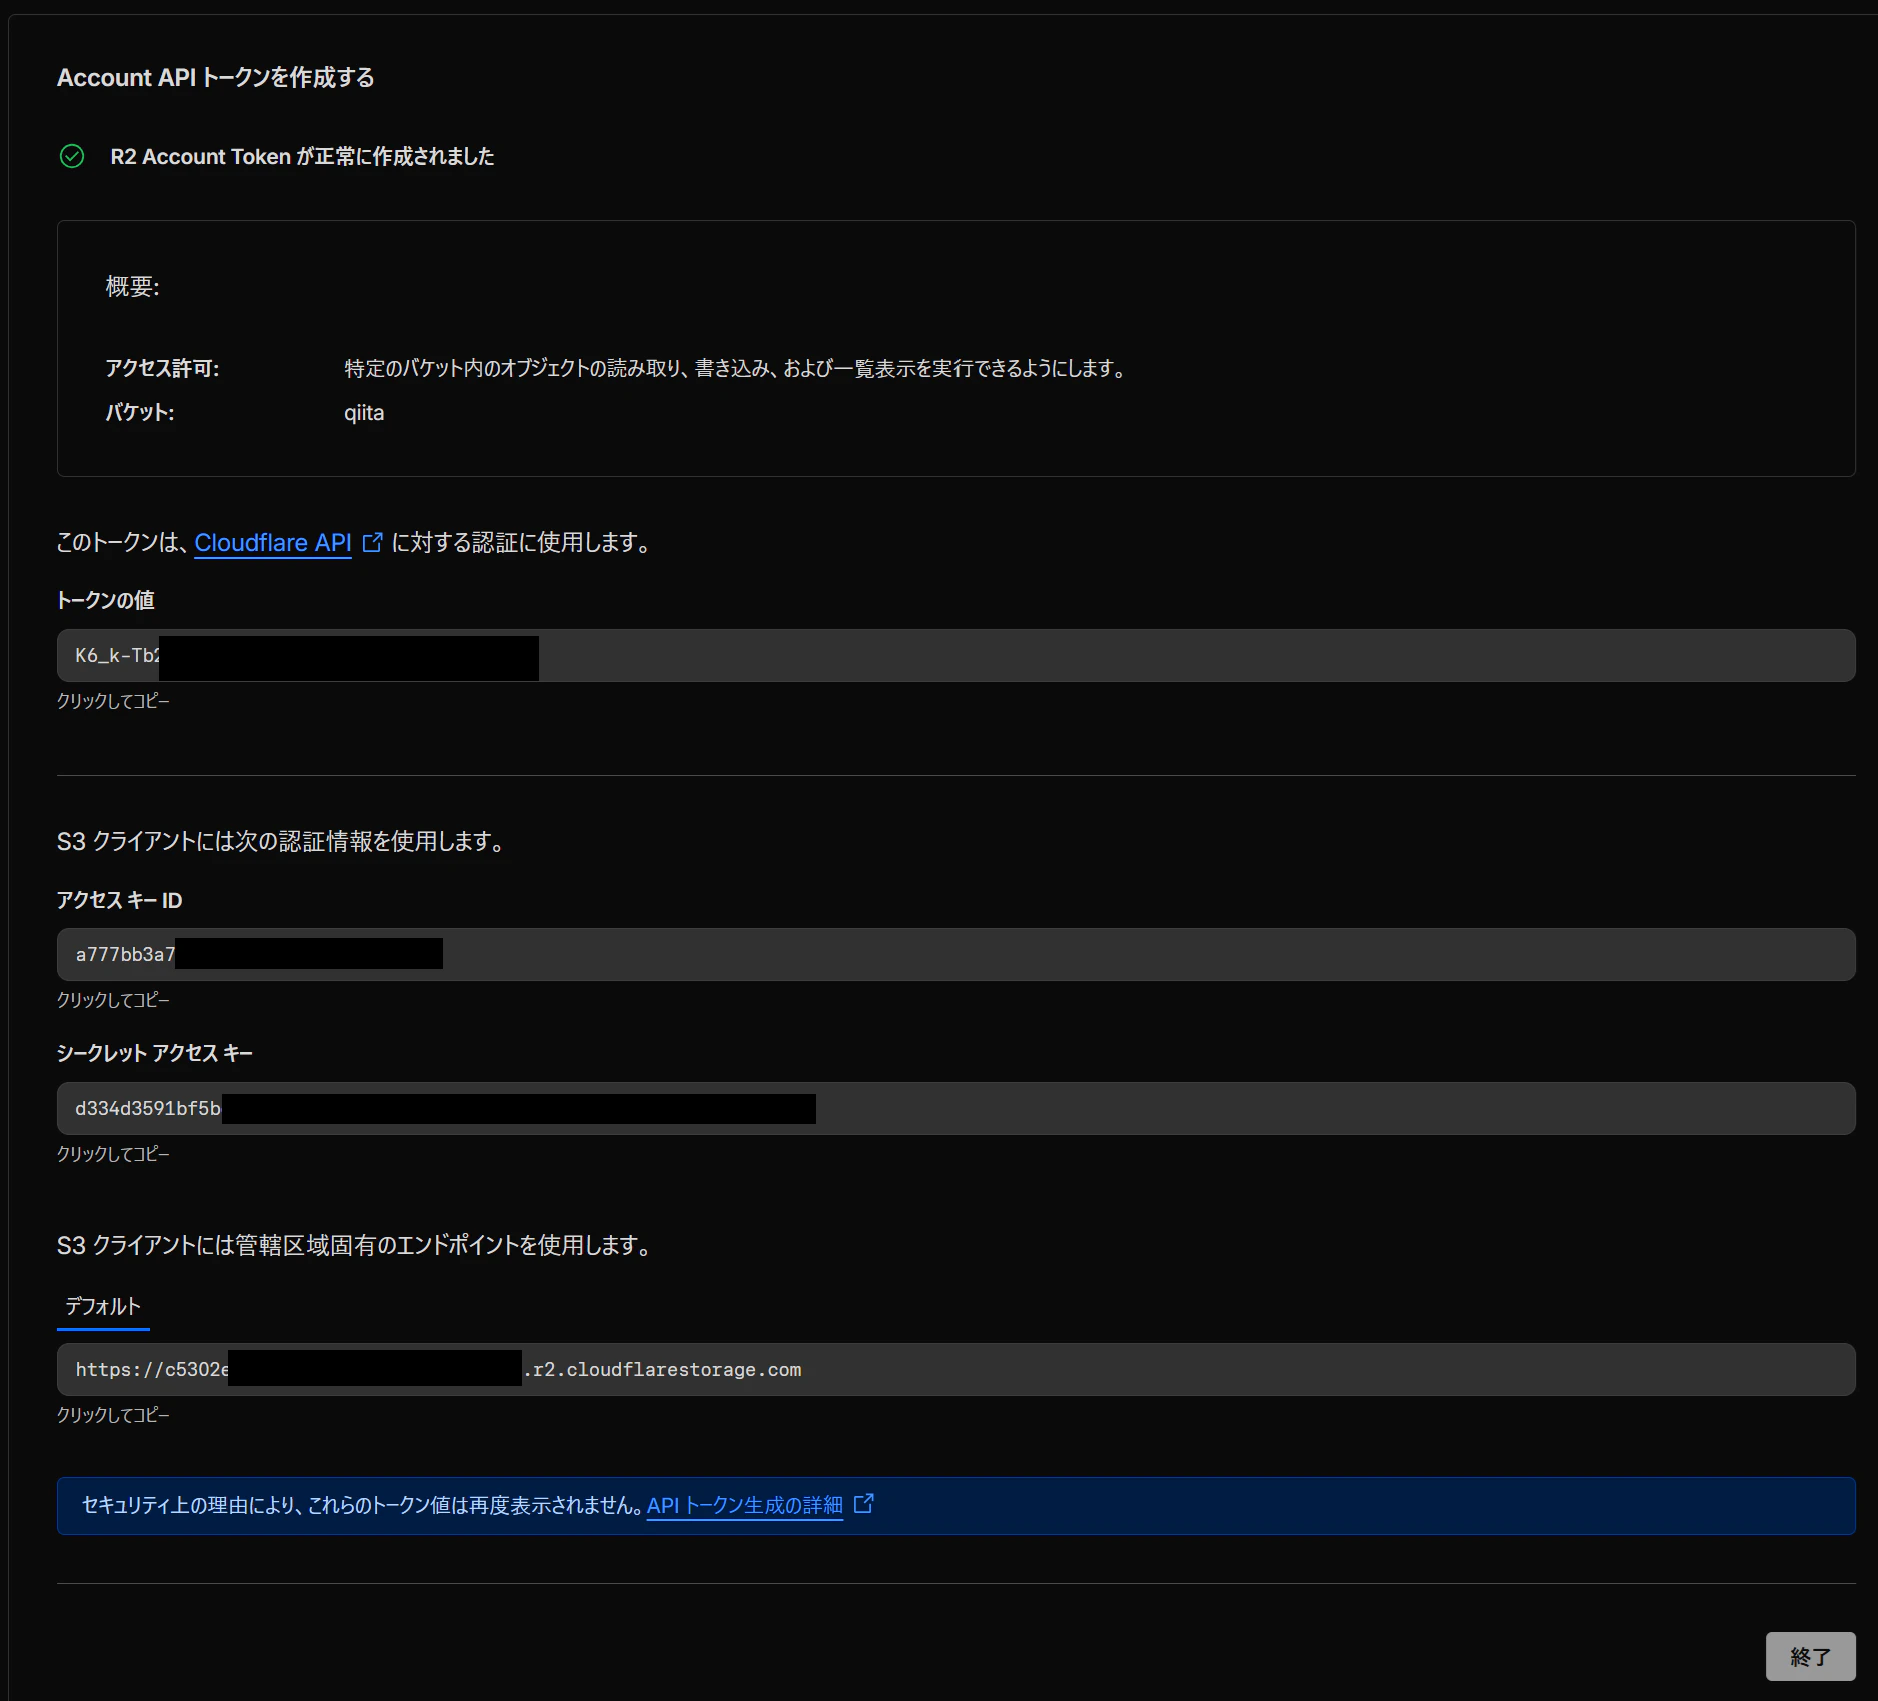
発行後に表示される アクセス キー IDシークレット アクセス キー、およびエンドポイントの URL を控えます。

image.png

0
1
0

Register as a new user and use Qiita more conveniently

  1. You get articles that match your needs
  2. You can efficiently read back useful information
  3. You can use dark theme
What you can do with signing up
0
1

Delete article

Deleted articles cannot be recovered.

Draft of this article would be also deleted.

Are you sure you want to delete this article?