はじめに
Chrome ExtensionにはGoogle Analyticsを設置することができますが、Google Chrome Extension公式チュートリアルには旧バージョンのGoogle Analyticsの設置方法のように見受けられたので、UniversalAnalyticsの場合の設置方法を調べてみました!
やり方
(全部で15分~20分ぐらい)
1. Google Analyticsのプロパティをつくります
2. トラッキングコードを入手します
3. トラッキングコードを修正して設置します
4. manifest.jsonにcontent_security_policyを追加します
5. デベロッパーダッシュボードでUAのIDを設定します
1. Google Analyticsのプロパティをつくります
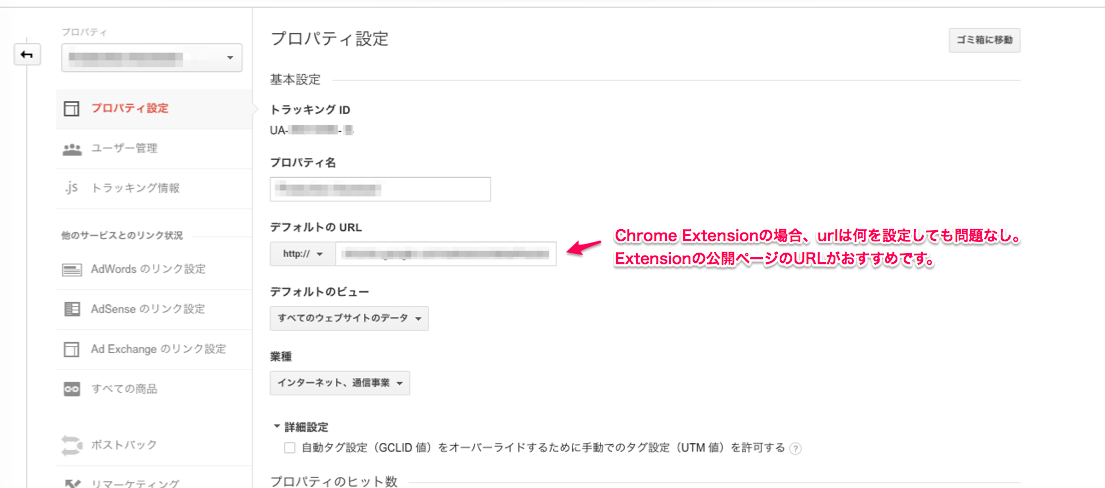
Google AnalyticsでChrome Extension用のプロパティを作ります。
Chrome Extensionの場合、URLが chrome-extension:// という特殊なURLになりますが、URLを入力するところは何を入力しても構いません。
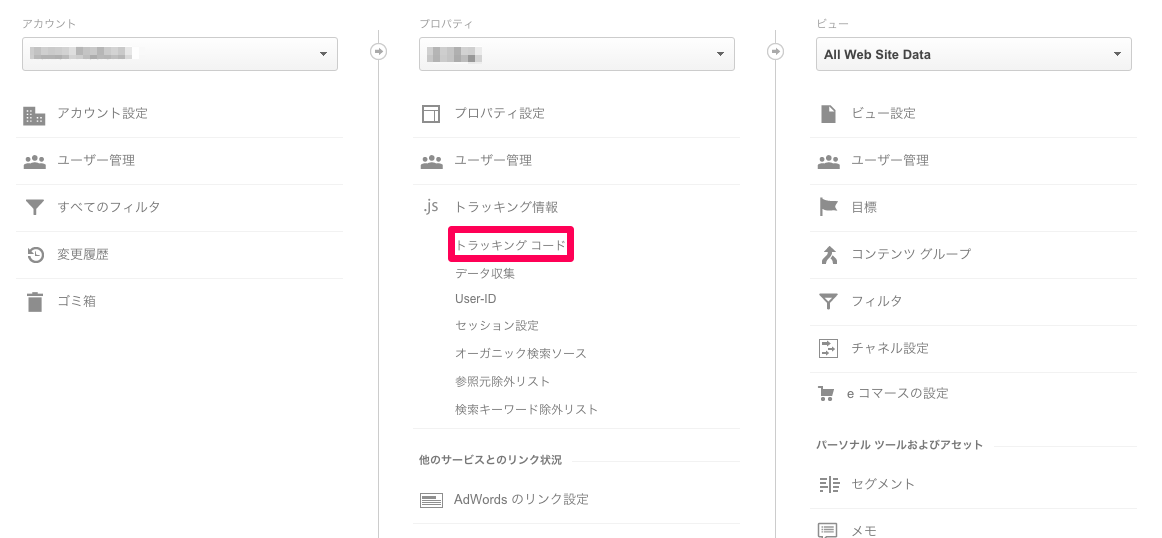
2. トラッキングコードを入手します
GAのトラッキングコードを入手します。
UA版の場合、ga.jsではなくanalytics.jsになっています。
<script>
  (function(i,s,o,g,r,a,m){i['GoogleAnalyticsObject']=r;i[r]=i[r]||function(){
  (i[r].q=i[r].q||[]).push(arguments)},i[r].l=1*new Date();a=s.createElement(o),
  m=s.getElementsByTagName(o)[0];a.async=1;a.src=g;m.parentNode.insertBefore(a,m)
  })(window,document,'script','//www.google-analytics.com/analytics.js','ga');

  ga('create', 'UA-xxxxxx-xx', 'auto');
  ga('send', 'pageview');

</script>
なお、ここから入手できます。
3. トラッキングコードを修正して設置します
修正サンプルです。
<script>
  (function(i,s,o,g,r,a,m){i['GoogleAnalyticsObject']=r;i[r]=i[r]||function(){
  (i[r].q=i[r].q||[]).push(arguments)},i[r].l=1*new Date();a=s.createElement(o),
  m=s.getElementsByTagName(o)[0];a.async=1;a.src=g;m.parentNode.insertBefore(a,m)
  })(window,document,'script','https://www.google-analytics.com/analytics.js','ga'); // 1.httpsをつけます

  ga('create', 'UA-xxxxxx-xx', 'auto');
  ga('set', 'checkProtocolTask', null); //2.httpやhttpsのprotocolチェックを回避します
  ga('send', 'pageview', '/popup.html'); //3.GA内で表示したいように設定します

</script>
3-1. httpsをつける
(window,document,'script','https://www.google-analytics.com/analytics.js','ga');
protocolがchrome-extension://でパスを参照できないため、httpsをつけます。
3-2. checkProtocolTaskをnullでセットします
ga('set', 'checkProtocolTask', null);
ページのプロトコルが http でも https でもない場合に、リクエストを中止する
checkProtocolTaskという機構があります。
これをnullにすることで、chrome-extension://配下でも
PVを送ることができるようにします。
3-3. sendメソッドを調整する(オプション)
ga('send', 'pageview', '/popup.html');
送るログの内容を設定するには、sendメソッドを調整する必要があります。
上記のサンプルでは popup.htmlのみでPageViewを送るため、上記の設定コードを入れています。
もし、pageとtitleをセットで送りたい場合は
ga('send', 'pageview', { page: '/about', title: 'About Us' });
といった具合になります。
また、何かをクリックした場合にeventのログを送りたい場合は
function addListener(element, type, callback) {
 if (element.addEventListener) element.addEventListener(type, callback);
 else if (element.attachEvent) element.attachEvent('on' + type, callback);
}

var downloadLink = document.getElementById('button');
addListener(downloadLink, 'click', function() {
  ga('send', 'event', 'button', 'click', 'nav-buttons');
});
といった設定をすることによってイベントログを送ることができるようになります。
このあたりは随時やりたいことに沿って調整する形になります。
3-4.トラッキングコードを設置します
こちらをChrome Extensionのscriptに設置します。
popup.htmlのhtmlファイル内で<script></script>は記述することができません。
外部のscript内にトラッキングコードを設置して読み込みます。
4. manifest.jsonにcontent_security_policyを追加します
Chrome Extensionの定義ファイルであるmanifest.jsonに以下を追加し、Chrome Extension内でのGAのscript実行を許可します。
{
  ...,
  "content_security_policy": "script-src 'self' https://ssl.google-analytics.com; object-src 'self'",
  ...
}
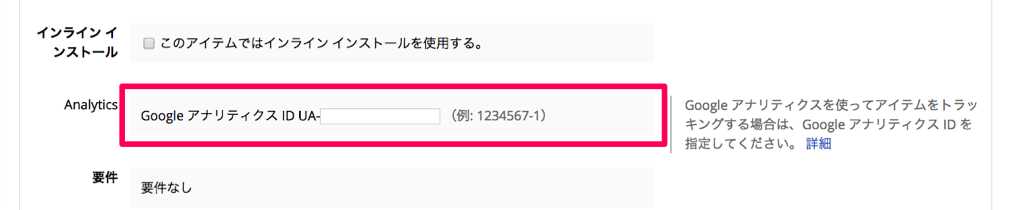
5. デベロッパーダッシュボードでUAのIDを設定します
最後に、Chrome Extensionを公開するChrome ExtensionのデベロッパーダッシュボードでGAのPropertyのIDを設定します。
確認したところ、この設定はChrome Extension内でGAが作動するように調整する機構ではなく、
インストールページのGAトラッキングを可能にするための設定のようです。
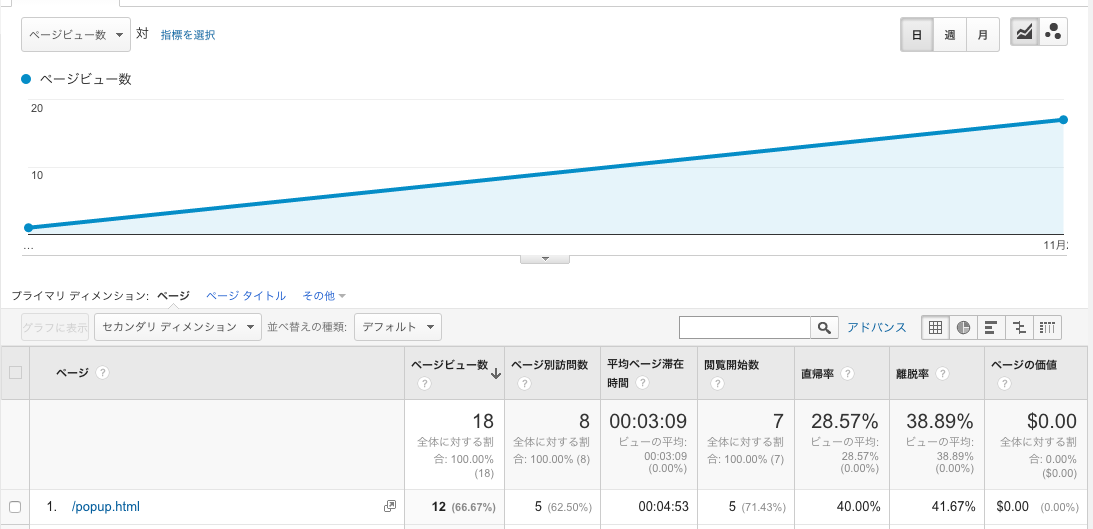
6. データが確認できるようになります
このようにデータが確認できるようになります。
関連リンク
- Chrome Extension チュートリアル
- Google Analytics (UA) チュートリアル