はじめに
Watson Openscaleでいろいろ検証する場合に、Openscale用の内部DBにアクセスすることはほぼ必須です。
石田さんの記事小ネタ: Watson OpenScaleのInternalDBの中身を見るを参考に、自分用の要点メモを作りました。
必要情報の入手
最終的にPythonのAPI呼出しで情報を入手するのですが、そのためには次の3つの情報が必要です。
- platform_apikey
- data_mart_id
- subscription_id
順番にどうやって入手するか説明します。
platform_apikey
IBM CloudのIAMの機能で作成します。
-> 「Manage」->「Access(IAM)」
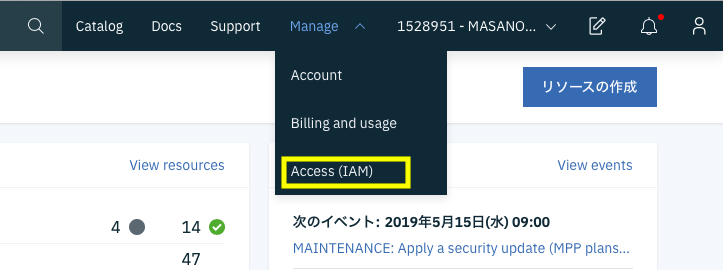
「IBM Cloud APIキー」->「IBM Cloud APIキーの作成」
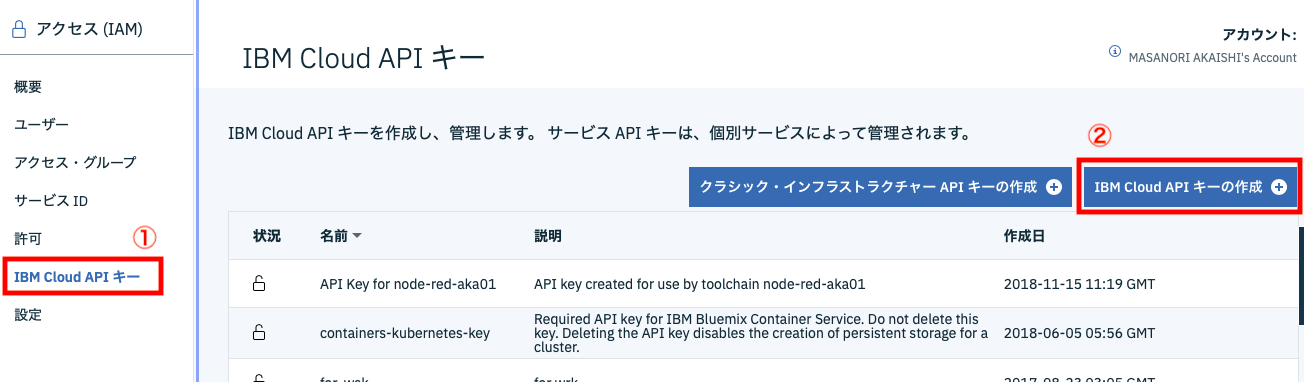
作成したキーは、クリップボードにコピーし、テキストエディタなどに保存しておきます。
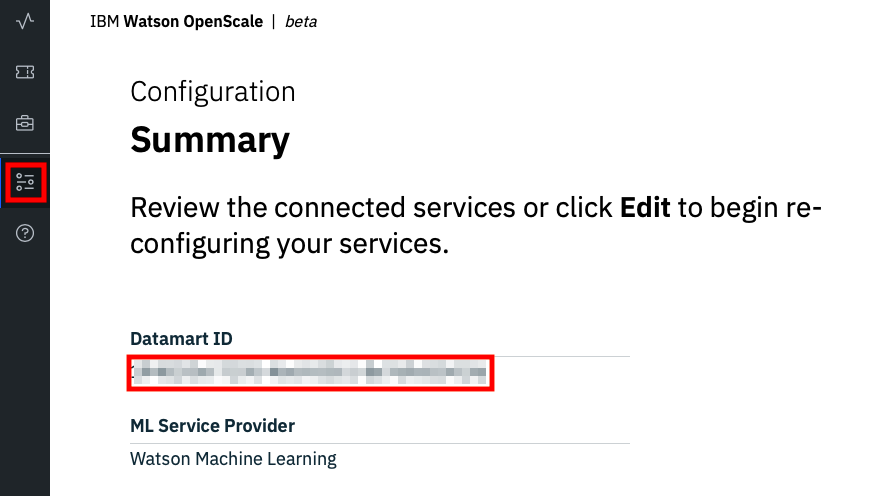
data_mart_id
OpenScaleのUIで、左の上から4つ目のアイコンをクリックすると、「Configuration Summary」の画面が表示されます。この中にこの項目があります。
subscription_id
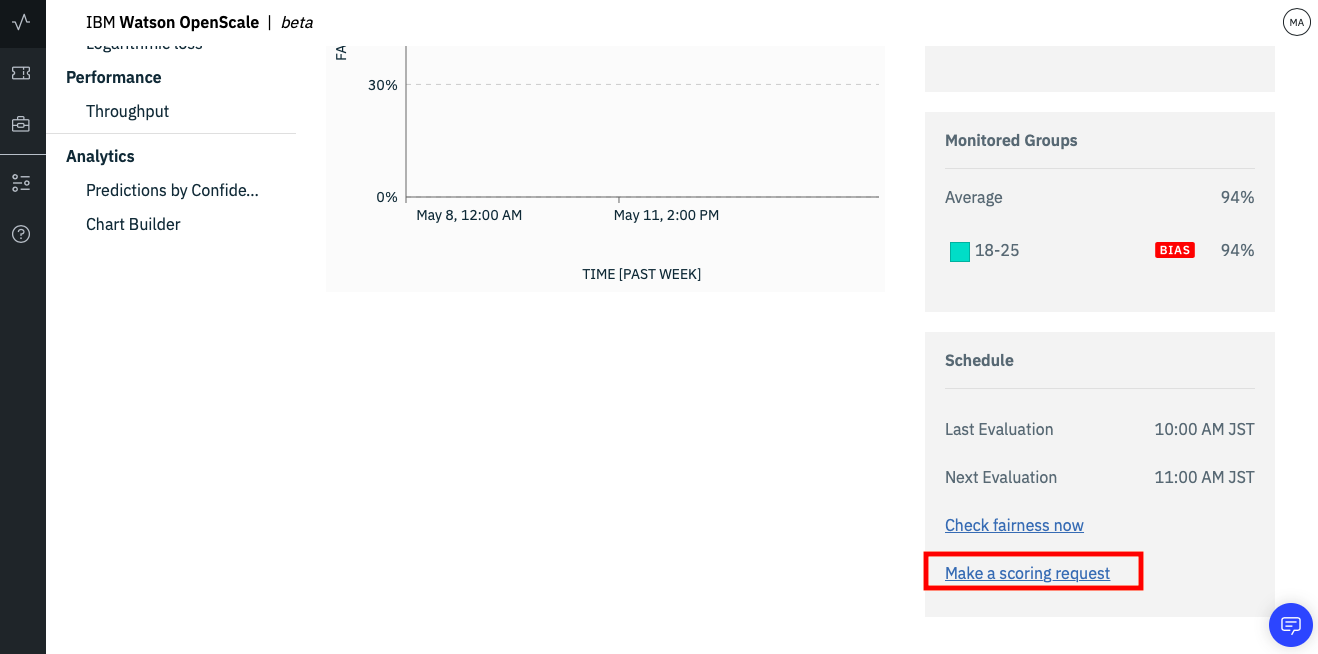
OpenScaleのモデル別ダッシュボードの画面右下の「Make a scoring request」のリンクをクリック
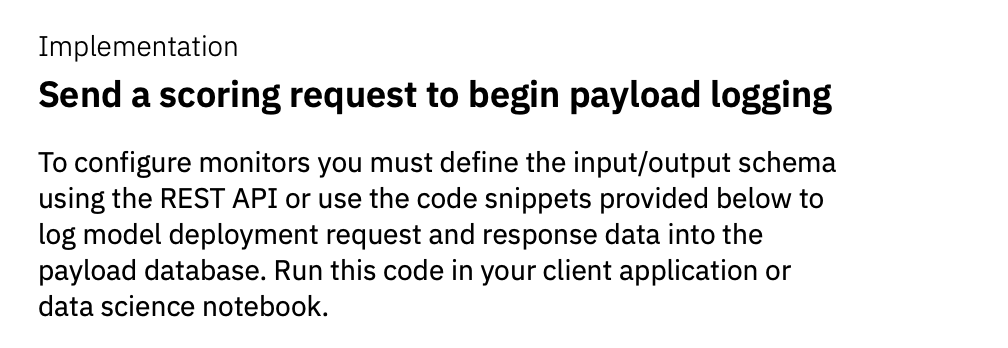
次の画面が出てきたら、下にスクロールして、snippetのコードを「show more」で詳細表示にします。
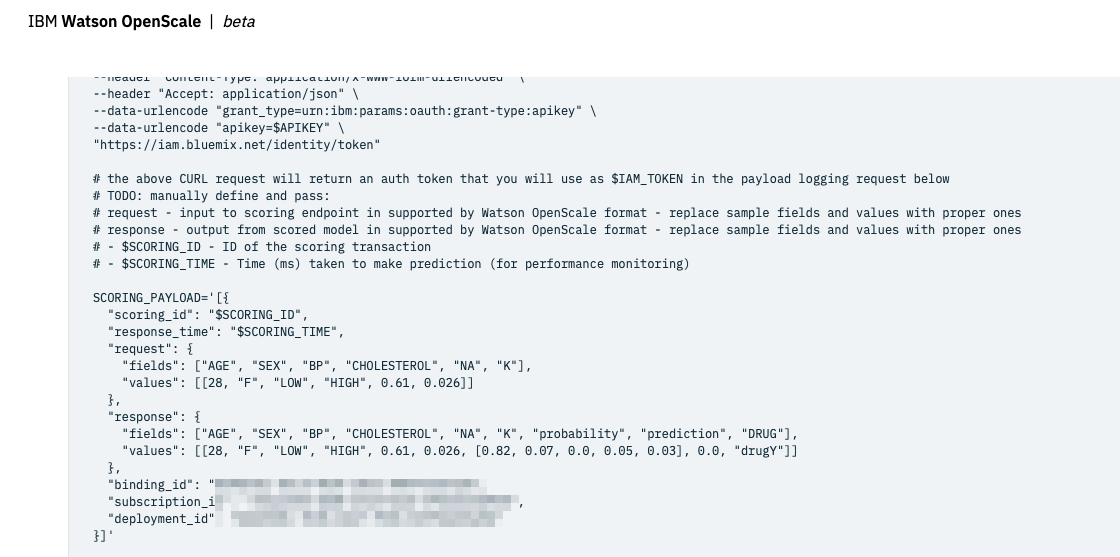
コードの中にsubscription_idの値も含まれています。
APIの呼出し
これで準備は整いました。石田さんが紹介しているPython CodeをWatson StudioのJupyter Notebookから実行します。
#  Watson OpenScaleのinternalDBの接続情報の入手
import requests, json

# IAM Tokenの入手
def getToken(apikey):
    url = 'https://iam.bluemix.net/identity/token'
    header = {'Content-Type': 'application/x-www-form-urlencoded',
        'Accept': 'application/json'}
    payload = {'grant_type': 'urn:ibm:params:oauth:grant-type:apikey',
        'apikey': apikey}
    response = requests.post(url, payload, headers=header).json()
    return response['access_token']


def getDBInfo():

    ##  CHANGE ME
    ##  platform_apikey ... IBM Cloudの 管理 - セキュリティ - プラットフォームAPIキー より作成
    ##  data_mart_id    ... AIOSの構成パネルより
    ##  subscription_id ... AIOSの構成パネルより
    aios_env ={
            "url": "https://api.aiopenscale.cloud.ibm.com",
            "platform_apikey": "xxxxx",
            "data_mart_id"   : "xxxxx",
            "subscription_id": "xxxxx"
    }

    aios_url = aios_env['url']+'/v1/data_marts/'+aios_env['data_mart_id']
    header = {'Content-Type': 'application/json',
        'Authorization': 'Bearer ' + getToken(aios_env['platform_apikey'])}
    payload = {'subscription_id': aios_env['subscription_id']}
    response = requests.get(aios_url, payload, headers=header).json()
    return response['database_configuration']['credentials']['uri']
    # 新しいインスタンスではこちらのレイアウトの場合も
    # return response['database_configuration']['credentials']['connection']['postgres']['composed'][0]

print(getDBInfo())
# --> postgres://admin:XXXXXXXXJKAYMKLJ@sl-us-south-1-portal.31.dblayer.com:65382/compose
最後のコメント文のような形で結果が返ってきますので、ここから下記の必要情報を抽出します。
user: admin
pass: xxxxx
host: xxxxx
port: xxxxx
database: compose
pgadmin4の導入
以下のコマンドで導入します。
$ brew cask install pgadmin4
接続の設定
導入が終わったら、「pgadmin 4」というプログラムがアプリケーションフォルダーにできているはずなので、これを起動します。
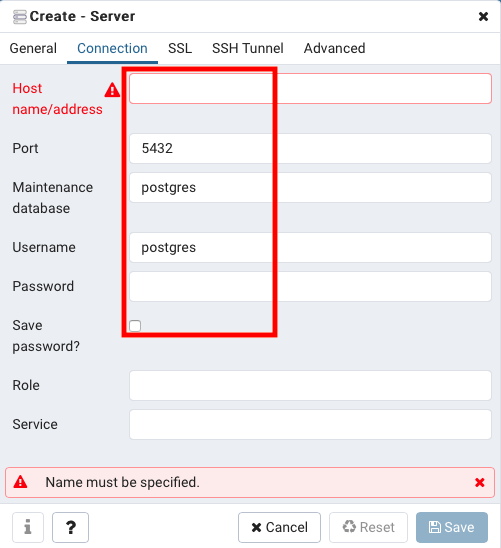
「Add New Server 」をクリック

Generalタブで名前を入力した後で、Connectionタブを表示し、赤枠の中を設定します。
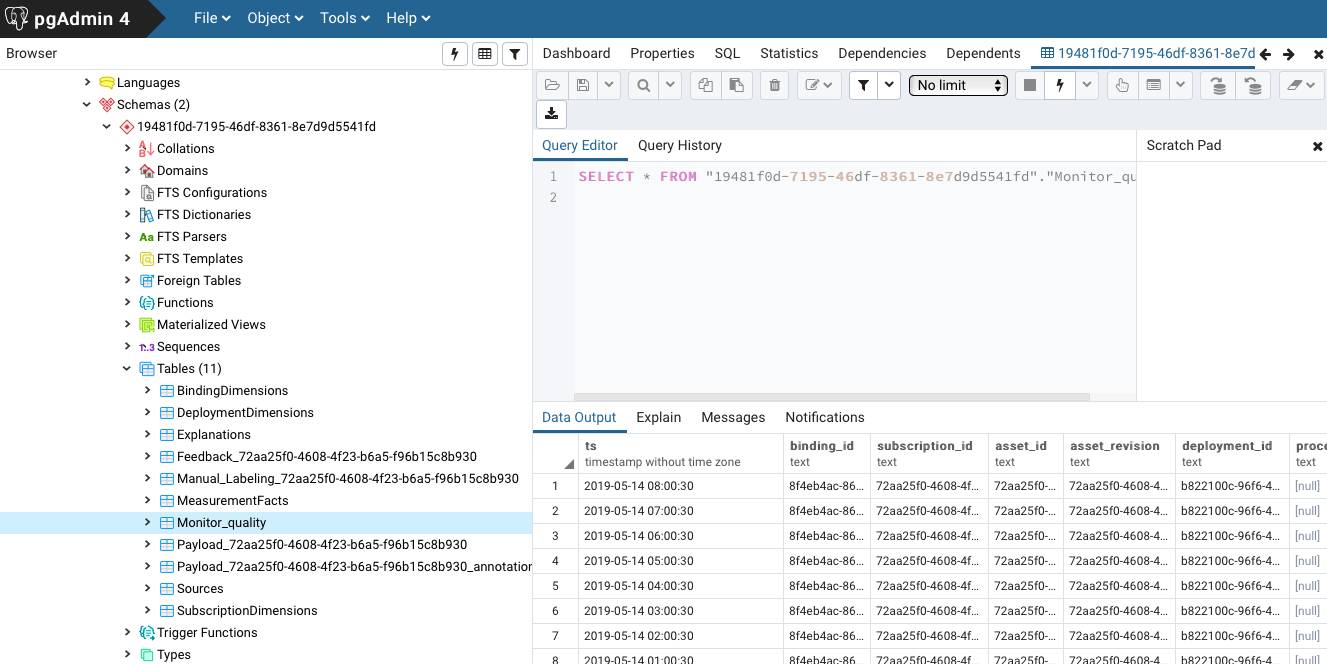
ツールの利用
直感的に使えるツールなので、使い方は省略します。うまくいくと、下記のようにどんなテーブルができているか、その中身がどうなっているかを確認できます。