概要
自分が管理しているMisskeyサーバーに毎朝天気予報を投稿するbotがあるのですが、それを最近Rustで書き直しました。
「Misskeyで」と言うと語弊があるかもしれませんが、Rustで書いたコードをAWS Lambdaにデプロイして、そこからMisskeyにノートを作成するという処理になっています。
以前書いた記事: https://qiita.com/maeda6uiui/items/5d0bf69966d74b8a9cf7
以前の記事で作成したコードは、GitHub ActionsのログからMisskeyとWeather APIのアクセストークンを流出させるという不祥事を起こしたため非公開になっています。
使用しているAPIなどは前回と大体同じなのですが、大きく異なる点として、botのコードをRustで書き直しています(これまで運用していたbotはPython)。
なんとなく「Rustを使ってみたいなー」程度のモチベーションでしたが...。
コードはGitHubで公開しています。
前回のような不祥事が起こらない限りはPublicにしておきます。
不祥事が起こらないことを祈っていてください。
https://github.com/maeda6uiui/misskey-weather-bot-2
コードの細かいところはGitHubのリポジトリを確認してもらうとして、この記事では自分が気になったところをメモ程度に残しておきます。
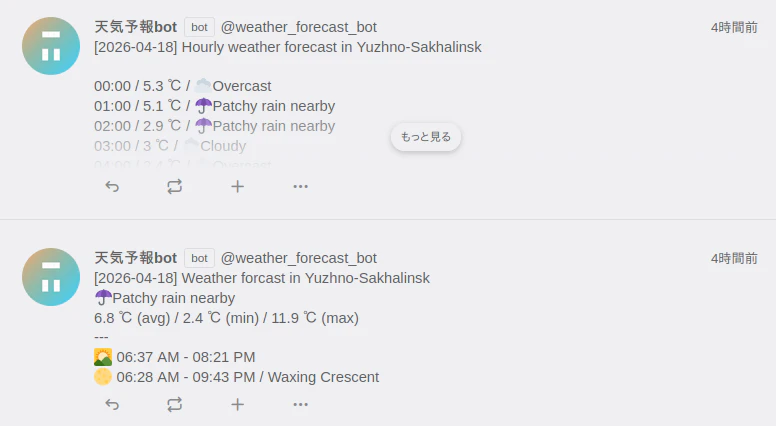
スクリーンショット
開発者の環境
OS: Linux Mint 22.3
Zorin OSからLinux Mintに乗り換えました。
Zorin OS 17から18への更新がなかなか利用可能にならなかったので、「Zorin OS 18をクリーンインストールするか」と思いましたが、せっかくクリーンインストールするなら別のdistroを試してみよう、ということで、有名どころのLinux Mintをインストールしてみました。
個人的にかなり使いやすくて気に入っています。
アプリ
Lambdaで動かすコードです。
コードはweather-botディレクトリに格納されています。
コードはいくつかのモジュールに分割されています。
| モジュール | 概要 |
|---|---|
| aws | AWSリソースを操作する |
| config | 設定値を管理する |
| emoji_converter | Weather APIの結果から対応する絵文字を取得する |
| misskey_client | Misskeyにノートを作成する |
| note_text_generator | Weather APIの結果からMisskeyに投稿するテキストを作成する |
| weather_api_client | Weather APIを実行する |
ディレクトリ構成は以下のとおりです。
.
├── Cargo.lock
├── Cargo.toml
├── Data
│   └── weather_conditions.csv
├── Dockerfile
├── README.md
├── run_locally.sh
└── src
    ├── aws
    │   ├── config.rs
    │   └── ssm.rs
    ├── aws.rs
    ├── config
    │   └── main.rs
    ├── config.rs
    ├── emoji_converter
    │   └── main.rs
    ├── emoji_converter.rs
    ├── main.rs
    ├── misskey_client
    │   ├── entity.rs
    │   └── main.rs
    ├── misskey_client.rs
    ├── note_text_generator
    │   └── main.rs
    ├── note_text_generator.rs
    ├── weather_api_client
    │   ├── entity.rs
    │   └── main.rs
    └── weather_api_client.rs
それぞれのモジュールについて簡単に説明しておきます。
aws
awsモジュールには、Parameter Storeからパラメータを取得するためのコードが入っています。
前回のコードでGitHub Actionsの実行ログにアクセストークンが出力されてしまった原因の一つとして、Lambdaの環境変数にアクセストークンを直接設定していたことが挙げられます。
このため、今回の構成ではAWS Systems Manager Parameter Storeにアクセストークンを設定し、Lambdaの環境変数にはパラメータのパスを設定することにします。
今回のコードではenumを使って独自のエラーを定義しています。
thiserror::Errorをderiveしています。
#[derive(Debug, Error)]
pub enum SsmClientError {
    #[error("sdk error: {0}")]
    SdkError(String),
    #[error("no parameter found: {0}")]
    NoParameterFoundError(String),
    #[error("no value found: {0}")]
    NoValueFoundError(String),
}

impl<T> From<SdkError<T>> for SsmClientError {
    fn from(value: SdkError<T>) -> SsmClientError {
        SsmClientError::SdkError(value.to_string())
    }
}
何らかのエラーからthiserror::Errorをderiveしたエラーに変換したい場合、わざわざ自前でFrom traitを実装しなくても、#[from]を使用すればいいです。
ただ、AWS SDKが返すSdkErrorはgenericsを使用しており、これを#[from]と合わせて使用する方法がわかりませんでした。
もしかするとできるのかもしれませんが、今回は自前でFrom traitを実装しています。
以上の対応により、Result<String, SsmClientError>を返す関数の中で?演算子を使用できるようになります。
参考までに、EmojiConverterErrorでは#[from]を用いてPolarsのエラーをEmojiConverterErrorに変換しています。
#[derive(Error, Debug)]
pub enum EmojiConverterError {
    #[error("no matching emoji found")]
    NoMatchingEmojiFound,
    #[error("polars error: {0}")]
    Polars(#[from] polars::error::PolarsError),
}
config
Weather APIのクエリやMisskeyサーバーのURLなどの設定を読み込む処理です。
ローカル環境での実行時とLambdaでの実行時で値の取得元が異なるので、featureフラグを用いて処理を分岐させています。
pub async fn new(override_args: Option<LocalArgs>) -> Result<Self, ConfigError> {
    if cfg!(feature = "local") {
        return Self::load_locally(override_args);
    } else if cfg!(feature = "default") {
        return Self::load_on_lambda().await;
    } else {
        return Err(ConfigError::UnknownRuntimeError);
    }
}
このモジュールにはテストコードもあります。
処理本体と同じファイルにtestsモジュールを追加してあります。
環境変数の有無による挙動を確認したいですが、環境変数の追加と削除はマルチスレッド環境では安全ではない(unsafe)です。
一方で、各テストケースはデフォルトでは並列に実行されるので、このままではテストコードの動作が不安定になってしまいます。
ChatGPTに質問したところ、serial_testというcrateをおすすめしてくれたので、これを使うことにしました。
使い方は簡単で、直列で実行したいテストケースに#[serial]を指定するだけです。
#[tokio::test]
#[serial]
async fn load_locally_success() {

}
emoji_converter
Weather APIの実行結果から対応する絵文字を取得する処理です。
絵文字の一覧表はCSVファイルとして用意してあります。
CSVファイルを読み込んでPolarsのDataFrameを作成し、そこからWeather APIのcodeに対応する絵文字を返す処理になっています。
misskey_client
MisskeyのRust SDKはあったのですが、メンテナンスされていない感じがしたので、今回はMisskeyのAPIを直接実行することにしました。
今回はノート作成の機能だけあればいいので、最小限のrequestとresponseを定義しています。
use serde::{Deserialize, Serialize};

pub enum NoteVisibility {
    Public,
    Home,
    Followers,
    Direct(Vec<String>),
}

#[derive(Deserialize)]
pub struct Note {
    pub id: String,
}

#[derive(Serialize)]
pub struct CreateNoteRequest {
    pub visibility: String,
    #[serde(rename = "visibleUserIds")]
    pub visible_user_ids: Vec<String>,
    pub text: String,
}

#[derive(Deserialize)]
pub struct CreateNoteResponse {
    #[serde(rename = "createdNote")]
    pub created_note: Note,
}
NoteVisibility::DirectはDM送信先のユーザーIDを値に取ります。
ここで空のVecを指定すれば、本人だけが確認できるノートとなります。
開発中の動作確認ではこの機能を使用していました。
HTTPリクエストの実行にはreqwestを使用しています。
特筆すべき点はなさそうですが、一応コード全体を掲載しておきます。
use std::time::Duration;

use reqwest::{
    Client, Url,
    header::{self, HeaderMap, HeaderValue, InvalidHeaderValue},
};
use thiserror::Error;

use crate::misskey_client::entity::{CreateNoteRequest, CreateNoteResponse, NoteVisibility};

pub struct MisskeyClient {
    server_url: String,
    access_token: String,
    http_client: Client,
}

#[derive(Debug, Error)]
pub enum MisskeyClientError {
    #[error("http client error: {0}")]
    HttpClientError(#[from] reqwest::Error),
    #[error("invalid header value: {0}")]
    InvalidHeaderValueError(#[from] InvalidHeaderValue),
    #[error("url parse error: {0}")]
    UrlParseError(String),
}

impl MisskeyClient {
    pub fn new(server_url: &str, access_token: &str) -> Result<Self, MisskeyClientError> {
        let http_client = Client::builder().timeout(Duration::from_secs(10)).build()?;
        Ok(MisskeyClient {
            server_url: server_url.to_string(),
            access_token: access_token.to_string(),
            http_client,
        })
    }

    pub async fn create_note(
        &self,
        text: &str,
        visibility: NoteVisibility,
    ) -> Result<CreateNoteResponse, MisskeyClientError> {
        let mut headers = HeaderMap::new();
        headers.insert(
            header::CONTENT_TYPE,
            HeaderValue::from_static("application/json"),
        );
        headers.insert(
            header::AUTHORIZATION,
            HeaderValue::from_str(format!("Bearer {}", &self.access_token).as_str())?,
        );

        let str_visibility = match visibility {
            NoteVisibility::Public => "public",
            NoteVisibility::Home => "home",
            NoteVisibility::Followers => "followers",
            NoteVisibility::Direct(_) => "specified",
        };
        let mut visible_user_ids: Vec<String> = Vec::new();
        if let NoteVisibility::Direct(user_ids) = visibility {
            user_ids
                .iter()
                .for_each(|v| visible_user_ids.push(v.to_string()));
        };

        let request = CreateNoteRequest {
            visibility: str_visibility.to_string(),
            visible_user_ids,
            text: text.to_string(),
        };

        let endpoint = format!("{}/api/notes/create", &self.server_url);
        let url = match Url::parse(&endpoint) {
            Ok(v) => Ok(v),
            Err(e) => Err(MisskeyClientError::UrlParseError(e.to_string())),
        }?;

        let response = self
            .http_client
            .post(url)
            .headers(headers)
            .json(&request)
            .send()
            .await?
            .json::<CreateNoteResponse>()
            .await?;
        Ok(response)
    }
}
note_text_generator
Weather APIの実行結果からMisskeyに投稿するテキストを生成します。
テキストを作成するときにindocというcrateが便利だったので紹介しておきます。
Misskeyに投稿するテキストはindoc::formatdoc!を用いて以下のように作成しています。
indoc::formatdoc!はformat!に対応するマクロで、複数行文字列の行の始まりを揃えてくれます。
let text = indoc::formatdoc! {
    r#"
    [{date}] Weather forcast in {location}
    {condition_emoji}{condition_text}
    {avgtemp_c} ℃ (avg) / {mintemp_c} ℃ (min) / {maxtemp_c} ℃ (max)
    ---
    🌄 {sunrise} - {sunset}
    🌕 {moonrise} - {moonset} / {moon_phase}
    "#
};
ここで単純にformat!を使うと、以下のように行の始めに余計な空白が入ってしまいます。
[2026-03-29] Weather forcast in Tokyo
            ☀Sunny
            16.1 ℃ (avg) / 12.7 ℃ (min) / 20.4 ℃ (max)
空白を削除する処理を自前で実装しようとしていたところ偶然このcrateを見つけて、使ってみると地味に便利でした。
weather_api_client
Weather APIを実行して天気予報を取得します。
Weather APIに対してgetリクエストを投げる処理で、misskey_clientと同じくreqwestを使用しています。
main.rs
プログラムのエントリーポイントです。
これまで運用していたPythonコードではローカル実行用(main_local.py)とLambda実行用(main.py)の二つのファイルがありましたが、今回のRustコードではfeature flagを用いてどちらのmain関数を用いるか制御します。
#[cfg(feature = "local")]
#[tokio::main]
async fn main() -> Result<(), lambda_runtime::Error> {
    function_handler(LambdaEvent::new(serde_json::json!({}), Default::default())).await
}

#[cfg(feature = "default")]
#[tokio::main]
async fn main() -> Result<(), lambda_runtime::Error> {
    lambda_runtime::run(service_fn(function_handler)).await
}
localフラグが設定されているときはローカル実行用にビルドし、何も設定されていないときはLambda実行用にビルドします。
Dockerfile
ChatGPTに質問しながら作成しました。
x86_64-unknown-linux-muslをtargetにするのはChatGPTの提案でしたが、builderのイメージとLambdaのイメージでglibcのバージョンが異なっていたり必要なライブラリが揃っていなかったりしてエラーになると面倒なので、この提案を採用しました。
今回のコードは比較的色々なcrateに依存しているのでどこかしらでエラーになるかもしれない...、と思っていましたが、予想に反して特に問題なくビルドできました。
詳しくはわかりませんが、rust:1.92-bullseyeイメージの中でいい感じに処理してくれているのかもしれません。
FROM rust:1.92-bullseye AS builder

WORKDIR /app
COPY . .
RUN apt-get update && apt-get install -y musl-tools
RUN rustup target add x86_64-unknown-linux-musl
RUN cargo build --release --target x86_64-unknown-linux-musl

FROM public.ecr.aws/lambda/provided:al2023

COPY --from=builder /app/target/x86_64-unknown-linux-musl/release/weather-bot /var/runtime/bootstrap
COPY Data/ /var/runtime/Data/
ENV RUST_LOG=info
CMD ["bootstrap"]
Terraform
botを動作させるために必要なAWSリソースはTerraformで作成します。
コードはterraformディレクトリに格納されています。
SSM
前回からの差分として、Parameter StoreのパラメータをTerraformで作成しています。
Terraformからパラメータを作成する際はとりあえず仮の値をセットしておいて、実際のアクセストークンはAWSコンソールから手動で設定します。
resource "aws_ssm_parameter" "weather_api_access_token" {
  name = "weather-api-access-token"
  type = "SecureString"

  #You have to set the actual value via AWS management console.
  value = "dummy"

  lifecycle {
    ignore_changes = [
      value
    ]
  }
}

resource "aws_ssm_parameter" "misskey_access_token" {
  name = "misskey-access-token"
  type = "SecureString"

  #You have to set the actual value via AWS management console.
  value = "dummy"

  lifecycle {
    ignore_changes = [
      value
    ]
  }
}
パラメータ(value)はTerraformではなく手動で更新するので、ignore_changesに追加してplan実行時の差分に表示されないようにしています。
IAMロール
今回のLambdaはParameter Storeから値を取得する権限が必要です。
resource "aws_iam_policy" "allow_lambda_access_to_ssm_parameter" {
  name = "${var.service}-allow-lambda-access-to-ssm-parameter-${var.env}"
  policy = jsonencode({
    Version = "2012-10-17"
    Statement = [
      {
        Effect   = "Allow"
        Action   = "ssm:GetParameter"
        Resource = var.ssm_parameter_arns
      }
    ]
  })
}
Lambda
環境変数にアクセストークンを設定しないので、今回はすべての環境変数をTerraformで管理します。
resource "aws_lambda_function" "main" {
  function_name = "${var.service}-${var.env}"

  role = var.lambda_role_arn

  #Actual image is deployed by GitHub Actions
  package_type = "Image"
  image_uri    = "${var.repository_url}:temp"

  timeout     = var.lambda_config.timeout
  memory_size = var.lambda_config.memory_size

  environment {
    variables = var.lambda_config.environment_variables
  }

  lifecycle {
    ignore_changes = [
      image_uri
    ]
  }
}
Lambda作成時に設定するイメージは仮のもので、実際のイメージはGitHub Actionsでデプロイします。
イメージのURIはGitHub Actionsでデプロイするたびに変わるので、ignore_changesに追加してplan実行時に差分として表示されないようにしています。
仮のイメージについては、ECRリポジトリを作成する際にシェルスクリプトを実行して用意しています。
resource "aws_ecr_repository" "main" {
  name                 = "lambda/misskey-weather-bot-2"
  image_tag_mutability = "IMMUTABLE"
}

resource "terraform_data" "main" {
  triggers_replace = [
    aws_ecr_repository.main.arn
  ]

  provisioner "local-exec" {
    command = "bash ${path.module}/push_temp_image.sh"
    environment = {
      AWS_REGION     = var.aws.region
      AWS_ACCOUNT_ID = var.aws.account_id
      REPOSITORY_URL = aws_ecr_repository.main.repository_url
    }
  }
}
#!/bin/bash

aws ecr get-login-password --region ${AWS_REGION} | docker login --username AWS --password-stdin ${AWS_ACCOUNT_ID}.dkr.ecr.${AWS_REGION}.amazonaws.com
docker pull hello-world:latest
docker tag hello-world:latest ${REPOSITORY_URL}:temp
docker push ${REPOSITORY_URL}:temp
github_actions
aws_iam_openid_connect_providerのthumbprint_listについては、GitHubと連携させる際には不要らしいので、今回のコードでは指定していません。
IAMロールについてはtoken.actions.githubusercontent.com:subの部分が重要で、この設定によってこのIAMロールをAssumeできるGitHubリポジトリを制限できます。
resource "aws_iam_openid_connect_provider" "github_actions" {
  url            = "https://token.actions.githubusercontent.com"
  client_id_list = ["sts.amazonaws.com"]
}

resource "random_id" "rnd" {
  byte_length = 4
}

resource "aws_iam_role" "github_actions" {
  name = "${var.service}-github-actions-${var.env}-${random_id.rnd.hex}"
  assume_role_policy = jsonencode({
    Version = "2012-10-17"
    Statement = [
      {
        Effect = "Allow"
        Action = "sts:AssumeRoleWithWebIdentity"
        Principal = {
          Federated = aws_iam_openid_connect_provider.github_actions.arn
        }
        Condition = {
          StringEquals = {
            "token.actions.githubusercontent.com:aud" = "sts.amazonaws.com"
          }
          StringLike = {
            "token.actions.githubusercontent.com:sub" = "repo:${var.github_info.username}/${var.github_info.repo_name}:*"
          }
        }
      }
    ]
  })
}

resource "aws_iam_policy" "allow_github_actions_access_to_ecr" {
  name = "${var.service}-allow-github-actions-access-to-ecr-${var.env}"
  policy = jsonencode({
    Version = "2012-10-17"
    Statement = [
      {
        Effect = "Allow"
        Action = [
          "ecr:UploadLayerPart",
          "ecr:PutImage",
          "ecr:InitiateLayerUpload",
          "ecr:CompleteLayerUpload",
          "ecr:BatchGetImage",
          "ecr:BatchCheckLayerAvailability"
        ]
        Resource = var.weather_forecast_bot.ecr.main.arn
      },
      {
        Effect   = "Allow"
        Action   = "ecr:GetAuthorizationToken"
        Resource = "*"
      }
    ]
  })
}

resource "aws_iam_policy" "allow_github_actions_access_to_lambda" {
  name = "${var.service}-allow-github-actions-access-to-lambda-${var.env}"
  policy = jsonencode({
    Version = "2012-10-17"
    Statement = [
      {
        Effect   = "Allow"
        Action   = "lambda:UpdateFunctionCode"
        Resource = var.weather_forecast_bot.lambda.main.arn
      }
    ]
  })
}

resource "aws_iam_role_policy_attachment" "allow_github_actions_access_to_ecr" {
  role       = aws_iam_role.github_actions.name
  policy_arn = aws_iam_policy.allow_github_actions_access_to_ecr.arn
}

resource "aws_iam_role_policy_attachment" "allow_github_actions_access_to_lambda" {
  role       = aws_iam_role.github_actions.name
  policy_arn = aws_iam_policy.allow_github_actions_access_to_lambda.arn
}
GitHub Actionsに与える権限はLambdaをデプロイするために必要な最小限のものに制限しています。
GitHub Actions
イメージのビルド、プッシュ、Lambdaへのデプロイを実行します。
共通する処理はreusable workflowにしておいて、それをsandbox環境とprod環境のワークフローから呼び出すという構成になっています。
name: Deploy Lambda function

on:
  workflow_call:
    inputs:
      lambdaFunctionName:
        type: string
        required: true
      ecrRepoName:
        type: string
        required: true
    secrets:
      awsDeploymentRoleArn:
        required: true

jobs:
  deploy:
    runs-on: ubuntu-latest
    steps:
      - name: Checkout
        uses: actions/checkout@v6
      - name: Configure AWS Credentials
        uses: aws-actions/configure-aws-credentials@v6
        with:
          aws-region: ap-northeast-1
          role-to-assume: ${{secrets.awsDeploymentRoleArn}}
      - name: Login to Amazon ECR
        id: login-ecr
        uses: aws-actions/amazon-ecr-login@v2
      - name: Set up QEMU
        uses: docker/setup-qemu-action@v4
      - name: Set up Docker Buildx
        uses: docker/setup-buildx-action@v4
      - name: Build and push
        uses: docker/build-push-action@v7
        env:
          REGISTRY: ${{steps.login-ecr.outputs.registry}}
          IMAGE_TAG: ${{github.sha}}
        with:
          platforms: linux/amd64
          context: weather-bot
          push: true
          tags: ${{env.REGISTRY}}/${{inputs.ecrRepoName}}:${{env.IMAGE_TAG}}
          provenance: false
      - name: Update Lambda function
        env:
          REGISTRY: ${{steps.login-ecr.outputs.registry}}
          IMAGE_TAG: ${{github.sha}}
        run: |
          aws lambda update-function-code \
            --function-name ${{inputs.lambdaFunctionName}} \
            --image-uri ${{env.REGISTRY}}/${{inputs.ecrRepoName}}:${{env.IMAGE_TAG}}
name: Deploy Lambda function to prod environment

on:
  push:
    branches:
      - main
    paths:
      - weather-bot/**
      - "!weather-bot/**.md"
      - "!weather-bot/**.png"
  workflow_dispatch:

permissions:
  id-token: write
  contents: read

jobs:
  deploy:
    uses: ./.github/workflows/deploy-lambda.yml
    with:
      lambdaFunctionName: misskey-weather-bot-2-prod
      ecrRepoName: lambda/misskey-weather-bot-2
    secrets:
      awsDeploymentRoleArn: ${{secrets.AWS_DEPLOYMENT_ROLE_ARN_PROD}}
感想
GitHub Actionsのログにawsコマンドの実行結果を出力したくないなら、単純にコマンドの実行結果を/dev/nullにリダイレクトすればいいだけでしたが、botのコードを書き直してから気づきました。
まあ、Parameter Storeからアクセストークンを取得する構成の方がベターなので、今回はこれでよしとします。
Lambdaの環境変数にアクセストークンを設定しなくなったことで、環境変数をすべてTerraformのコードで管理できるようになりましたし。
自分はこの記事を書くためにコードをPublicにしていますが、もしもこれを参考にしてMisskeyのbotを作成する物好きな方がいるなら、Privateリポジトリにした方がいい気がします。
IaCのコードやawsコマンドの実行結果を公開する理由は特にないでしょう。
PublicリポジトリだとGitHub Actionsが無料で使えるので、そこは大きなメリットですが...。
前回のような不祥事が起こらない限りは自分のコードはPublicにしておくので、不祥事が起こらないことを祈っていてください。