OculusGoを買いました。
気分が上がってきたのでUnityで遊びたくなりましたがコントローラー周りで詰まり解決方法を探ったまとめです。
なお、昨日からUnityに入門するため間違い等ありましたらご指摘&修正リクをお願い致します。m(_ _)m
Unity入門を遊んだ後に
https://unity3d.com/jp/learn/tutorials/projects/hajiuni-jp
この玉転がしのチュートリアルの後にこのゲームをOculusGoに対応させます。
上記チュートリアルを終わった後に追加作業でOculusGoに対応します。
OculusGoを開発者モードにしてAndroid開発環境を入れる
これは以下に情報があります。
https://qiita.com/Hirai0827/items/f62588cc7d5c6c17e364
アプリのVR対応
まずメニューからFile->BuildSettingに行きます
 Platformで``Android``を選んだ後に ``switch platform``を選びます。
``switch platform``ボタンの隣りにある``Player Setting``をクリックして``PlayerSetting``を表示します
Platformで``Android``を選んだ後に ``switch platform``を選びます。
``switch platform``ボタンの隣りにある``Player Setting``をクリックして``PlayerSetting``を表示します
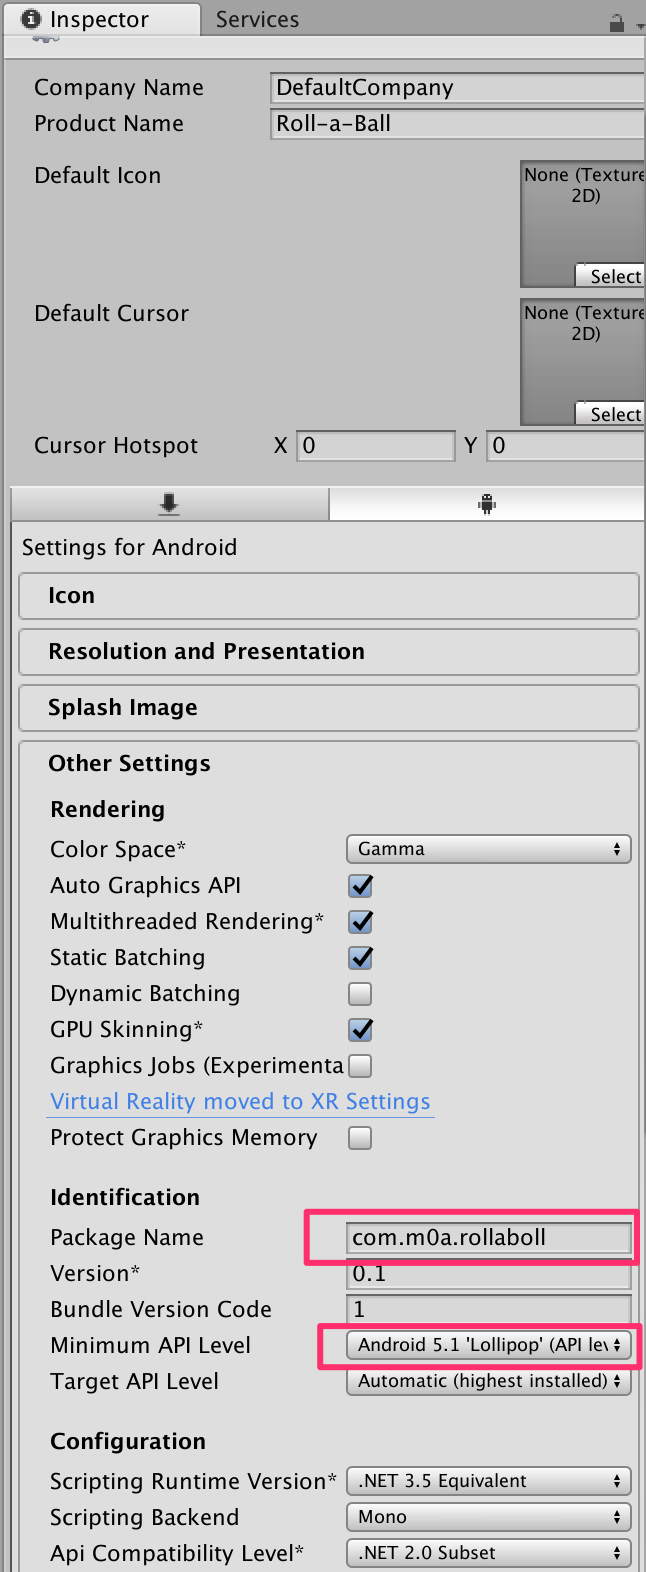 ``Other setting``内の
``Package name``に任意の識別子を設定します。(他のアプリとかぶらないような)
``Minimum API Level``はとりあえず ``5.1``にしました。 (でもGoは7.1なので7.1でよかったかもです。)
``Other setting``内の
``Package name``に任意の識別子を設定します。(他のアプリとかぶらないような)
``Minimum API Level``はとりあえず ``5.1``にしました。 (でもGoは7.1なので7.1でよかったかもです。)

次はXR Settingsの項目です。
Virtual Rearity Suppoerted を有効化し
Vertula Rearity SDKsにOculusを追加します
Stereo Rendering MethodsをSingleに設定します。
この状態でFile -> Build & Runを実行すると見た目だけVRに対応します。
コントローラー側の対応
でも肝心の操作が効きません。
ピクリとも動かない。
Oculus Integrationを導入します。
メニューのwindow -> Asset Storeを選びOculus Integrationで検索します

importをクリックし

importします。
Oculus Integration内にて提供されるOVRInputを用いて入力の取得をおこないます。
PlayerControllerのコード修正
PlayerController.csを修正します。
現状は以下のようになっています。
using System.Collections;
using System.Collections.Generic;
using UnityEngine;

public class PlayerController : MonoBehaviour {
	public float speed = 10;


	void FixedUpdate(){

		float x = Input.GetAxis("Horizontal");
		float z = Input.GetAxis("Vertical");

		Rigidbody rigidbody = GetComponent<Rigidbody>();
		rigidbody.AddForce(x * speed, 0, z * speed);
	}
}
先ず上記クラス名とファイル名を修正します。なんでかというとOculus Integration内のクラスと名前衝突しているからです。
PlayerBallControllerとかにしておきます。
ここにOVRInputを利用するコードを追加します
using System.Collections;
using System.Collections.Generic;
using UnityEngine;

public class PlayerBallController : MonoBehaviour {
	public float speed = 10;

    private void Start()
    {
    }
	void Update() {
        OVRInput.Update();
    }
	void FixedUpdate(){

# if UNITY_ANDROID && !UNITY_EDITOR
        OVRInput.FixedUpdate();
        //右手持ち決め打ちで実装
        Vector2 vector =  OVRInput.Get(OVRInput.Axis2D.PrimaryTouchpad, OVRInput.Controller.RTrackedRemote);
        float x = vector.x;
        float z = vector.y;

# else
        float x = Input.GetAxis("Horizontal");
        float z = Input.GetAxis("Vertical");
# endif

		Rigidbody rigidbody = GetComponent<Rigidbody>();
		rigidbody.AddForce(x * speed, 0, z * speed);
	}
}
今回は、OVRInputを使うために呪いとしてFixedUpdate内で OVRInput.FixedUpdate()、Update内でOVRInput.Update()を呼ぶ必要があります。
(OVRManagerがシーン内に一つだけ存在する場合はこの呪いは不要です。)
更に、右手持ち前提でタッチパッド操作情報を拾うようにしました。いろいろ手を抜いています。
参考情報:
https://taiyaq.com/contents/jJMNL163YkNy1HQ1eN0G7pG9v
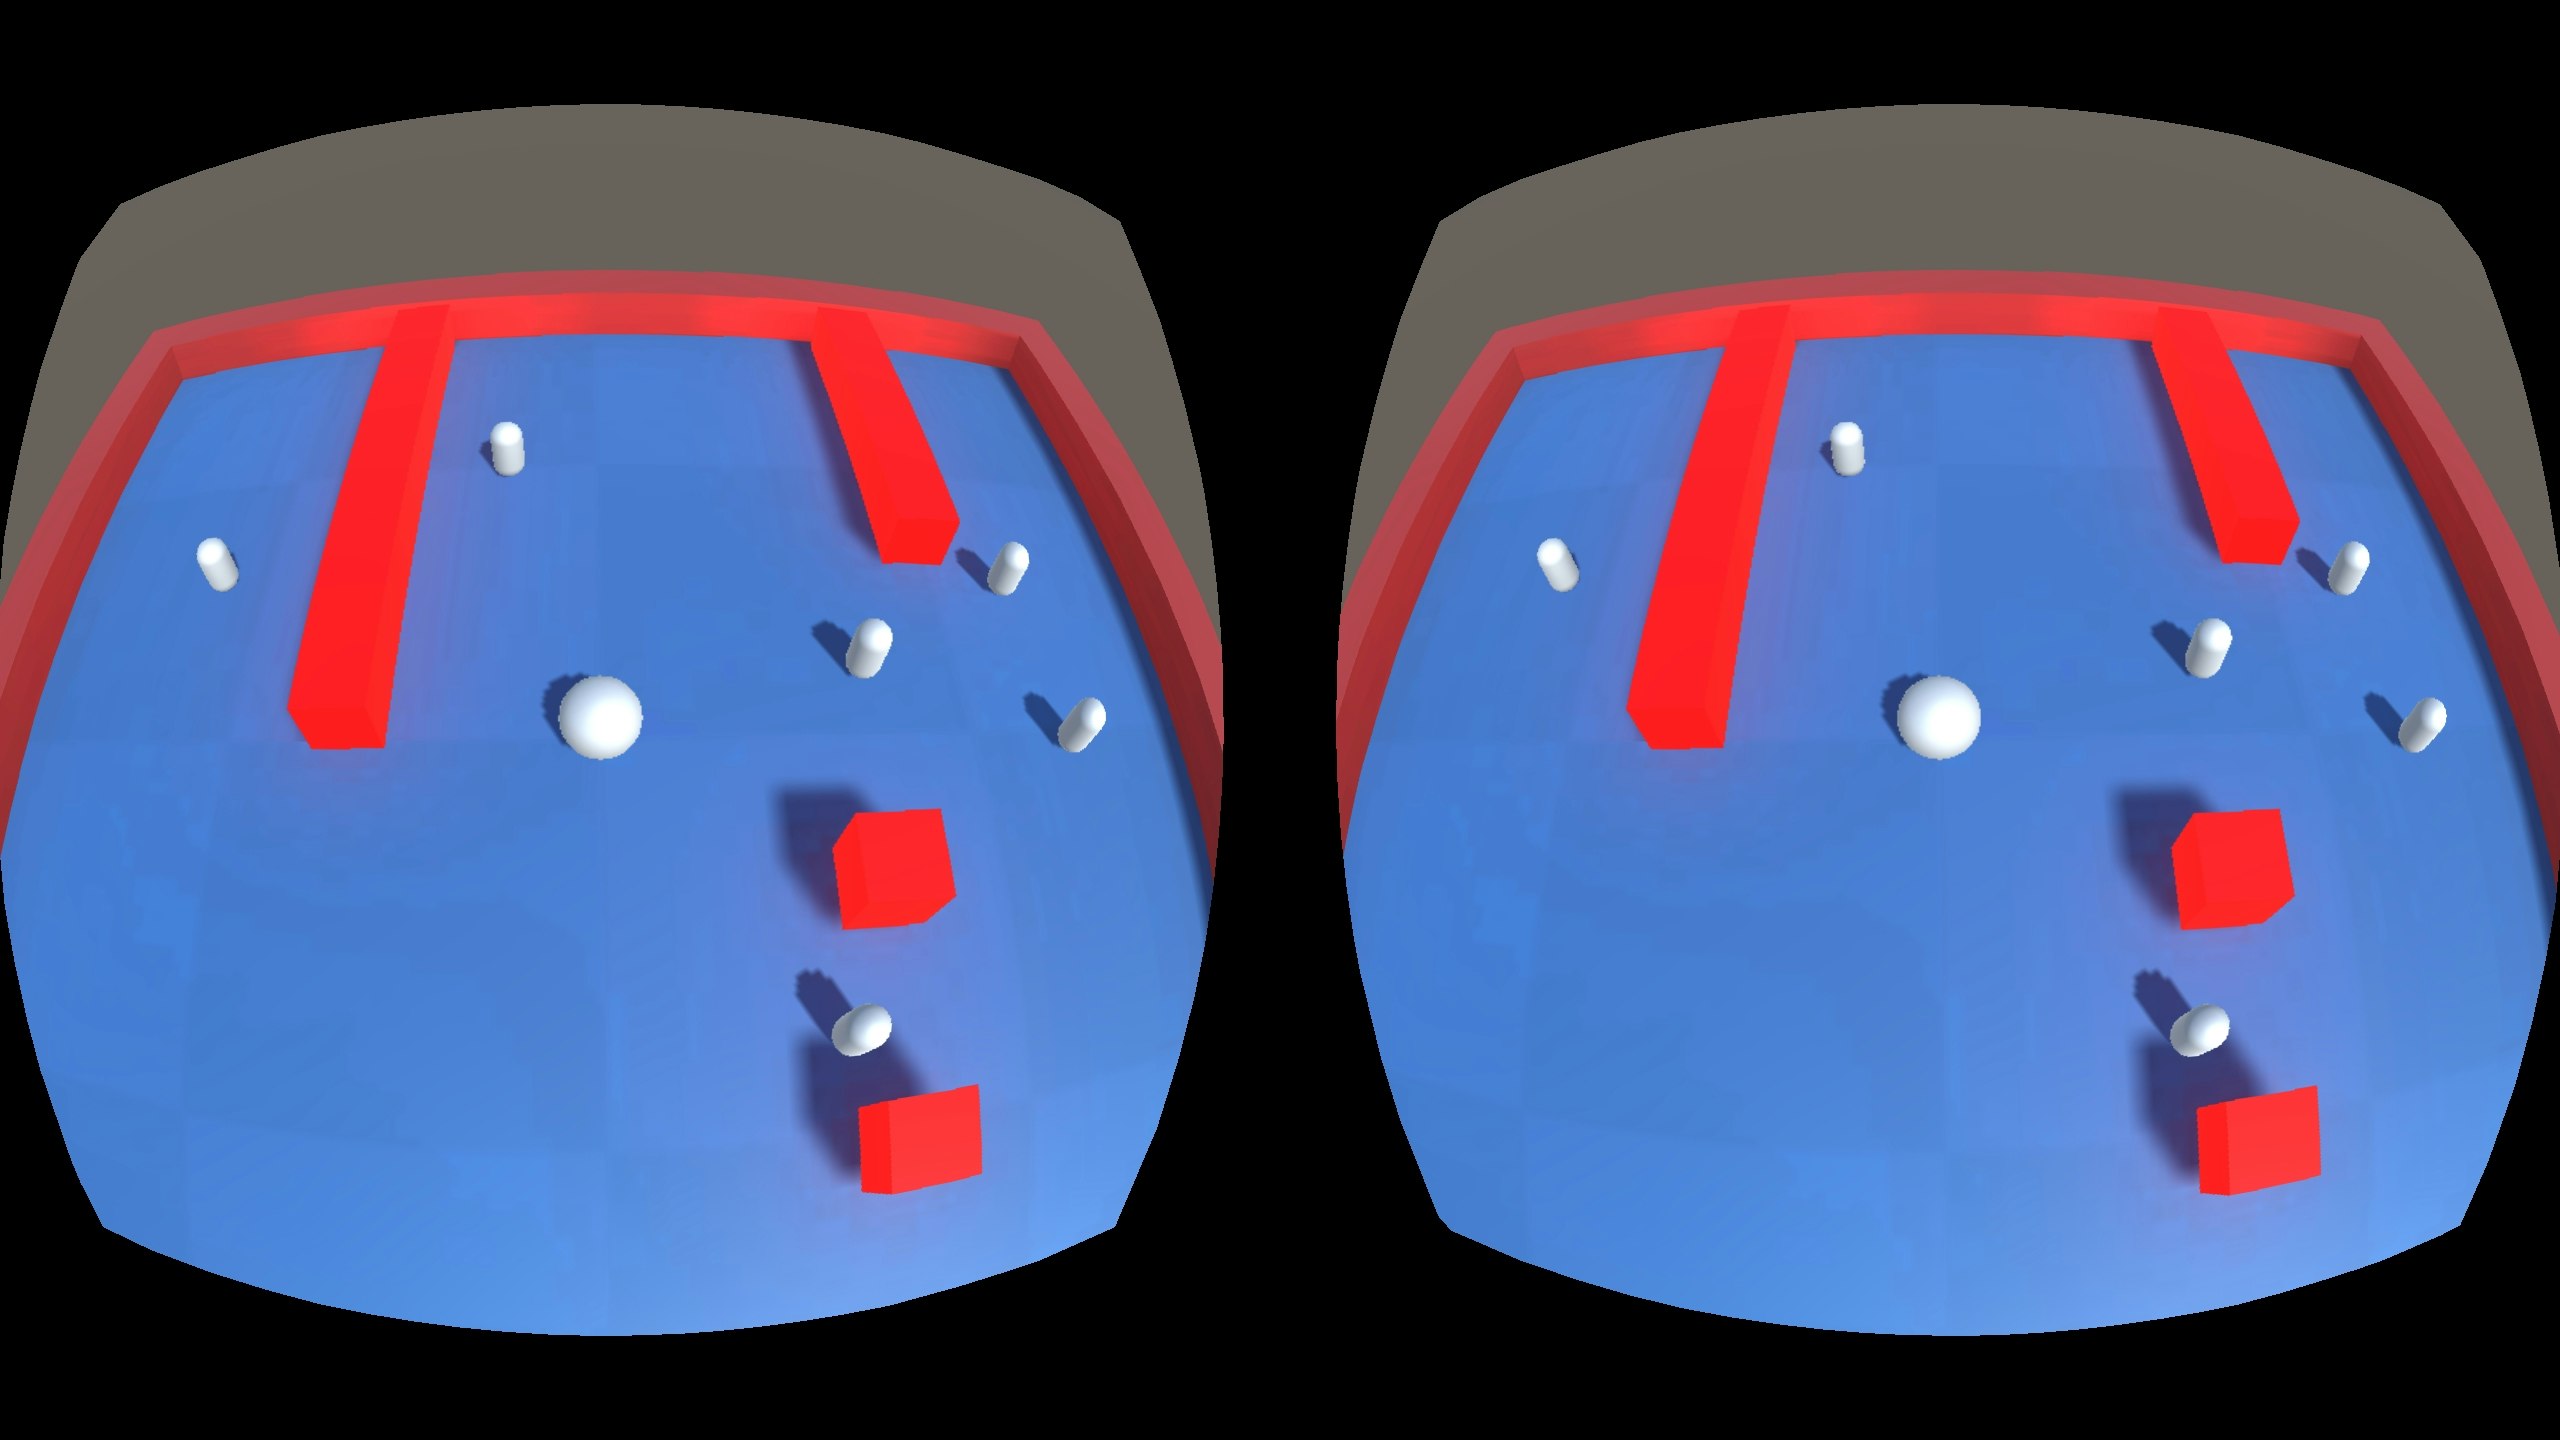
Unityの玉転がしチュートリアルを#OculusGoに対応させる(途中) pic.twitter.com/R7syXriz6S
— m0a (@abe00makoto) 2018年5月15日
ですが得点表示とか全部のアイテムを取り終わったらYou Winと出るはずですがでません。
ここを次に対応させます。
得点表示できるようにする
今あるカメラの代わりに、OVRCameraRigを使います。
以下のようにOculus/VR/Prefabs内にあるOVRCameraRigをシーンにドラッグして新しいカメラを作ります。更に元々あったMain Cameraを削除します。

Main Cameraと同じ設定をOVRCameraRigに対して行います。
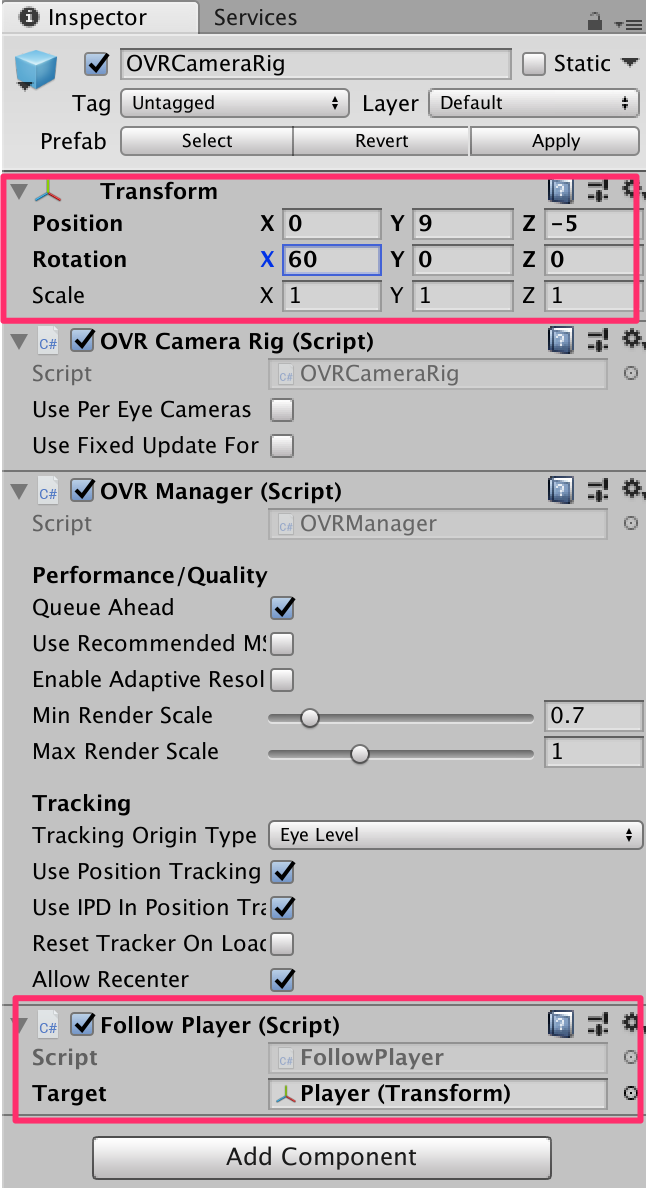
Transformに同じようにPositionを(0,9,-5)とRotationを(60,0,0)に設定します。
更にAdd Componentでチュートリアルで作成したFollowPlayerスクリプトを取り込みます。
忘れずにTargetにPlayerをドラックして設定します。
ここまで行うとボールの動きに従って視線も動くようになります。
OVRCameraRig 追加に伴うコードの変更
OVRCameraRig内にはOVR Managerが入っています。
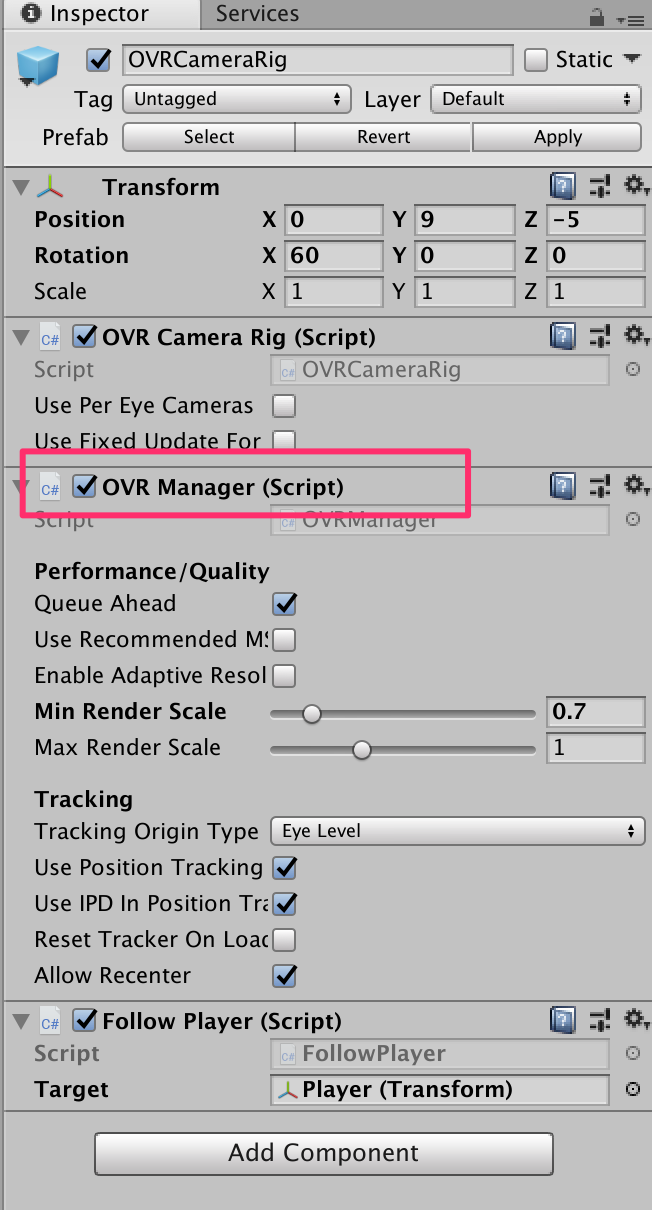
これに伴いPlayerのコードを変更します
using System.Collections;
using System.Collections.Generic;
using UnityEngine;

public class PlayerBallController : MonoBehaviour {
	public float speed = 10;

	void FixedUpdate(){

# if UNITY_ANDROID && !UNITY_EDITOR
        Vector2 vector =  OVRInput.Get(OVRInput.Axis2D.PrimaryTouchpad, OVRInput.Controller.RTrackedRemote);
        float x = vector.x;
        float z = vector.y;

# else
        float x = Input.GetAxis("Horizontal");
        float z = Input.GetAxis("Vertical");

# endif

		Rigidbody rigidbody = GetComponent<Rigidbody>();
		rigidbody.AddForce(x * speed, 0, z * speed);
	}
}
OVRInputを使うために呪いとして追加していた、FixedUpdate内で OVRInput.FixedUpdate()、Update内でOVRInput.Update()の呼び出しを削除しました。
UIを表示できるように
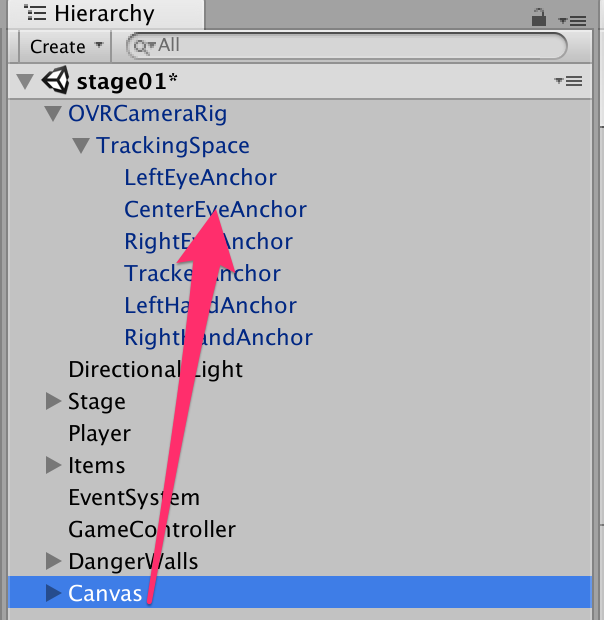
元々あった得点表示とYou Winと表示するCanvasをOVRCameraRig内のCenterEyEAnchor内へドラックして移動します。
CenterEyEAnchor内にコンテンツを設定することで常に目の前に表示できるようになります。

以下実際の設定値です。色々試行錯誤した結果です。
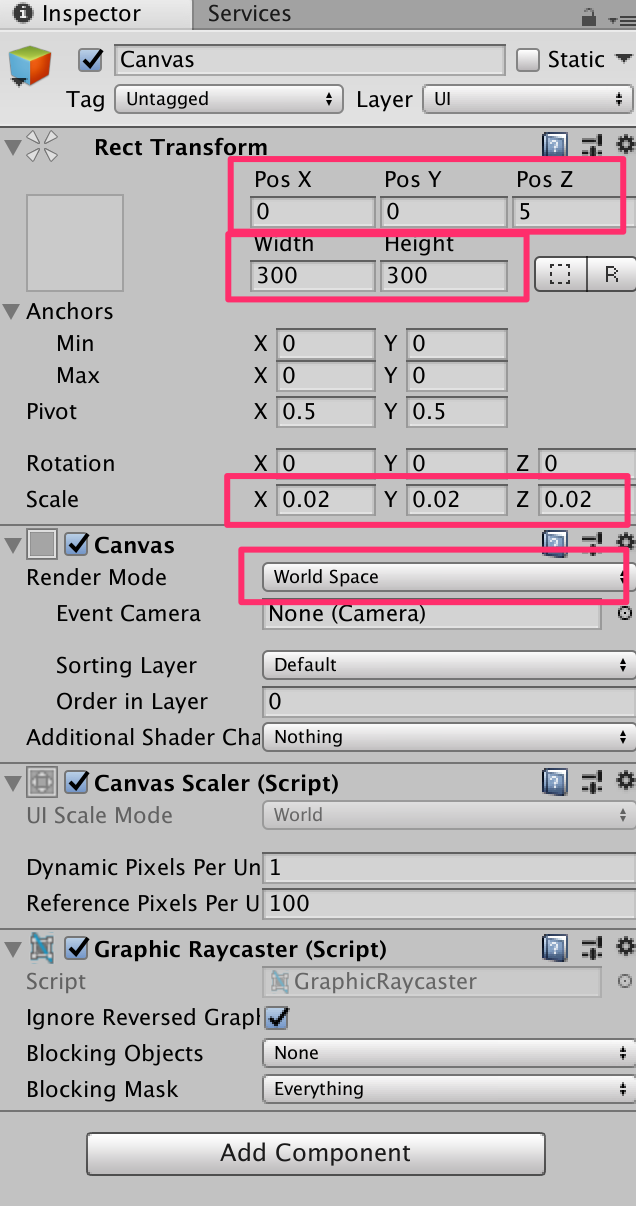
Canvasについて、
Render Mode をWorld Space にします。
Rect Transformについてそれぞれ
Postionは(0,0,5)、Width,Heightは(300,300)
Scaleを(0.02,0.02,0.02)に設定しました。

ScoreLabelについて、
Rect Transformについてそれぞれ
Postionは(-90,-90,0)、Width,Heightは(50,50)
Font Sizeを40に設定しました。

WinnerLabelについて、
Rect Transformについてそれぞれ
Postionは(20,0,0)、Width,Heightは(280,80)
Font Sizeを60に設定しました。
完成
Unityの玉転がしチュートリアルを#OculusGoに対応させる(完成) pic.twitter.com/QwZUAHBbx5
— m0a (@abe00makoto) 2018年5月16日
まとめ
結構簡単にできました。
参考情報
http://bibinbaleo.hatenablog.com/entry/2018/05/14/001544
https://framesynthesis.jp/tech/unity/touch/