
前回、ComfyUIとMiniMax-H3を使ったAI動画生成のローカル構築手順を紹介しました。高クオリティな動画と音声が同時に吐き出される感動は大きかったのですが、実際に運用してみて一番大きな課題だと感じたのが、動画生成にかかる待ち時間の長さです。
10秒の動画を出力するのに公式標準ワークフローだと約830秒(約14分)かかっていました。プロンプトを少し変えて試行錯誤するたびにコーヒーを淹れ直したりSNSを眺めたり……なかなか根気が要りますよね。
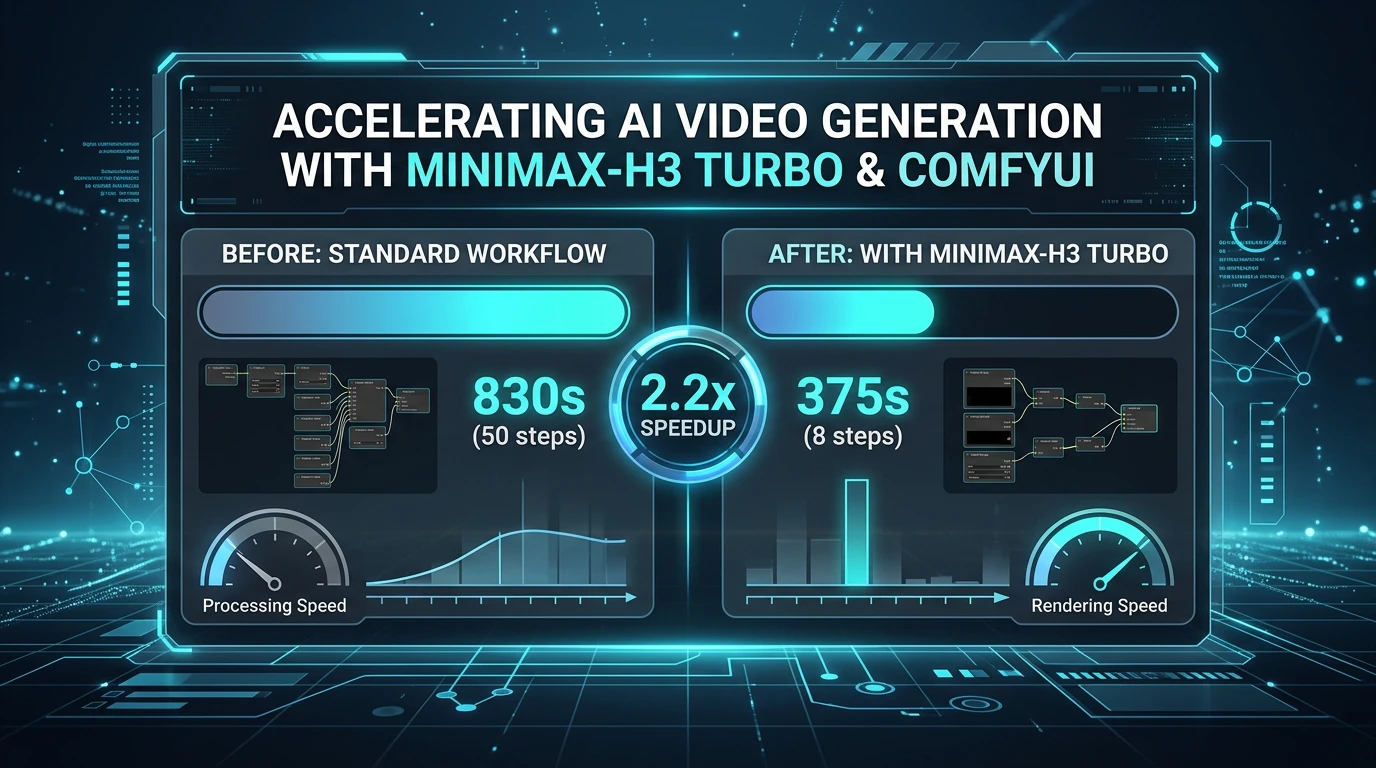
今回は、MiniMax-H3-Turboを導入して生成時間を830秒から375秒へと半減(約55%短縮)させる方法を解説します。
1. クイックリファレンス
| 項目 | 詳細 |
|---|---|
| 技術名 | MiniMax-H3-Turbo (lightx2v LoRA) |
| 開発元 / リポジトリ | ModelTC / lightx2v (GitHub) |
| コアアプローチ | 敵対的/ステップ蒸留(Distillation)をLoRA形式で統合 |
| 推奨ステップ数 | 8ステップ(FL2VA 8-step v1.0) / 4ステップ |
| 必要な環境 | ComfyUI 0.31.0以降 / VRAM 12GB〜16GB以上推奨 |
| 検証環境GPU | NVIDIA GeForce RTX 5060 Ti 16GB |
| 実測生成時間 | 10秒動画生成時:830秒 ➔ 375秒 (約54.8%短縮) |
2. AI動画生成における主な速度改善アプローチと今回の仕組み
「動画生成をもっと速くしたい!」という要求に対して、現在オープンソースコミュニティでは主に3つのアプローチが使われています。
主な動画生成高速化のアプローチ
-
モデルの量子化 (Quantization)
- FP16やBF16の重みを FP8, INT8, GGUF(Q4_K) などに圧縮。
- VRAM使用量を大幅に削減し、GPUのメモリ帯域ネックによる遅延を緩和します。
-
Attention / カーネル最適化
- FlashAttention-2 や SageAttention, Torch.compile などを導入し、アテンション計算の無駄を削ぎ落とす手法です。
-
ステップ蒸留 (Model Distillation / Turbo LoRA)
- 通常50〜100ステップ必要な拡散過程(Sampling steps)を、数ステップ(4〜8ステップ)で同等水準に収束させる技術。
今回導入する「MiniMax-H3-Turbo」の仕組み
今回採用したのは3つ目のステップ蒸留LoRAです。
lightx2v / ModelTC チームが公開した Minimax-H3-Turbo は、元モデル(MiniMax-H3)の表現力を損なわずにサンプリングステップ数を激減させる蒸留LoRAノードです。
重く巨大なベースモデルを再学習・置換するのではなく、差分重みであるLoRA(.safetensors)を追加で挿入するだけで、8ステップ(FL2VA Turbo 8-step)での動画生成を可能にします。
3. 【実測比較】公式ワークフロー vs Turbo 8-step
同じプロンプト・同じ解像度(1344x768 / 10秒動画)条件で生成時間を比較しました。
テスト環境
- GPU: NVIDIA GeForce RTX 5060 Ti (VRAM 16GB)
- 解像度: 1344 × 768 (16:9 Widescreen)
- 動画長: 10.0秒
比較結果
| 構成 | サンプリングステップ数 | 生成時間 | 比較 |
|---|---|---|---|
| 公式標準ワークフロー | 50 steps | 830秒 (13分50秒) | 基準 |
| MiniMax-H3-Turbo (本手法) | 8 steps | 375秒 (6分15秒) | 54.8%短縮 (2.21倍速) |
830秒から375秒へ。1回あたりの待ち時間が半分以下になったおかげで、構図やカメラワークの試行錯誤が圧倒的に楽になりました。
4. MiniMax-H3-Turbo の導入と ComfyUI 設定手順
前回の公式ワークフローをすでにComfyUIに構築済みであることを前提として進めます。
Step 1: Turbo LoRA モデルのダウンロード
lightx2v/Minimax-h3-Turbo (HuggingFace) から、以下のLoRAモデルをダウンロードし、ComfyUIの models/loras/ ディレクトリへ配置します。
-
推奨モデル:
minimax_h3_fl2v_turbo_8step_v1.0_comfyui_bf16.safetensors
配置後のフォルダ構造:
ComfyUI/
└── models/
    └── loras/
        └── minimax_h3_fl2v_turbo_8step_v1.0_comfyui_bf16.safetensors
Step 2: 専用ワークフローのインポート
ModelTC/Minimax-H3-Turbo GitHubリポジトリ からサンプルワークフロー (JSON) をダウンロードし、ComfyUI画面へドラッグ&ドロップして開きます。
Step 3: 各コンポーネントとパラメータの設定
ワークフローを開いたら、ノードの各設定項目を確認・選択します。
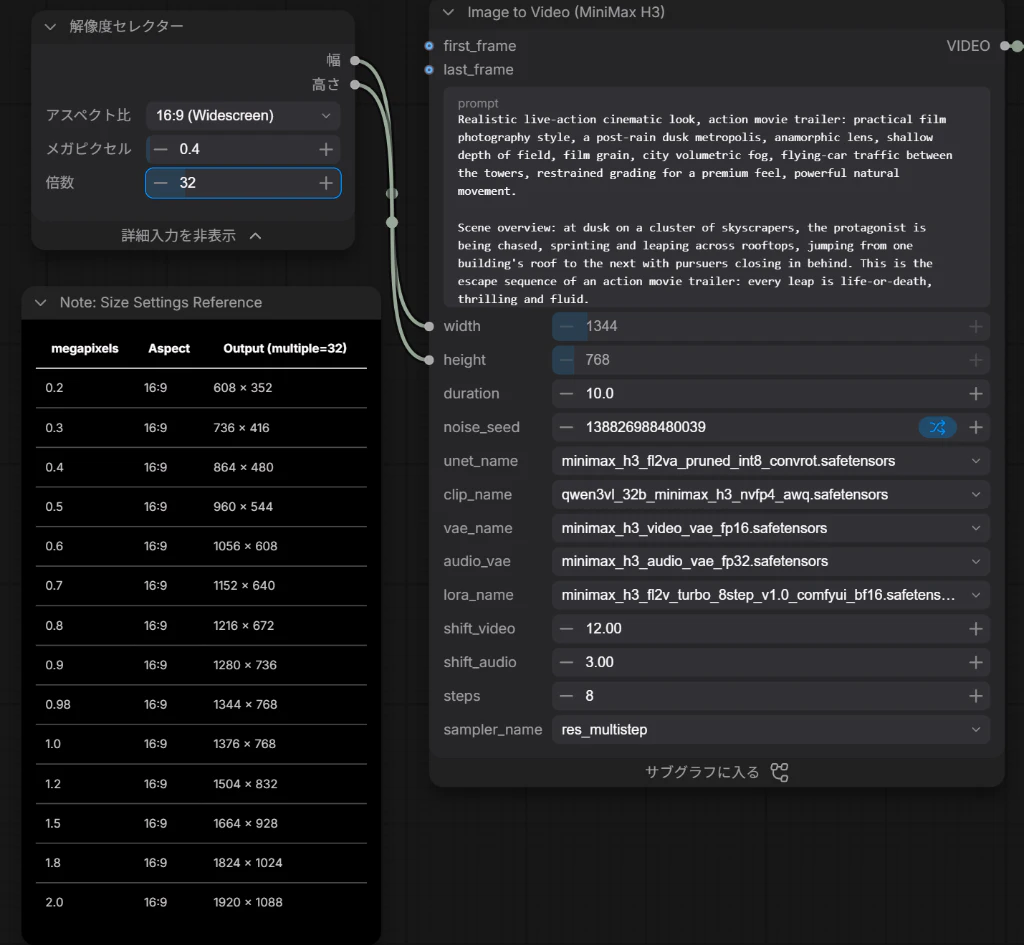
-
基本モデル (unet, clip, vae など)
- 前回公式ワークフローで使用したものと同じモデル(
minimax_h3_fl2va_pruned_int8_convrot.safetensors等)を選択します。
- 前回公式ワークフローで使用したものと同じモデル(
-
LoRAの選択 (
lora_name)- 先ほどダウンロードした
minimax_h3_fl2v_turbo_8step_v1.0_comfyui_bf16.safetensorsを指定します。
- 先ほどダウンロードした
-
パラメータの最適化
-
steps:8 -
shift_video:12.00 -
shift_audio:3.00 -
sampler_name:res_multistep
-
これで準備完了です!
5. 今回検証に使用したプロンプト
動作検証で使用したハリウッド映画予告編風のアクションシーケンスプロンプトです。
Realistic live-action cinematic look, action movie trailer: practical film photography style, a post-rain dusk metropolis, anamorphic lens, shallow depth of field, film grain, city volumetric fog, flying-car traffic between the towers, restrained grading for a premium feel, powerful natural movement.

Scene overview: at dusk on a cluster of skyscrapers, the protagonist is being chased, sprinting and leaping across rooftops, jumping from one building's roof to the next with pursuers closing in behind. This is the escape sequence of an action movie trailer: every leap is life-or-death, thrilling and fluid.

Storyboard (each shot a separate scene, rapid cuts, all landing on the musical beats):
[0s-1.5s] Shot 1: high side angle: the protagonist sprinting at the roof edge, pursuers appearing in the rooftop doorway behind him, wind catching his coat.
[1s-2.5s] Shot 2: the protagonist leaps across the gap between buildings, body stretching mid-air, towers and flying-car light trails behind him, a slight slow-motion feel.
[2.5s-4s] Shot 3: he lands, rolls and rises, low-angle shot, tower shadows and fog behind him, he keeps running.
[4s-5s] Shot 4: freeze: the instant he hits the edge of the next roof and launches into the jump, silhouette, holding.

Camera: each shot its own angle, cuts clean and hard, no dissolves, a slight frame jitter on the jumps.

Audio: wind, rapid footsteps, city ambience, low score underneath, an accent hit on each leap, the score bursting at 4s, closing the last 1s.

No text, subtitles, logos or watermarks of any kind, no animation or cartoon rendering, no overly-CG look, keep the live-action texture.
6. メリットと気になった点(正直な感想)
良かった点(メリット)
- 生成時間の大幅短縮: 14分弱かかっていた生成が6分強で終わるのはとにかく快適。
- 解像度・音質の維持: ステップ数を削っているにもかかわらず、MiniMax-H3本来の特長である「映像と同時に出力される同期音声(BGM・SE)」の品質が劣化していません。
注意点・制限事項
-
ステップ数・Shiftパラメータの厳密さ:
steps=8の際にshift_video=12.00/shift_audio=3.00の設定を崩すと、一気に破綻したりノイズが乗る傾向があります。指定数値を正しく入力するのがコツです。
7. 向いているユーザー
- MiniMax-H3をローカル環境でヘビーに試行錯誤したい人
- 1回のレンダリング待ち時間に耐えかねている人
- RTX 4070 / RTX 5060 Ti などの12GB〜16GB VRAM環境で効率よく動画を作りたい開発者・クリエイター
8. おわりに
LoRAを1枚追加するだけで、MiniMax-H3の動画生成時間を半分以下に短縮できる「MiniMax-H3-Turbo」。ローカル生成AIにおけるスピード改善の影響力は絶大です。
公式ワークフローをお使いの方は、ぜひTurbo LoRAを試して制作スピードの違いを体感してみてください!
皆さんの環境での生成速度やクオリティ変化についても、ぜひコメント欄で教えてもらえると嬉しいです。