Part 2: SwiftUI 2.0 & UIKit
The article is broken in three different parts:
- Part 1: SwiftUI 2.0 & Storyboard
- Part 2: SwiftUI 2.0 & UIKit 日本語
- Part 3: Storyboard & SwiftUI 2.0
The second part is about using UIKit elements in a SwiftUI 2.0 application.
Use UIKit elements in SwiftUI
To be able to use UIKit views and view controllers in SwiftUI, They have to be wrapped in types conforming to the UIViewRepresentable and UIViewControllerRepresentable protocols.
The XCode Project
Create a new SwiftUI app project

Name the project

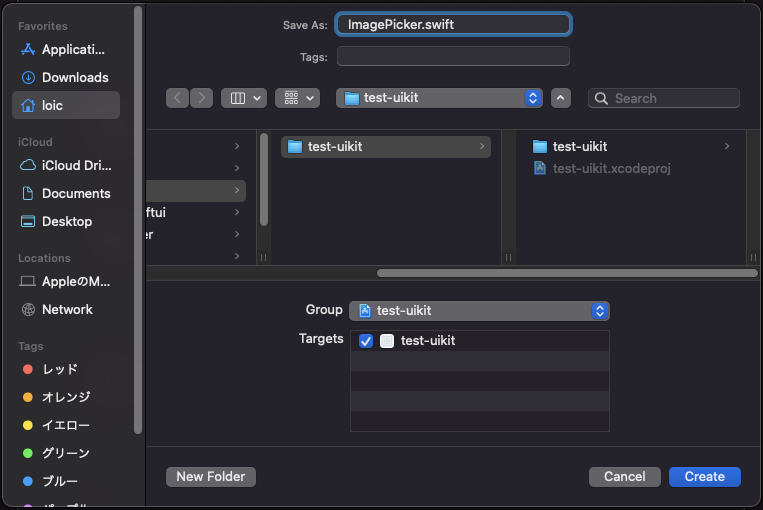
Create a new Swift file

Name it
Now we have to create a type conforming to the UIViewControllerRepresentable protocol to wrap a UIKit component ...
ImagePicker: The UIViewControllerRepresentable conforming type
First, let's create the ImagePicker type to wrap the UIImagePickerController.
The UIViewControllerRepresentable protocol has 2 requirements:
- a
makeUIViewController(context:)method that creates and configure aUIViewController - an
updateUIViewController(_:context:)method that updates the state of the specified view controller with new information from SwiftUI. We will leave it blank as we won't use it for our example.
import Foundation
import SwiftUI
import AVKit

struct ImagePicker: UIViewControllerRepresentable {
    func makeUIViewController(context: UIViewControllerRepresentableContext<ImagePicker>) -> UIImagePickerController {
        // ...
    }
    func updateUIViewController(_ uiViewController: UIImagePickerController, context: UIViewControllerRepresentableContext<ImagePicker>) {
    }
}
Next, let's create the UIImagePickerController in the makeUIViewController(context:) method:
let imagePicker = UIImagePickerController()
Then let's configure it:
- Set the user interface for choosing among saved pictures and movies (To set the user interface for taking a new picture or movie use
.camerainstead):
imagePicker.sourceType = .photoLibrary
- Specify the media types to be accessed by the media picker controller, images and movies:
imagePicker.mediaTypes = UIImagePickerController.availableMediaTypes(for: .photoLibrary) ?? ["public.image", "public.movie"]
- Disable editing of the selected still images and movies:
imagePicker.allowsEditing = false
- Set the video recording and transcoding quality:
imagePicker.videoQuality = .typeHigh
- Set the image picker’s delegate object that will handle the image picker's event notifications:
imagePicker.delegate = context.coordinator
※ We will discuss the delegate object in the next section ...
- And last, return the
UIImagePickerController:
return imagePicker
Finally, to be able to change the source type when creating an ImagePicker, define a variable to hold the default .photoLibrary source type to be used during configuration in the makeUIViewController(context:) method:
struct ImagePicker: UIViewControllerRepresentable {
    var sourceType: UIImagePickerController.SourceType = .photoLibrary
    // ...
    func makeUIViewController(context: UIViewControllerRepresentableContext<ImagePicker>) -> UIImagePickerController {
        // ...
        imagePicker.sourceType = sourceType
        imagePicker.mediaTypes = UIImagePickerController.availableMediaTypes(for: sourceType) ?? ["public.image", "public.movie"]

        // ...
    }
    // ...
}
The source type of the UIImagePickerController can then be changed at creation time like below:
ImagePicker(sourceType: .camera, /* ... */)
Coordinator: The UIImagePickerController's delegate
To communicate changes occurring within the view controller to other parts of the SwiftUI interface, a custom coordinator object must be provided to the SwiftUI view.
To listen to changes in UIKit components, delegates are used. Delegates handle event notifications before or after the event itself has been handled by the system.
And, to listen to UIImagePickerController changes our Coordinator will have to conform to the UIImagePickerControllerDelegate and UINavigationControllerDelegate protocols, as well as inherit from NSObject to conform to the NSObjectProtocol protocol which cannot be declared in Swift.
Let's declare our Coordinator type with a constructor setting a reference to the ImagePicker instance whose changes it observes:
struct ImagePicker: UIViewControllerRepresentable {
    // ...
    final class Coordinator: NSObject, UIImagePickerControllerDelegate, UINavigationControllerDelegate {
        var parent: ImagePicker
        init(_ parent: ImagePicker) {
            self.parent = parent
        }
        // ...
    }
    // ...
}
imagePickerController(_:didFinishPickingMediaWithInfo:)
To catch the "user picked an image or a movie" event notification, we need to implement the imagePickerController(_:didFinishPickingMediaWithInfo:) method telling the delegate that the user picked a still image or a movie.
In it, we check whether the user picked an image or a movie:
- If the user picked an image, the
infoparameterUIImagePickerController.InfoKey.originalImagecontains anUIImageobject. - If the user picked a movie, the
infoparameter.mediaURLcontains anURLobject.
struct ImagePicker: UIViewControllerRepresentable {
    // ...
    final class Coordinator: NSObject, UIImagePickerControllerDelegate, UINavigationControllerDelegate {
        // ...
        func imagePickerController(_ picker: UIImagePickerController, didFinishPickingMediaWithInfo info: [UIImagePickerController.InfoKey : Any]) {
            if let image = info[UIImagePickerController.InfoKey.originalImage] as? UIImage {
                // ...
            }
            if let videoURL = info[.mediaURL] as? URL {
                // ...
            }
            // ...
        }
    }
    // ...
}
To communicate to the SwiftUI interface what files the user picked, we chose to use a binding to an external Array of URLs passed as argument to the ImagePicker at creation time.
struct ImagePicker: UIViewControllerRepresentable {
    // ...
    @Binding var selectedFiles: Array<URL>
    final class Coordinator: NSObject, UIImagePickerControllerDelegate, UINavigationControllerDelegate {
        // ...
        func imagePickerController(_ picker: UIImagePickerController, didFinishPickingMediaWithInfo info: [UIImagePickerController.InfoKey : Any]) {
            if let image = info[UIImagePickerController.InfoKey.originalImage] as? UIImage {
                // ...
                parent.selectedFiles.append(imagePath.absoluteURL)
            }
            if let videoURL = info[.mediaURL] as? URL {
                parent.selectedFiles.append(videoURL)
            }
            // ...
        }
    }
    // ...
}
When a user picks a movie, we get an URL, which can directly be added to the url array.
But, when the user picks an image, we have to first write a temporary file to disk, before adding the URL representation of its path to the url array:
    // ...
    if let image = info[UIImagePickerController.InfoKey.originalImage] as? UIImage {
        let imageName = UUID().uuidString
        let paths = FileManager.default.urls(for: .documentDirectory, in: .userDomainMask)
        let imagePath = paths[0].appendingPathComponent(imageName)

        if let jpegData = image.jpegData(compressionQuality: 0.8) {
            try? jpegData.write(to: imagePath)
        }

        parent.selectedFiles.append(imagePath.absoluteURL)
    }
    // ...
}
The last step in our imagePickerController(_:didFinishPickingMediaWithInfo:) method is to dismiss the picker using the environment property presentationMode:
struct ImagePicker: UIViewControllerRepresentable {
    // ...
    @Environment(\.presentationMode) private var presentationMode
    final class Coordinator: NSObject, UIImagePickerControllerDelegate, UINavigationControllerDelegate {
        // ...
        func imagePickerController(_ picker: UIImagePickerController, didFinishPickingMediaWithInfo info: [UIImagePickerController.InfoKey : Any]) {
            // ...
            parent.presentationMode.wrappedValue.dismiss()
        }
    }
    // ...
}
Custom Coordinator Object
To provide our own coordinator object instead of the default implementation provided, we need to implement the makeCoordinator() method in ImagePicker:
struct ImagePicker: UIViewControllerRepresentable {
    // ...
    func makeCoordinator() -> Coordinator {
        Coordinator(self)
    }
    // ...
}
The ImagePicker Source Code
import Foundation
import SwiftUI
import AVKit

struct ImagePicker: UIViewControllerRepresentable {
    var sourceType: UIImagePickerController.SourceType = .photoLibrary
    @Binding var selectedFiles: Array<URL>
    @Environment(\.presentationMode) private var presentationMode
    final class Coordinator: NSObject, UIImagePickerControllerDelegate, UINavigationControllerDelegate {
        var parent: ImagePicker
        init(_ parent: ImagePicker) {
            self.parent = parent
        }
        func imagePickerController(_ picker: UIImagePickerController, didFinishPickingMediaWithInfo info: [UIImagePickerController.InfoKey : Any]) {
            if let image = info[UIImagePickerController.InfoKey.originalImage] as? UIImage {
                let imageName = UUID().uuidString
                let paths = FileManager.default.urls(for: .documentDirectory, in: .userDomainMask)
                let imagePath = paths[0].appendingPathComponent(imageName)
                if let jpegData = image.jpegData(compressionQuality: 0.8) {
                    try? jpegData.write(to: imagePath)
                }
                parent.selectedFiles.append(imagePath.absoluteURL)
            }
            if let videoURL = info[.mediaURL] as? URL {
                parent.selectedFiles.append(videoURL)
            }
            parent.presentationMode.wrappedValue.dismiss()
        }
    }
    func makeCoordinator() -> Coordinator {
        Coordinator(self)
    }
    func makeUIViewController(context: UIViewControllerRepresentableContext<ImagePicker>) -> UIImagePickerController {
        let imagePicker = UIImagePickerController()
        imagePicker.sourceType = sourceType
        imagePicker.mediaTypes = UIImagePickerController.availableMediaTypes(for: sourceType) ?? ["public.image", "public.movie"]
        imagePicker.allowsEditing = false
        imagePicker.videoQuality = .typeHigh
        imagePicker.delegate = context.coordinator
        return imagePicker
    }
    func updateUIViewController(_ uiViewController: UIImagePickerController, context: UIViewControllerRepresentableContext<ImagePicker>) {
    }
}
The ContentView Source Code
Now, let's add our ImagePicker to the App ContentView.
We use a Button to present our ImagePicker in a sheet using the sheet(isPresented:onDismiss:content:) method:
import SwiftUI

struct ContentView: View {
    @State var imageFiles = Array<URL>()
    @State private var isShowingPhotoLibrary = false

    var body: some View {
        VStack {
            Text("Pick an Image!")
                .padding()
            Button(action: {
                self.isShowingPhotoLibrary = true
            }) {
                Image(systemName: "photo.fill")
                    .font(.system(size: 40))
            }.sheet(isPresented: self.$isShowingPhotoLibrary) {
                ImagePicker(sourceType: .photoLibrary, selectedFiles: $imageFiles)
            }
        }
    }
}

struct ContentView_Previews: PreviewProvider {
    static var previews: some View {
        ContentView()
    }
}
The App
Launch the App, and in the content view, click on the button to open the image picker:

In the picker, select an image:

I added a print statement at the end of the imagePickerController(_:didFinishPickingMediaWithInfo:) to display the contents of the url array.
After picking the first image:
selectedFiles= [
    file:///Users/loic/Library/Developer/CoreSimulator/Devices/XXXXXXXX-XXXX-XXXX-XXXX-XXXXXXXXXXXX/data/Containers/Data/Application/XXXXXXXX-XXXX-XXXX-XXXX-XXXXXXXXXXXX/Documents/XXXXXXXX-XXXX-XXXX-XXXX-XXXXXXXXXXXX
]
After picking a second image:
selectedFiles= [
    file:///Users/loic/Library/Developer/CoreSimulator/Devices/XXXXXXXX-XXXX-XXXX-XXXX-XXXXXXXXXXXX/data/Containers/Data/Application/XXXXXXXX-XXXX-XXXX-XXXX-XXXXXXXXXXXX/Documents/XXXXXXXX-XXXX-XXXX-XXXX-XXXXXXXXXXXX,
    file:///Users/loic/Library/Developer/CoreSimulator/Devices/YYYYYYYY-YYYY-YYYY-YYYY-YYYYYYYYYYYY/data/Containers/Data/Application/YYYYYYYY-YYYY-YYYY-YYYY-YYYYYYYYYYYY/Documents/YYYYYYYY-YYYY-YYYY-YYYY-YYYYYYYYYYYY
]
It works!
That wraps up this article about using UIKit elements in SwiftUI.