目的
会社と自宅で仕様書を楽に作成したい。
Pandoc + Git + Jenkins = Auto Generate Document Systemというドキュメントシステムを試してみることにした。
ここでは、Git, Pandoc, Jenkinsをインストールすることを目的とする。
やることリスト
- Gitをインストール
- Jenkinsをインストール
- Pandocをインストール
環境
- CentOS release 6.7 (Final)
- Vagrant 1.9.1
- Proxy環境
構築した実験環境については以下。
http://qiita.com/tsnb/items/47bca690e4a722653bc1
詳細
1. Gitをインストール
以下を参考にした。
http://qiita.com/sirone/items/2e233ab9697a030f1335
とりあえず、yumでgitをインストール。
gitでソースをclone->ビルド->インストールして最新にする。
足りないパッケージで怒られたら適宜入れてください。
終わったらyumのgitはremoveする。
$ sudo yum -y install git
$ yum -y install curl-devel expat-devel gettext-devel openssl-devel zlib-devel gcc perl-ExtUtils-MakeMaker

$ cd /usr/local/src/
$ git clone https://git.kernel.org/pub/scm/git/git.git
$ cd git
$ su -
$ make prefix=/usr/local all
$ make prefix=/usr/local install
$ git --version
git version 2.11.1.431.g8a8f121

$ sudo yum remove git
2. Jenkinsをインストール
以下を参考にした。
http://qiita.com/kijitoraneko/items/5c97da72a718c93082b1
$ sudo yum install java-1.8.0-openjdk
$ java -version
openjdk version "1.8.0_121"
OpenJDK Runtime Environment (build 1.8.0_121-b13)
OpenJDK 64-Bit Server VM (build 25.121-b13, mixed mode)

$ sudo wget -O /etc/yum.repos.d/jenkins.repo http://pkg.jenkins-ci.org/redhat/jenkins.repo
$ sudo rpm --import http://pkg.jenkins-ci.org/redhat/jenkins-ci.org.key
$ sudo yum -y install jenkins

マシン起動時に立ち上げたい場合は以下。
$ sudo chkconfig jenkins on

$ sudo service jenkins start

以下からポート8080でサーバが建てられているっぽい。
任意のtcp ポート8080がLISTENになっているので大丈夫ぽい。
ファイアウォール設定は/etc/sysconfig/iptables にあるので8080を許可するようにする。
今回はVagrantのboxでiptablesは無効になっているよう。

$ ps aux |grep jenkins
jenkins   8709  9.6 23.0 2237184 115596 ?      Ssl  06:42   0:11 /etc/alternatives/java -Dcom.sun.akuma.Daemon=daemonized -Djava.awt.headless=true -DJENKINS_HOME=/var/lib/jenkins -jar /usr/lib/jenkins/jenkins.war --logfile=/var/log/jenkins/jenkins.log --webroot=/var/cache/jenkins/war --daemon --httpPort=8080 --debug=5 --handlerCountMax=100 --handlerCountMaxIdle=20
vagrant   8856  0.0  0.1 103324   912 pts/0    S+   06:44   0:00 grep jenkins
[vagrant@akzwpc git]$ netstat -nutpl |grep 8080
(Not all processes could be identified, non-owned process info
 will not be shown, you would have to be root to see it all.)
tcp        0      0 :::8080                     :::*                        LISTEN      -
ブラウザで <サーバを立てたホストのFQDN>:8080 でJenkinsにアクセスする。
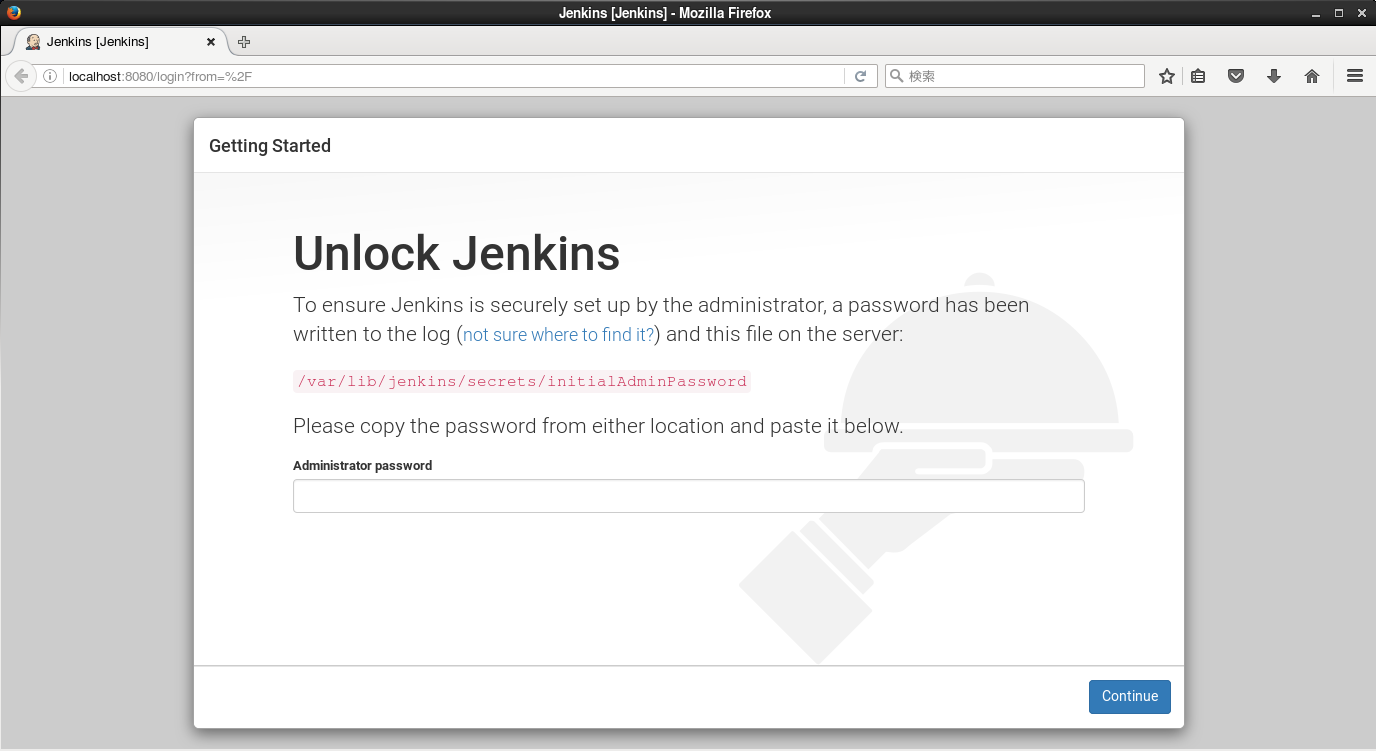
初回はUnlockしないとダメらしいので、以下のファイル内の値をAdministrator passwordに入力する。
$ sudo cat /var/lib/jenkins/secrets/initialAdminPassword
20fc51d929ee****
Proxyがある場合は、proxy設定画面が出てくるので設定してからプラグイン設定をする。
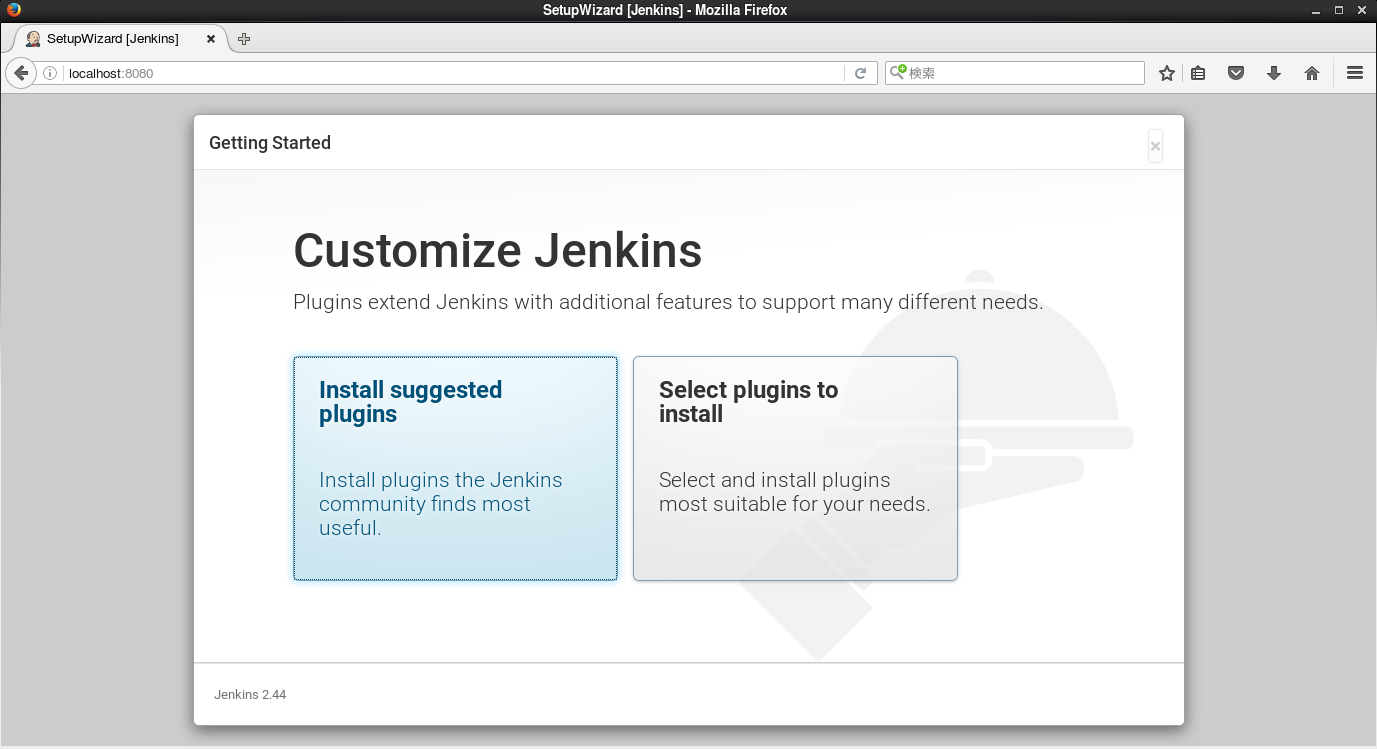
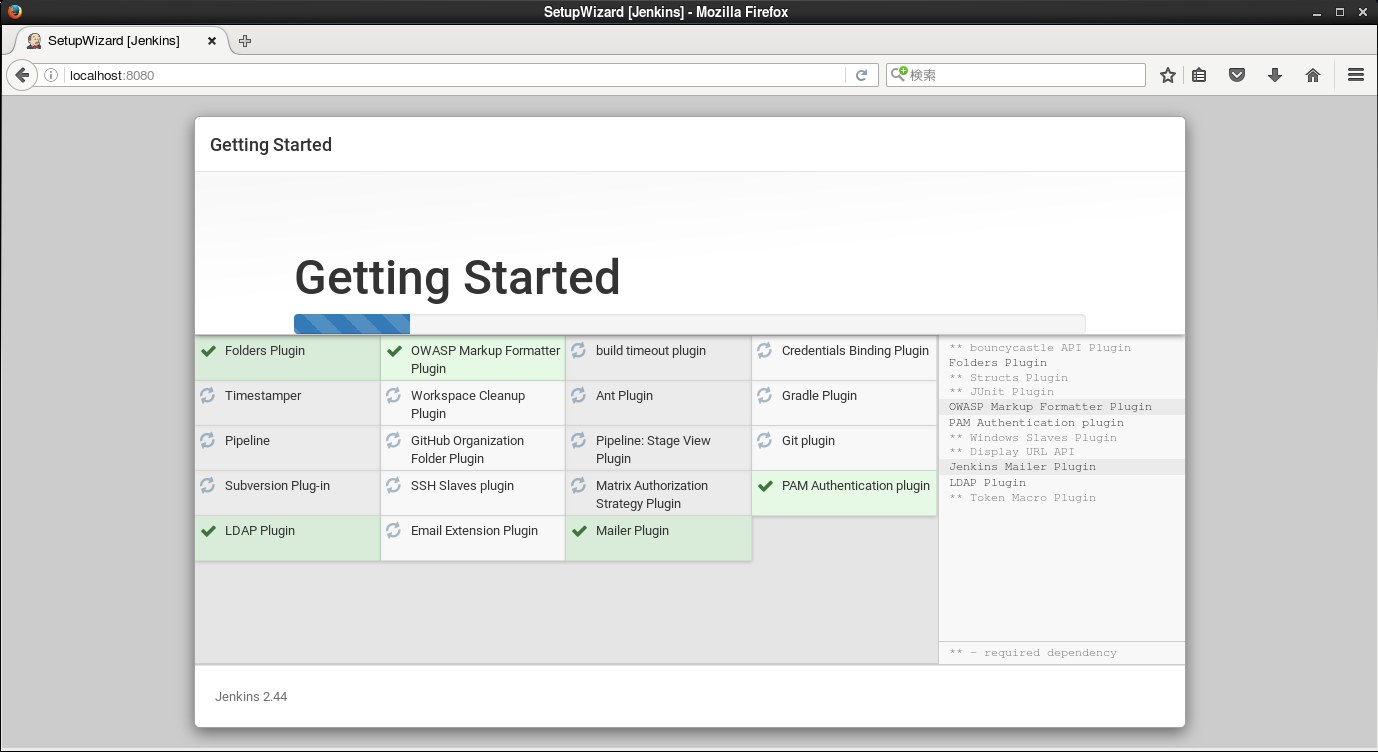
Install suggested pluginsをクリックすると以下のように何らかのプラグインのインストールが始まる。終わったらユーザ名等の登録画面になるので入力する。
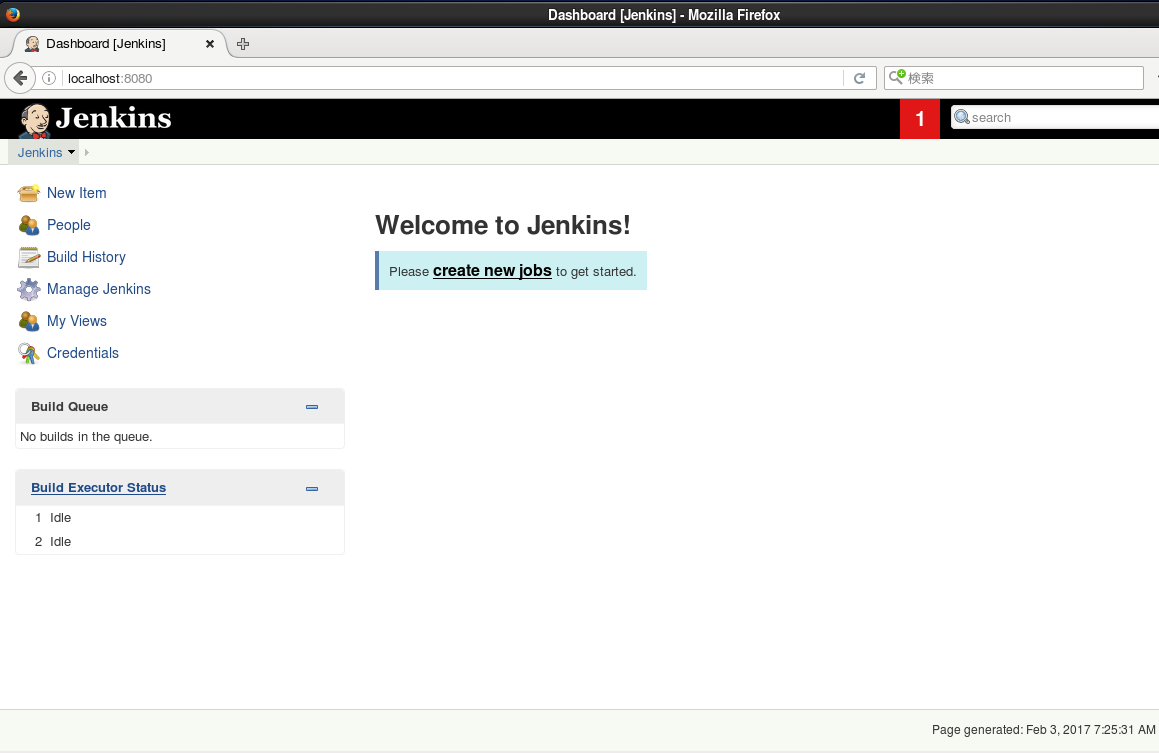
登録が終わると以下の画面が表示される。日本語にしたい場合は、
Firefoxの[設定]-> [コンテンツ]-> [言語設定]で、Webページの言語 を日本語[ja]のみにする。
(Mozilla Firefox 45.7.0の場合)
3. Pandocをインストール
以下の公式のインストール方法でやる。
http://pandoc.org/installing.html
まず、CentOS用のリポジトリはないっぽい。公式ページにあるソースからのインストールをする。
epelリポジトリを追加すればyumでpandocを入れられるがバージョンが古いのでやめとく。
~~1. stackをyumインストールするためにepelリポジトリを追加する。 ~~
(追記:2017/02/09)
この部分はいりませんでした。別のやり方(cabal)のログが混じっていました。
入れても問題はないと思います。
```
$ wget http://dl.fedoraproject.org/pub/epel/6/x86_64/epel-release-6-8.noarch.rpm
$ rpm -ivh epel-release-6-8.noarch.rpm
```
-
stackのインストール
https://docs.haskellstack.org/en/stable/README/$ wget -qO- https://get.haskellstack.org/ | sh -
pandocのソースをダウンロード
今回はwgetで落とした。$ wget https://hackage.haskell.org/package/pandoc-1.19.2/pandoc-1.19.2.tar.gz $ tar xf pandoc-1.19.2.tar.gz $ cd pandoc-1.19.2/ -
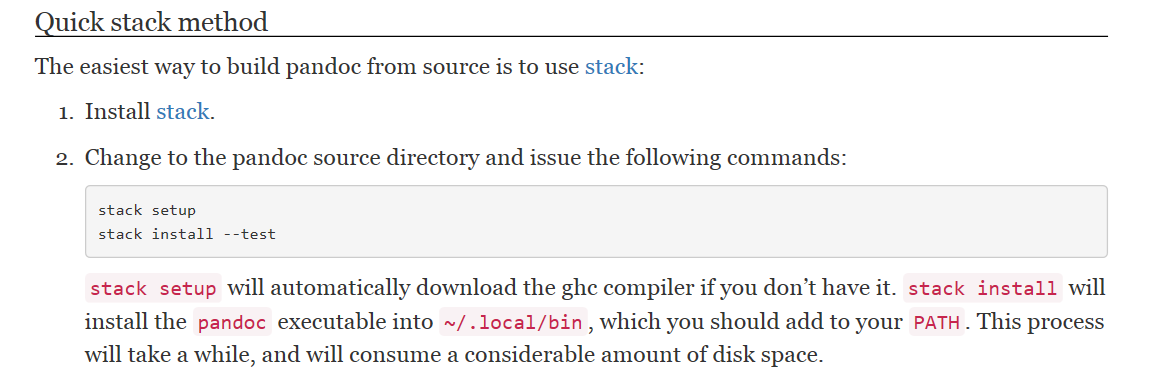
stackでpandocインストール
setupでエラーがでている。なぜかわからなかった。
わかる方いたら教えてください。
(追記:2017/03/03)
公式の通りやりましたが、テンプレートの追加あたりが
pandocをCentOS7にインストール
の方がイケてるので、以降は無視してそっちを参考にしてください。CentOS6.7でもうまくいきました。
$ stack setup
Downloaded lts-7.14 build plan.
Updating package index Hackage (mirrored at https://github.com/commercialhaskell                                                                                Fetching package index ...remote: Counting objects: 13, done.
remote: Compressing objects: 100% (11/11), done.
remote: Total 13 (delta 2), reused 13 (delta 2), pack-reused 0
Unpacking objects: 100% (13/13), done.
From https://github.com/commercialhaskell/all-cabal-hashes
   2f2ee4f904..f964df0874  hackage         -> origin/hackage
 t [tag update]            current-hackage -> current-hackage
Fetched package index.
Populated index cache.
Preparing to install GHC (gmp4) to an isolated location.
This will not interfere with any system-level installation.
Downloaded ghc-gmp4-8.0.1.
Unpacking GHC into /home/vagrant/.stack/programs/x86_64-linux/ghc-gmp4-8.0.1.tem                                                                                Running /bin/tar Jxf /home/vagrant/.stack/programs/x86_64-linux/ghc-gmp4-8.0.1.tar.xz in directory /home/vagrant/.stack/programs/x86_64-linux/ghc-gmp4-8.0.1.temp/ exited with ExitFailure (-9)
Unpacking GHC into /home/vagrant/.stack/programs/x86_64-linux/ghc-gmp4-8.0.1.tem
Error: Error encountered while unpacking GHC with
         tar Jxf /home/vagrant/.stack/programs/x86_64-linux/ghc-gmp4-8.0.1.tar.xz
         run in /home/vagrant/.stack/programs/x86_64-linux/ghc-gmp4-8.0.1.temp/

    The following directories may now contain files, but won't be used by stack:
  - /home/vagrant/.stack/programs/x86_64-linux/ghc-gmp4-8.0.1.temp/
  - /home/vagrant/.stack/programs/x86_64-linux/ghc-gmp4-8.0.1/
エラーでghcが入ってないっぽいので以下の--install-ghcをつけた。
$ stack install --test --install-ghc
メモリ足りないみたいなエラーが出て上記コマンドでうまく行かなかった。
vagrantのメモリを490MB->2GBにしてやり直したらうまくいった。
ちなみにpandocのインストールは時間かかる。
config.vm.provider "virtualbox" do |vb|
  # Display the VirtualBox GUI when booting the machine
  vb.gui = true
#
#   # Customize the amount of memory on the VM:
  vb.memory = "2048"
end
~/.local/bin/の下にpandocの実行ファイルができている。
$ ~/.local/bin/pandoc -v
pandoc 1.19.2
Compiled with pandoc-types 1.17.0.4, texmath 0.9, skylighting 0.1.1.2
Default user data directory: /home/vagrant/.pandoc
Copyright (C) 2006-2016 John MacFarlane
Web:  http://pandoc.org
This is free software; see the source for copying conditions.
There is no warranty, not even for merchantability or fitness
for a particular purpose.
あとはパスを通す。今回はパスが通っている/usr/local/binに実行ファイルを置いた。
$ sudo cp ~/.local/bin/pandoc /usr/local/bin/
おしまい
今回の目的である、Git, Pandoc, Jenkinsのインストールが出来たので終わり。
もっと良いよっていうやり方があれば教えてください。
環境が出来たので、Pandoc + Git + Jenkins = Auto Generate Document Systemを試してみようと思う。