事前準備
実行する前にEclise用のAWSツールキットを導入しておいてください。導入手順は以下のリンクにご参考をお願いします。
導入完成したらAWSプロジェクトがプロジェクト新規画面で出てくるはずです。
mavenは導入済みの前提です。

Lambdaファンクションを書く
- まずはAWS Lambda Java ファンクションのプロジェクト作成する.

- プロジェクト名 :S3EventTutorial
- パッケージ名:com.amazonaws.lambda.s3tutorial
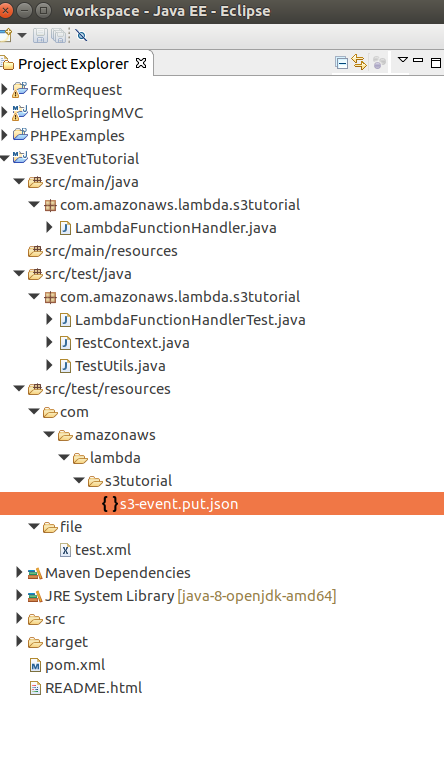
以上のように必須な情報をいれておきまましょう。「完了」を押したらプロジェクトは作成されて一般的なプロジェクトフォルダは以下のようにみれます。
- S3をモックするように「s3mock_2.11」というライブラリをMavenで導入する。pomファイルに依存ライブラリを定義するだけでいいですので下のpomファイルを参考にして自分が作成したプロジェクトのpomを作成してみてください。
<project xmlns="http://maven.apache.org/POM/4.0.0" xmlns:xsi="http://www.w3.org/2001/XMLSchema-instance"
	xsi:schemaLocation="http://maven.apache.org/POM/4.0.0 http://maven.apache.org/xsd/maven-4.0.0.xsd">
	<modelVersion>4.0.0</modelVersion>
	<groupId>com.amazonaws.lambda</groupId>
	<artifactId>s3tutorial</artifactId>
	<version>4.0.0</version>
	<dependencies>
		<dependency>
			<groupId>com.amazonaws</groupId>
			<artifactId>aws-lambda-java-core</artifactId>
			<version>1.1.0</version>
			<scope>compile</scope>
		</dependency>
		<dependency>
			<groupId>com.amazonaws</groupId>
			<artifactId>aws-lambda-java-events</artifactId>
			<version>1.3.0</version>
			<scope>compile</scope>
		</dependency>
		<dependency>
			<groupId>junit</groupId>
			<artifactId>junit</artifactId>
			<version>4.11</version>
			<scope>test</scope>
		</dependency>
		<dependency>
			<groupId>com.amazonaws</groupId>
			<artifactId>aws-java-sdk</artifactId>
			<version>1.11.119</version>
			<scope>compile</scope>
		</dependency>

		<!-- https://mvnrepository.com/artifact/com.typesafe.akka/akka-http-experimental_2.11 -->
		<dependency>
			<groupId>com.typesafe.akka</groupId>
			<artifactId>akka-http-experimental_2.11</artifactId>
			<version>2.4.11.1</version>
		</dependency>

		<!-- https://mvnrepository.com/artifact/com.typesafe.scala-logging/scala-logging_2.11 -->
		<dependency>
			<groupId>com.typesafe.scala-logging</groupId>
			<artifactId>scala-logging_2.11</artifactId>
			<version>3.5.0</version>
		</dependency>

		<!-- https://mvnrepository.com/artifact/io.findify/s3mock_2.11 -->
		<dependency>
			<groupId>io.findify</groupId>
			<artifactId>s3mock_2.11</artifactId>
			<version>0.1.10</version>
			<scope>test</scope>
		</dependency>
		<!-- https://mvnrepository.com/artifact/org.mockito/mockito-core -->
		<dependency>
			<groupId>org.mockito</groupId>
			<artifactId>mockito-core</artifactId>
			<version>2.7.22</version>
		</dependency>
		<!-- https://mvnrepository.com/artifact/com.github.tomakehurst/wiremock -->
		<dependency>
			<groupId>com.github.tomakehurst</groupId>
			<artifactId>wiremock</artifactId>
			<version>2.6.0</version>
		</dependency>


	</dependencies>
</project>
ロカールにおいてあるmavenのリポジトリーにない依存ライブラリがあるかもしれないので一応プロジェクトのrootフォルダで「mvn package」をコマンドラインとして実行してみましう。そしてmavenはpomに定義されていたdependencyをダウンロードしてくれます。
- Lambdaファンクションのロジック
作成してもらったLambdaFunctionHandler.javaを開いてロジックをかいてみましょう。アイデアは凄っく簡単です。
S3からファイルがアップロードされたというイベントがこられたら、イベントの内容を見てアップロードされたファイルをゲットしてコンソールでそのファイルを書き出すという作業です。コードみてみたらすぐ分かると思いますので説明しないですむ。
public class LambdaFunctionHandler implements RequestHandler<S3Event, Object> {

	private AmazonS3 s3Client;

	public LambdaFunctionHandler(AmazonS3 s3Client){
		this.s3Client = s3Client;
	}
	public LambdaFunctionHandler(){
		this.s3Client =  new AmazonS3Client(new ProfileCredentialsProvider());
	}

	private static void storeObject(InputStream input) throws IOException {
		// Read one text line at a time and display.
		BufferedReader reader = new BufferedReader(new InputStreamReader(input));
		while (true) {
			String line = reader.readLine();
			if (line == null)
				break;
			System.out.println("    " + line);
		}
		System.out.println();
	}

	@Override
	public Object handleRequest(S3Event input, Context context) {
		context.getLogger().log("Input: " + input);

		// Simply return the name of the bucket in request
		LambdaLogger lambdaLogger = context.getLogger();
		S3EventNotificationRecord record = input.getRecords().get(0);
		lambdaLogger.log(record.getEventName()); // イベント名

		String bucketName = record.getS3().getBucket().getName();
		String key = record.getS3().getObject().getKey();
		/*
		 * Get file to do further operation
		 */
		try {
			lambdaLogger.log("Downloading an object");

			S3Object s3object = s3Client.getObject(new GetObjectRequest(bucketName, key));

			lambdaLogger.log("Content-Type: " + s3object.getObjectMetadata().getContentType());

			storeObject(s3object.getObjectContent());

			// Get a range of bytes from an object.

			GetObjectRequest rangeObjectRequest = new GetObjectRequest(bucketName, key);
			rangeObjectRequest.setRange(0, 10);
			S3Object objectPortion = s3Client.getObject(rangeObjectRequest);

			System.out.println("Printing bytes retrieved.");
			storeObject(objectPortion.getObjectContent());

		} catch (AmazonServiceException ase) {
			System.out.println("Caught an AmazonServiceException, which" + " means your request made it "
					+ "to Amazon S3, but was rejected with an error response" + " for some reason.");
			System.out.println("Error Message:    " + ase.getMessage());
			System.out.println("HTTP Status Code: " + ase.getStatusCode());
			System.out.println("AWS Error Code:   " + ase.getErrorCode());
			System.out.println("Error Type:       " + ase.getErrorType());
			System.out.println("Request ID:       " + ase.getRequestId());
		} catch (AmazonClientException ace) {
			System.out.println("Caught an AmazonClientException, which means" + " the client encountered "
					+ "an internal error while trying to " + "communicate with S3, "
					+ "such as not being able to access the network.");
			System.out.println("Error Message: " + ace.getMessage());
		}catch (IOException ioe){
			System.out.println("Caught an IOException, which means" + " the client encountered "
					+ "an internal error while trying to " + "save S3 object, "
					+ "such as not being able to access the network.");
			System.out.println("Error Message: " + ioe.getMessage());
		}
		return record.getS3().getObject().getKey();
	}

}
書いたコードに対してのテストケースを作成しましょう
今回は実装したLambdaコードを注目しますのでLambdaFunctionHandlerTestを開いてテストケース作成します。まずはテストケースのコードに目を通してみましょう。
    private static S3Event input;
    private static AmazonS3Client client;

    @BeforeClass
    public static void createInput() throws IOException {
        input = TestUtils.parse("s3-event.put.json", S3Event.class);

        S3Mock api = S3Mock.create(8999, "/tmp/s3");
        api.start();

        client = new AmazonS3Client(new AnonymousAWSCredentials());
        client.setRegion(Region.getRegion(Regions.AP_NORTHEAST_1));

        // use IP endpoint to override DNS-based bucket addressing
        client.setEndpoint("http://127.0.0.1:8999");

    }

    private Context createContext() {
        TestContext ctx = new TestContext();

        // TODO: customize your context here if needed.
        ctx.setFunctionName("Your Function Name");

        return ctx;
    }

    @Test
    public void testLambdaFunctionHandlerShouldReturnObjectKey() {

        client.createBucket(new CreateBucketRequest("newbucket", "ap-northeast-1"));
    	ClassLoader classLoader = this.getClass().getClassLoader();
    	File file = new File(classLoader.getResource("file/test.xml").getFile());
        client.putObject(new PutObjectRequest(
        		                 "newbucket", "file/name", file));

        LambdaFunctionHandler handler = new LambdaFunctionHandler(client);
        Context ctx = createContext();

        Object output = handler.handleRequest(input, ctx);

        if (output != null) {
        	assertEquals("file/name", output.toString());
            System.out.println(output.toString());
        }
    }
テストのため、createInput関数でS3Mockのインスタンスを作成して起動します。このインスタンスはローカル環境の8999番ポートにバイドしてリクエストを待ちます。それに「/temp/s3」というフォルダを作成しておいてS3サービスのストレージを真似する。
一番大事なのはtestLambdaFunctionHandlerShouldReturnObjectKeyという関数の内容です。見るの通り、以下の作業を実装します。
- 「testbucket」を作成する。注意:Regionを指定するのは必須です(Regionの内容は別になでもいいですがなかったらjava.lang.NoSuchMethodError: com.amazonaws.regions.RegionUtils.getRegionByEndpoint(Ljava/lang/String;)Lcom/amazonaws/regions/Region;というErrorが出てきます。これはAWSのバグです)
- プロジェクトのしたにあるresourceフォルダに作成したfile/test.xmlを仮ストレージにアップロードする
- アップロードしたファイルを仮S3からダウンロードして内容をチェックする。
トリガーは「s3-event.put.json」で定義されているイベントの内容なので「s3-event.put.json」の内容にアップロードされたファイルの情報を反映しなければなりません
{
  "Records": [
    {
      "eventVersion": "2.0",
      "eventSource": "aws:s3",
      "awsRegion": "us-east-1",
      "eventTime": "1970-01-01T00:00:00.000Z",
      "eventName": "ObjectCreated:Put",
      "userIdentity": {
        "principalId": "EXAMPLE"
      },
      "requestParameters": {
        "sourceIPAddress": "127.0.0.1"
      },
      "responseElements": {
        "x-amz-request-id": "",
        "x-amz-id-2": "FMyUVURIY8//JRWeUWerMUE5JgHvANOjpD"
      },
      "s3": {
        "s3SchemaVersion": "1.0",
        "configurationId": "testConfigRule",
        "bucket": {
          "name": "testbucket",
          "ownerIdentity": {
            "principalId": "EXAMPLE"
          },
          "arn": "arn:aws:s3:::mybucket"
        },
        "object": {
          "key": "file/name",
          "size": 1024,
          "eTag": "d41d8cd98f00b204e9800998ecf8427e"
        }
      }
    }
  ]
}
注意:bucket名とobjectのキーは一番大事です。見た内容の通りファイルはtestbuckにfile/nameというキーでアップロードされましたので応じてjsonの内容はそ言うことを表現される。
#終わり
ドラフトに説明しましたが不明なところがありましたらご相談をお願いします