この記事はなに?
自分の勉強用にTerraformでAKS(Azure Kubernetes Service)を構築してみた際のメモ。
ソースコード
上記レポジトリに置いている。
ディレクトリ構成とかInput Variablesの持ち方とか、細々した部分がここの解説と違う。
READMEに動かし方を書いている(英語)。
環境
- Terraform 0.12.0以降
- Microsoft Azureのアカウント
- Azure CLI 2.13以降
- GitHubのアカウント([おまけ]に必要)
手順
1. [最初の1回のみ] Service Principalを作成し、ログインする
https://registry.terraform.io/providers/hashicorp/azurerm/latest/docs#authenticating-to-azure
にあるように、Terraformを使ってAzureの認証を通過するには複数の方法がある。
今回は、Service PrincipalとClient Secretを使う方法で認証を通す。
https://registry.terraform.io/providers/hashicorp/azurerm/latest/docs/guides/service_principal_client_secret
Service Principalとは、(通常のユーザとは異なり、)アプリケーションや自動化ツールなどがAzureのリソースにアクセスする際に使われる、権限を制限した形のユーザの一種らしい。
https://docs.microsoft.com/en-us/cli/azure/create-an-azure-service-principal-azure-cli
Service Principalを作成し、それを使ってAzureにログインする。
$ az login
  # Azureアカウントでログイン
  # コマンド実行後、ブラウザにリダイレクトされるので、メールアドレスとパスワードを入力する

$ az account list
  # コマンドの実行結果(JSON)から、今回使いたいAzureアカウントを探し、その"id"(サブスクリプションID)の値を以下の値に代入
$ SUBSCRIPTION_ID=${id}

$ az account set --subscription="${SUBSCRIPTION_ID}"
  # 今回使いたいサブスクリプションをアクティブにする

$ az ad sp create-for-rbac --role="Contributor" --scopes="/subscriptions/${SUBSCRIPTION_ID}"
  # Contributorのroleを持つService Principalを作成する
  # コマンドの実行結果(JSON)から"appId"、"password"、"tenant"の値をそれぞれ以下の値に代入
  # 特にpasswordはここの出力以外からは得られず、一度紛失するとリセットするしかなくなるので注意
$ CLIENT_ID=${appId}
$ CLIENT_SECRET=${password}
$ TENANT_ID=${tenant}

$ az login --service-principal -u ${CLIENT_ID} -p ${CLIENT_SECRET} --tenant ${TENANT_ID}
  # Service Principalを使ってログイン

$ az account show
  # ここで、
  # {
  #   "environmentName": "AzureCloud",
  #   "homeTenantId": "xxx",
  #   "id": "xxx",
  #   "isDefault": true,
  #   "managedByTenants": [],
  #   "name": "xxx",
  #   "state": "Enabled",
  #   "tenantId": "xxx",
  #   "user": {
  #     "name": "xxx",
  #     "type": "servicePrincipal"
  #   }
  # }
  # のように、新たに作られた"type": "servicePricipal"のアカウントでログインできていることを確認する
2. [最初の1回のみ] Azure Blob StorageでTerraformのStateを管理する
以下、自分の手元のPCでしかTerraformを利用しない場合は不要。
Terraformには、Stateという、Terraform管理下にあるリソースの状態を管理するためのオブジェクトがある。
https://www.terraform.io/docs/state/index.html
デフォルトでは、Stateはterraform.tfstateというローカルPCのファイルに保存されるが、これだと複数人でのStateの共有ができない。
今回は、StateをオブジェクトストレージであるAzure Blob Storageに保存することとする。
$ STORAGE_ACCOUNT_NAME=${arbitrary_storage_account_name}
  # Storage Accountの名前。(Azure内で一意である限り、)任意のものでよい。
$ RESOURCE_GROUP_NAME=${arbitrary_resource_group_name}
  # Storage Accountが属するResource Groupの名前
$ LOCATION=${location_name}
  # Storage Accountを配置するリージョン("eastus"とか)

$ az group create --location ${LOCATION} --resource-group ${RESOURCE_GROUP_NAME}
  # (なければ)Storage Accountを配置するResource Groupを作成する

$ az storage account create -n ${STORAGE_ACCOUNT_NAME} -g ${RESOURCE_GROUP_NAME} -l ${LOCATION}
  # Storage Accountを作成する

$ az storage account show-connection-string -n ${STORAGE_ACCOUNT_NAME} -g ${RESOURCE_GROUP_NAME}
  # 作成したStorage Accountに対するconnection string(アクセスキー等を含む接続文字列)を取得する
  # コマンドの実行結果(JSON)から"connectionString"の値を以下の値に代入
CONNECTION_STRING="${connection_string}"

CONTAINER_NAME=${arbitrary_name_for_storage_container}
  # Storage Account内のContainerの名前。任意のものでよい(アルファベット小文字のみ)。

$ az storage container create -n ${CONTAINER_NAME} --connection-string ${CONNECTION_STRING}
  # Storage Account内に、Blob(今回はState)を配置するためのContainerを作成する

$ az storage container show -n ${CONTAINER_NAME} --connection-string ${CONNECTION_STRING}
  # {
  #   "metadata": {},
  #   "name": "xxx",
  #   "properties": {
  #     "contentLength": 0,
  #     "etag": "\"xxx\"",
  #     "hasImmutabilityPolicy": false,
  #     "hasLegalHold": false,
  #     "lastModified": "xxx",
  #     "lease": {
  #       "duration": null,
  #       "state": "available",
  #       "status": "unlocked"
  #     },
  #     "publicAccess": null
  #   }
  # }
  # のように、Containerが作られていることを確認する
これで、Stateを保存するための準備ができた。
Azure Blob Storageの詳細と、Storage Account、Container、Blobがそれぞれ何かについては、公式ドキュメントが詳しい。
https://docs.microsoft.com/en-us/azure/storage/blobs/storage-blobs-introduction
今回はStorageをAzure CLIで作ったが、もちろんAzureポータルで作ってもよいし、Terraformで作ってもよい(と思う)。
また、Stateを他人と共有する方法としては、Terraform Cloudなど、他にもあるらしい(未検証)。
https://www.terraform.io/docs/state/remote.html
3. Terraformを使ってAKSクラスタを構築する
-
新たにディレクトリを1つ切り、以下のファイルをすべて配置する。
main.tfterraform { required_version = ">=0.12.0" # TerraformのbackendとしてAzureを利用する backend "azurerm" { } } # Azure Provider provider "azurerm" { # バージョンによって動いたり動かなかったりが多いので固定しておく version = "=2.32.0" subscription_id = var.subscription_id client_id = var.client_id client_secret = var.client_secret tenant_id = var.tenant_id features {} } # Resource Group resource "azurerm_resource_group" "aks_rg" { name = var.resource_group_name location = var.location } # AKS resource "azurerm_kubernetes_cluster" "aks" { name = var.cluster_name location = azurerm_resource_group.aks_rg.location resource_group_name = azurerm_resource_group.aks_rg.name dns_prefix = var.dns_prefix default_node_pool { name = var.default_node_pool_name enable_auto_scaling = var.enable_auto_scaling vm_size = var.vm_size node_count = var.node_count } service_principal { client_id = var.client_id client_secret = var.client_secret } }variables.tfvariable "subscription_id" { type = string description = "Subscription ID for Azure" } variable "client_id" { type = string description = "App ID in Azure Service Principal where we want to pass the auth" } variable "client_secret" { type = string description = "Password in Azure Service Principal where we want to pass the auth" } variable "tenant_id" { type = string description = "Tenant in Azure Service Principal where we want to pass the auth" } variable "resource_group_name" { type = string description = "Name of Azure Resource Group" } variable "location" { type = string description = "Location of the resource" } variable "cluster_name" { type = string description = "Name of Azure Kubernetes Cluster" } variable "dns_prefix" { type = string description = "DNS prefix for the managed cluster" } variable "default_node_pool_name" { type = string description = "Name of default node pool" } variable "enable_auto_scaling" { type = string description = "Whether auto scaling is enabled" } variable "vm_size" { type = string description = "Size of VM (like Standard_DS2_v2)" } variable "node_count" { type = string description = "Initial number of Nodes in the created cluster" }output.tf# Terraform実行後にAKSクラスタのクライアント証明書を出力 output "client_certificate" { value = azurerm_kubernetes_cluster.aks.kube_config.0.client_certificate } # Terraform実行後にAKSクラスタのkubeconfigを出力 output "kube_config" { value = azurerm_kubernetes_cluster.aks.kube_config_raw } # Terraform実行後にAKSクラスタのFQDNを出力 output "fqdn" { value = azurerm_kubernetes_cluster.aks.fqdn }terraform.tfvarssubscription_id = ${subscription_id} # AKSクラスタのサブスクリプションID。Azureへのログインに使ったものと同じものになるはず client_id = ${client_id} # Service Principalを作成したときの"appId"の値と同じもの client_secret = ${client_secret} # Service Principalを作成したときの"password"の値と同じもの tenant_id = ${tenant_id} # Service Principalを作成したときの"tenant"の値と同じもの resource_group_name = ${resource_group_name} # AKSクラスタを配置するResource Group。Storage Accountのものと必ずしも同じでなくてもよい location = ${arbitrary_location} # AKSクラスタを配置するリージョン("eastus"とか) cluster_name = ${arbitrary_cluster_name} # AKSクラスタの名前。任意のものでよい dns_prefix = ${arbitrary_dns_prefix} # AKSクラスタのDNSのprefix。(英数字とハイフンのみを含む限り)任意のものでよい("kubecluster"とか) default_node_pool_name = ${arbitrary_default_node_pool_name} # デフォルトnode poolの名前。任意のものでよい("default"とか) enable_auto_scaling = ${enable_auto_scaling} # オートスケーリングを有効にするかどうか。trueかfalseの二値 vm_size = ${vm_size} # KubernetesのNodeに使うVMの種類("Standard_D2_v2"とか) node_count = ${node_count} # KubernetesのNodeのVM数("1"とか)各パラメタの意味については、
https://registry.terraform.io/providers/hashicorp/azurerm/latest/docs/resources/kubernetes_cluster
に書いてある。 -
以上のファイルを配置後、同じディレクトリで以下のコマンドを実行する。
# Azure Backend向けの環境変数の設定 # terraform.tfvarsに指定したものと重複する $ export ARM_SUBSCRIPTION_ID=${subscription_id} # AKSクラスタのサブスクリプションID $ export ARM_CLIENT_ID=${client_id} # Service Principalを作成したときの"appId"の値と同じもの $ export ARM_CLIENT_SECRET=${client_secret} # Service Principalを作成したときの"password"の値と同じもの $ export ARM_TENANT_ID=${tenant_id} # Service Principalを作成したときの"tenant"の値と同じもの $ BC_resource_group_name=${resource_group_name} # Stateを配置したAzure Blob Storageを作成したResource Groupの名前 $ BC_storage_account_name=${storage_account_name} # Stateを配置したAzure Blob StorageのStorage Accountの名前 $ BC_container_name=${container_name} # Stateを配置したAzure Blob StorageのContainerの名前 $ BC_key=${arbitrary_key_name} # Azure Blob Storageに配置したBlob(今回はState)の名前。任意のものでよい $ terraform init --backend-config resource_group_name=${BC_resource_group_name} --backend-config storage_account_name=${BC_storage_account_name} --backend-config container_name=${BC_container_name} --backend-config key=${BC_key} # Terraformの初期化 # このコマンドの実行前にAzureにSerivce Principalを使ってログインしている必要があることに注意 $ terraform plan # Terraformの実行計画を確認する # 何らかの理由で実行できない場合はここでエラーになるはず $ terraform apply --auto-approve # AKSクラスタを作成する。5分弱ぐらいかかる $ AKS_CLUSTER_NAME=${aks_cluster_name} # AKSのクラスタ名 $ AKS_RESOURCE_GROUP_NAME=${aks_resource_group_name} # AKSを配置したResource Groupの名前 $ az aks get-credentials -n ${AKS_CLUSTER_NAME} -g ${AKS_RESOURCE_GROUP_NAME} # AKSのContext(認証情報)を現在のユーザの~/.kube/configに設定 $ az aks install-cli # kubectlのダウンロードとインストール $ kubectl get nodes # 作成したAKSクラスタのNodeを表示 # ここで、 # NAME STATUS ROLES AGE VERSION # aks-default-19536001-vmss000000 Ready agent 10m v1.17.11 # のようにNodeが表示されていればAKSクラスタが問題なく作成されているARM_*という名前の環境変数については以下を参照。
https://registry.terraform.io/providers/hashicorp/azurerm/latest/docs/guides/service_principal_client_secret#configuring-the-service-principal-in-terraform
Input Variablesと重複した値を設定値として持っているのは、main.tfでAKSの構築をする際にclient_idとclient_secretの入力が必要になるから。あんまりイケてない。ここまでで、Terraformを使ったAKSの構築自動化は完了。
-
作ったAKSクラスタが要らなくなったら、
$ terraform destroy --auto-approveで、削除できる。
4. [おまけ] GitHub Actionsを使って構築を自動化する
一度GitHub Actionsを使ってみたかったので、ここの構築作業をWorkflowに組み込んでみた。
-
上述のTerraformのファイルと同じディレクトリ階層に、以下のような
.gitignoreを作る..gitignore# Local .terraform directories **/.terraform/* # .tfstate files *.tfstate *.tfstate.* # Crash log files crash.log # Exclude all .tfvars files, which are likely to contain sentitive data, such as # password, private keys, and other secrets. These should not be part of version # control as they are data points which are potentially sensitive and subject # to change depending on the environment. # *.tfvars # Ignore override files as they are usually used to override resources locally and so # are not checked in override.tf override.tf.json *_override.tf *_override.tf.json # Include override files you do wish to add to version control using negated pattern # # !example_override.tf # Include tfplan files to ignore the plan output of command: terraform plan -out=tfplan # example: *tfplan* # Ignore CLI configuration files .terraformrc terraform.rc # Exclude .tfbackend files *.tfbackendhttps://github.com/github/gitignore/blob/master/Terraform.gitignore
上記を参考にしている。重要なのは、TerraformのStateと、
.tfvarsの拡張子を持つファイルをGit管理下から除いていること。 -
同じディレクトリ階層に、以下のような
.github/workflows/construct-aks.ymlと.github/workflows/destroy-aks.ymlを作る..github/workflows/construct-aks.ymlname: "Construct an AKS cluster" on: workflow_dispatch: {} jobs: terraform: name: 'Construct a AKS cluster with Terraform' runs-on: ubuntu-latest # Use the Bash shell regardless whether the GitHub Actions runner is ubuntu-latest, macos-latest, or windows-latest defaults: run: shell: bash env: ARM_SUBSCRIPTION_ID: ${{secrets.TF_ARM_SUBSCRIPTION_ID}} ARM_CLIENT_ID: ${{secrets.TF_ARM_CLIENT_ID}} ARM_CLIENT_SECRET: ${{secrets.TF_ARM_CLIENT_SECRET}} ARM_TENANT_ID: ${{secrets.TF_ARM_TENANT_ID}} TF_VAR_subscription_id: ${{secrets.TF_ARM_SUBSCRIPTION_ID}} TF_VAR_client_id: ${{secrets.TF_ARM_CLIENT_ID}} TF_VAR_client_secret: ${{secrets.TF_ARM_CLIENT_SECRET}} TF_VAR_tenant_id: ${{secrets.TF_ARM_TENANT_ID}} TF_VAR_resource_group_name: "aks-test" TF_VAR_location: "East US" TF_VAR_cluster_name: "test-aks-cluster" TF_VAR_dns_prefix: "kubecluster" TF_VAR_default_node_pool_name: "default" TF_VAR_enable_auto_scaling: false TF_VAR_vm_size: "Standard_D2_v2" TF_VAR_node_count: "1" BC_resource_group_name: "k8s-test" BC_storage_account_name: "lethe2211k8s" BC_container_name: "aks-state" BC_key: "prod.terraform.tfstate" steps: # Checkout the repository to the GitHub Actions runner - name: Checkout uses: actions/checkout@v2 # Display environmental variables for debugging - name: Display env vars run: env # Install the latest version of Terraform CLI - name: Setup Terraform uses: hashicorp/setup-terraform@v1 # Initialize a new or existing Terraform working directory by creating initial files, loading any remote state, downloading modules, etc. - name: Terraform Init run: terraform init --backend-config resource_group_name=${BC_resource_group_name} --backend-config storage_account_name=${BC_storage_account_name} --backend-config container_name=${BC_container_name} --backend-config key=${BC_key} # Checks that all Terraform configuration files adhere to a canonical format - name: Terraform Format run: terraform fmt -check # Generates an execution plan for Terraform - name: Terraform Plan run: terraform plan # Build or change infrastructure according to Terraform configuration files - name: Terraform Apply run: terraform apply -auto-approve..github/workflows/destroy-aks.ymlname: "Destory the AKS cluster created by \"Construct an AKS cluster\" job" on: workflow_dispatch: {} jobs: terraform: name: 'Destory the created AKS cluster' runs-on: ubuntu-latest # Use the Bash shell regardless whether the GitHub Actions runner is ubuntu-latest, macos-latest, or windows-latest defaults: run: shell: bash env: ARM_SUBSCRIPTION_ID: ${{secrets.TF_ARM_SUBSCRIPTION_ID}} ARM_CLIENT_ID: ${{secrets.TF_ARM_CLIENT_ID}} ARM_CLIENT_SECRET: ${{secrets.TF_ARM_CLIENT_SECRET}} ARM_TENANT_ID: ${{secrets.TF_ARM_TENANT_ID}} TF_VAR_subscription_id: ${{secrets.TF_ARM_SUBSCRIPTION_ID}} TF_VAR_client_id: ${{secrets.TF_ARM_CLIENT_ID}} TF_VAR_client_secret: ${{secrets.TF_ARM_CLIENT_SECRET}} TF_VAR_tenant_id: ${{secrets.TF_ARM_TENANT_ID}} TF_VAR_resource_group_name: "aks-test" TF_VAR_location: "East US" TF_VAR_cluster_name: "test-aks-cluster" TF_VAR_dns_prefix: "kubecluster" TF_VAR_default_node_pool_name: "default" TF_VAR_enable_auto_scaling: false TF_VAR_vm_size: "Standard_D2_v2" TF_VAR_node_count: "1" BC_resource_group_name: "k8s-test" BC_storage_account_name: "lethe2211k8s" BC_container_name: "aks-state" BC_key: "prod.terraform.tfstate" steps: # Checkout the repository to the GitHub Actions runner - name: Checkout uses: actions/checkout@v2 # Display environmental variables for debugging - name: Display env vars run: env # Install the latest version of Terraform CLI - name: Setup Terraform uses: hashicorp/setup-terraform@v1 # Initialize a new or existing Terraform working directory by creating initial files, loading any remote state, downloading modules, etc. - name: Terraform Init run: terraform init --backend-config resource_group_name=${BC_resource_group_name} --backend-config storage_account_name=${BC_storage_account_name} --backend-config container_name=${BC_container_name} --backend-config key=${BC_key} # Checks that all Terraform configuration files adhere to a canonical format - name: Terraform Format run: terraform fmt -check # Destroy infrastructure according to Terraform configuration files - name: Terraform Destroy run: terraform destroy -auto-approvehttps://github.com/actions/starter-workflows/blob/d7ac62140faf23b67c29e892d4ce68342eb09609/ci/terraform.yml
上記を参考にしている。ここで、
terraform.tfvarsを使ってInput Variablesを指定する代わりに、TF_VAR_*という名前の環境変数を指定している。一部の変数(サブスクリプションIDやappId、password、tenant)の値を、公開Gitレポジトリに残したくないというのが理由。実際の値については、後述のSecretsを使って注入する。構築作業は基本的に手動での起動で行いたい(プルリクエストなどのイベントに紐付けて実行する必要はない)ので、
workflow_dispatchイベントをトリガーにする。
https://docs.github.com/en/free-pro-team@latest/actions/reference/events-that-trigger-workflows#workflow_dispatch -
これらのディレクトリをGit管理し、GitHubのリポジトリを作って
masterブランチにpushする(省略) -
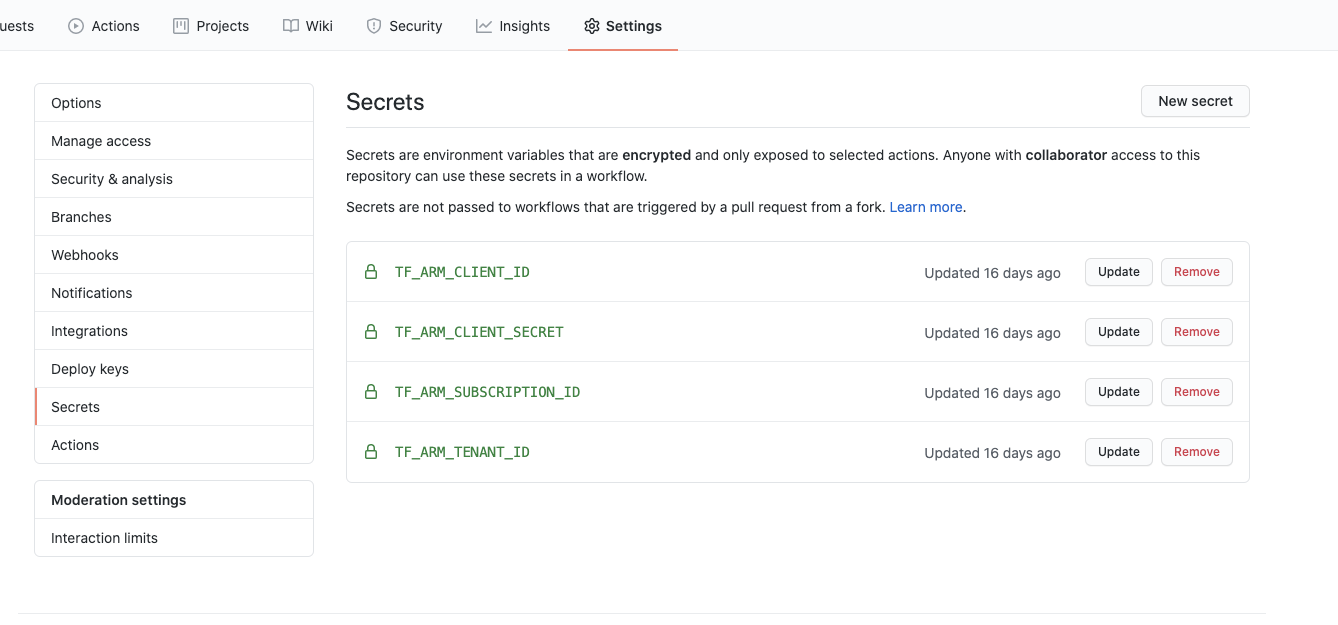
右上の"New secret"ボタンをクリックし、Secretの名前と値を設定する。今回必要なSecretは、
- TF_ARM_SUBSCRIPTION_ID: AKSクラスタのサブスクリプションID
- TF_ARM_CLIENT_ID: Service Principalを作成したときの"appId"
- TF_ARM_CLIENT_SECRET: Service Principalを作成したときの"password"
- TF_ARM_TENANT_ID: Service Principalを作成したときの"tenant"
各々、設定できたら"Add secret"をクリックすることでSecretsとして追加する
-
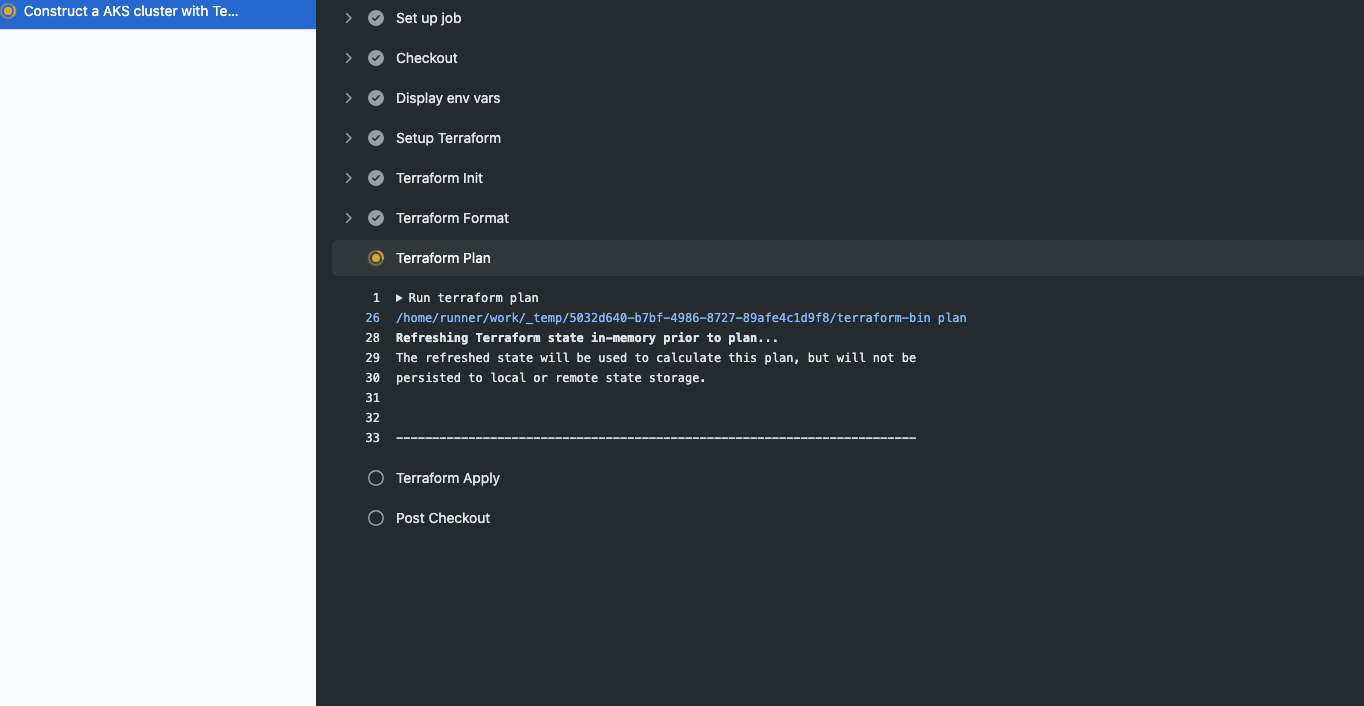
リポジトリ上で"Actions"タブをクリックし、その中から"Construct an AKS cluster"を選んでクリックする

-
"Run workflow"のボタンをクリックし、出てきたプルダウンメニューから
masterブランチを選択して"Run workflow"のボタンをクリックする

-
片付けるときは、"Destory the AKS cluster created by "Construct an AKS cluster" job"から同様にジョブを動かせばよい。
感想
- AKS、ずっと動かしていると結構お金を持っていかれる(動かしっぱなしだと最小構成でも10K/monthぐらい行っちゃう?)ので、作って壊してができる環境が欲しかった。(今後使うかどうかは別として)その意味ではよかったと思う
- Terraformを初めて使ったが、素人がStateの状態を判断するのが難しいのと、結構な頻度で破壊的変更が入るらしく、探したチュートリアル的なWeb記事の大半がそのままでは動かなかった
- この記事を書いたもともとのモチベーションが「Terraform公式ドキュメントのAKSチュートリアルがまったく動かなかった」こと、なのだが、今見たら新しくなっていた。これだと動くのかも。 https://learn.hashicorp.com/tutorials/terraform/aks
- GitHub Actionsも初めて使ったが、こちらは使い勝手よさそう。積極的に使っていきたい
参考記事
Terraform を使用して Azure Kubernetes Service で Kubernetes クラスターを作成する
Azure Provider: Authenticating using a Service Principal with a Client Secret
azurerm
azurerm_kubernetes_cluster
TerraformでAKSにKubernetesクラスタを構築する
Terraformの「ここはvariable使えないのか...」となった所

