1 目的
中央にスナップしつつ横スクロールもフリックもできるViewを作成する
2 目標
(1) 横スクロール
(2) 中央にスナップする(スクロールから指を離したとき、最も中央に近いアイテムのViewを中央に表示し直す)
(3) フリックでは1つずつアイテムViewを移動する
(4) 隣のアイテムViewは見えている(ViewPagerではダメ)
(5) AdapterViewで実装する
今回、(1)〜(4)までは出来ました。
(5)は保留中です。
3 アプローチ
(1)(4) ⇒HorizontalScrollViewを使う
HorizontalListViewなるものがあるらしいので、利用可能な状況ならそちらに置き換えたら(5)も達成なのかも。
MITライセンスっぽいので今回は使わない方向で。
(2) ⇒画面幅とアイテムのViewサイズから表示indexを計算する
先頭と最後のアイテムを中央に表示するためには、両端に必要なサイズを計算した「空」のViewを置く
(3) ⇒Gestureでなんとかする
4 実装
SwipeView.java
public class SwipeView extends HorizontalScrollView {

	int currentIndex = 0;

	private LinearLayout linearLayout;
	private int dpWidth; // ディスプレイの横サイズ
	private int ivWidth; // ImageViewの横サイズ(隙間込み)
	private int pad; // 画像を真ん中に表示させるためのpadding
	private int scrollX; // ScrollViewの座標(現在)
	/** ジェスチャー用 */
	GestureDetector gestureDetector = null;

	int itemCount; // アイテム数

	public SwipeView(Context context) {
		super(context);
	}

	public SwipeView(Context context, AttributeSet attrs) {
		super(context, attrs);
	}

	public SwipeView(Context context, AttributeSet attrs, int defs) {
		super(context, attrs, defs);
	}

	/** スクロールViewで制御するLinearLayoutをセットする */
	public void setChildLayout(LinearLayout linearLayout) {
		this.linearLayout = linearLayout;
		if (this.linearLayout == null) {
			this.linearLayout = (LinearLayout) getChildAt(0);
		}
		// ウィンドウマネージャのインスタンス取得
		WindowManager wm = (WindowManager) getContext().getSystemService(
				Context.WINDOW_SERVICE);
		// ディスプレイのインスタンス生成
		Display disp = wm.getDefaultDisplay();
		Point p = new Point();
		disp.getSize(p);
		dpWidth = p.x;

		// ジェスチャーの設定
		gestureDetector = new GestureDetector(getContext(), gestureListener);
	}

	/** gesture リスナー */
	private final SimpleOnGestureListener gestureListener = new SimpleOnGestureListener() {

		@Override
		public boolean onFling(MotionEvent event1, MotionEvent event2,
				float velocityX, float velocityY) {
			if (velocityX < 0) {

				// 右へフリック
				moveNextItem(1);
				return true;

			} else if (velocityX > 0) {
				// 左へフリック
				moveNextItem(-1);
				return true;
			}

			return super.onFling(event1, event2, velocityX, velocityY);
		}

		@Override
		public boolean onSingleTapUp(MotionEvent e) {
			return true;
		}
	};

	/** カレントアイテムindex */
	public int getCurrentIndex() {
		return currentIndex;
	}

	/** カレントインデックスをセット */
	public void setCurrentIndex(int index) {
		currentIndex = index;
		// その位置までスクロール
		int to = getTargetPosition(currentIndex);
		smoothScrollTo(to, 0);
	}

	@Override
	public void onWindowFocusChanged(boolean hasFocus) {
		if (this.linearLayout == null) {
			setChildLayout(null);
		}
		if (ivWidth == 0) {
			// ディスプレイサイズとImageViewの横サイズから両端の空白を計算し挿入
			itemCount = this.linearLayout.getChildCount();
			if (itemCount == 0)
				return;

			View item = linearLayout.getChildAt(0);
			ivWidth = item.getWidth();
			if (ivWidth != 0) {
				TextView view_0 = new TextView(getContext());
				TextView view_1 = new TextView(getContext());
				pad = (int) ((dpWidth - ivWidth) / 2);
				view_0.setWidth(pad);
				view_1.setWidth(pad);
				linearLayout.addView(view_0, 0);
				linearLayout.addView(view_1, linearLayout.getChildCount());
			}
		}
	}

	@Override
	public boolean onTouchEvent(MotionEvent event) {
		if (gestureDetector.onTouchEvent(event)) {
			return true;
		}
		int action = event.getAction();
		switch (action) {
		case MotionEvent.ACTION_UP:
		case MotionEvent.ACTION_CANCEL:

			postDelayed(new Runnable() {

				@Override
				public void run() {

					// スクロール終了なので位置を調整
					setDisplayPosition();
				}
			}, 50);
		}
		return super.onTouchEvent(event);
	}

	private int getTargetPosition(int index) {
		int to = index == 0 ? 0
				: (pad + index * ivWidth - (dpWidth - ivWidth) / 2);
		return to;
	}

	private void setDisplayPosition() {
		scrollX = getScrollX();
		currentIndex = toIndex(); // 真ん中に表示させるべき画像のIndex
		int to = getTargetPosition(currentIndex);
		smoothScrollTo(to, 0);
	}

	private int toIndex() {
		int index = 0;
		for (int i = 0; i < itemCount; i++) {
			if (i == 0) {
				if (scrollX < pad) {
					index = i;
					break;
				}
			} else if (scrollX < pad + i * ivWidth) {
				index = i;
				break;
			}
		}
		return index;
	}

	/** 次のアイテムをカレントにセットする */
	public void moveNextItem(int move) {
		currentIndex += move;
		if (currentIndex < 0)
			currentIndex = 0;
		if (currentIndex >= itemCount)
			currentIndex = itemCount - 1;
		// その位置までスクロール
		int to = getTargetPosition(currentIndex);
		smoothScrollTo(to, 0);
	}
}
大量の表示ならAdapterViewにするのが必須ですが、固定メニューなど数に限りがある場合にはこんなので十分ではないかと。
なお、上記のままだと、onTouchEventで以下のようなワーニングが出ます。
気になる人はググって直して下さい。
Custom view XXXXXX/SwipeView overrides onTouchEvent but not performClick
4 使い方
レイアウトxmlで配置して、子にアイテムViewを含んだLinearLayout(orientation="vertical")を配置しておくか(HorizontalScrollViewと同様)、プログラム内でLinearLayoutを作成、アイテムViewを追加してsetChildLayoutでセットして下さい。
xmlサンプル
activity_main.xml
<RelativeLayout xmlns:android="http://schemas.android.com/apk/res/android"
    xmlns:tools="http://schemas.android.com/tools"
    android:layout_width="match_parent"
    android:layout_height="match_parent"
    tools:context="${relativePackage}.${activityClass}" >

    <TextView
        android:id="@+id/textView1"
        android:layout_width="wrap_content"
        android:layout_height="wrap_content"
        android:text="@string/hello_world" />

    <com.example.swipeviewsample.SwipeView
        android:id="@+id/swipe"
        android:layout_width="wrap_content"
        android:layout_height="wrap_content"
        android:layout_alignParentBottom="true"
        android:layout_alignParentLeft="true"
        android:layout_alignParentRight="true"
        android:layout_below="@+id/textView1" >

        <LinearLayout
            android:layout_width="wrap_content"
            android:layout_height="wrap_content"
            android:layout_gravity="center_vertical"
            android:orientation="horizontal" >

            <ImageView
                android:layout_width="250dp"
                android:layout_height="250dp"
                android:src="@drawable/ic_launcher" />

            <ImageView
                android:layout_width="250dp"
                android:layout_height="250dp"
                android:src="@drawable/ic_launcher" />

            <ImageView
                android:layout_width="250dp"
                android:layout_height="250dp"
                android:src="@drawable/ic_launcher" />

            <ImageView
                android:layout_width="250dp"
                android:layout_height="250dp"
                android:src="@drawable/ic_launcher" />

            <ImageView
                android:layout_width="250dp"
                android:layout_height="250dp"
                android:src="@drawable/ic_launcher" />

        </LinearLayout>
    </com.example.swipeviewsample.SwipeView>

</RelativeLayout>
左端イメージ
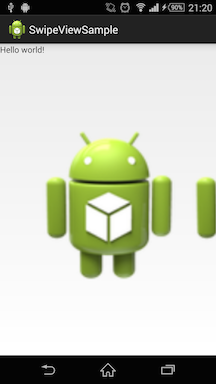
中央にスナップ

右端イメージ
