はじめに
いろんな画像での部分部分でのフーリエ変換を対話的に取得して、眺めることで2次元フーリエ変換後のスペクトル図の特徴をつかむ。つまりフーリエ変換で遊びたいというのが今回の目的。
環境
Python 3.6.6
numpy 1.15.0
cv2 3.4.1
実装
import numpy as np
import cv2
import copy

def nothing(x):
    pass

def mouse(event,x,y,flags,param):
    """
    マウスが動いたときの動作
    """


    global img2,px,py,tx1,tx2,ty1,ty2

    img2=copy.deepcopy(img)
    #マウスが動いたイベントの場合
    if event == cv2.EVENT_MOUSEMOVE:

        #トリミングする左上(tx1,ty1)と右下(tx2,ty2)を指定
        tx1=x-int(px/2)
        tx2=x+int(px/2)
        ty1=y-int(py/2)
        ty2=y+int(py/2)


        print(x,tx1,tx2)
        print(y,ty1,ty2)

        #画像端部での動作
        if tx1<0:
            tx1=0
            tx2=px
        if tx2>img2.shape[1]:
            tx1=img2.shape[1]-px
            tx2=img2.shape[1]

        if ty1<0:
            ty1=0
            ty2=py
        if ty2>img2.shape[0]:
            ty1=img2.shape[0]-py
            ty2=img2.shape[0]

        #トリミングする場所を四角で囲う
        cv2.rectangle(img2,(tx1,ty1),(tx2,ty2),(255,0,0),1)


def fourie(img):
    """
    画像中の特定位置の画像をフーリエ変換
    """
    global img2,px,py,tx1,tx2,ty1,ty2

    #ウィンドウを作成
    cv2.namedWindow("img",cv2.WINDOW_NORMAL)
    cv2.namedWindow("img2",cv2.WINDOW_NORMAL)
    cv2.namedWindow("f",cv2.WINDOW_NORMAL)
    #トリミングする画像領域の大きさを指定するバーを作成
    cv2.createTrackbar('x','img',10,300,nothing)
    cv2.createTrackbar('y','img',10,300,nothing)

    #マウスモーション
    cv2.setMouseCallback('img',mouse)


    img2=copy.deepcopy(img)

    #初期値
    tx1,tx2,ty1,ty2=0,5,0,5
    while(1):

        #バーから値を取得
        px = cv2.getTrackbarPos('x','img')
        py = cv2.getTrackbarPos('y','img')


        #マウス位置の周辺をトリミング
        img3=img[ty1:ty2,tx1:tx2]

        #フーリエ変換
        f = np.fft.fft2(img3)
        fshift = np.fft.fftshift(f)
        ms = 20*np.log(np.abs(fshift))
        ms=ms/(np.max(ms))*2**8


        cv2.imshow("img",img2)
        cv2.imshow("img2",img3)
        cv2.imshow("f",ms.astype(np.uint8))


        k=cv2.waitKey(1) & 0xFF
        if k ==27:
            break


    cv2.destroyAllWindows()


# フォルダーとファイル名
foldername=r"フォルダーの名前"
filename=r"ファイルの名前.jpg"

# 画像読み込み
img=cv2.imread(foldername+"\\"+filename,0)


tes=fourie(img)
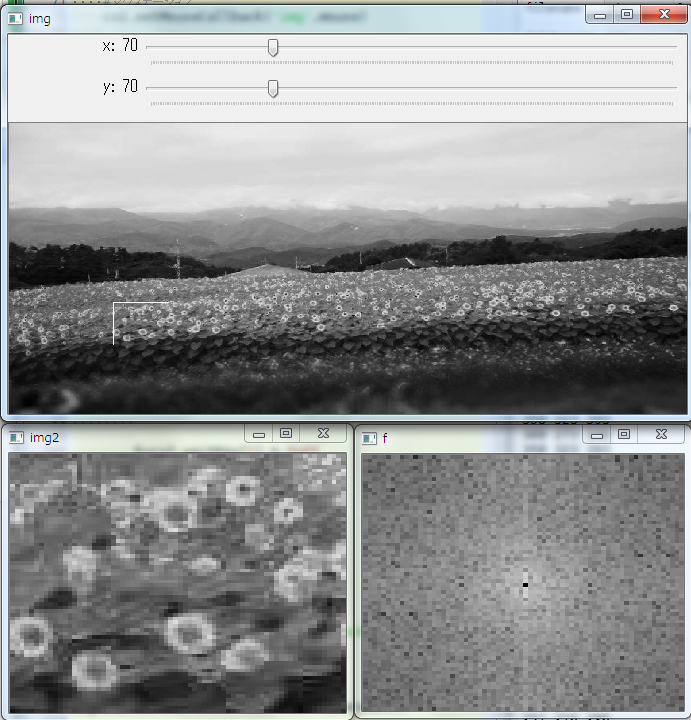
結果
こんなかんじ。いろいろな画像で遊ぶと楽しい。
参考文献
フーリエ変換
https://qiita.com/kon2/items/8290ac3e1b11e2308c14
https://algorithm.joho.info/programming/python/numpy-fast-fourier-transform/
四角作成
http://rasp.hateblo.jp/entry/2016/01/24/135417
マウス位置
http://labs.eecs.tottori-u.ac.jp/sd/Member/oyamada/OpenCV/html/py_tutorials/py_gui/py_mouse_handling/py_mouse_handling.html#mouse-handling
CopyとDeepCopy
https://qiita.com/Kaz_K/items/a3d619b9e670e689b6db