はじめに
Windows環境で、簡単なタスクトレイ常駐アプリ(定周期で指定フォルダを監視するアプリ)を作ることになったが、このためだけに Visual Studio をインストールするのが面倒臭い・・・ということで、Visual Studio ではなく VSCode でやってみた。
環境
.Net Core 3.1.412
Visual Studio Code 1.59.1
プロジェクト作成
まずは任意のプロジェクトフォルダを作成し、そこで VSCode を起動し、ターミナルから
dotnet new wpf
でプロジェクトを作成する。
以下のように、WPFのテンプレートとなるファイルが作成される。
デバッグ実行
とりあえずデバッグ実行できるか試してみる。
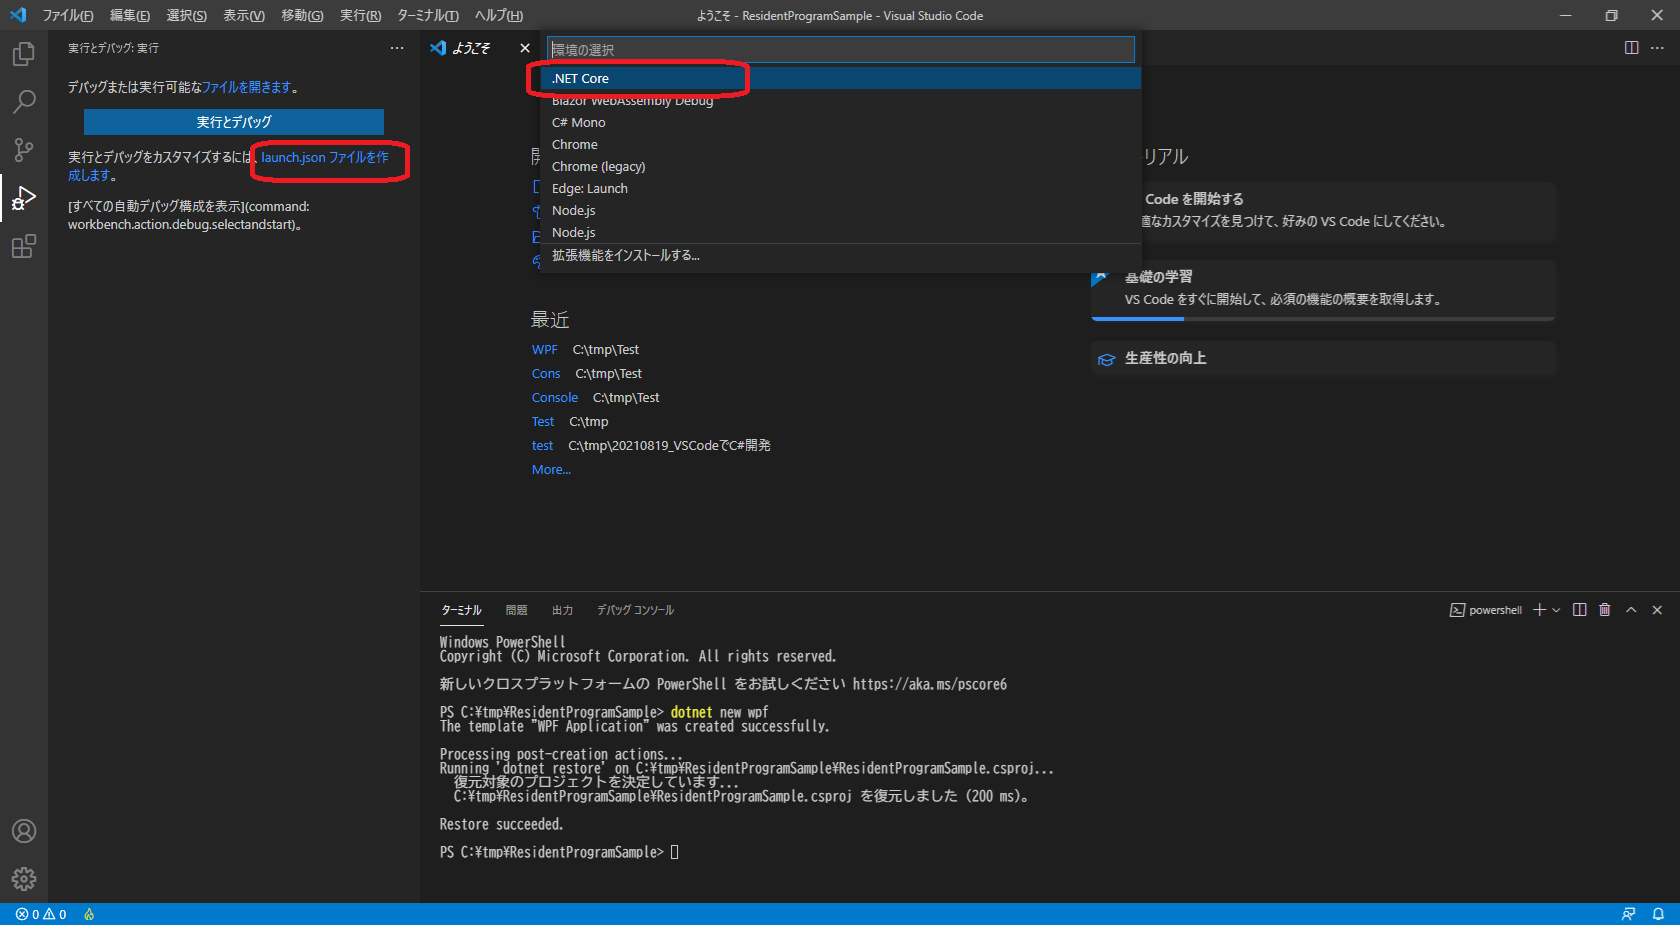
左のデバッグから「launch.jsonを作成します」→「.Net Core」を選択する。
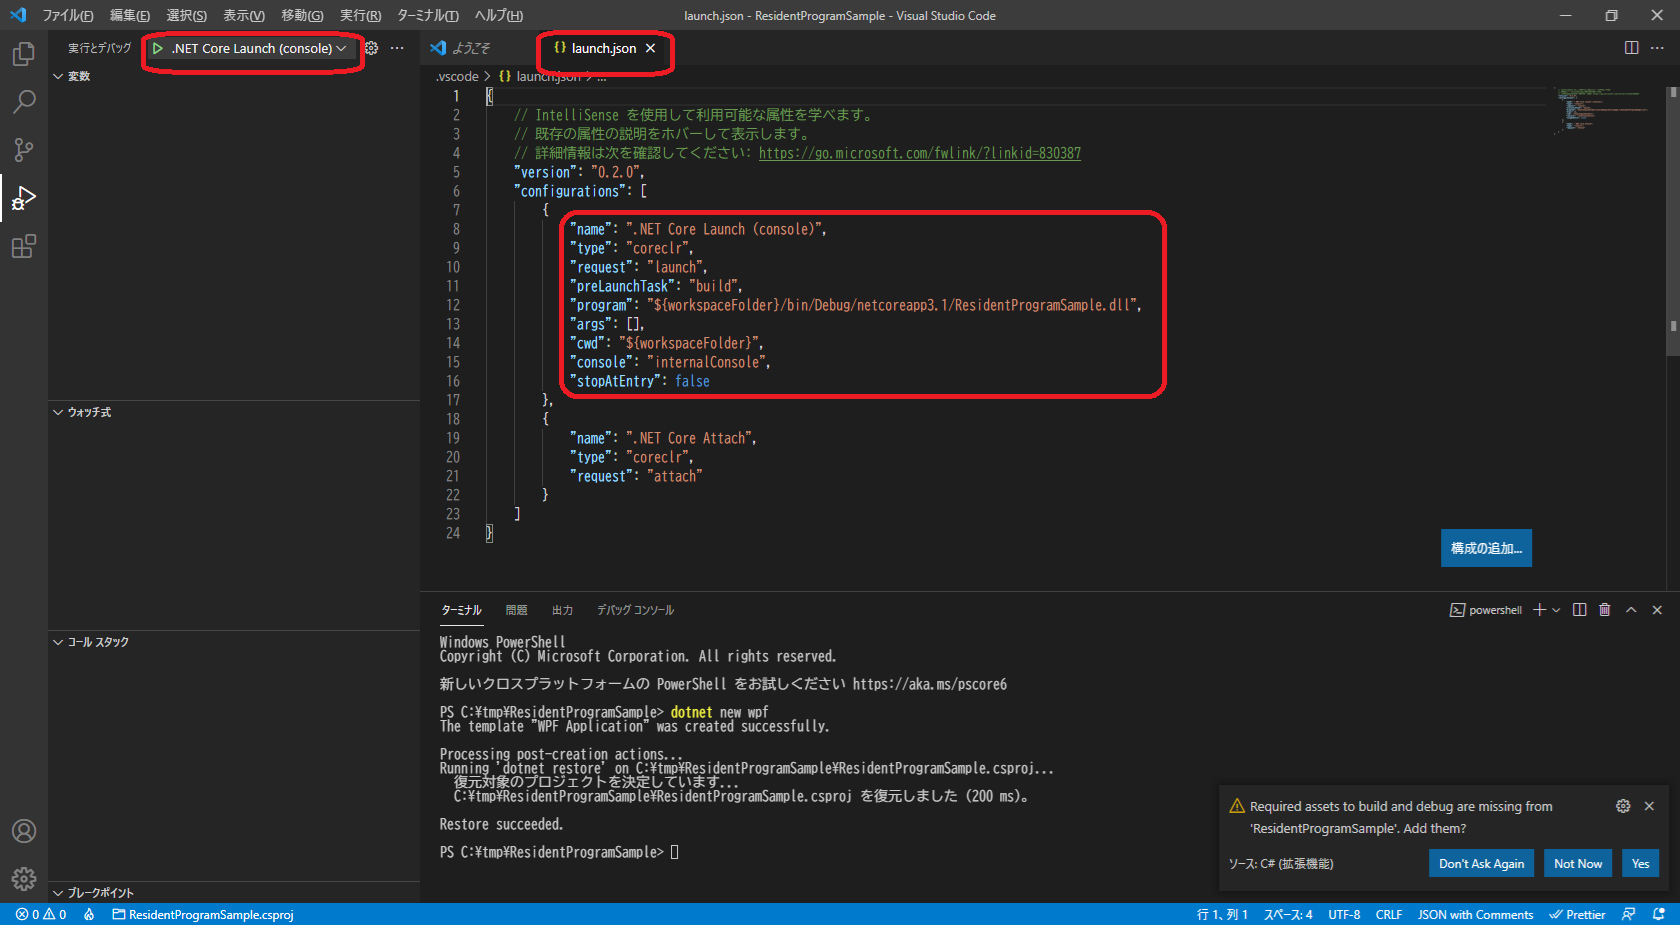
以下のような launch.json ファイルが作成されるはず。
(「実行とデバッグ」→「.Net Core」としてしまうと、空の launch.json が作成されてしまうらしい。
この場合は、いったん launch.json を削除して、「launch.jsonを作成します」→「.Net Core」をやり直すとよい。)
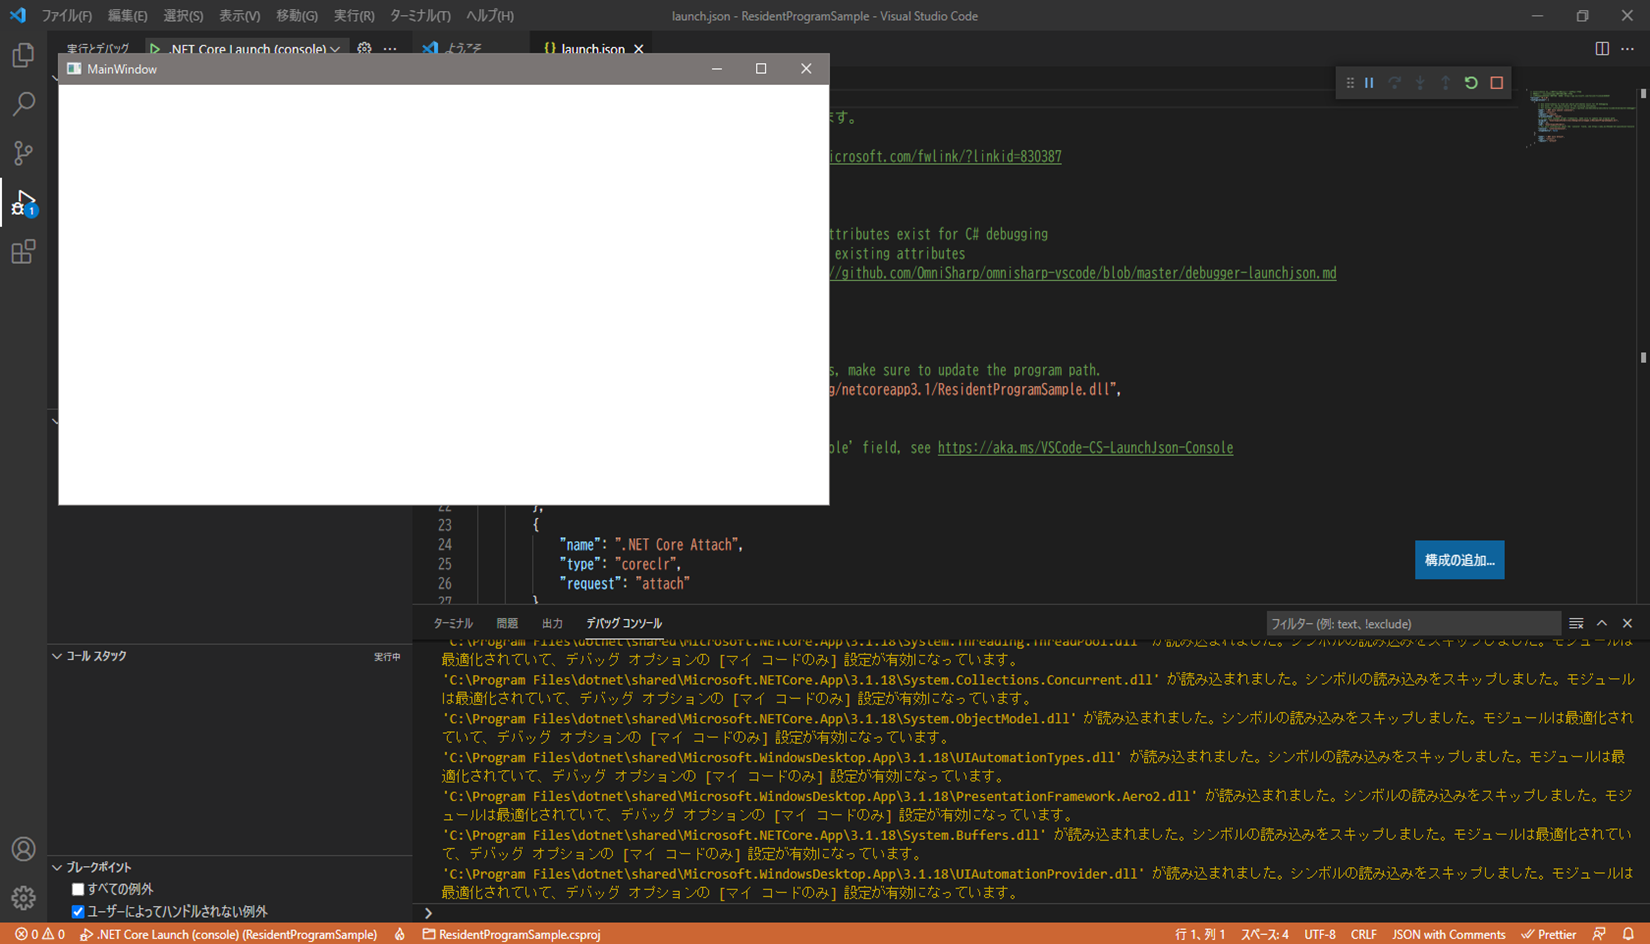
左上の実行とデバッグボタン(▶ボタン)を押すと、WPFのテンプレート画面が表示される。
起動時は画面を非表示にする
常駐アプリなので、起動時の画面表示は不要。
App.xamlの
StartupUri="MainWindow.xaml"
の部分を削除する。
<Application x:Class="ResidentProgramSample.App"
             xmlns="http://schemas.microsoft.com/winfx/2006/xaml/presentation"
             xmlns:x="http://schemas.microsoft.com/winfx/2006/xaml"
             xmlns:local="clr-namespace:ResidentProgramSample"
             StartupUri="MainWindow.xaml">  ★ここの設定を削除
    <Application.Resources>

    </Application.Resources>
</Application>
プロジェクトファイルの設定
プロジェクトファイル(プロジェクト名.csproj)に参照設定を追加する。
今回は、タスクトレイのアイコンを使用するのでそのアイコンファイルへの参照と、System.Windows.Formsへの参照を追加する。
<Project Sdk="Microsoft.NET.Sdk.WindowsDesktop">

  <PropertyGroup>
    <OutputType>WinExe</OutputType>
    <TargetFramework>netcoreapp3.1</TargetFramework>
    <UseWPF>true</UseWPF>
    <UseWindowsForms>true</UseWindowsForms>    ★System.Windows.Forms を使用するために追加
  </PropertyGroup>

  <ItemGroup>
    <Resource Include="icon.ico" />         ★アイコン を使用するために追加
    <Reference Include="System.Windows.Forms" />  ★System.Windows.Forms を使用するために追加
  </ItemGroup>

</Project>
※ icon.icoファイルの実体は適当に作成してください。
※ System.Windows.Formsを使用しないなら、この設定は不要です。
タスクトレイへのアイコン、コンテキストメニューの設定
OnStartupで、タスクトレイへアイコンやコンテキストメニューを登録し、Thread.Start()で定周期処理を起動する。
        protected override void OnStartup(StartupEventArgs e)
        {
            Debug.WriteLine("OnStartup");

            base.OnStartup(e);

            var icon = GetResourceStream(new Uri("icon.ico", UriKind.Relative)).Stream;

            var menu = new System.Windows.Forms.ContextMenuStrip();
            menu.Items.Add("終了", null, Exit_Click);

            notifyIcon = new System.Windows.Forms.NotifyIcon
            {
                Visible = true,
                Icon = new System.Drawing.Icon(icon),
                Text = "ResidentProgramSample",
                ContextMenuStrip = menu
            };

            notifyIcon.MouseClick += new System.Windows.Forms.MouseEventHandler(NotifyIcon_Click);

            // 定周期処理の開始
            this.thread = new Thread(intervalProcess);
            this.thread.Start();
        }
※ intervalProcessが別スレッドで起動されるので、この中に定周期処理を記述する。
※ アイコンクリックでNotifyIcon_Clickが、右クリックから終了でExit_Clickがコールされる。
設定画面
定周期処理の設定ができるよう、MainWindow.xamlを設定画面として利用する。
以下のように、xml形式で画面のアイテムを配置する。
<Window x:Class="ResidentProgramSample.MainWindow"
        xmlns="http://schemas.microsoft.com/winfx/2006/xaml/presentation"
        xmlns:x="http://schemas.microsoft.com/winfx/2006/xaml"
        xmlns:d="http://schemas.microsoft.com/expression/blend/2008"
        xmlns:mc="http://schemas.openxmlformats.org/markup-compatibility/2006"
        xmlns:local="clr-namespace:ResidentProgramSample"
        mc:Ignorable="d"
        xmlns:wfm="clr-namespace:System.Windows.Forms;assembly=System.Windows.Forms"
        Title="設定" Height="233" Width="626" WindowStyle="ToolWindow"
        Closing="Window_Closing"
        ResizeMode="NoResize">
    <Grid>
        <!-- テキスト -->
        <Label x:Name="TextInputLabel" Content="テキスト入力" HorizontalAlignment="Left" Height="18" Margin="21,19,0,0" VerticalAlignment="Top" Width="141" VerticalContentAlignment="Center" Padding="5,1"/>
        <TextBox x:Name="TextInputText" HorizontalAlignment="Left" Height="20" Margin="186,18,0,0" TextWrapping="Wrap" VerticalAlignment="Top" Width="176" Text="帳票保存先"/>
        <!-- フォルダ選択 -->
        <Label x:Name="FolderPathLabel" Content="フォルダ選択" HorizontalAlignment="Left" Height="18" Margin="21,63,0,0" VerticalAlignment="Top" Width="127" VerticalContentAlignment="Center" Padding="5,1"/>
        <TextBox x:Name="FolderPathText" HorizontalAlignment="Left" Height="20" Margin="186,62,0,0" TextWrapping="Wrap" VerticalAlignment="Top" Width="374"/>
        <Button x:Name="FolderPathButton" Content="…" HorizontalAlignment="Left" Height="19" Margin="565,62,0,0" VerticalAlignment="Top" Width="23" Click="FolderPathButton_Click" RenderTransformOrigin="0.652,-0.632"/>
        <!-- スピン -->
        <Label x:Name="SpinLabel" Content="スピン(0~100)" HorizontalAlignment="Left" Height="23" Margin="21,104,0,0" VerticalAlignment="Top" Width="127" Padding="5,1" VerticalContentAlignment="Center"/>
        <WindowsFormsHost x:Name="SpinText" Grid.Row="0" Margin="186,128,343,151" Height="23" VerticalAlignment="Bottom" >
            <wfm:NumericUpDown x:Name="Spin1" x:FieldModifier="public" Value="5" Minimum="0" Maximum="100" />
        </WindowsFormsHost>
        <!-- ボタン -->
        <Button x:Name="ApplyButton" Content="適用" HorizontalAlignment="Left" Height="27" Margin="21,152,0,0" VerticalAlignment="Top" Width="84" Click="ApplyButton_Click"/>
        <Button x:Name="CloseButton" Content="閉じる" HorizontalAlignment="Left" Height="27" Margin="506,152,0,0" VerticalAlignment="Top" Width="82" Click="CloseButton_Click"/>
    </Grid>
</Window>
設定画面を閉じてもアプリは終了しないよう、画面の表示・非表示を切り替えるような作りにする。
インスタンスは共通でいいので、シングルトンパターンで実装する。
        private static MainWindow _Instance;
        public static MainWindow GetInstance()
        {
            if (_Instance == null)
            {
                _Instance = new MainWindow();
            }
            return _Instance;
        }
タスクトレイのアイコンクリックで設定画面を表示させるようにする。
        // アイコンクリック
        private void NotifyIcon_Click(object sender, System.Windows.Forms.MouseEventArgs e)
        {
            if (e.Button == System.Windows.Forms.MouseButtons.Left)
            {
                ResidentProgramSample.MainWindow.GetInstance().Show();
            }
        }
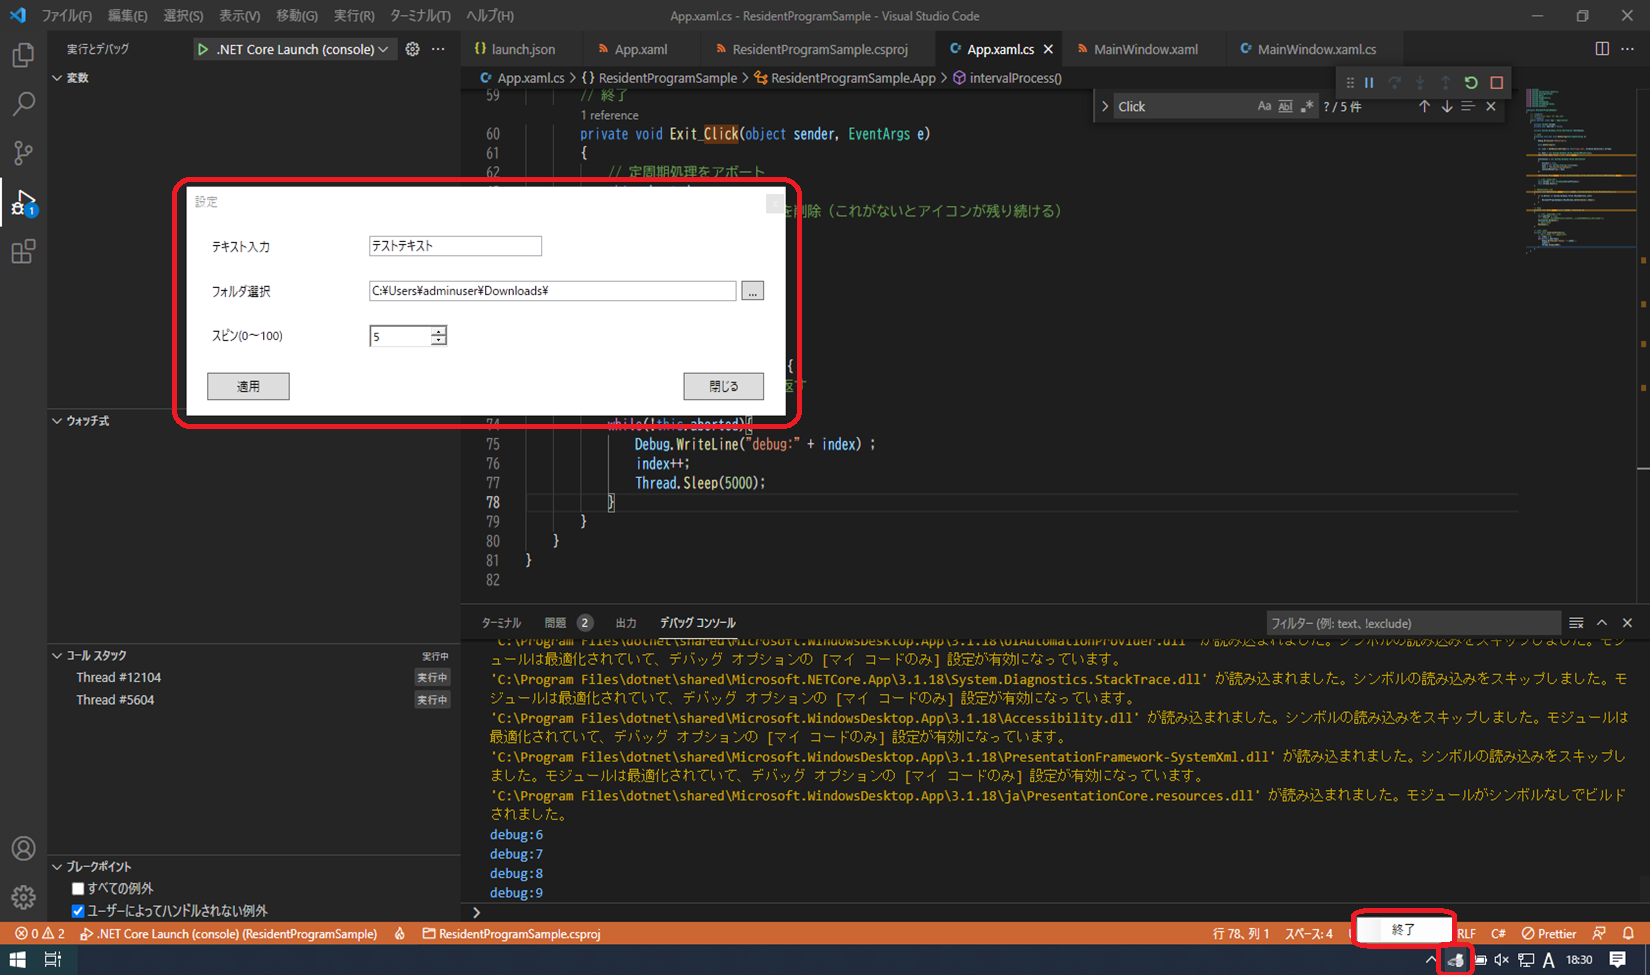
以下のように、タスクトレイのアイコンクリックで、設定画面が開かれるようになる。
拡張機能
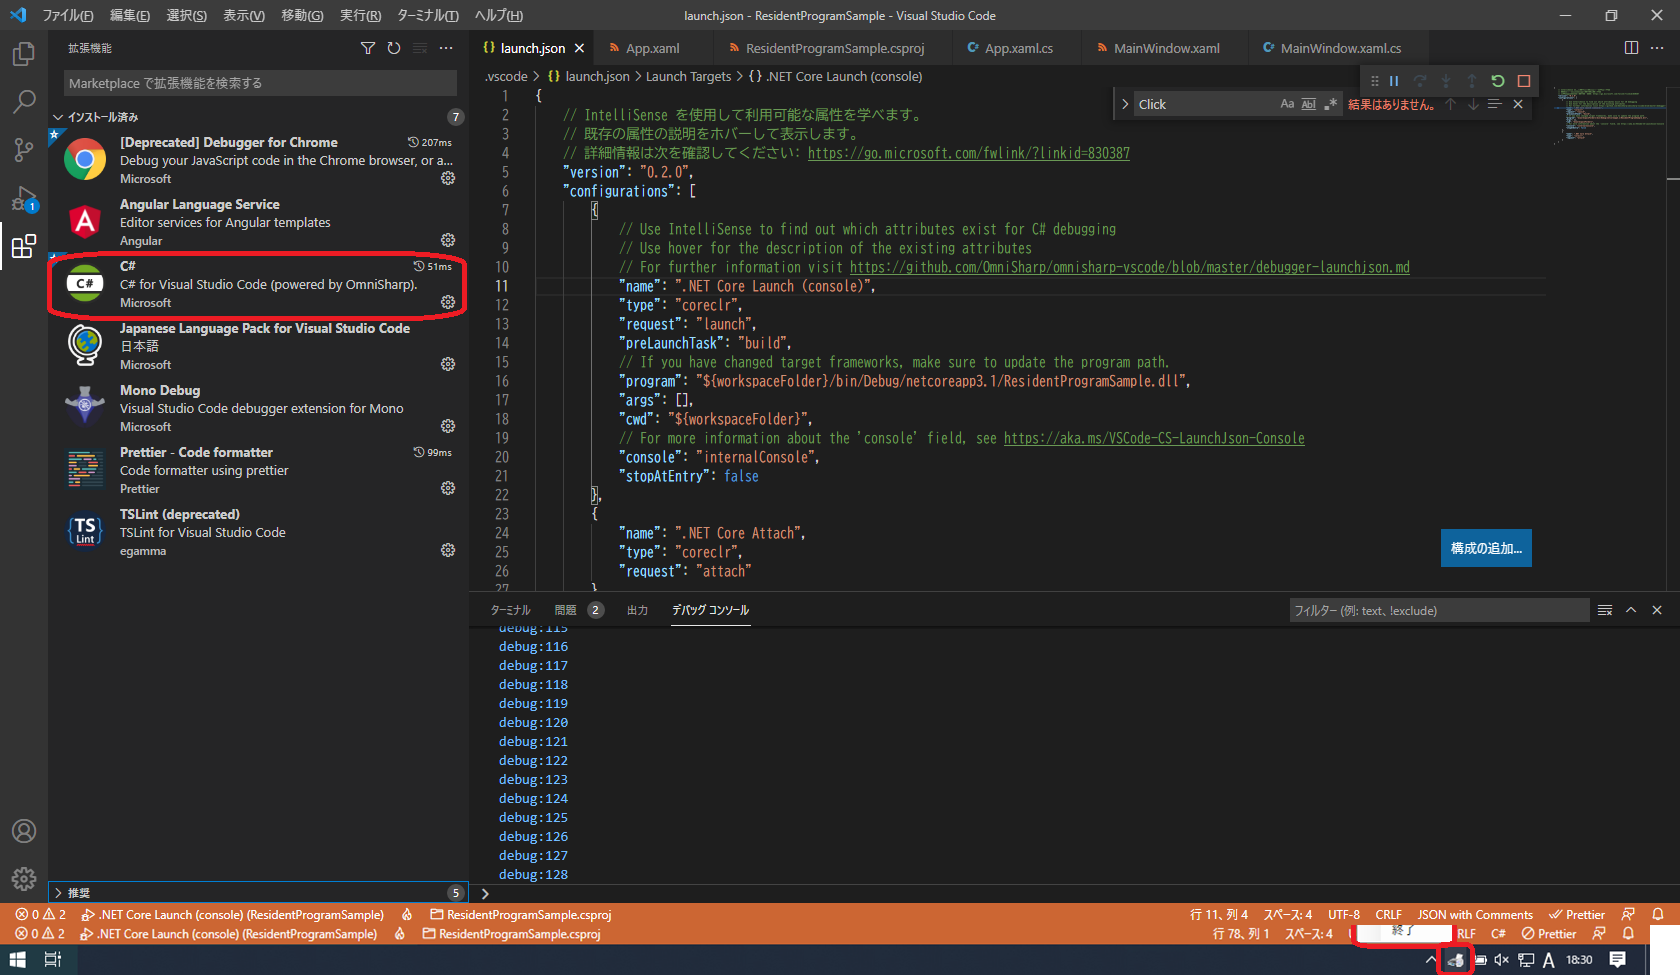
拡張機能は、最低限はC#だけ追加すればよかったと思います。
(テスト環境でインストールされていた拡張機能は以下の通りです。念のため。。。)
最後に
いちおう VSCode でも開発できることは確認できましたが、結局今回はおとなしく Visual Studio を使用することにしました・・・。
理由は、以下の3点です。
1.画面デザイナーの機能がないので、画面デザインの追加・変更があったときに面倒そう。
2.今後、Excel操作などの機能拡張を予定しているが、ライブラリの呼び出し方などを調べるのが面倒そう。
3.実行環境に.Net Core をインストールする必要がある。
逆に言うと、上記のような懸念がなければ、VSCode でも問題なく開発できそうです。
全ソース
今回作成したソースを以下に公開しています。
ご参考までに。
ResidentProgramSample

