Pythonでネットワークを学習し、C++で推論する (2022年版)
TenosrFlowを用いて、PythonとGPUでネットワークのパラメータを学習し、C++とCPUで推論を行うために必要な作業を紹介します。
前回は、Pythonで学習したモデル(.ckptファイル)をC++で読み込み可能な形式(.pbファイル)に変換しました。
前提条件
TensorFlowを用いた学習はPythonで実行します。
モデルのパラメータやネットワークを保存した.ckptファイルはすでに作成済みであるとします。
Pythonで学習したネットワークを用いてC++で推論を行います。
また、学習・推論で用いるアクセラレータ等の環境はCPU onlyまたはCPU+GPUを想定しています。
ネットワークの入出力層の名前はすでに分かっている(詳しくはこちらをご参照ください)とします。
.ckptファイルを.pbファイルに変換できている(詳しくはこちらをご参照ください)とします。
環境
学習:tensorflow-gpu-2.4.1(Python)
推論:tensorflow_cc-2.4.1(C++)
C++でTensorFlowの推論を実行する手順
[1. 学習済みモデルの入力層・出力層の名前を取得する。](https://qiita.com/kyaFUK/items/635ef0d31e8e7eba9ab8) [2. **.ckptファイルを.pbファイルに変換する。](https://qiita.com/kyaFUK/items/a4cb330b77bc3a41ac3c) 3. **.pbファイルと[tensorflow_cc](https://github.com/FloopCZ/tensorflow_cc)を用いて、C++でTensorFlowの推論を実行する。**このページでは3.を解説します。
tensorflow_ccのインストール
まずは、環境構築を行います。
本番環境で実装する前に、Dockerなどで環境を使ってテストをします。
ここでは、tensorflow_ccを使います。
cloneしたら、_Running the image on CPU_のコマンドを使ってDocker ImageからContainerを作ります。
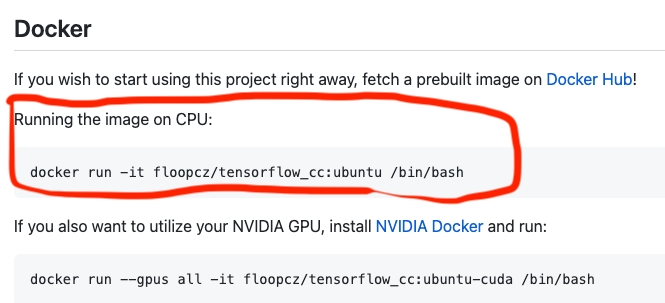
これ以降は、このContainerの中で作業します。
.pbファイルとtensorflow_ccを用いて、C++でTensorFlowの推論を実行する。
@rxoxixyxd様の解説とこちらのリポジトリを参考にして作りました。
とりあえずサンプルを動かしてみたい場合は、上記のページをおすすめします。
今回のファイル階層は以下のようになります。
tensorflow_cc
├─Dockerfiles
├─Test
│  ├─build
│  ├─CMakeLists.txt
│  ├─main.cpp
│  ├─numpy.hpp
│  ├─common.cpp
│  └─common.h
概要
今回利用するプログラムは以下になります。
学習データは(64, 64, 3)の次元を持つ画像を想定しています。
# include <iostream>
# include <string>

# include <tensorflow/core/public/session.h>
# include "tensorflow/core/lib/io/path.h"
# include "tensorflow/core/platform/env.h"
# include "tensorflow/core/platform/init_main.h"
# include "tensorflow/core/public/session.h"

# include "common.h"

using std::string;


int main(int argc, char* argv[]) {

  const string graph_def_filename = "../frozen_graph.pb";


  // Setup global state for TensorFlow.
  tensorflow::port::InitMain(argv[0], &argc, &argv);

  std::cout << "Loading graph\n";

  // Load a frozen model
  tensorflow::GraphDef graph_def;
  TF_CHECK_OK(tensorflow::ReadBinaryProto(tensorflow::Env::Default(),
                                          graph_def_filename, &graph_def));

  // Load an input data
  std::vector<int> s;
  std::vector<double> input_data; //直接の入力

  std::vector<std::vector<std::vector<float>>> \
    batch(64, \
    std::vector<std::vector<float>> (64, \
    std::vector<float> (3) )); // reshape&batch取得された後

  int i=0;
  aoba::LoadArrayFromNumpy("../input.npy", s, input_data);

  std::cout << s[0] << " " << s[1] << " " << s[2] << std::endl; // dimension

  /* Data reshape */
  get_batch_from_input(input_data, batch)


  // Create a session
  std::unique_ptr<tensorflow::Session> session(tensorflow::NewSession(tensorflow::SessionOptions()));
  TF_CHECK_OK(session->Create(graph_def));


  predict(session, input);

  return 0;
}
TensorFlowの初期化
  // Setup global state for TensorFlow.
  tensorflow::port::InitMain(argv[0], &argc, &argv);
学習済みモデルのグラフ・パラメータ読み込み
  const string graph_def_filename = "../frozen_graph.pb";
  std::cout << "Loading graph\n";

  // Load a frozen model
  tensorflow::GraphDef graph_def;
  TF_CHECK_OK(tensorflow::ReadBinaryProto(tensorflow::Env::Default(),
                                          graph_def_filename, &graph_def));
Dataの入力とReshape
データの入力には.npyファイルを通してNumPyのndarrayを用います。
C++で.npyファイルを読み込みvecotrに変換してくれるヘッダファイルnumpy.hを用います。
また、ネットワークに入力するテンソルデータの作成は、このページが参考になります。
  // Load an input data
  std::vector<int> s;
  std::vector<double> input_data; //直接の入力

  std::vector<std::vector<std::vector<float>>> \
    batch(64, \
    std::vector<std::vector<float>> (64, \
    std::vector<float> (3) )); // reshape&batch取得された後

  int i=0;
  aoba::LoadArrayFromNumpy("../input.npy", s, input_data);

  std::cout << s[0] << " " << s[1] << " " << s[2] << std::endl; // dimension

  /* Data reshape */
  get_batch_from_input(input_data, batch)
推論部分
推論に用いる以下の関数はcommon.cppで定義されています。
predict(session, input);
# include "common.h"

# include <iostream>
# include <fstream>

# include "tensorflow/core/framework/tensor.h"
# include "tensorflow/core/lib/io/path.h"
# include "tensorflow/core/platform/env.h"
# include "tensorflow/core/platform/init_main.h"
# include "tensorflow/core/platform/logging.h"
# include "tensorflow/core/platform/types.h"

using std::string;
using std::vector;

tensorflow::Tensor MakeTensor_Placeholder(const std::vector<std::vector<std::vector<float>>>& batch) {
  tensorflow::Tensor t(tensorflow::DT_FLOAT,
                       tensorflow::TensorShape({(int)batch.size(),64,64,3}));  //(64,64,3)

  /* tにbatchを代入する操作 */

  return t;
}


void predict(const std::unique_ptr<tensorflow::Session>& session, const std::vector<std::vector<std::vector<float>>>& batch) {
  // Create an input data

  vector<std::pair<string, tensorflow::Tensor>> inputs = {

    {"Placeholder", MakeTensor_Placeholder(batch)}//入力層

  };

  std::vector<tensorflow::Tensor> out_tensors; //結果を格納する変数ベクトル(batch_size,64,64,3)

  // Predict
  TF_CHECK_OK(session->Run(inputs, {"stack"}, {}, &out_tensors));
}

void get_batch_from_input(std::vector<int>& s, std::vector<double>& input_data,  std::vector<std::vector<std::vector<float>>>& batch){
  /* Reshape data and get a batch */
}
# pragma once

# include <string>
# include <vector>

# include "tensorflow/core/public/session.h"

# include "numpy.hpp"

tensorflow::Tensor MakeTensor_Placeholder(const std::vector<std::vector<std::vector<float>>>& batch);
void predict(const std::unique_ptr<tensorflow::Session>& session, const std::vector<std::vector<std::vector<float>>>& batch);
void get_batch_from_input(std::vector<int>& s, std::vector<double>& input_data,  std::vector<std::vector<std::vector<float>>>& batch);
入力層の名前
MakeTensor_Placeholder(batch)でvectorのbatchをtensorのtに変換し、入力層Placeholderに代入します。
入力層の名前はモデルごとに違う可能性があるので、こちらの方法で調べる必要があります。
  vector<std::pair<string, tensorflow::Tensor>> inputs = {

    {"Placeholder", MakeTensor_Placeholder(batch)}//入力層

  };
buildについて
buildにはCMakeを使います。
ディレクトリbuildの中で、cmake .. & makeとすればbuildできます。
cmake_minimum_required(VERSION 3.3)

add_executable(predict predict.cpp common.h common.cpp numpy.hpp)

find_package(TensorflowCC REQUIRED)
target_link_libraries(predict TensorflowCC::TensorflowCC)
補足
このあと起こりうる問題として、推論のためのリソースをどの程度制限する(または拡張する)かということが考えられます。
Tensorflowには、リソースを制限するパラメータとして、config.set_inter_op_parallelism_threads(threads num)やconfig.set_intra_op_parallelism_threads(threads num)があります。
詳しくは、こちらの資料をご参照ください。
流行りの(?)エッジAIとの関係
エッジAIとは、サーバーやクラウドなどの大規模なシステムで学習を行い、学習済みモデルが搭載されたスマホなどのエッジデバイスで推論を行うことのようです。
エッジAI、エッジ推論、Edge Machine Learning (EdgeML)、Edge Intelligenceなどとも呼ばれ、Edge Computingの分野の一つとされています。
Python on GPUで大量のデータを学習し、C++ on CPUで高速に推論を行うことで、組込みシステムやアプリ開発などにも応用できそうです。
詳しくは、参考にしたサイト を参照してください。
参考にしたページ
TensorFlowの学習・推論をC++で行う。
CMakeの設定
NumPy.hpp
Threadsについて
エッジAIについて