はじめに
この記事は続き物となっています。過去の記事もご覧ください。
- [Node.js] Express を TypeScript で書く - 環境整備まで
- [Node.js] Express を TypeScript で書く - ルーティング編
- [Node.js] Express を TypeScript で書く - MongoDB 接続編
また環境は以下を前提としてます。
- Windows 10
- Node.js 10.10.0
- Express 4.16.3
- TypeScript 3.0.3
- MongoDB 4.0.2 Community Server
- MongoDB Node.js 3.1.4
- Visual Studio Code 1.26.1
今回は user に対する CRUDを実装していきます。
準備
document を定義する
まずはじめに document の構造を定義します。TypeScriptならではの所ですね。
import * as MongoDB from 'mongodb';

export interface UserDocument {
    _id: MongoDB.ObjectId;
    user_id: string;
    name: string;
    password: string;
}
ユーザID、名前、パスワードを定義してます。内部IDも取得したいため _id も定義してあります。
これを作ることによって collection を取得するところで以下の様にするとdocumentに関する値に型が付与されるようになります。
const collection = db.collection<UserDocument>('user');
collection.findOne({ user_id: 'xxx' }, (err, doc) => {
    console.log(doc.user_id);
    console.log(doc.name);
    console.log(doc.password);
});
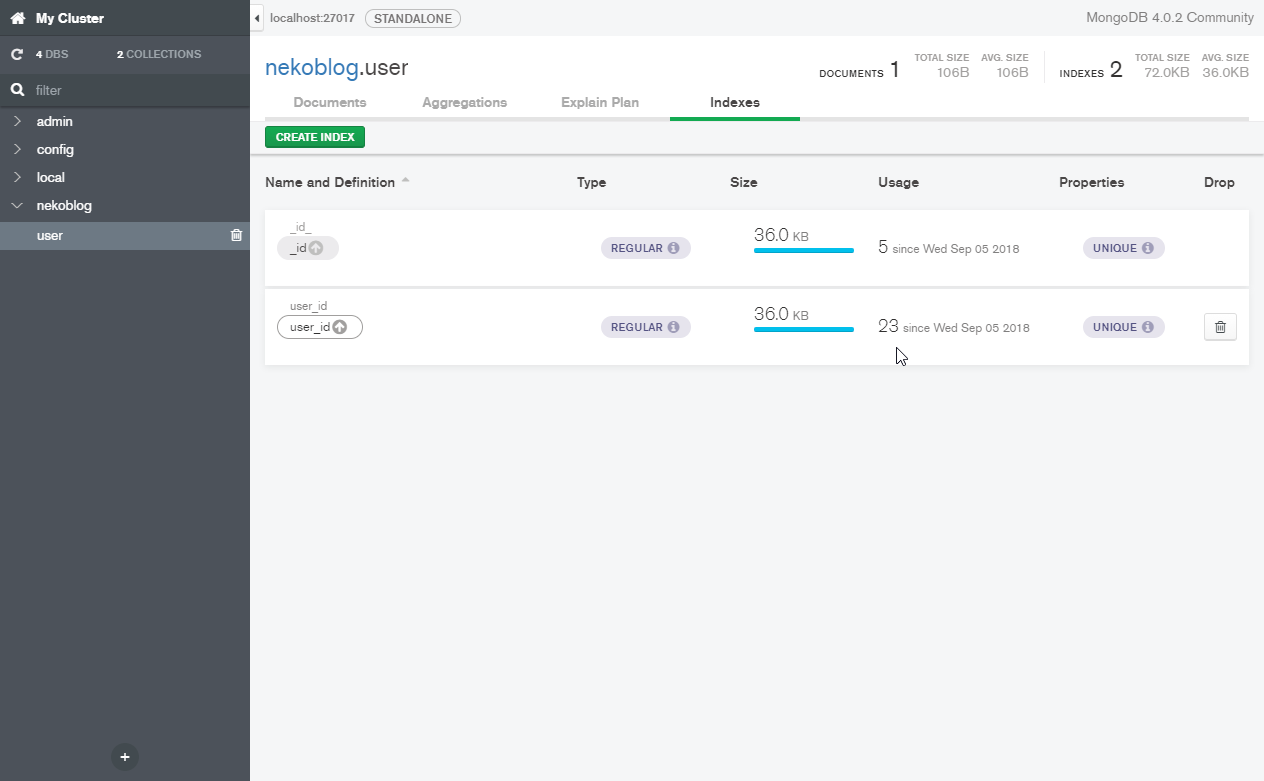
Index を定義する。
user_id は ユニークにしたいので Index を作っておきます。
私は MongoDB Compass Community (GUI) 上で設定しておきました。
Express で JSON を受け取れるようにする。
基本的に値のやり取りはJSONで行いたいので、それをExpressで出来るようにします。
body-parser を利用します。
npm install --save body-parser
server.ts を書き換えます。
import * as Express from 'express';
import * as BodyParser from 'body-parser';

const app = Express();

app.use(BodyParser.urlencoded({ extended: true }));
app.use(BodyParser.json());

/** 以下省略 */
ついでに 無効なURLをリクエストされた場合にデフォルトのHTMLじゃなくてJSONを返すように変えときます。
/** 省略 */

// 各ルーティングの定義が終わったあとに書く。
app.use((req, res) => {
    res.status(404).json({ message: 'Not Found API.' });
});

/** 省略 */
CRUDの実装とAPIの実装
ここから各APIにCRUDを実装していきます。
POST /user/new (CREATE)
このAPIは以下のパラメータをJSON形式で受け取ります。
{
    user_id, // REQUIRED, Allow Characters [a-zA-Z0-9_]
    name, // REQUIRED
    password // REQUIRED
}
user_id は URL で指定できるようにしたいので使える文字種を絞ります。
APIの戻り値として、登録された情報を返します。ただしパスワードは返しません。
{
    user_id,
    name
}
document の追加は collection.insertOne() を使えばできそうです。
以下が実装となります。
import * as Express from 'express';
import errorJSON from '../../common/errorJSON';
import mongodbClient from '../../common/mongodbClient';
import { UserDocument } from '../../documents/User';

const router = Express.Router();
// ユーザの新規作成
router.post('/new', (req, res, next) => {
    // パラメータ取得
    const user_id = req.body.user_id;
    const name = req.body.name;
    const password = req.body.password;

    // 必須項目が入力済みかチェック
    if (user_id === undefined || name === undefined || password === undefined) {
        res.status(400).json(errorJSON('Parameter', 'Require Parameter.'));
        return next();
    }

    // user_id の書式チェック
    if (user_id.match(/^[a-zA-Z0-9_]+$/) == null) {
        res.status(400).json(errorJSON('Parameter', 'Invalid Parameter.'));
        return next();
    }

    mongodbClient((err, client, db) => {
        if (err) {
            client.close();
            res.status(500).json(errorJSON('MongoDB', err.message));
            return next(err);
        }

        const collection = db.collection<UserDocument>('user');
        collection.insertOne(
            {
                user_id: user_id,
                name: name,
                password: password,
            },
            (err, result) => {
                if (err) {
                    client.close();
                    res.status(500).json(errorJSON('MongoDB', err.message));
                    return next(err);
                }

                res.status(200).json(filterUserDocument(result.ops[0]));
                client.close();
            }
        );
    });
});
errorJSON はエラー用に出力するJSONを取得する関数です。
filterUserDocument は渡されたdocumentにフィルターを掛けて不要な項目を消して返す関数です。実装は以下の通りです。
function filterUserDocument(doc: object) {
    const denied = ['_id', 'password'];
    return Object.keys(doc)
        .filter(key => denied.indexOf(key) === -1)
        .reduce((obj, key) => {
            obj[key] = doc[key];
            return obj;
        }, {});
}
passwordを平文で保存してますが、本来であれば何かしらの暗号化を施すべきです。今回はローカルでしか使わない練習用なのでそういったことは行いません。
GET /user/:user (READ)
次は user 情報取得用APIです。urlによる指定のみで引数はありません。
このAPIはユーザが存在する場合は以下のJSONを返します。
{
    user_id,
    name
}
存在しない場合は 404 エラーを返すようにします。
MongoDBから特定documentを取得する場合は collection.findOne() を使えば良さそうです。
以下実装です。
router.get('/:user', (req, res, next) => {
    const user_id = req.params.user;

    mongodbClient((err, client, db) => {
        if (err) {
            client.close();
            res.status(500).json(errorJSON('MongoDB', err.message));
            return next(err);
        }

        const collection = db.collection<UserDocument>('user');
        collection.findOne({ user_id: user_id }, (err, result) => {
            if (err) {
                client.close();
                res.status(500).json(errorJSON('MongoDB', err.message));
                return next(err);
            }

            client.close();

            if (result == null) {
                res.status(404).json({ message: 'Not Found.' });
            } else {
                res.json(filterUserDocument(result));
            }
        });
    });
});
PUT /user/:user (UPDATE)
次は user の更新APIです。
このAPIは以下のパラメーターを受け取ります。
{
    user_id,
    name,
    password
}
全ての項目がオプションとなります。指定された項目のみを更新します。
戻り値は更新後の user 情報を返します。
document の更新には collection.findOneAndUpdate() を使います。
値をセットする場合は第二引数に{ $set: { hoge: 'xxx' } }のように $setをつけたオブジェクトを与える必要があります。
また更新後の値は再検索して取得する必要があります。
以下実装になります。
router.put('/:user', (req, res, next) => {
    // URLから対象のuser_idを取得
    const user_id = req.params.user;

    // JSONより更新用パラメータを取得
    const new_user_id = req.body.user_id;
    const name = req.body.name;
    const password = req.body.password;

    // 更新用オブジェクト作成
    const updateFields = {};
    if (new_user_id !== undefined) { updateFields['user_id'] = new_user_id; }
    if (name !== undefined) { updateFields['name'] = name; }
    if (password !== undefined) { updateFields['password'] = password; }
    const update = { $set: updateFields };

    mongodbClient((err, client, db) => {
        if (err) {
            client.close();
            res.status(500).json(errorJSON('MongoDB', err.message));
            return next(err);
        }

        const collection = db.collection<UserDocument>('user');
        collection.findOneAndUpdate({ user_id: user_id }, update, (err, result) => {
            if (err) {
                client.close();
                res.status(500).json(errorJSON('MongoDB', err.message));
                return next(err);
            }

            if (result.value === null) {
                // 対象レコードが存在しなかった場合 result.value に null が返る。
                client.close();
                res.status(404).json({ message: 'Not Found.' });
                return;
            }

            // 更新後のdocumentを取得するために再検索する。
            collection.findOne({ _id: result.value._id }, (err, result) => {
                if (err) {
                    client.close();
                    res.status(500).json(errorJSON('MongoDB', err.message));
                    return next(err);
                }

                client.close();
                res.json(filterUserDocument(result));
            });
        });
    });
});
このAPIは今は誰でも呼び出せてしまいますが、後ほどログイン認証つけて自分のみ更新を受け付けるように変更します。
DELETE /user/:user (DELETE)
最後に削除のAPIです。引数はありません。URLのみを渡します。
戻り値は削除出来た場合は 200, 指定されたユーザが存在しない場合は 404 を返します。
document の削除には collection.findOneAndDelete() を使用します。
以下実装になります。更新用のパラメーターが無い意外は殆どUPDATEのときと同じです。
router.delete('/:user', (req, res, next) => {
    const user_id = req.params.user;

    mongodbClient((err, client, db) => {
        if (err) {
            client.close();
            res.status(500).json(errorJSON('MongoDB', err.message));
            return next(err);
        }

        const collection = db.collection<UserDocument>('user');
        collection.findOneAndDelete({ user_id: user_id }, (err, result) => {
            if (err) {
                client.close();
                res.status(500).json(errorJSON('MongoDB', err.message));
                return next(err);
            }

            client.close();
            if (result.value == null) {
                res.status(404).json({ message: 'Not Found.' });
            } else {
                res.json({ message: 'Deleted.' });
            }
        });
    });
});
このAPIも今は誰でも呼び出せてしまいますがこれも後ほどログイン認証つけて自分のみ削除できるようにします。
次はユーザのログイン認証処理を実装していこうとおもいます。